

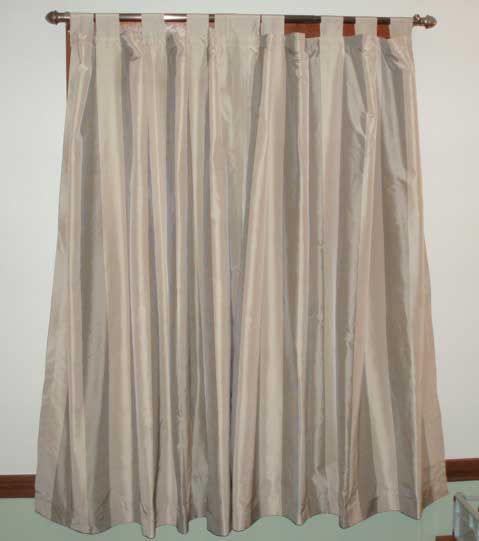
The right curtains can make a big difference in your energy bills. This pair not only looks terrific, it also keeps out the cold.
With cold weather here in northern parts, and the cost of energy skyrocketing, we’re all looking for ways to save on fuel costs. One way is to decorate your windows with lined curtains. They keep drafts out and keep heat in. And the beauty is that they are easy to make! For my purposes, I made tab-top curtains, but this works just as well for any other type of curtain.
Flannel is not just for PJs
First, determine the size of your finished curtains. There are any number of great how-to references for making curtains (see below for a good one). For the purposes of this post, we’ll concentrate on making them warmer.
The first thing you want to do is get (and pre-wash, make sure you pre-wash!) some plain cotton flannel. I used white, but you can use a coordinating color to your curtain fabric. You can even use a whimsical print if you like! Cut your flannel lining to dimensions that are 2 inches narrower than your curtain fabric in width. The length of your flannel should be one inch shorter than the length of your curtain fabric, less the amount of your curtain’s header. In my case, the finished dimensions of each curtain panel are 49 inches long by 52 inches wide. The panels have a 4 inch doubled hem (2 inches folded over) and a 2 inch doubled header (1 inch folded over).
Curtain FabricLining FabricFinished Length49 inches48 inchesHem4 inches4 inchesHeader
2 inches0 inchesTotal Length55 inches52 inchesFinished Width50 inches48 inchesSide Hems4 inches4 inchesTotal Width54 inches52 inches
It’s all downhill from here
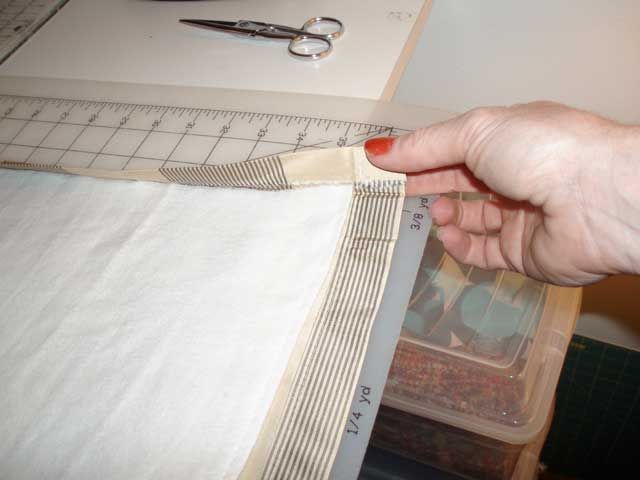
The measuring and calculating is always the hardest part. After that, it’s easy! Once you have determined your measurements, hem both your curtain and lining starting with the sides and finishing with the bottom. Once that is done, fold over your header and press. Butt the unfinished edge of the top of your lining against the folded top of your header, as shown here:

The unfinished edge of the top of your lining should line up with the folded top of your header.
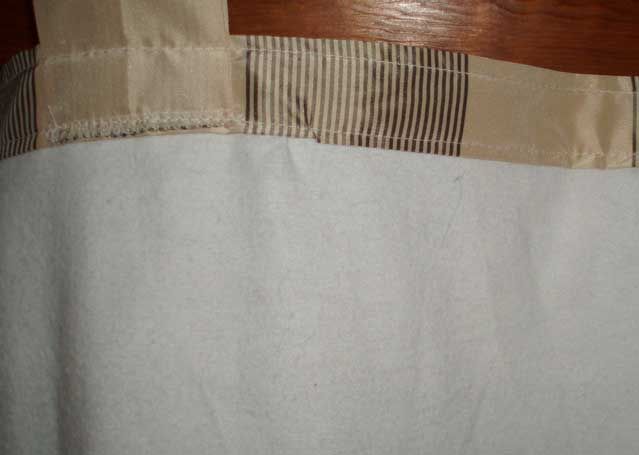
Sew your header, catching your lining in the stitching.

As you stitch the header, you’ll also secure the lining in place. I attached tabs in the same stitching pass.
Hang them up and you are done. A great window treatment that looks good and keeps you toasty warm!


Log in or create an account to post a comment.
Sign up Log in