

Try combining two or more trims to make one custom trim that's perfect for your design.
Now that my jacket construction is done, it’s time to find the perfect trim to complete and pull together the garment. Trimming is a highly personal part of any garment. It takes a plain jacket, in this case, and turns it into a statement that reflects the wearer. I find that it’s not unusual for me to spend more time and money on trims than I do on the garment itself. Just as this jacket has been an exercise in Slow Sewing, so has it been an exercise in Particular Trimming. I wanted something that was unusual and would not be easily identifiable. I also wanted something that I couldn’t find back at home. I was on business in New York, so I decided to take some free time to visit three trimming stores: M&J Trims, Pacific Trims, and Ginsburg Trims. Jacket in hand, I went on the hunt.
All three stores are heaven for seamsters. M&J Trim, located at 1008 6th Avenue, is arguably the largest retail trim store in New York. It’s packed to the 30-foot-high ceiling with just about any and every trim you could want. Pacific Trims, located at 313 West 37th Street, has a large assortment of handbag hardware, ribbon and chain trims, zippers, grommets, buckles, and just about anything else you need to complete your project. Both of these stores had some great possibilities, but nothing that really spoke to me. Finally, I walked into Ginsburg Trims, located at 242 West 38th Street. Earlier in the day, a designer friend said to me, “You need to trim that jacket with leather piping. That’s what’s hot right now.” In Ginsburg’s window was a display of all types of leather piping and trimming, perfect for my jacket.
Why Stop at One?
After spending time with one of the staff there, I’d found several choices. I narrowed it down to two finalists. One was a leather braided piping with both suede finish and metallic leather. The other was a 1/4-inch-wide ivory patent-leather strap. Both of them looked good with the jacket, but they looked even better together! I decided to take them both home and work some magic.
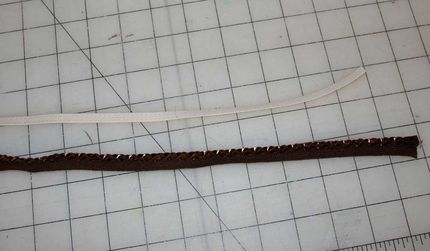
Here are some trim possibilities: Patent leather or braided piping? Or how about both?
Transition is Key
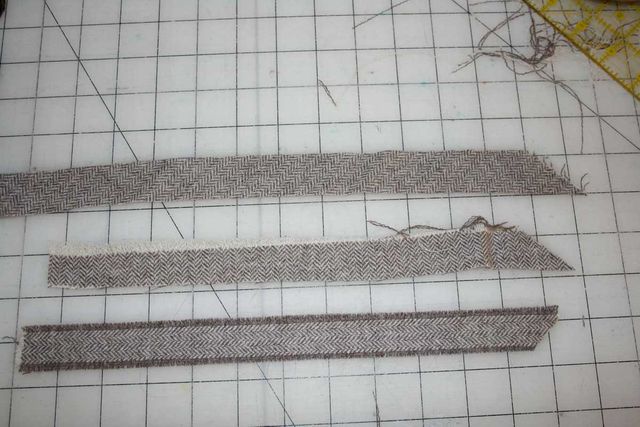
Once I got my trims home, I threw them on my jacket and let them sit there for a while. I’d look at them and think about how I wanted to apply them. I had already made the decision to pair them together, but I wasn’t entirely satisfied with the way they looked laid bare on the jacket. I needed a transitional step to go from the tweed to the leather. I thought about possibilities, like a complimentary fabric or silk organza. After more thought, I decided the best transition was the fabric itself. I cut test strips of the fabric, each 1 1/4 inches wide. The first I cut on the bias, the second on the cross-grain, and the final on the lengthwise grain. I wanted to test how each one would look with a fringed edge. I quickly eliminated the bias and the cross-grain strips; neither produced the kind of result I was looking for. The lengthwise strip, though, was perfect. It fringed exactly the way I envisioned, and it integrated the colors in the leather with the fibers in the jacket.
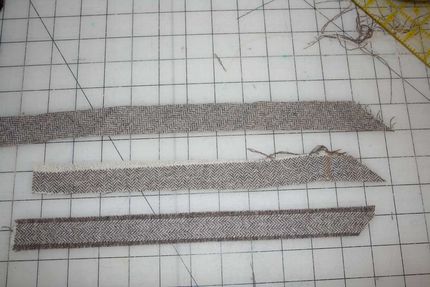
I cut fabric strips on various grains to experiment with fringing options.
Go for the Layered Look
To make this trim my own, I decided to layer both trims on the backing fabric. The only other question I had was whether to center the leathers in the wool strip, or to attach them at the edge and treat it like piping. I made two small test pieces to see which I liked best.
Make test pieces to try out different types of trim before deciding.
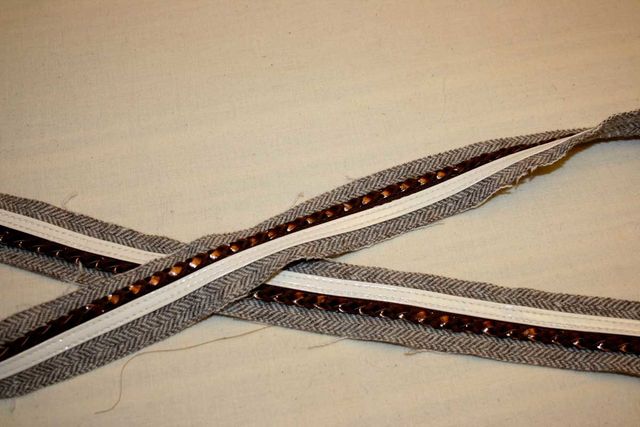
In the end, I preferred the centered application, with fringe on both sides of the leathers. I basted the braided piping to the wool strip first, then I stitched the patent strapping over it, securing both to the backing. This gave me a whole new look.
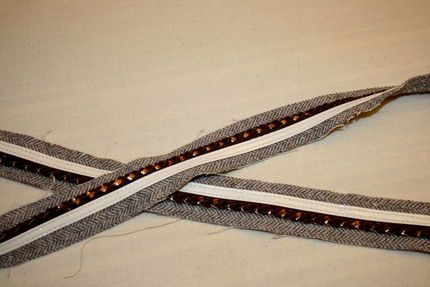
These are my three trims, joined to create one fabulous, custom trim.
Attach the Trim
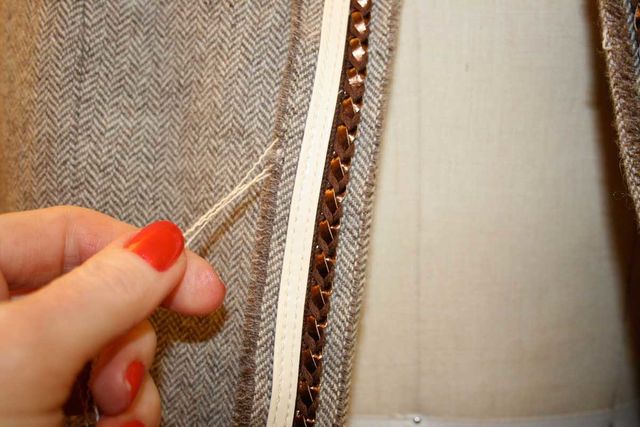
Once the trim was prepared, I attached it to the outside of my jacket using a prickstitch, similar to the way you hand-insert a zipper. This allowed me to place my trim precisely. I mitered the corners to achieve a smooth look. Once the trim was attached, I created the fringe by pulling threads.

Create a fringe look by pulling threads. 
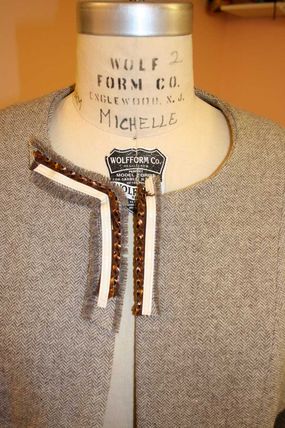
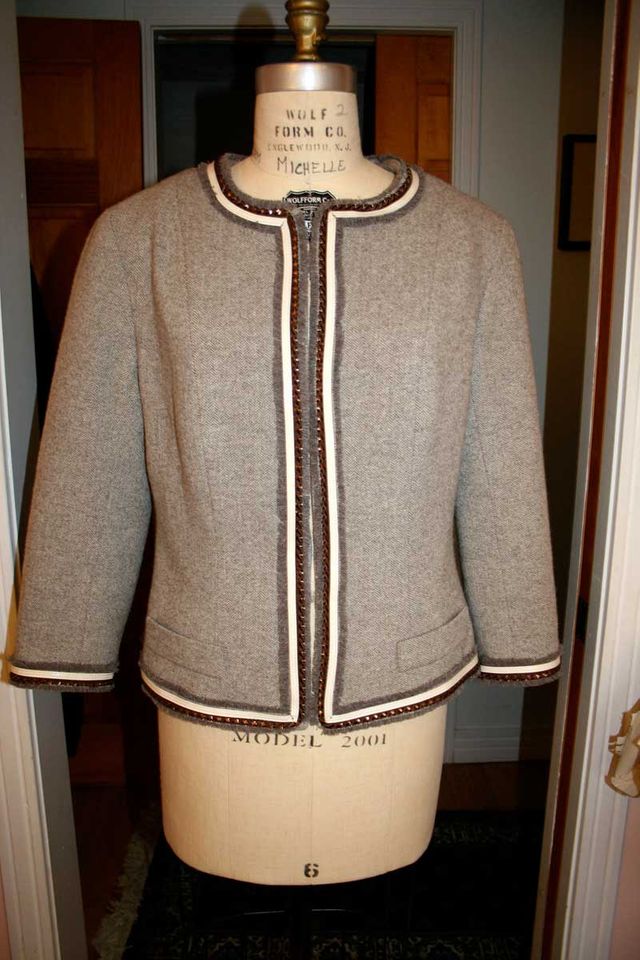
The final jacket almost looks like a whole new garment!
Some Helpful Hints when Working with Trim
Here are some hints that helped me choose my trim. Hopefully they’ll be useful to you, too.
1. Watch your proportions. Too large a trim will overpower a garment. Too small a trim will be lost.
2. Bring your garment with you when trim shopping. By having the whole garment rather than just a swatch of fabric, you’ll get an exact idea of how a trim will look. Sometimes you aren’t able to complete the garment before shopping for the trim: for instance when you’re buying piping to put on a jacket edge. In that case, complete the garment to the point just before you apply the trim, and bring it with you.
3. Avoid home-dec trims. That’s not a hard and fast rule, but I have found that, unless you have something completely unique, home-dec trims (especially rayon gimp or passementerie trims) are readily identifiable as such. Here’s a true story: I once sat next to a lady who was wearing a beautiful jacket she had made, and it was trimmed with the exact same braid that trimmed the sofa on which we were seated!
4. Don’t be afraid to mix and match! Just as I did here, you can combine trims to create a whole new look. Most designers don’t use ready-to-sew trims. By combining trims, you create a look that is uniquely yours.


why didn't you "bag line" your jacket??
Thanks for this tutorial