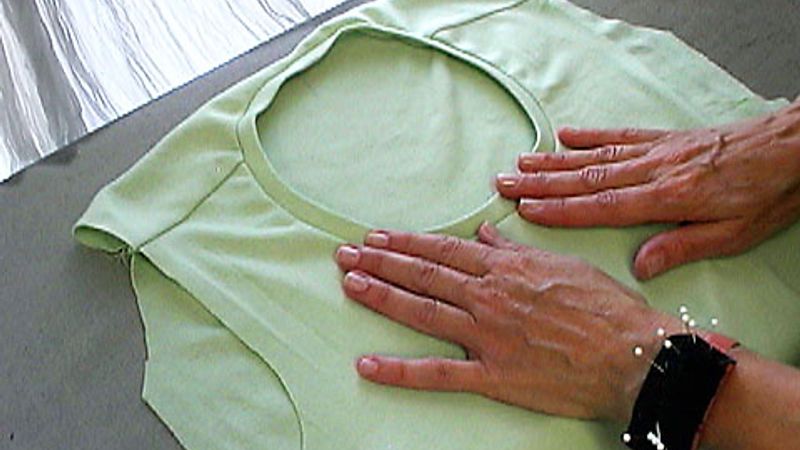
This video will teach you to create an incredible neckline binding on a knit top. The amount of stretch varies from knit to knit, so teacher and author Sarah Veblen of Sparks, Maryland, recommends that you try her techniques on assorted samples to learn how they behave and then experiment with the various types of neckline finishes you will be creating.
Read Sarah’s article, “Neckline Finishes for Knits,” in Threads #106, April/May 2003. If you’re not certain how to quarter your binding and neckline, watch her other video, A Turtleneck Finish for Knits.
This is an online extra to Threads #106.


Watching the video for different steps in producing all the elements of the final projects was fascinating! Somthing to think about. kreativelady.
This is a wonderful video. She takes you through the process painlessly and beautifully.
Thank you
Thank you Sarah and David for posting this wonderful video. This one is especially good for me, who has a "fear of knits". This video is so clearly illustrative--I have boosted confidence now!
This is a wonderful visual, as good as the knits only classes I attended when knits first appeared back in the 60's and 70's. I used to think I needed the ribbing and since it was no longer available in matching colors as before I was ignoring making knit T's. I am delighted to see how well the body knit works just as well. Thank you!
Using knit fabric, does anyone know how to make a split neckline?
This is one of the best tutorials I've ever seen - and I've seen many. The way Sarah explains every step and the way the camera shows what she's doing - it's just brilliant.
Instructions included in a KWIK-SEW pattern for t-shirt say divide neckband and neckline into fourths and then stitch stretching neckband to fit neckline. It's correct, but sounds a bit like a cake recipe that tells you to mix all the ingredients and just bake it.
Thanks you so much, I'm going to finish the t-shirts that I'm making right now.
All the best in the new year, Threads, many hugs from Australia :o).
This is THE BEST tutorial! Explains not only how, but why! Video clearly shows every step. Now I feel confident to go try a t-shirt again!
This is my favorite video. It is so helpful. I've watched it over and over, every time I make a tee.
Thanks for this superb video to help me avoid pitfalls in my beginning phase of sewing with knits.
Thank you so much! How wonderful it is to be able to come to the computer and look up what is needed for a project. I'm looking forward to hints,etc. God Bless!!
marvellous video for attaching neckribbing by sarah. thanks so much. r
Thank you so much for this video. I had learned a slightly different method back in the 1970's. The knits then were nowhere as stretchy as the ones today. My older method often left me with ripples and "out-standing"binding. I had to remake the necklines on undershirts for my spouse, twice before they were OK. Nehmah
Hi,this video doesn't work!
It works after all, I just had to wait.
I was searching the high end stores for neck finishes. The one that intrigued me was a binding like this but smaller, about 1/4 to 3/8 inch & it had elastic added. The elastic would be 1/8 inch. Then it had twin needle stitching. The underside was completely enclosed.
Love this video...Sarah is thorough in her teaching, I love her videos, this video is what I really needed. I have cloned an old T-Shirt to make one for my husband. However, I chose a sweatshirt style cotton...not a wise choice because I tried to do the neckline and the fabric does not stretch much. However, Sara mentions here how to estimate the right amount of fabric you will need and where exactly you should stretch the binding. Brilliant!
Not afraid anymore!
Great video. Beautiful clear instructions, the best ones I have seen. Thank you.
I just did a similar neck edge finish and now I know how to sew it so much better. Thank you for this video.
Sooo helpful!! I hope the zigzag or stretch stitch works as well for those of us without sergers.
Very nice, clear video, with a good demonstration of sewing trim onto a T-shirt. I do it similarly, with some variation:
When I was teaching the Stretch and Sew method back in the early 80s--and when I first learned it back in about 1970--we applied ribbing much the same way. The differences: If applying ribbing, didn't try to figure out the trim measurement like Sarah does; instead we used a 2 to 3 ratio (rib measurement was 2/3 the neck or sleeve opening measurement) plus 1/2" for seam allowances; if using self-fabric (as Sarah is) with less than 80% stretch, we used a 3 to 4 (3/4) ratio, plus 1/2" for seam allowances. You measure the neckline by "walking" your tape measure on its edge around the folded T, from CF to CB, then double it (I just fold the tape measure over, but you can also do this mathematically). That's the full neckline measurement, then I fold the tape measure in thirds (or fourths) to get the 2/3 or 3/4 ratio, and add 1/2".
When I first learned this method, we didn't even know what a serger was (smile!), so we used two rows of slightly lengthened (3.0) stitches, one on the seam line and one halfway between the seam and the raw edges. As always, we stretched as we sewed--stretched the ribbing to match the opening and then a little bit more. For a U-shaped neckline, like Sarah is making, we would also stretch a little more thru the curves, and less thru the straighter areas.
Here it is, 45 years after I made my first t-shirt. I now have a computerized sewing machine with many different stitches, as well as a serger, and I still use the same method as I learned back then. I've made so many t-shirts (one husband, one son, 5 grands, several nephews, numerous babies, and myself have all worn t-shirts I've made) I could practically make them in my sleep, I think! LOL Frankly, I don't like the serger on t-shirts--I think it puts too much thread into the seam. I did make a t-shirt completely on my serger one time, and wasn't at all happy with it. But, that's me. As the saying goes, your mileage may vary.
Thanks SO much for this excellent, easy to follow video.
I have made numerous tee shirts, never getting the neck edge just right.
Thanks to you I now know how to do it correctly.
Thank you. Thank you. Thank you.
Fabulous video. Just what I wanted!!
Your technique is excellent. I attended Angela Wolf's EQS here in VABeach but left the necklines for my home machine, Bernina. This really fits the bill. Thank you.
That method of figuring out the ratio of neckline to binding seems too complicated to me. I was taught to measure the neckline and make your binding ¾ (75% less) This works every time, and produces a flat, smooth binding.