
The Box Pleat Experiments, Part 2: Cross drape trim

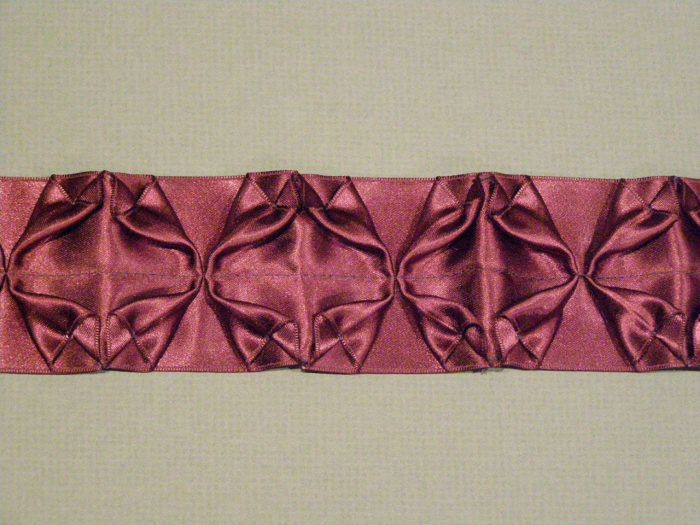
Here is what I like to refer to as a cross drape trim.
This is the second installment of the box-pleat trims. I call this a cross drape because the fold forms a cross over the box pleated ribbon.
For brevity, I’ll refer you to the first post, to get the instructions on how to make the box pleated ribbon.
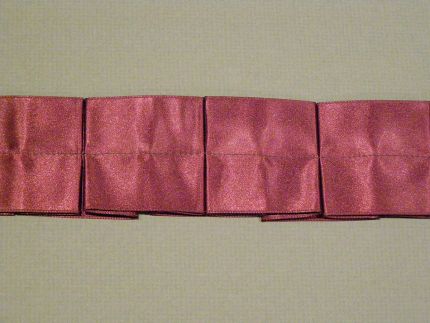
We’ll begin with the ribbon, box pleated, and machine stitched down the middle of the of the strip.
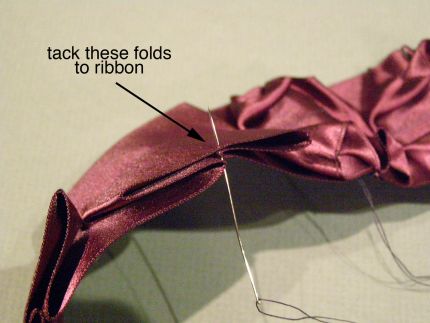
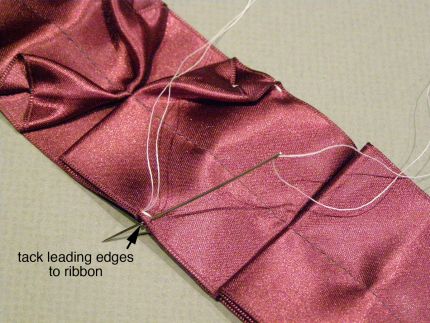
Begin by threading a needle, and tacking the back folds of the box pleats, to the upper ribbon face. Bring the needle up from behind, catching one fold.
Then, insert the needle down through the ribbon and catch the opposite fold.
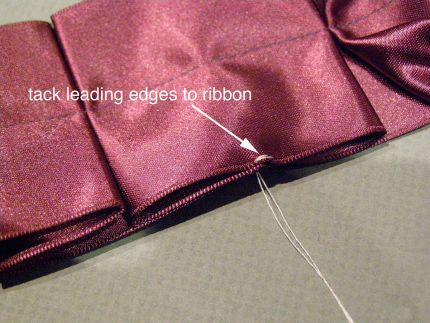
Repeat this one more time to double stitch the pleats.
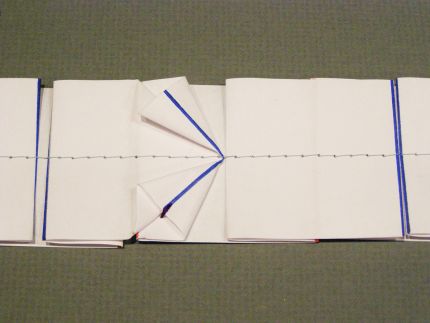
Now I’ll switch to the paper for clarity.
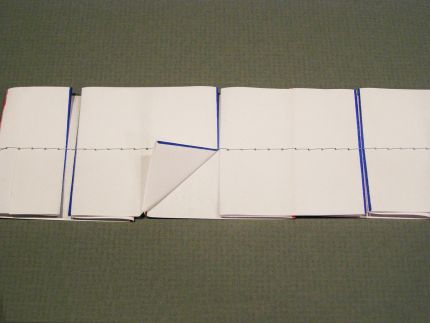
Fold one side of the pleat back, forming a 45 degree fold.
Next, divide this fold in half to make the crease line align with the 45 degree fold created in the last step.
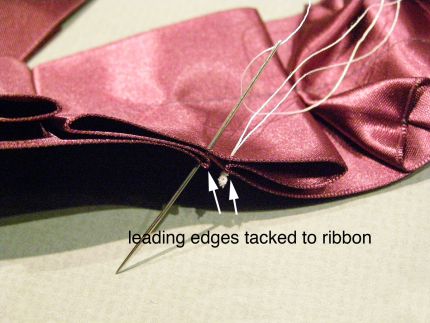
Bring the needle up from under the fabric, where the edge of the ribbon intersects the 45 degree fold, and catch the edge of the ribbon and the 45 degree fold.
Travel under the work to the opposite edge.
Bring the needle up and secure the back folds of the box pleats, as was shown above.
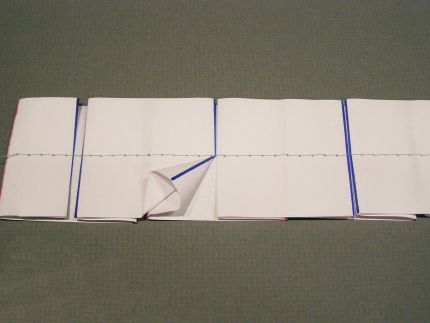
Now I’ll switch back to the paper for clarity.
Fold the other side of the pleat back, forming a 45 degree fold.
Again, divide this fold in half, making the crease line sit along the 45 degree fold created in the last step.

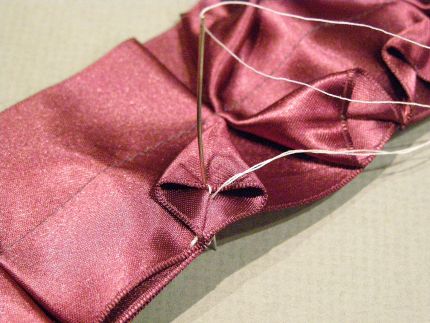
As before, bring the needle up from under the fabric, where the edge of the ribbon intersects the 45 degree fold.
Insert the needle back into the work, catching the edge of the ribbon and the 45 degree fold.
Start your 14-day FREE trial to access this story.
Start your FREE trial today and get instant access to this article plus access to all Threads Insider content.
Start Your Free TrialAlready an Insider? Log in


The trims are quite lovely but difficult to incorporate into garments. I have used some of this type of trim on hats or spring-like purses.
This is really elegant. It would be superb for period clothing like a Victorian gown a la Charles Frederick Worth.
I'm thinking about using box pleats on strips of knits, meshes, and lace. Ribbon shows the pleat detail wonderfully,but isn't something I'd wear frequently. Softer fabrics might make an intriguing look.
These are very neat! I really like them and I look forward to trying them out. Thank you for your concise directions; looking at the steps of making the cross pleats with paper I found to be very instructive and clarifying in transforming the design to the ribbon (only in my head, at this point, though!) Really appreciate you sharing your wonderful and beautiful design ideas with us!!! Have a very Happy Thanksgiving, Kenneth! :-)
Most Sincerely, Sewing Sadie (aka: Jan)
As always I love what you do. Will definitely try these pleats.
Gorgeous! Will definitely be in my mind for my future projects :)
Lovely! I can see this being used on little dresses for American Girl dolls in maybe a smaller width. I would love to see this on an adult garment in a soft organdy or such. Thanks, again, Kenneth, for sharing your expertise.
This reminds me a bit of fabric folding (and stitching) done by Rami Kim for both quilting and apparel. The beautiful handwork in folding and stitching, including adding beads along stitched areas, gives any project an elegant finish. Thanks!