


READERS’ QUESTIONS – EXPERT ANSWERS
Q: I want to make pants to sit at the waistline with just a facing, not a waistband. Is there any easy way to draft a waist facing?
-Sharon Jacobsen, via Facebook
A: Kathleen Cheetham, designer and owner of Petite Plus Patterns, answers:
It’s easy to replace a waistband with a waist facing on fly-front or side-zip pants (or skirts). The best way to accomplish this is to start with a pant pattern designed to sit at or just below your natural waist. However, you can use a pant pattern with a lower-set waist that already fits well, if you wish; but you must first raise its waistline so that it rests at or just below your natural waist, above the hip curve. If you must raise the pant waistline, you may also need to widen its waist darts slightly for a more precise waist fit. The pant should fit snugly, but not tightly, at the waist to keep from slipping downward.
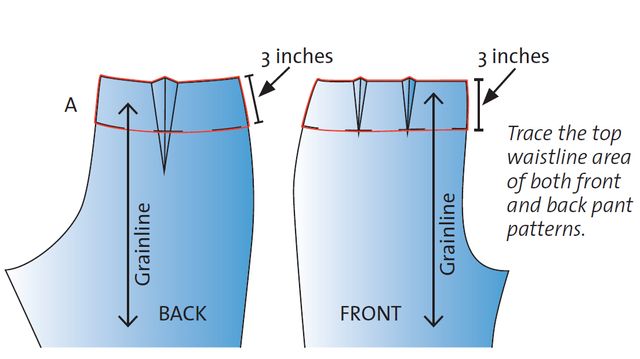
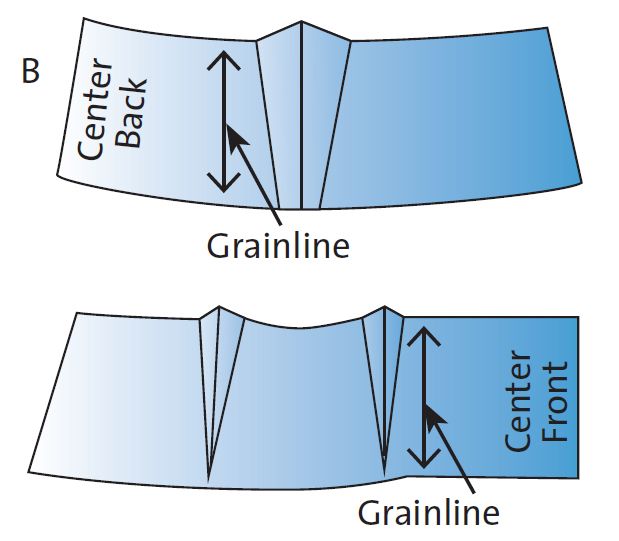
To draft the waist facings, lay a blank piece of pattern tissue on top of the pant front and back pattern pieces. On both the front and back pieces, trace the waist, side seam, and the center front and center back cutting lines to a depth of 3 inches (A). Transfer the seam allowances, darts, and all other markings. Draw lower edge cutting lines, and cut out the facing patterns (B).
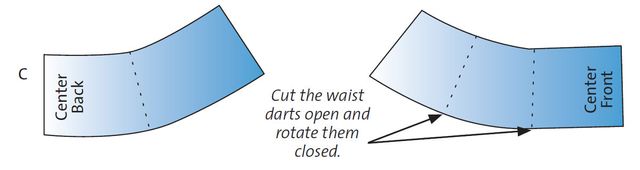
Next, cut and close the waist darts on the facing patterns. Mark a notch at the dart bases on the facings to help match them to the darts on the pant. Clearly label and mark the side seams, center front, and center back to avoid mixing up the pattern pieces (C).
For a fly-front pant, I recommend temporarily removing the fly extension from the pattern before drawing the facing pattern; you can reattach it afterward. Alternatively, add seam allowances to the fly extension’s center front and pant edge, where it will be sandwiched between the facing and the pant body when sewn.
To create a single-piece facing pattern, you can join the front and back facing patterns at the side seamlines. Be sure to mark seamlines clearly on single-piece facings.
Cut the facing fabric and interfacing on the same grain as the pant front and back to ensure a firm fit. This may not be possible on a single-piece facing, and a center-front straight grain is usually best. Be sure to make a muslin to test the fit of the facings.
This Q&A was originally featured in Threads #172 (April/May 2014).
Have a Question? Send it to us and we’ll find an expert’s answer.
via mail: Threads Q&A, PO Box 5506, Newtown, CT 06470-5506
via email: ThreadsQ&[email protected]
via the Contact the staff page to submit your entry


Log in or create an account to post a comment.
Sign up Log in