


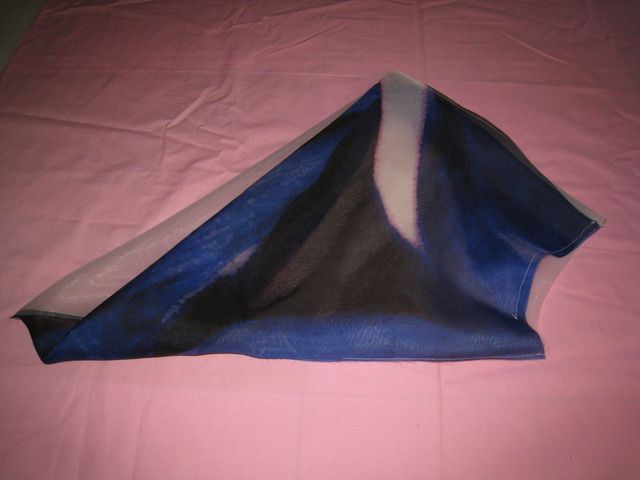
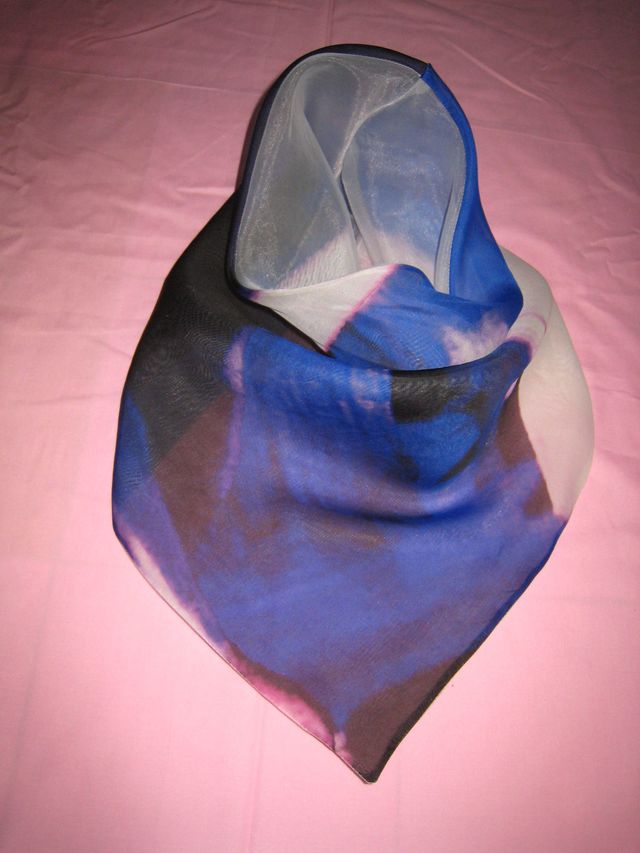
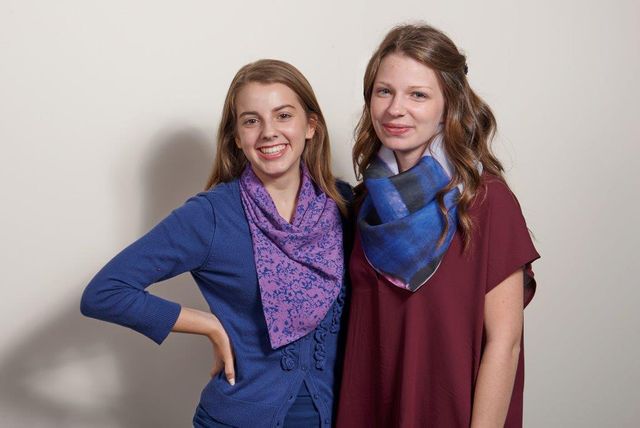
Whether in drapy fabric (left) or a textile with body (right), the cowl scarf frames the face beautifully.
In Threads #60, Karen Morris showed how to make a charming, retro-inspired cowl scarf. Based on a vintage 1950s “smoke ring” scarf, this accessory pulls on over the head and automatically falls into a face-framing, comfortable style. There’s no need to master tricky scarf-tying techniques.
Many fabrics work for this scarf, from sheers with body or with drape to slithery silk velvet to polyester fleece. You can make it with two fabrics for a reversible scarf, or place the upper edge on the fabric fold for a single-textile piece. One yard of fabric makes two scarves, so you can sew one for yourself and one to give away.
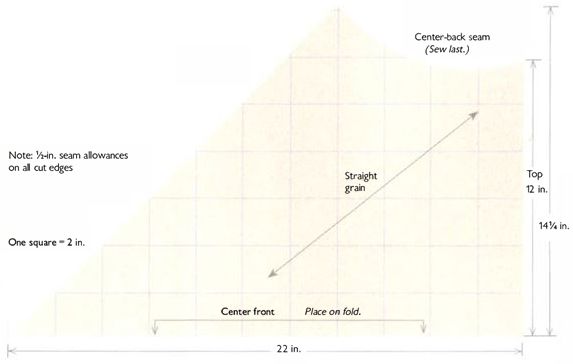
Cut one or two layers of fabric, sew a couple of seams, and you’re finished. It’s important to keep track of the fabric grain when cutting: Be sure the pattern is placed correctly on the bias. This ensures that the finished scarf drapes beautifully.
Supplies
Fabric:
• For a single-fabric scarf, 1 yard of 60-inch-wide fabric makes two scarves.
• For a two-fabric scarf, use 3/4 yard of two fabrics, 60 inches wide; each fabric makes two scarf halves.
Gridded pattern paper
Thread to match fabric
Pattern
The pattern includes 1/2-inch-wide seam allowances on all sides.

Sewing instructions
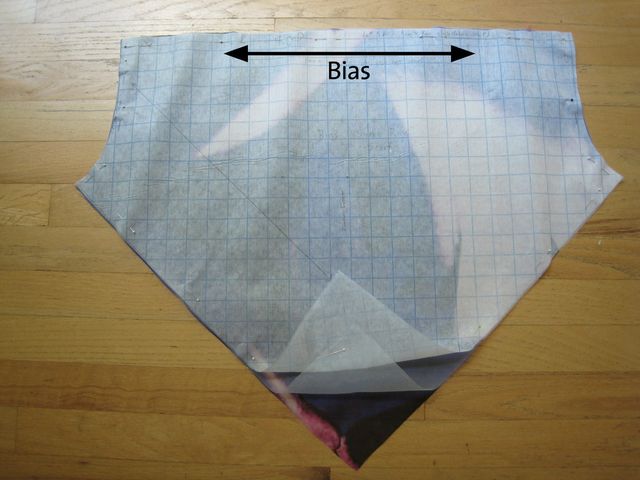
1. Enlarge the pattern. Draft it to measure on gridded patternmaking paper, so that the gridlines are 2 inches apart. To make a complete pattern, place the center-front line on the fold of another piece of paper, trace around it, and cut both layers. Mark the grainline and the center front.
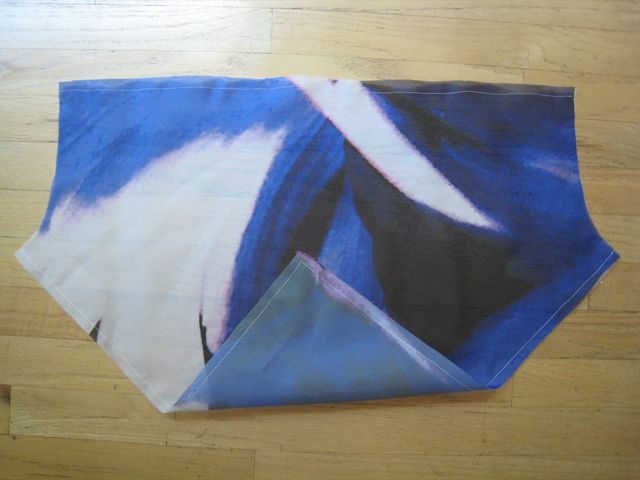
2. Cut the fabric. For a two-fabric scarf, layer the fabrics with right sides together. Position the top edge on the bias.
For a single-fabric scarf, cut off or fold down the 1/2-inch-wide seam allowance along the top edge. Fold the fabric on the bias, with right sides together, and place the top edge on the fold. In both cases, pin the fabric layers together and cut.
3. Sew the top edge. If you’re making a single-fabric scarf with the top edge on a fold, skip to step 4. If you’re using two fabrics, sew the upper edge, with right sides together. Stretch it slightly as you stitch, so there’s some give. Trim the seam allowances and press them to one side. If your fabric is sheer, trim the fabric close to the stitching and finish the allowances with a picot stitch or a small zigzag. Opaque fabrics don’t need a seam finish.
Tip:
Control shifty fabric. If your fabric is unstable or slips around as you handle it, keep the pattern pinned to the layers for the first few steps. Fold the pattern edges back to expose the seamline, and pin it around the edges and throughout the center of the piece. Sew the upper edge and V point, then remove the pattern.
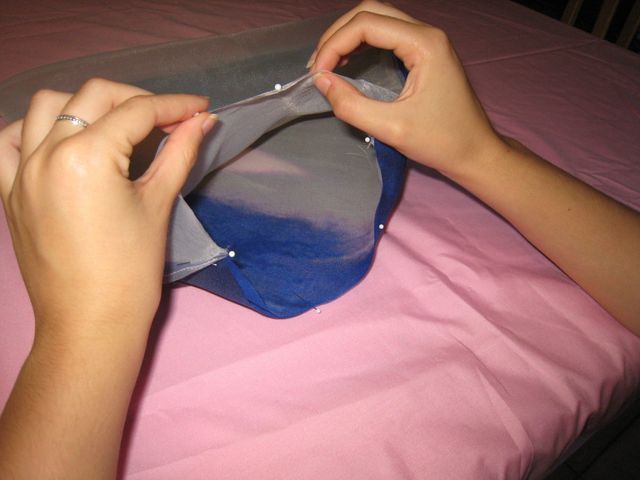
4. Sew the V seams. With right sides together, sew from center back to center front on one side, then turn the work over and repeat on the other side. Clip the point, trim the seam allowances, press them flat, then to one side.
5. Prepare to sew the center-back seam. Reach into one center-back opening, grasp the opposite center-back edge and pull it inside and through the scarf, until the raw edges align, with right sides together. Match the V seams and the top seam (if present), and pin around the opening.

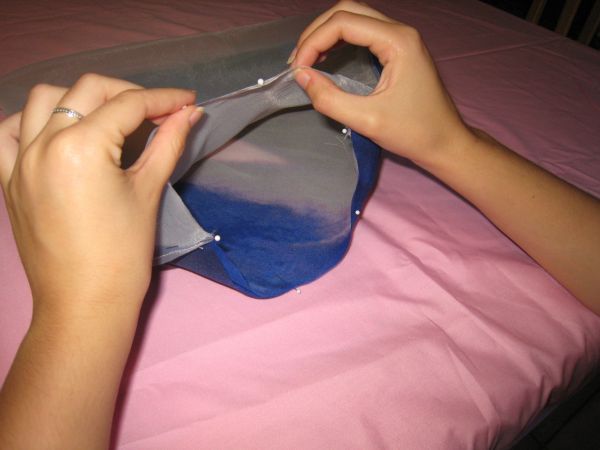
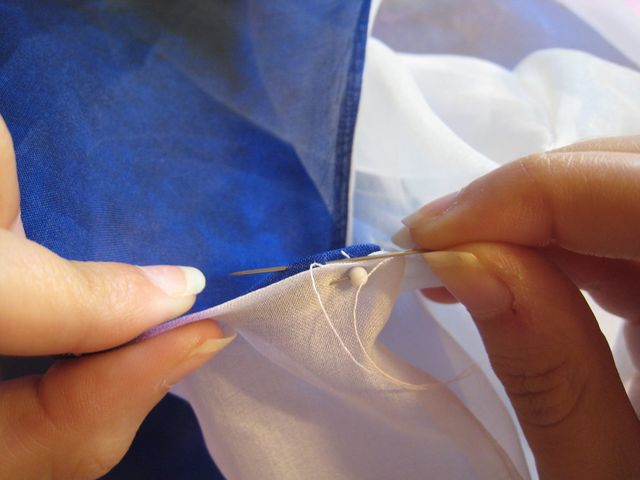
6. Stitch the center-back seam. Sew around the center-back seam, leaving a 3-inch-long opening for turning. Trim the seam allowances to 1/4 inch.

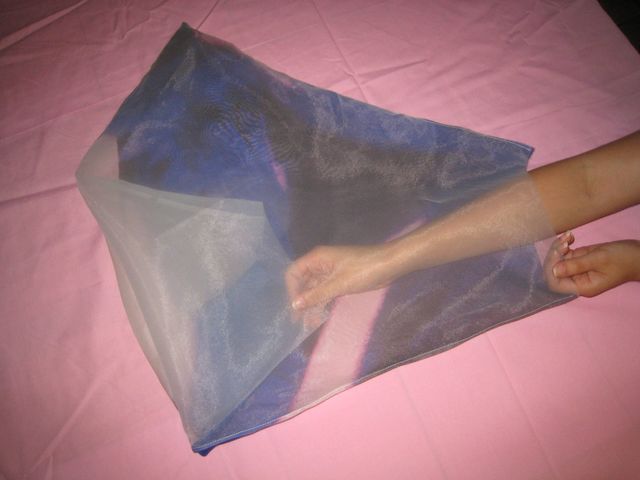
7. Finish the scarf. Turn the scarf right side out through the opening, and press the center-back seams to one side. Pin the opening closed, and hand-sew to close. Press the scarf’s V edges flat, but don’t press the top edge flat.


Do you have a favorite fabric that you’d like to use for a smoke ring scarf?


Oh, good idea! The fabric should be elastic, though, right?
Although you can use a stretch fabric, you will get a different, drapier result. The example shown here is made of organza. When cut on the bias, it has enough give to go over the head with no trouble. We also made one in rayon challis, shown on the model on the left, and you can see it has a softer drape.
Carol J. Fresia, Threads Senior Technical Editor
I like the smoke ring plan for the scarf, but I will have to make a few changes. I only have 1/4 yd of 60 inch wide light silk, in muted autumn shades. The predominate color is burgundy, and I have purchased some silk in burgandy to make a set. I will probably play with the idea of a soft lining or ultra thin batt to give it a little body. But I hadn't thought of putting it on the bias before. Good idea, for a nice drape.
I loved this pattern when it originally came out, and I'm so happy to see it again, with updated fabric ideas. For a variation, it also hangs beautifully with a smoothed curve instead of a V.
I am usually pretty god at figuring out how to read pattern, but this one...I just can't make the measurements work.
The way the arrow shows straight of grain on the pattern??
is the 22" fold, center front on the bias?
I wish there would have been a video, or a bit better explanations.aybe I'm too dense :-(
Can someone clarify this one? Thanks.
A..
Yes, the 22-inch fold goes on the bias. Your confusion may lie in the fact that the pattern is drawn with the bias along the pattern material's grid, which is fairly counter-intuitive for most sewers. However, it's easier to draft the pattern that way! I think if you give it a try, it'll work out for you.
Carol Fresia, Threads Senior Technical Editor
Help.....the neck is too small to go over my head. What did I do wrong?
I'm not sure what you did wrong. Here are a few things to verify:
Did you place the 22-inch edge on a fold?
Did you place that same edge on the bias when you cut it? If not, the top edge won't stretch laterally to accommodate your head.
Did you make a two-colored scarf with a seam along the top edge? If so, it's possible that the seam doesn't stretch quite enough to go over your head.
Finally, an easy solution: Adjust the dimensions of the pattern. You can make the "top" edge (the one that is 12 inches long, and is shown on the right-hand side of the pattern above) longer if you prefer; this will enlarge the head opening. Lengthen it by an inch or two, and draw of the pattern similarly. The V point will be slightly wider, but it will still look more or less as these do.
Good luck!
Carol Fresia, Threads Senior Technical Editor
I make this scarf out of wind block polartec. It makes a wonderful warm head cover under a bike or riding helmet.
To wear it under a helmet just put it on with the point to the back. The neck hole snugs up around your head. Put it on before your jacket and now you don't have anyplace for the wind to race down into your jacket. Put your helmet on over the scarf and you are ready to ride.
I love your podcast and I know you really all know your stuff, but this tutorial presentation is very hard to see and to follow. It would be so much easier if you provided a PDF download of the pattern at 100%. The layout of the text is difficult too. The pictures and the text don't line up well together and you have to keep scrolling up and down. I've given up.