


There are a number of ways the addition of a seam allowance can save or enhance a garment. If, for example, you’ve inadvertently cut a garment section intended to be placed on the fold as two separate pieces-minus seam allowances-you can save the garment by “creating” a seam allowance. I have a clever method for doing this. (Hint: The lining saves the day.) I’ll show you a version for straight seams and another for curved seams.
I’ve used the same technique to enlarge a too-small garment, and to connect garment fabrics that are too thick to seam together. If your fabric is narrow, and you’re barely able to fit a pattern piece on it, try this approach. It also works well for reversible fabrics, as it produces an attractive finish on the right and wrong sides. Select a lining fabric that’s strong enough to withstand wear, and that complements the garment’s fashion fabric.
For straight seams
In this technique, the lining seams hold the garment together, and their seam allowances secure and bind the outer fabric pieces. This method works well for straight seams, as at the shoulders and sides.
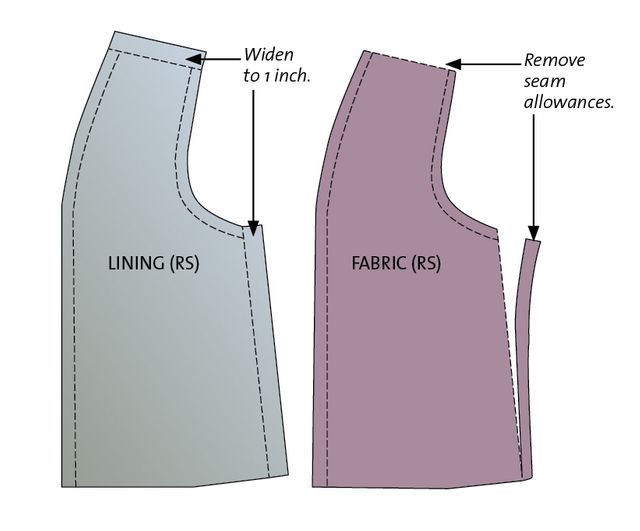
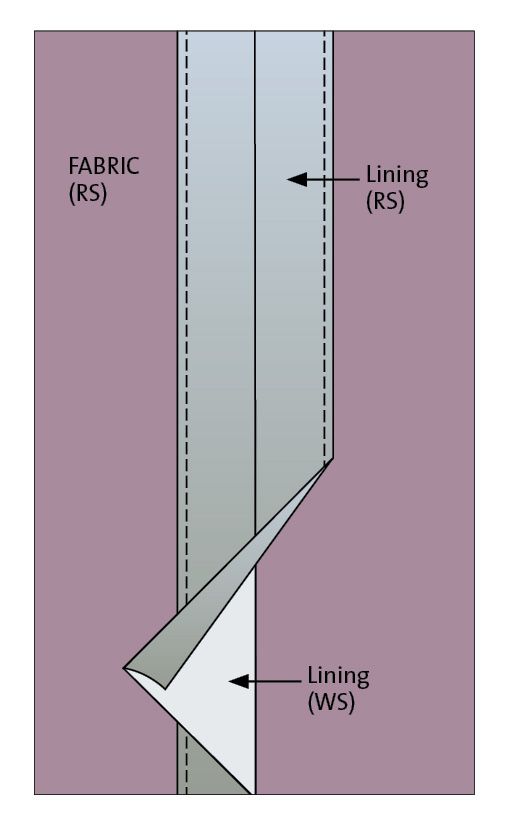
1. Cut the outer and lining fabrics. Omit the shoulder and side seam allowances from the outer fabric. Widen the lining shoulder and side seam allowances to 1 inch.

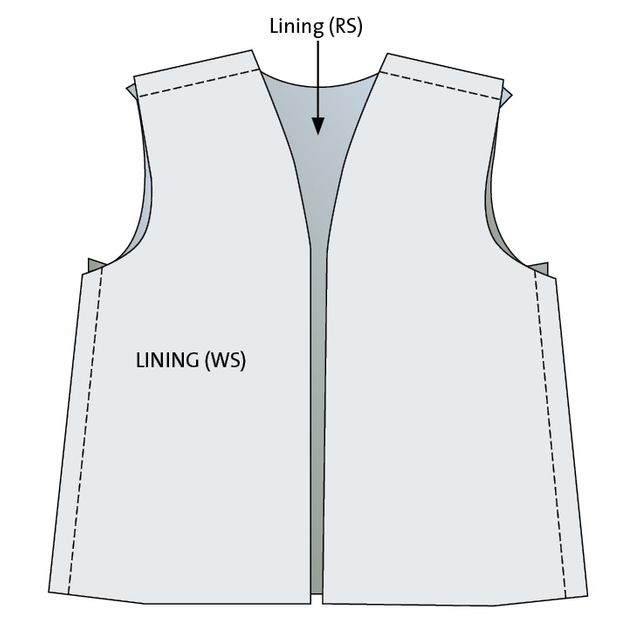
2. Join the lining pieces. With right sides together, sew the shoulder and side seams.

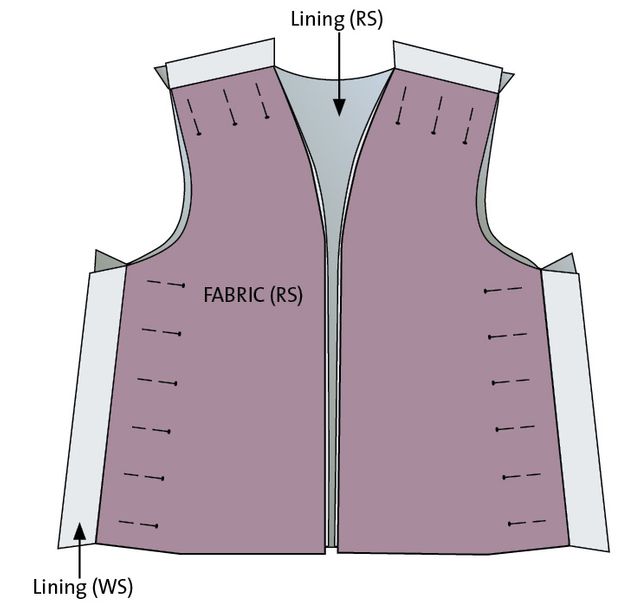
3. Apply the outer fabric. With wrong sides together, place the garment front and back sections onto the corresponding lining areas, matching the seamlines. Pin securely.

4. Secure the lining seam allowances. Press them under 1⁄2 inch, then press them flat, over the outer fabric raw edges. Pin, then sew them down by hand or machine. This line of stitching anchors the outer fabric to the lining and secures the lining edges.

For curved edges
If the seamline is curved, it’s tricky to fold the lining edges over. In that case, use a bias or knit strip.
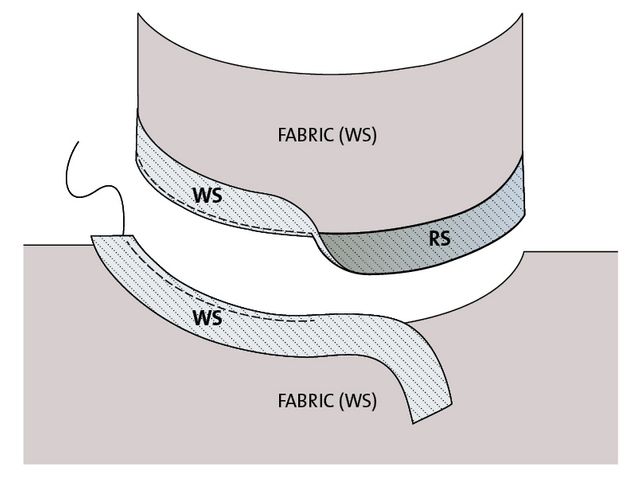
1. Cut the fabrics. Omit seam allowances from the edges where binding is desired. For each edge to be bound, cut a 2-inch-wide bias or knit strip; cut a strip for each side of the seam.
2. Attach the bias strip. With the strip right side against the garment wrong side, pin a strip along each edge to be bound. Sew the strip in place using a 1⁄2-inch-wide seam allowance. Press the strips away from the garment.

3. Join the garment sections. With the garment wrong sides together, and the binding right sides together, sew the binding seam along the garment cut edge. This edge represents the original seamline location.

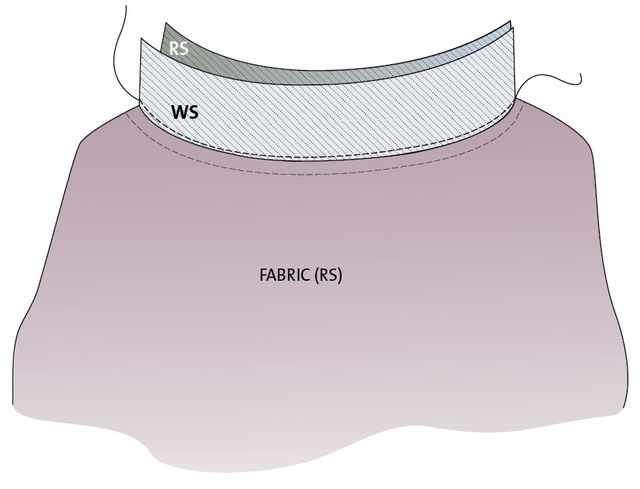
4. Secure the binding edges. Press the garment and binding open. Then fold the binding raw edges under and press
the binding flat. Secure its free folded edge with hand or
machine stitching.

Tip: Finish with decorative stitches. Consider using a decorative machine stitch to sew the lining or binding edges to the garment.


Here India now start winter and good stuff sewing saves seam Allowance
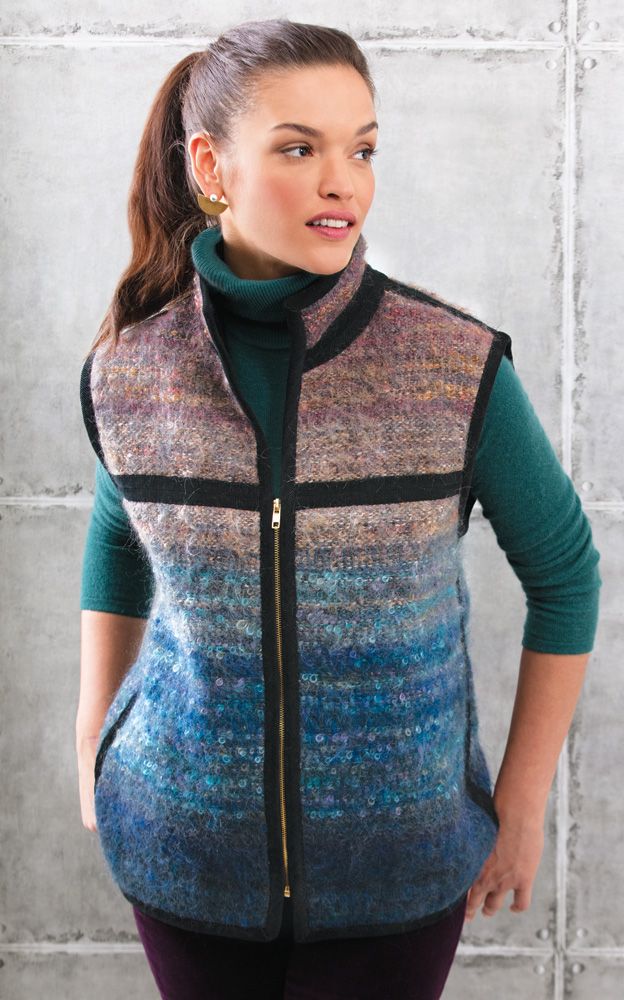
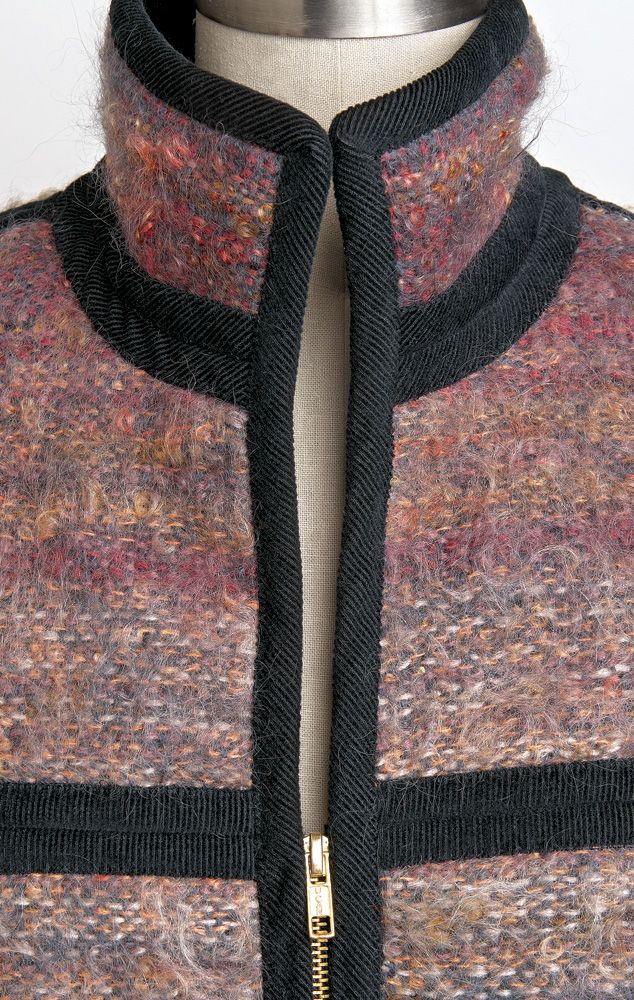
Any idea what pattern the model is wearing?
Hi! I'm sorry for the slow reply. The pattern is one designed by the author herself: https://www.weaversew.com/shop/800-zippered-vest.html
This is designed for use with handwoven fabrics, but of course you could make it in anything from wool wovens to polar fleece. Daryl is such a thoughtful designer, and she tests her patterns extensively because she also teaches with them. I hope you try it! Enjoy!
Carol Fresia, Threads editor
Thank you! Daryl's pattern is the perfect project for a beautiful woven scarf that I have been wanting to repurpose.