Make a Flirty Pin-Tucked Skirt on a Serger
Learn how to serge tucks and sew a skirt that shows them off.
Follow these easy instructions to create pin-tucked fabric on your serger, then turn it into a sweet garment – no pattern required! This skirt is made from pin-tucked fabric rectangles sewn to a fabric-covered elastic waistband.
Prepare the Skirt Pieces

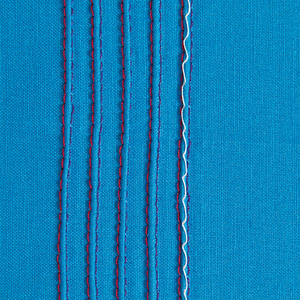
1) Add pin-tucks to sufficient yardage to create skirt front and back panels based on your body measurements (see step 2). Retain a portion of untucked fabric to create a waistband.
2) Cut the skirt front and back. Measure your hip circumference and add 20 inches. Divide the total in half. Cut two panels of the tucked fabric on the cross-grain to this width and as long on the straight-grain as you want the finished skirt to be.
3) Cut the waistband. Mark and trim a rectangle of untucked fabric 2 3/4 inches wide and as long as the total width of the tucked panels, minus 2 inches for the skirt’s side seam allowances. This is the waistband piece.
4) Measure your natural waist. Add 2 inches and cut a piece of elastic this length.
Sew the Skirt’s Side Seams

1) Place the tucked skirt panels right sides together, raw edges aligned. Sew the side seams, allowing a 1/4-inch seam allowance. Turn the skirt right side out.
2) Now you’ll turn the side seams into serged tucks. Fold the fabric from the right side along each seam to enclose the seam allowances.
3) Serge the side seams on the right side with a rolled hem stitch, set to the same width used to create the tucked yardage.
Attach the Waistband and Finish the Skirt
1) Sew the waistband into a ring by stitching the short ends right sides together with a 1/4-inch seam allowance. Align a waistband edge to the skirt’s waist edge, right sides together. Sew or serge the edges together. Fold the waistband in half lengthwise, aligning the free edge to the inside waist edge. Sew or serge the edge to the waist seam, forming a channel for elastic. Leave about 1 inch of the seam open.

2) Thread the elastic piece through the waistband channel. Pin one end outside the channel opening. Use a large safety pin attached to the other end to move the elastic through the channel.
3) Once the elastic is through the channel, overlap the ends by 1 inch. Stitch a square through the lapped ends, then stitch an X inside the square. Allow the joined ends to slip inside the waistband channel.
4) Finish sewing or serging the waistband channel seam, enclosing the elastic.
5) Finish the skirt with a serged rolled hem. Serge in the same direction that the tucks are pressed.
Read “Versatile Serger Feet” by Gail Patrice Yellen in Threads #195 Feb./March 2018, for step-by-step instructions on how to make pin tucks quickly and precisely using a serger blind-hem foot.
This project first appeared in the SewStylish Fall 2011 article “Serge So Fine.”


amazing!