
Learn Kumihimo, a Japanese Braiding Technique | Video
This easy-to-learn braid gives a custom touch to any sewing project.
Kumihimo, the art of Japanese braiding, is simple to learn and even easier to get hooked on. There are innumerable variations, and a change of braiding material multiplies the options for beautiful results. Once you learn some basic techniques, you’ll find it’s impossible to make an unattractive cord. Follow this tutorial to braid a 16-strand cord.
You can learn more about this traditional art form in Kumihimo: The Essence of Japanese Braiding by Aiko Sakai and Makiko Tada (translated by Connie Prener and Ethel Kawamura; Lacis, 2004). This classic book, published in 1980 in Japanese and translated into English, is available here.

Traditionally, artisans practice kumihimo with weighted threads on a tall wooden stand with a ring-shaped top, called a marudai. They braid while sitting cross-legged on the floor, with arm movements reminiscent of a beautiful and thoughtful dance.
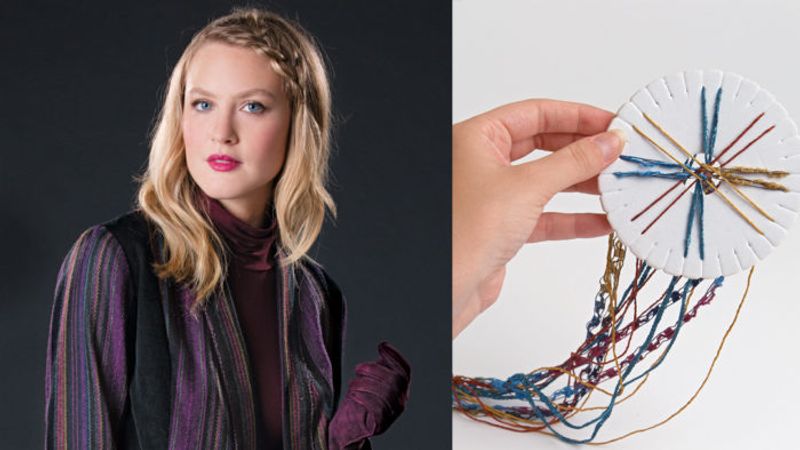
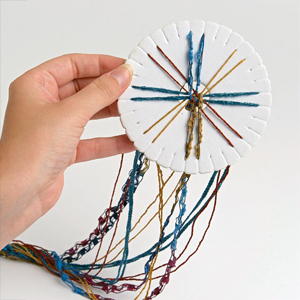
Today, foam disks with grooves cut into the perimeter to support the yarns and ribbons can stand in for the marudai. This lovely art form is portable and useful for creating cords to make frogs, loops, ball buttons, and other closures.
In this video tutorial, we show how to create a 16-strand cord, which has a spiral effect. We used rattail braid for our sample, but you can use a wide range of materials. It’s best if they are similar in diameter. Consider mixing different yarns and cords for interesting textures.
Read “Learn to Braid a Japanese Cord for Unique Sewing Accents” for a step-by-step tutorial on kumihimo braiding.
This video accompanies the article “Unique Braided Trims” by Daryl Lancaster in Threads #194, p. 22.


But how do you finish the ends?
You can finish the ends in a number of ways, depending on how you plan to use the braid. If it's skinny and you are applying it to a garment, you can sew the ends into a seam. If the braid is thick, you can knot the ends (either all into one big knot, or into several smaller knots), tie them to a charm or ring, bind them together into a tassel, etc. With thicker cords, you can even sew all the ends together neatly by hand and, if desired, sew piece of fabric over the end to enclose it. I'm sure there are other options as well--a little experimentation will help.
Love this! I have a bunch of funky yarns, threads, ravelly fabrics, etc. that would make unusual trims. Thanks for the ideas and instructions.
I tried this after seeing it in the magazine. I made a very pretty loop and knot closure for a jacket.
How would you use it for piping, though? If you folded fabric over it in order to attach it, you would hide the beautiful braids.