
Quilt a Picnic Blanket to Use Up Extra Fabric
This beautiful summer quilt is an easy way to get started with patchwork.
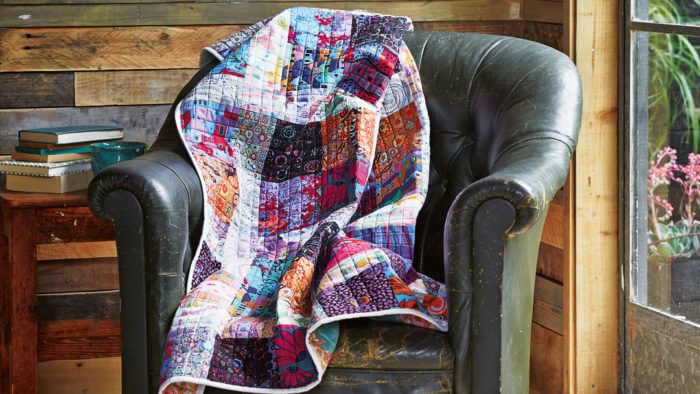
This attractive quilt is perfect for long, lazy summer picnics. It is also a great stash buster, as you can use a heap of scraps or a selection of fat quarters. Start by separating the fabrics into light and dark colors. The fabrics I used in quilt shown are from the Kaffe Fassett Collective, known for rich patterns and colors. The saturated blues and purples contrast with the softer mauves and grays to reflect the warm colors of summer.
Finished size
65 inches (165cm) square, approximately
Notes
WOF = width of fabric
FQ = fat quarter
Use ¼-inch-wide seam allowances, unless instructed
otherwise
Fabrics used
Quilt top: Kaffe Fassett Collective by
Westminster Fibers
Quilt back: Botanique by Joel
Dewberry for Westminster Fibers
Binding: Flurry by Dashwood Studio
You will need:
• 12 dark FQs, or the equivalent in scraps (if the FQs are
22 inches wide throughout, only nine will be needed)
• Seven light FQs, or the equivalent in scraps
• Backing fabric: 4 yards (3.75 m)
• Batting: 73 in (185cm) square
• Binding fabric: ½ yd (0.5 m)
• Suitable piecing and quilting threads
Cutting
1. Cut each of the 12 dark FQs into three 5½-inch by 22-inch strips. Cut each of these strips into three (or four if your FQs are big enough) 5½-inch squares (see Fig 1). You will need 100.
2. Cut each of the seven light FQs into five 3½-inch by 22-inch strips. Cut each of these strips into three 3½-inch by 5½-inch rectangles and one 3½-inch square (see Fig 2). You will need 100 rectangles and 25 squares.
3. From the binding fabric cut seven 2½-inch by WOF strips.
4. Cut the backing fabric into two equal lengths.
Making the Blocks
5. Sew two dark 5½-inch squares to either side of one light 3½-inch by 5½ inch rectangle. Press the seam allowances toward the dark fabrics (Fig 3). This is Unit A. Repeat to make 50 units.
6. Sew two light 3½-inch by 5½-inch rectangles to either side of one different light 3½-inch square. Press the seam allowances toward the center square (Fig 4). This is Unit B. Repeat to make 25 units.
7. Sew two of Unit A to either side of one Unit B, taking care to align seams. Press seams toward the center strip (Fig 5). This is one block, or Unit C. At this stage, the block should be 13½ inches square. Repeat this to make 25 units. To help with the final layout, place a pin in each block through the center of the block and parallel with the seams just sewn (Fig 6).
![]()
Assembling the Quilt
8. To assemble the quilt top, lay out the 25 blocks on a design wall (or table, floor, or bed) to decide on the best layout. Note: So that all seam allowances on all blocks nest with those on adjacent blocks, rotate each block so that the pins are always facing in a different direction from those on the adjacent blocks (Fig 7). The blocks can then be numbered. I numbered mine in rows using an erasable Frixion pen (you could use any removable marker ), so the first row is blocks A1, A2, A3, A4 and A5, the second row is blocks B1, B2, B3, B4 and B5, and so on.
9. Sew the blocks into five rows, each with five blocks. Press the row seam allowances in alternating directions.
10. Sew the five rows together to finish the quilt top. Press the seam allowances open or to one side as desired.
![]()
Quilting and Finishing
11. Sew the two pieces of backing fabric together along the long sides using a ½-inch-wide seam allowance, then press the seam allowances open. Make a quilt sandwich of the quilt back (right side down), the batting, and the quilt (right side up).
12. Quilt as desired. The quilt shown was quilted in a grid of vertical and horizontal lines 1 inch apart, set ½ inch away from each seamline. The quilting threads used were 50-weight Aurifil 1240 (dark maroon) across the darker stripes in the quilt and 2600 (dove) across the lighter.
13. When all quilting is finished, square up the quilt, removing excess batting and backing as you do so.
14. Sew the binding strips together end to end using diagonal seams, or straight seams if preferred. Press wrong sides together along the length to make a double-fold binding. Bind the quilt to finish, taking care to miter the corners neatly. (For reference, please read “Neat Corners” by Mary Ray, Threads #100, April/May 2002, p.54.)
![]()
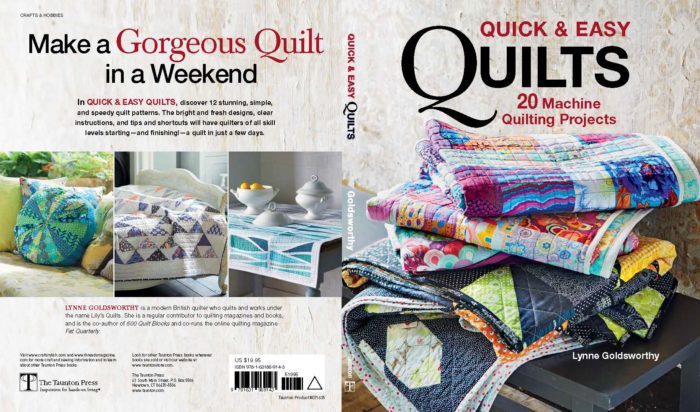
This post was excerpted from Quick & Easy Quilts by Lynne Goldsworthy (The Taunton Press, 2018).
For more quilting inspiration, The Taunton Press sells many Kaffe Fassett books, such as the Quilts in Ireland (The Taunton Press, 2017). Visit your local bookseller or order some online today.


super
nice
super
cool
pięknie :)
fajne