
How to Sew Hidden Snaps for Bouclé Jackets

There must be something in the air about wanting to have a beautifully finished garment. Just a few weeks ago Mary Ray showed how to cover snaps in silk dupioni. At the very same time I was working on a boucle jacket that was going to have silk-covered snaps.
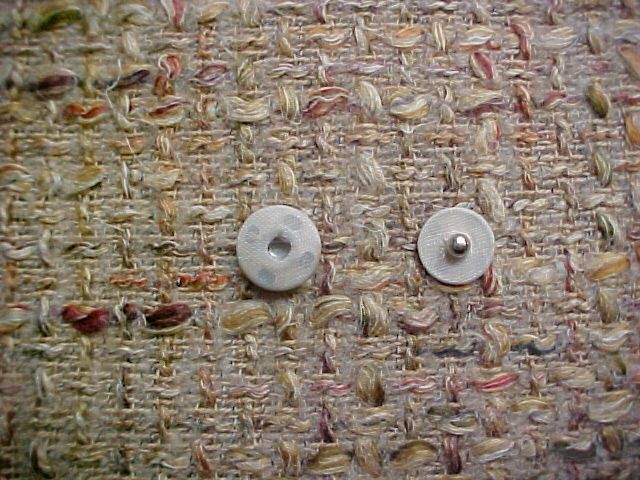
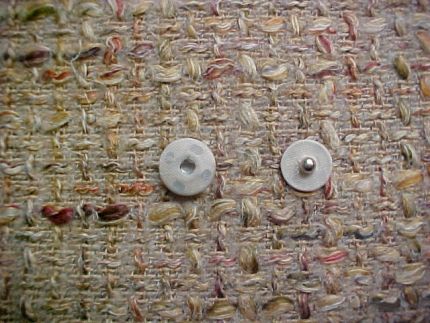
Both parts of the 1/2 inch snaps were covered in 8mm silk lining fabric as Mary recommended in her post.
I like to do my hand stitching in silk thread. To have my hand work sew smoother and not tangle, I pull the thread through beeswax and then press the thread under a warm iron to melt the wax into the thread. I double the thread through a needle and tie a knot at the end. (This way you’re working with 4 threads instead of 2.) You will be able to stitch the small snap opening only twice, but will have 8 threads securing the snap through the one hole.
I tried on the jacket to achieve the proper placement of the snaps along the center front line. The first snap is always placed at the apex of the bust points. With additional snaps placed from 2½ inches to 3 inches apart along the center front line. The socket snap is stitched to the facing on the right front. Usually a button would be placed on the outside of the garment at the same location.
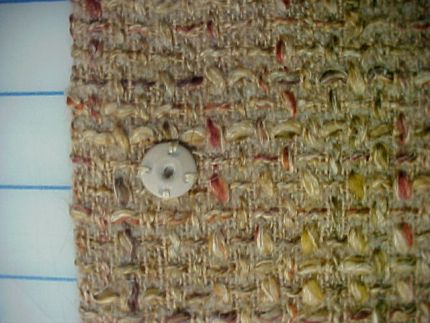
Using a loosely woven boucle fabric, push the ball part of the snap from the wrong side garment front so only the small metal bump shows. Gently separate the fashion fabric around the snap. When the garment is worn open, the snap on the facing will not show and the tiny bump will usually blend into the boucle fabric.
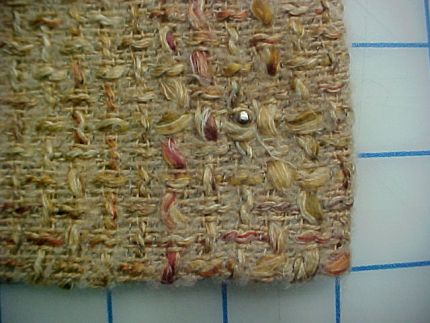
From the wrong side of the garment front, stitch the snap into…
Start your 14-day FREE trial to access this story.
Start your FREE trial today and get instant access to this article plus access to all Threads Insider content.
Start Your Free TrialAlready an Insider? Log in


Cool method. It's one of those "Now, why didn't I think of that?" Thanks for sharing.