
Machine Quilt a Supple and Stylish Garment, Part II

Use a Hong Kong finish to bind the seams and add a special detail to a quilted jacket.
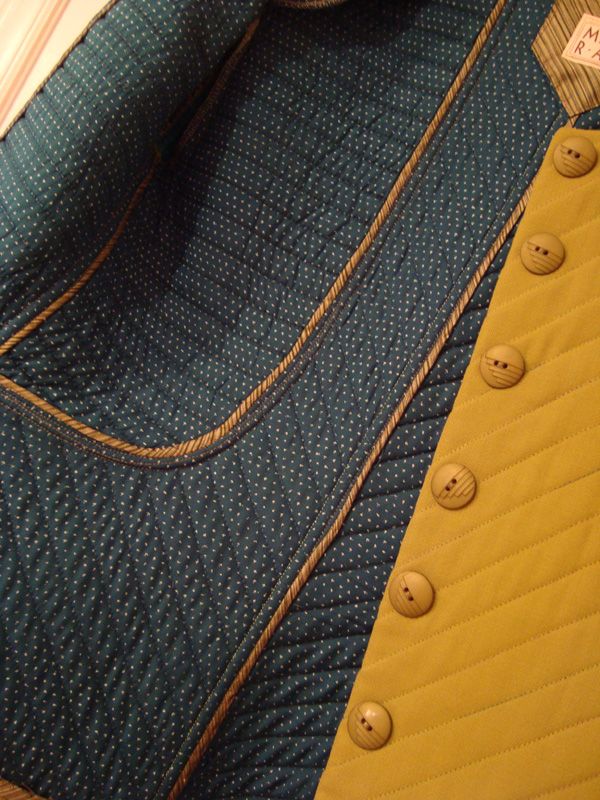
Many of you wanted to hear more in response to my previous post about quilting a garment. That post addressed the basics of choosing fabric and batting and how to press and stitch for optimum softness. Here are some tips on how to finish the seams. But first, some of you wanted to know which pattern I used for the jacket. I made that jacket quite awhile ago for an article that appeared in Threads Issue #100, pp. 52-54, “Binding Notched Collars,” in which I showed how to finish the edges of a notched collar jacket without adding a facing or interfacing. (If you don’t have the issue, it can be found on the new Archive DVD). That pattern is no longer available, but I did a little research and found a few examples of jackets with those same princess seam (shoulder to hem) style lines in the back, so check these out: Vogue 7975, Vogue 1040, Simplicity 2810, Simplicity 3628, and New Look 6610.
My Favorite Ways to Finish the Seams on an Unlined Quilted Jacket
The Serged Flat Fell Seam Finish:
Sew the seam right sides together, press the seam as you’ve sewn it, press both seam allowances to one side (usually toward the back of the garment to be consistent); trim the under seam allowance to about 3/16 of an inch, serge the remaining seam allowance, press the garment from the right side to ensure the seam is pressed flat, and topstitch on the garment’s right side, ¼ inch from the seamline.

Trim away one seam allowance and serge the other.

Press the serged seam over the trimmed seam and top stitch on the right side of the garment, 1/4 inch from the seamline.
The Hong Kong Seam Finish:
This is a couture technique and a beautiful way to finish the seams on…
Start your 14-day FREE trial to access this story.
Start your FREE trial today and get instant access to this article plus access to all Threads Insider content.
Start Your Free TrialAlready an Insider? Log in


Hi there Mary,
Thanks for Part Two....................great detailed information as usual.
I was so desperate to get the same pattern as on your Part One that I found your wonderful website and emailed you this morning........so sorry for the duplication.
Have to say, I do have the Vogue Pattern you mentioned V7975, but your gold jacket looks beautifully shaped into the waist.............Oh, how I would love, like everyone else to get my hands on the original pattern! LOL
Must buy the dvd's on the threads mags as I have only been a subscriber for a year. I am sure it will be a Godsend to have. Adding it to my Christmas Wishlist!
Thanks again,
Marysia.
This is a great follow up! Both articles are super. Thanks for putting this up. I have plans to quilt some silk and make a jacket, so this is very timely and inspirational for me.
Mary, Both techniques are great. I would use a technique that quilters use when they quilt each block separately then combine them for a completed quilt. This would encase all seams within the garment and could actually make it reversible.
Mary, Wonderful articles! Thank you. I find myself itching to sew one up. Being quilted, do you need to allow extra ease for a nice fit and if so how much do you recomend.
Cheryl
When I make a quilted jacket I finish the seams as if I were working with doublecloth - I match and stitch jacket right side by machine; trim sewn seam and then fold the second side into place and slip stitch. Sleeve seams take extra fiddling but end result is rewarding.
Thank you for the wonderful instructions on the Hong Kong seaming. It makes for a beautiful piece.
I too would like to know if you have to make allowances of extra fabric because the piece is quilted.
When I make a quilted garment, following the batting and pressing tips I talked about in the previous post, the "sandwich" is thin and I don't add anything to the size.
Wonderful instructions--I already use these techniques but it is great to see that they are preferred and recommended by the professionals at Threads. Patrons should Goggle for out of print patterns and I'm sure they will be able to find this particular pattern,it is amazing what patterns you can find with a little research----good luck sewers/I will look now and see if I can find it on one of the sites I use.
MARY Please post number/manufacturer of the pattern for this jacket and I will try to find it on the sites I use to find vintage and out of print patterns. I will post it then for others incase they would like one of their own to use instead of the DVD thanks
Thank you Mary! Beautiful finishing touches