

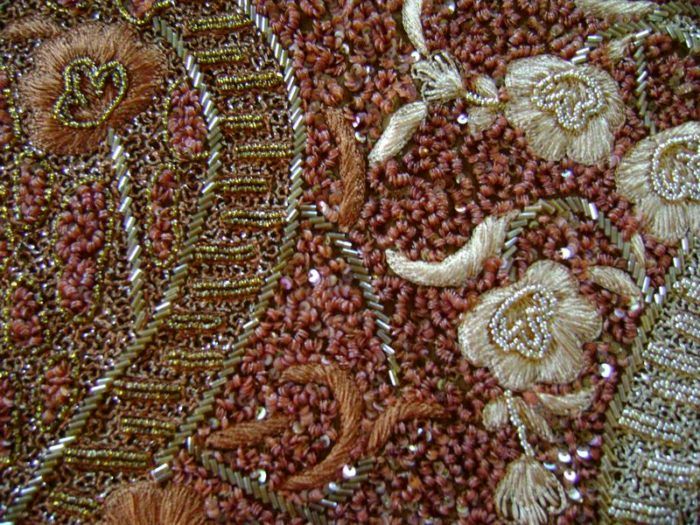
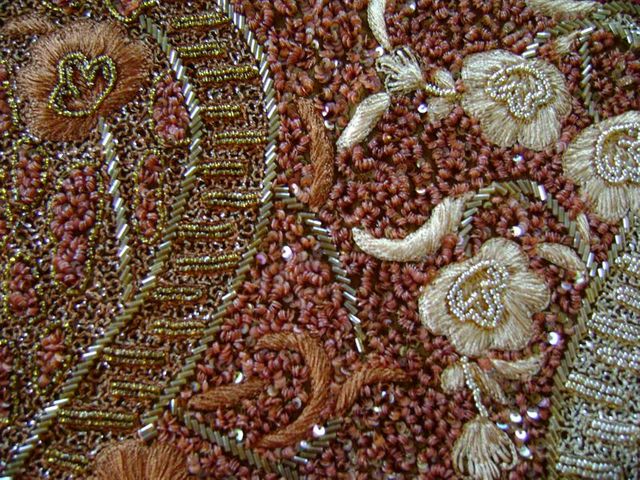
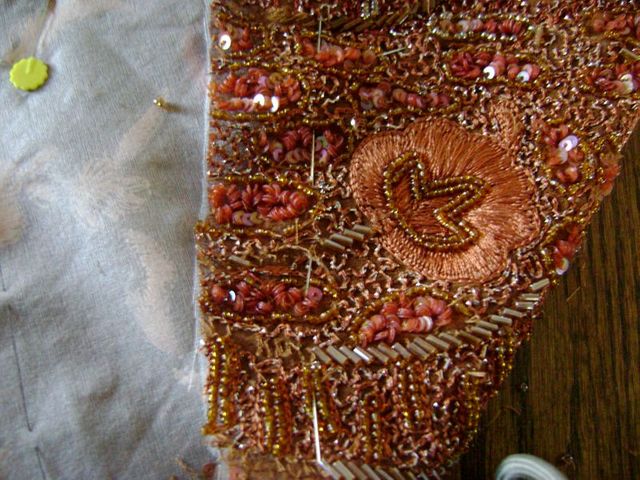
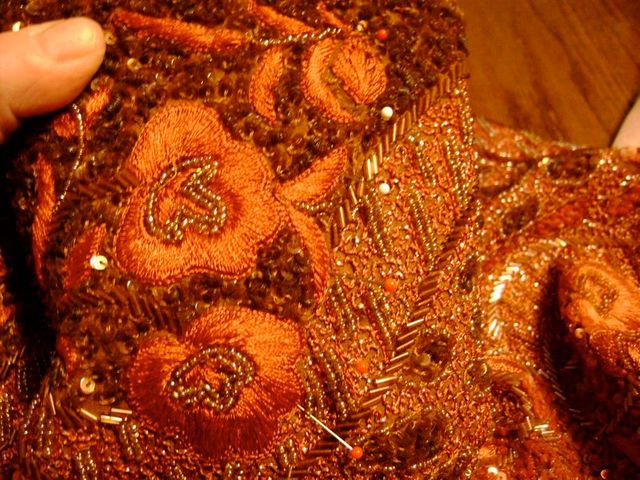
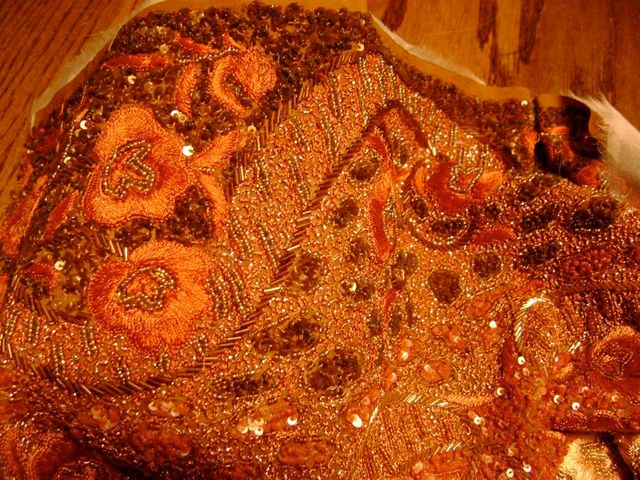
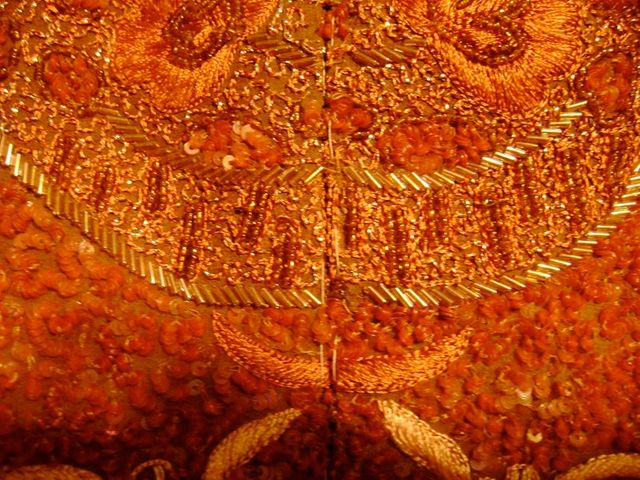
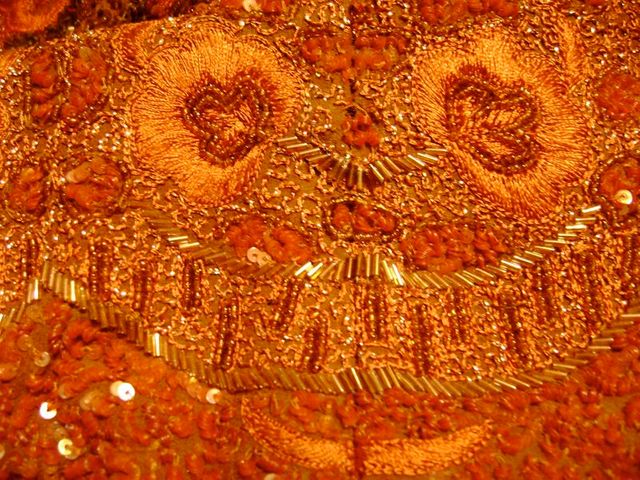
I’ve had a piece of beautifully embellished silk chiffon for a while. A recent studio reorganization turned it up, and I think it’s time to work with it. It’s heavily decorated with glass seed and bugle beads, metallic thread embroidery, and sequins. The ornamentation is so thick that you have to search to see any of the chiffon underlay. This fantastic material inspires a tutorial about working with heavily embellished fabric. I’ll take you through the process as I create a garment.
This project is broken down into two sections. Part 2 will be covered in another post. In this first part, I’ll explain how to:
• Check the fabric to make sure the embellishments are securely sewn on
• Attach an underlining
• Remove the beads from the seam allowances of the side seams
• Deal with the darts
• Sew and catch-stitch the side seams
• Prepare the lining
First, consider the nature of my chosen design and fabric. I am keeping the design simple—a straight skirt that is slightly pegged at the hem, without a waistband, underlined with silk organza, and lined with silk charmeuse. I have about a yard of fabric. At 45 inches wide, it’s not wide enough to go around me, especially considering seam allowances. As the embellishments are symmetrical from side to side, I cut it down the middle, parallel to the selvages, and created two identical pieces. I’ll use these pieces horizontally.
With a minimal hem (I’ll add a facing) and a simple treatment at the waistline, I’ll end up with a skirt that’s about 22 inches long. While it is not a long skirt, there’s a lot going on embellishment-wise, so less is going to be more, in this case.
Cut and prepare the embellished fabric
1. Create two identical pieces to use horizontally by cutting the fabric down the middle, parallel to the selvages.
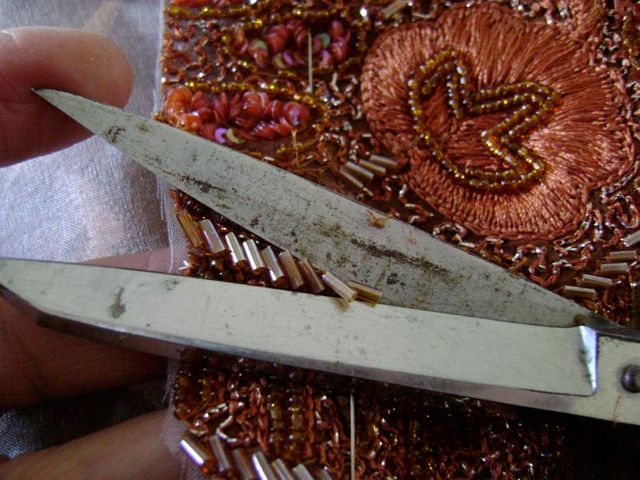
Note: Use your oldest scissors for this cutting job because, inevitably, you will be cutting through beads.

2. Check the embellished fabric carefully after you have cut out pattern pieces. Embellishments are typically applied with a tambour hook. While that technique enables the embellisher to work at great speed, applying a tremendous number of beads quickly and easily, it is a liability. The embellishments are applied with a chainstitch, so once a thread is pulled, it can keep on pulling, releasing the beads as it goes. Stabilize threads that have worked their way loose. A dab of tacky glue on the reverse side works well, as do a few stitches in place. It might be necessary to do some filling in, so save any loose embellishments.

3. Keep the pattern as simple as possible and eliminate any seams you can. I am using a straight skirt pattern.
Underlining
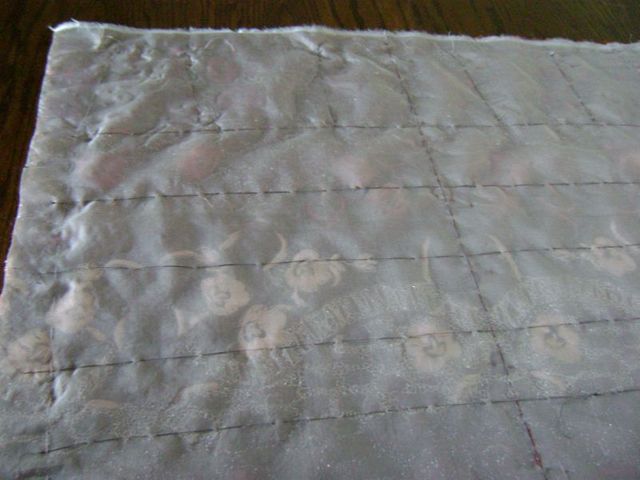
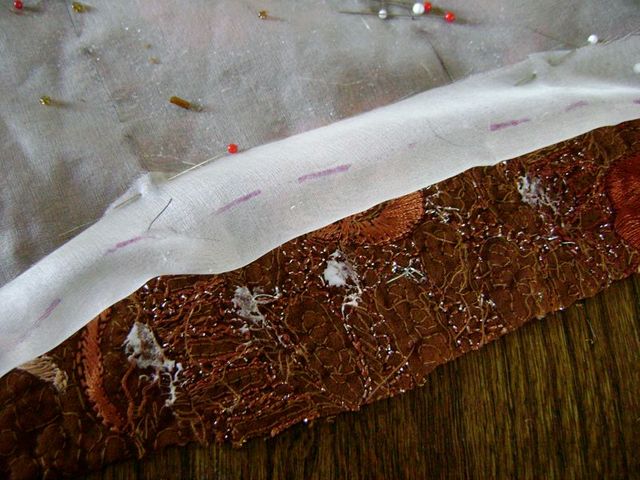
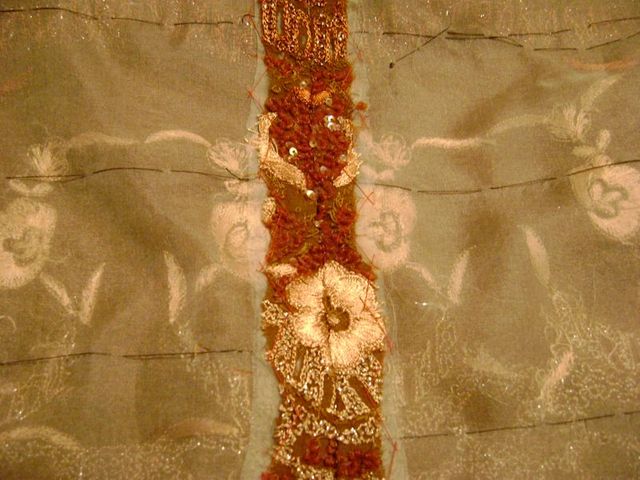
4. Prepare the silk organza underlining, using carbon paper to trace the stitching lines, darts, waistline and hemline. I’ve added a few horizontal reference lines, to help me orient the fabric symmetrically.

I got rid of the center-back seam so the design won’t be interrupted, and it will eliminate one tricky-to-sew seam, leaving just the two side seams. The zipper will go along the left side seam instead of down the center back.
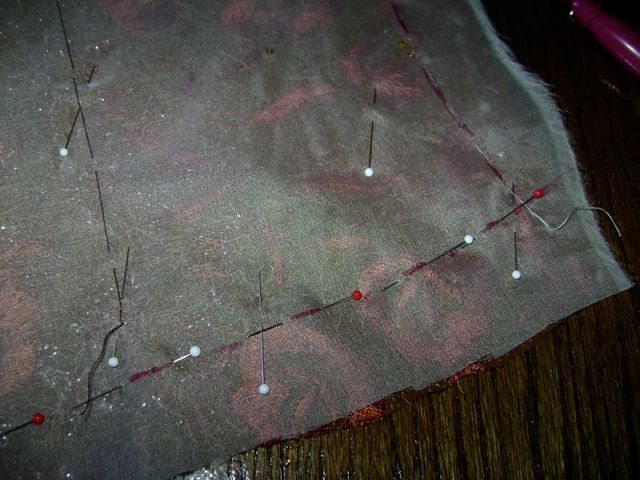
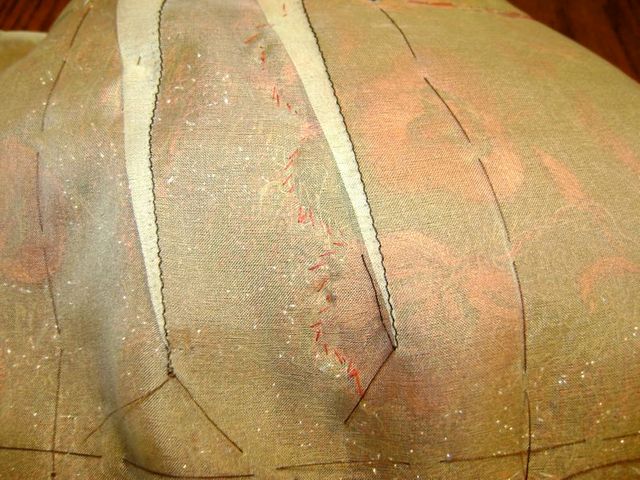
5. Pin the organza to the chiffon as carefully and symmetrically as possible. Steam the layers from the silk organza side to help mesh them, and do a fair amount of basting and internal tacking to keep the layers together. The embellished fabric is heavy, and you don’t want it to sag, now or later. Keep it in line by joining it to the well-behaved organza.

Remove beads from seam allowances
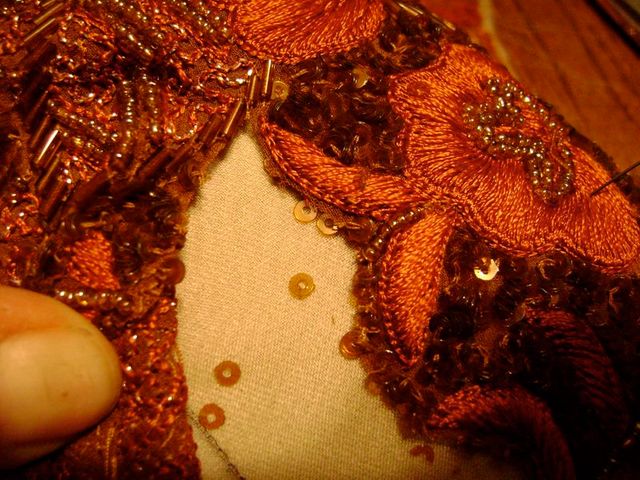
6. Before the side seams can be sewn, the glass beads need to be cleared from the seam allowances. The ornamentation consists of tiny sequins (those can stay), metallic thread embroidery (that can stay), seed beads (those have to go) and bugle beads (those also have to go). Work carefully, though, cutting only through the threads that hold the beads on, not through the underlying fabric.


7. Go back to working on the wrong side of the fabric: Peel back the organza a little bit, and dab glue over the loose threads wherever beads were removed; use a really tacky, quick-drying fabric glue.

Once the glue has dried, smooth the organza back into place and baste the two layers together along the side seams.There shouldn’t be any beads in the seam allowance; if any were overlooked, remove them and glue their loose threads.
Create the darts
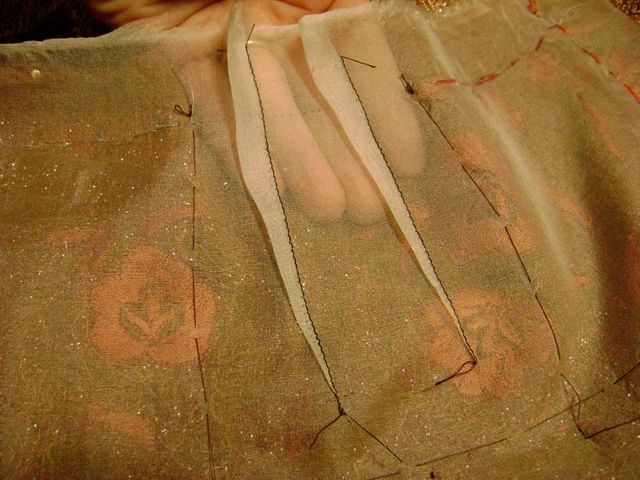
8. Now it’s time to deal with the darts. Stitch the darts in the organza and press them over a ham.

9. Obviously, there’s going to be extra fashion fabric, so that has to be dealt with.

The fashion fabric is too thick to dart in the traditional manner, so the fabric is cut into, and one side overlaps the other.

Find a “leading edge” on the upper layer (a nice line along which to cut and then stitch), trim the excess from underneath, then put the the top layer back into place.

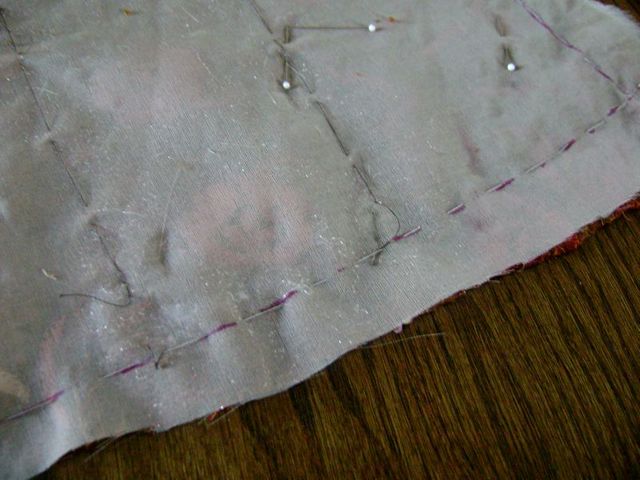
Hand-stitch the cut edge through all three layers: the edge of the top layer, the underlayer, and the silk organza. The stitches and the new seam are nearly invisible from the right side of the fabric, but they can be seen on the underside.


It is a good idea to do this sort of shaping on a ham, as it mimics the body’s contours.
It isn’t necessary for shaping to be right over the darts; it just needs to be in the same general area, and eliminate the same amount of excess from the embellished fabric as from the darts.
Sew the side seams
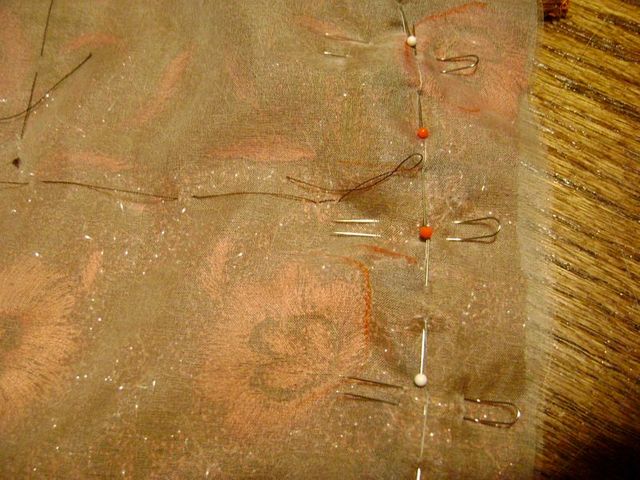
10. Now it’s time for the side seams. With right sides together, thoroughly pin the side seams, taking care to align the patterns in the embellishments perfectly.

Use fork pins. They do a superb job of keeping the layers (four layers, counting the organza) from shifting as you stitch with a zipper foot. The needle goes along the stitching line, alongside the beads that are still in the body of the fabric.
11. I often sew these sorts of seams twice, stitching slowly, just to make sure the stitching is tight. The loft of the fabric created by the embellishments can make a tight seam challenging. Stitch very slowly. My theory is that by stitching slowly, the needle can slide down alongside any beads that it encounters. If you stitch quickly, the needle can hit errant beads directly: You’ll break beads, you’ll break needles, you’ll put holes in the underlying fabric.
12. Finish the side seams. Press them open thoroughly, and catch-stitch the seam allowances to the silk organza underlining. This will keep them flat.

13. Go back to secure the beads along the seamlines, adding a few here and there to fill in any missing sections. You can see where a few beads need to be filled in.


Now that the skirt is sewn together, I’m glad I went to the trouble of basting the embellished fabric so thoroughly to the silk organza. Fabrics that are densely ornamented with glass beads, like this one, are heavy and need support.
14. Assemble the silk charmeuse lining. Sew the darts and side seams, and keeping an opening in the left side seam to accommodate the zipper.
Jump to the second installment, “Working with Heavily Embellished Fabrics, Part 2,” to see how to finish the skirt.


As usual, Susan Kahlje taught a rather complex subject matter in an easily understood way. I look forward to Part II. We are very lucky to have you! Linda S from MD
Oops, should have double checked that I spelled Khalje correctly!
Excellent information. I've always wanted to work on embellished fabrics and now I feel I'm ready pending part two, of course. Thank you for sharing your expertise.
Susan is an excellent instructor - very knowledgable, thorough and patient! I enjoyed one of her workshops years ago in Baltimore!
Greetings Susan,
This is very well explained, Thank you. I'll be sure to look for the Part 2.
I have a couple of heavily embellished saris, in my fabric collection. This article has me thinking about how to use them.
MT
Beautiful stuff! Putzy, but worth the work.
My mother, who was a seamstress, always said " the more detailed the fabric, the simpler the pattern. And the simpler the fabric, you can do a more complicated pattern."
This is a perfect example of that philosophy.
I love Susan's work and instruction. I am looking forward to the next installment. She makes it seem so easy.
NO, NO, NO, Do NOT cut the threads that hold beads and such to clear them from your seam allowances and darts!! They are usually sewn in with a chainstitch (see the Threads article about that a few years ago). So, if you cut the chainstitch you will cause a "chain reaction" and soon beads will begin coming off every time you move the garment. The best way to get beads out of the seam allowance is to crush them with pliers. Wear goggles to protect your eyes from flying shards, perform this over a wastebasket, and give your hands a break every 10 minutes or so (so you don't get a cramp). Since beads are usually glass, they will eventually begin cutting the thread and begin unravelling all by themselves, so be prepared to nip that problem in the bud by saving fallen beads and sewing them back on ASAP, being sure to knot-off the chain of thread at both ends.
I'm going to have to disagree with pheather - I've never liked the idea of smashing the beads (though I know people do that) - I'm uncomfortable with the idea of glass shards, no matter how tiny, inside a garment or in the workroom. And there are chain stitches and there are chain stitches - some pull apart right away, but often they're more stable than you'd think - tugging at the remaining beads will be your clue. I prefer a tiny dab of glue on the underside of the fabric, or an extra stitch or two to hold things in place.
Susan
I think this will be very interesting fabric to work with.
I agree with Susan's method of removing the beads. I am currently finishing up a beaded silk chiffon gown that was loaded with beads and sequins. Although rather labor intense, I found I had more control and a better look when removing the beads by hand. I enjoyed seeing how Susan stabilizes a heavily beaded garment with the organza and basting stitches. I am looking forward to Part II.
Thanks, Susan. I used to watch your show on PBS and really miss it. It got me interested in sewing with better techniques. Pressing, Pressing, Pressing correctly and taking your t-i-m-e when you sew. You always give such wonderful instructions. If it hadn't been for you, I'd never have tackeled making wedding gowns. Am looking forward to reading Part 2!
Could I eliminate the center back seam on a wedding dress that has a train? I am dealing with an alencon lace fabric. I'de like to get rid of the center back seam to eliminate the need for a center back seam I would like to do that.