

Raw-edge bias binding can be used instead of facing or regular fold-over bias binding to finish a garment. I have found this technique is a wonderful edge finish for dimensional handwoven fabrics or bouclés. Many times, these fabrics have a bulky appearance when faced with self fabric and trying to stitch a conventional bias binding tends to give a “homemade” appearance.

More on edge finishes
• A Clever Finish Makes a Single Layer Reversible
• Get Creative with Edge Finishes on a Twist Top
• 3 Neat Edge Finishes for Sleeveless Styles
• Sheer Seams and Edges
• Video: A Neckline Binding for Knits
• How to Cut and Sew a Decorative Bias Facing
How to create raw-edge binding
These steps show raw bias edges on linen applied in a self-fabric. However, I have also used hand-dyed bias silk ribbon as an edge, silk taffeta cut on the bias, and bias china silk.
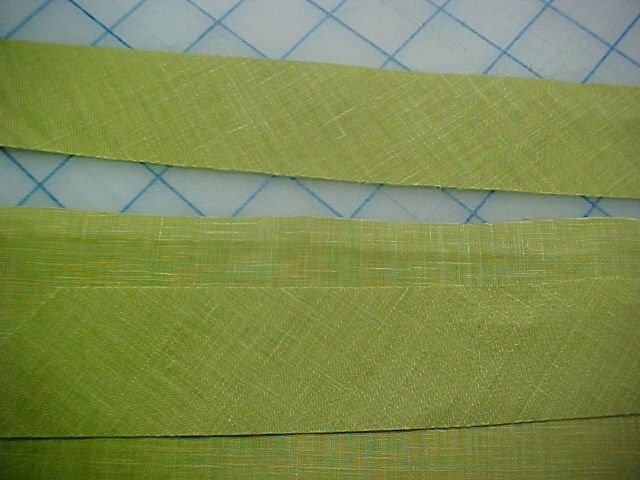
1. Cut the bias strips 1 1/2 inches wide. It will be cut again with a rotary cutter after it is stitched, but starting out with 1 1/2 inches is easy to work with when creating the edging. One piece of bias is placed on the wrong side of the garment edge and the other bias is placed on the right side. The right sides of the bias are placed toward the garment. All raw edges match along the outside edge. Unless is an important part of the garment, I don’t remove the seam allowances around the outside of the garment.
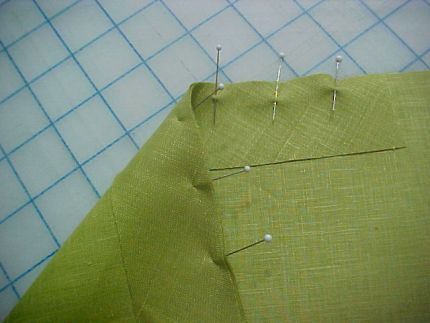
2. Pin the raw edges in place with the pin taking a “pick” at what will be the stitching line.
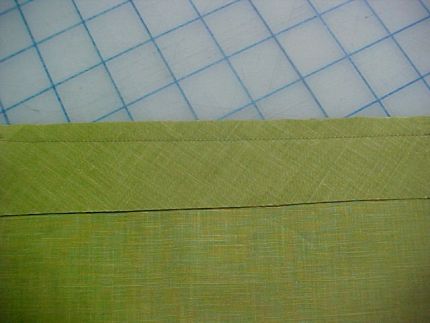
3. Stitch a presser foot away from the raw edge or about 3/8 inch.
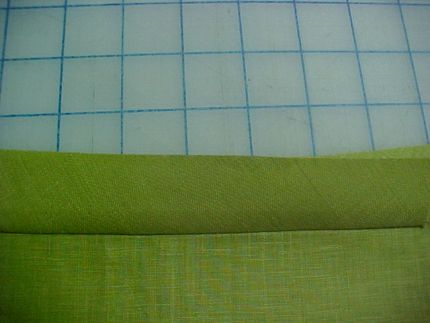
4. Press the bias binding away from the garment on the right side and on the wrong side of the garment.
5. Stitch the inside and…
Start your 14-day FREE trial to access this story.
Start your FREE trial today and get instant access to this article plus access to all Threads Insider content.
Start Your Free TrialAlready an Insider? Log in


Oh, Louise, that's gorgeous! Thanks for sharing it.
I love it Louise! Rest assured that I will be using this technique.
Thanks!
I like this! I mean, I really like this! How pretty.
This is so cool! I am dying to try this technique on a boiled wool jacket using a contrast colored linen. Let me at my sewing room!
I agree...this is really lovely and easy to do. Thanks!!!
This looks like a fun technique. I will plan to try it on a future project. Thank you for such simple yet detailed instructions.
Thank you for another terrific idea!! The new techniques always seem to come just when I'm looking for a different way to finish a garment or home decor project. This is one method I will be using on some light weight shirts right away!...thanks again...Paws 2
Hi! n This looks like a wonderful technique to try. I would like to save it to my computer rather than printbut couldn't find that option.
Also, I have purchased the Threads CD and must say it is amazing to see how the magazine has evolved. Threads has been one of my favorite magazines for many years. Oralee
To Auralee,
You can save the information in any article to your computer if you just open a blank word document while you have the information open in another window. With your left button held down, highlight all the information you want (including pictures), right click with your cursor somewhere in the printed area, left click on copy, click on your open blank document, and right click, then left click on paste. This method will paste all of your highlighted information to your word document.
It really isn't difficult to do and you can edit out any information you don't want or you can add your own comments, then Save it to a name of your choice on your hard drive. Be sure to save it or all of your work is gone. This enables you to have it on hand and it can be edited and printed if you should want to do so at some point. I have a file folder on my hard drive named Sewing that I saved all sewing files to. Once you get the hang of it, you'll find it only takes a few minutes to do. Hope this helps!
Love this idea, I'm working my brain overtime for how I plan to use this technique. I love the look of it.
TO AURALEE:
This is in answer to auralee regarding saving articles. While on the page you want to save click "file" (upper left-hand side of the menu toolbar. Click on "saveas", this brings up a dialogue box. In the box click on "documents or on some computers it may say "my documents". You will notice that in the save box at the bottom it will either have the web page name or the name of the article (you can hightlight this box and name it whatever you want - I use the article title for quick retrieval). click save and viola! you have it. This will save the webpage and all subsequent pages for those articles that have multiple pages of instructions. And, as Kenots write you can create a "new folder" called sewing in the documents folder and when you open your documents folder you can scroll down and click on the sewing folder and store all of your saved articles in this one folder.
Beautiful, but I'm confused about the measurements. In my head, I would start with a bias strip 1 1/2" wide, line up the raw edges and sew it to the good side at 3/4". Then after pressing away from the garment, you sew again at 3/8", centred between the first stitch line and the edge. There would be nothing left to trim, and three layers to brush. Does that make sense?
This is coming at a perfect time as I'm prepped to make a Chanel type boucle jacket for spring!
Thank you Threads for another great idea. Love the garment embellishing ideas you always have, both modern and from past designers. I always get compliments when the ideas came from you! Can't wait to use this one!
Oh, I see now, there are two pieces of binding! I get it now, duh! Silly me.
I am dissapointed, I have tried to print this article 5 times and I have only 5 first pages. What is the problem?
This is exactly what I was looking for on my current project. However, I don't understand why the seam allowance is not removed or at least reduced. Surely, this finished edge is going to be 1 1/4" to 1 3/8" beyond what the edge would be with a regular facing sewn on. I was away on holiday when this article first came out. Hopefully somebody else is reading it late and can help me out.
I have just finished a linen shirt and this would have been ideal.I will use it next time. Thank you for this wonderful idea.
FOR PRINTING OPTIONS:
I downloaded the Primo PDF to my computer {www.primopdf.com}. When I click on print, I have the option to click on my default printer, or click on Primo PDF to save it as a PDF to my documents. I usually save it as a PDF first (stored to my computer to retrieve years later) and then print it out for my binder. If there is no print option on the article, just use Ctrl P to force the print option. Hope this helps several of you!
Also, there is a website/program called Print Friendly {www.printfriendly.com} You can copy a URL and paste it into the box on that site. THEN, you have the option to click on sections to delete (such as ads or long intros to articles).
This is very useful for me as I have some sheers that I am just about to start for my windows and wanted an interesting finish that was not bulky but I could use another tone of sheer to highlight, thank you