


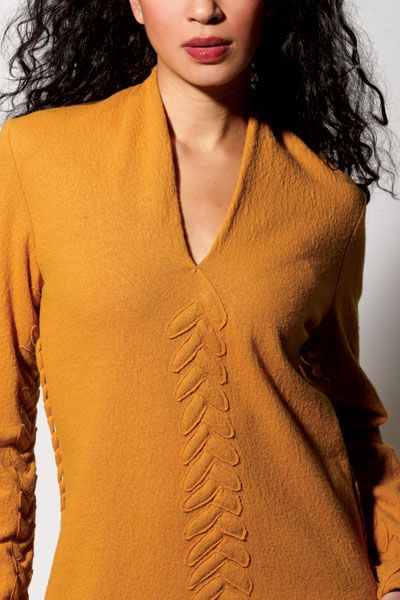
The intertwined fingers create a camouflaged seam that looks like embellishment.
The winner of Most Unexpected Seams award, during last year’s All About Seams Challenge with ASDP, featured an interlocking seam, a braided edge finish, and a whipstitched standard seam that transforms seam allowances into embellishment—all perfect for felted jersey since the edges don’t ravel. Choose a pattern with simple lines, or add straight seams for the interlocking techniques. We show you how to put your garment in the spotlight, with this seam showcased on Ruth Ciemnoczolowski’s design.
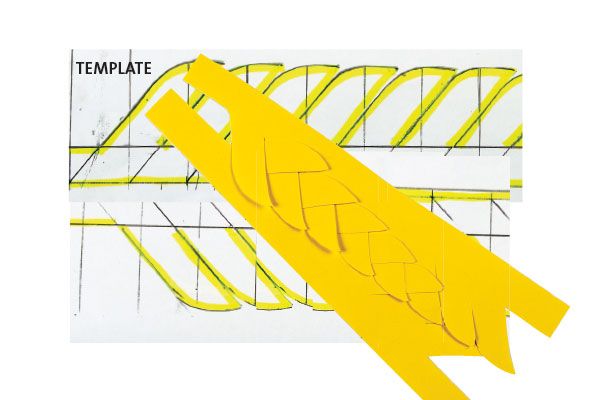
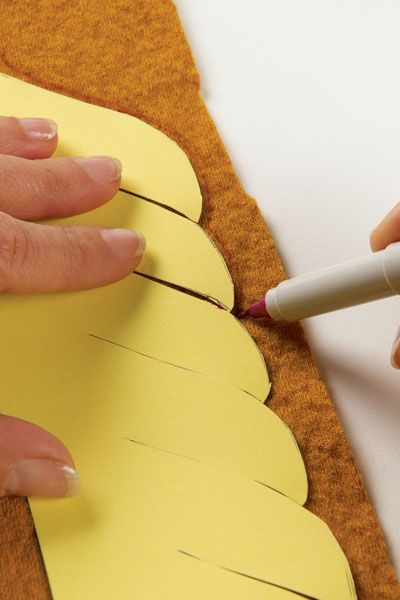
1. Create a pattern for the seam edges. Experiment with paper to cut “leaves” or “fingers” along the seam edges. Figure out the correct angle and finger length so they interlock, lie flat, and don’t leave holes when the seam is stitched. The fingers shown are 1 3⁄4 inch long and 3⁄4 inch wide. The slits between the fingers should end on the original seam allowance. When the design appears to work, test it in fabric.

2. Trace the new seam-edge shape. Trace your paper pattern onto the appropriate edges for the seam, and cut it out.

Trace the seam edge shape.
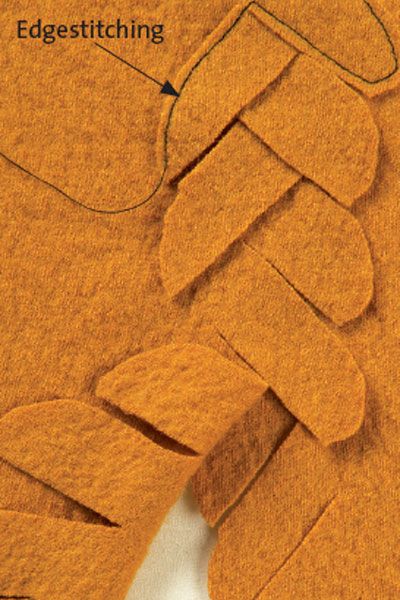
3. Weave the fingers to form the cable. With the edges lapped, intertwine the fingers to look like a braid, as shown above in paper and at right in fabric. Pin each finger in place.
4. With matching thread, edgestitch around each finger. (Edgestitching is shown in black here for visual clarity.) Stop as needed and pull the thread tails to the wrong side, and tie them off.

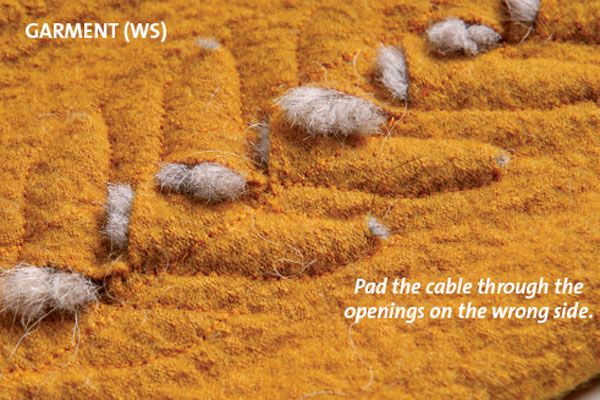
5. Stuff the cable with yarn. For added dimension, stuff the cable slightly with fluffy yarn from the wrong side (trapunto style).

Pad the cable through the openings on the wrong side.
excerpted from “Seams on Stage”, Threads #148, p.37


I love this treatment. Could you show us how she did the hem, please?
This is sooooo genius! Thank you for such a unique technique- I really adore this. I am going to try it on the topside of a pair of gloves I am making.
I think this technique is awesome and cannot wait to try it.
Keep up the good work and keep 'em coming.
Do not limit yourself to a non raveling fabric. Use a lining fabric and sew around each finger and turn right side out. This method would give you many options.
This is fabulous! I wish the other seams were shown as well. I can't quite see how they stitched the sleeve seams. This whole technique has all kinds of ideas popping up in my mind, and I can't wait to lay it out and see how if I can master it. The trapunto effect is an unexpected plus.
Adycakes: your gloves sound wonderful, too. When you finish them, could you zap me an email with the photo? I'd love to see how they turn out. I'm a sucker for gloves, and collect as many as I can afford!
The front seam looks great. I would use the seam only for decoration however. Possibly down the middle of the sleeve, avoiding the extra bulk under the arm. I intend to use the seam on a fleece jacket, adding it to the center of the back and down the sleeves. Thanks.
The other winning garments from the seam challenge, and the instructions for how to create the seams are shown in the latest issue of Threads, #148 April/May.
Yes, have wondered about the hem since my Threads came. It doesn't seem to be just a side shot....
VEry nice work. It looks so beautiful. One question that I have is that If I can use this seam with any fabrics. And if we can do it in many shapes?
Este tutorial está excelente, pensé que era una blusa tejida, ¡y vaya sorpresa! es de tela, muchas gracias
Este tutorial está excelente, pensé que era una blusa tejida, ¡y vaya sorpresa! es de tela, muchas gracias
It is good design of clothing learn from your your blog, Interlocking design will be so simple to create by it own...
Thanks for suggested me. New and creative idea!
Best effort
Mariah Williams
Professional Designer
Datarecoverysoftware Tips & Tricks
JUDDDDIIIIIITTTTHHHHHHH!!!!! If you read these comments and questions, could you please tell me how she did the hem treatment? There was a cryptic comment in the article about braiding the hem, and I'd like to know more, please.
Love the inter-locking seam tip. Please could you show how to us this on the hem, please!
Always love these tips.....