


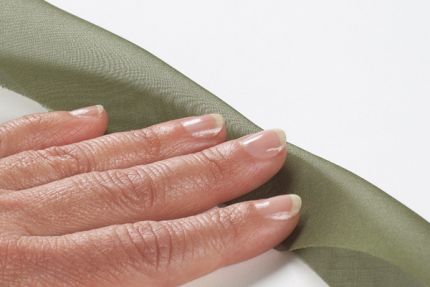
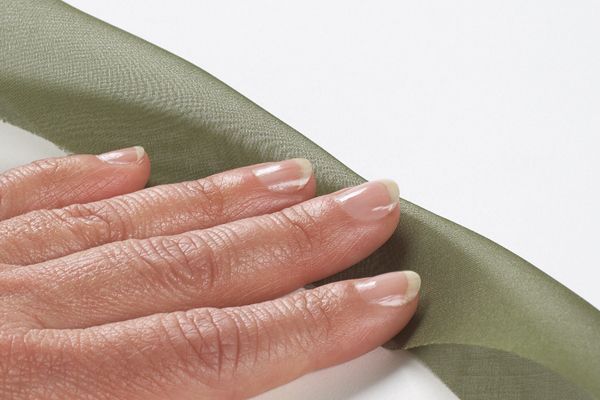
Hemstitched rows of bias strips shape this gown’s bodice for an elegant all-over seams look.
The design that won Best Implied Seams and Audience Choice in the 2009 ASDP Challenge featured hemstitched lapped bias strips shaped over a bustier. The gown was made with an industrial machine not available to everyone, but you can get similar results on a home-sewing machine set for a hemstitch with a wing needle.
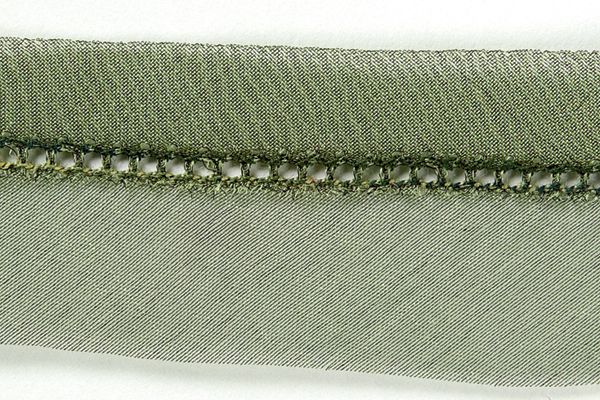
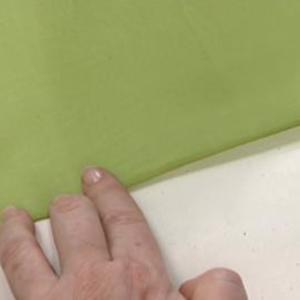
1. Cut the bias strips, and sew the first. Cut the bias strips 2 1/2 inches wide. Fold the first bias strip in half lengthwise, and sew a hemstitch 1/2 inch from the fold.
Fold a 2 1/2-inch-wide bias strip in half lengthwise.

Sew a hemstitch 1/2-inch from the fold.
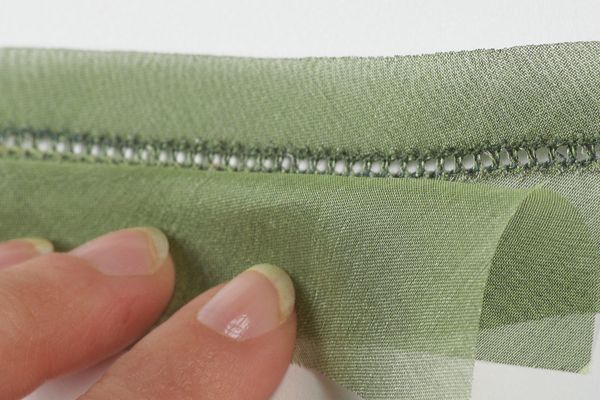
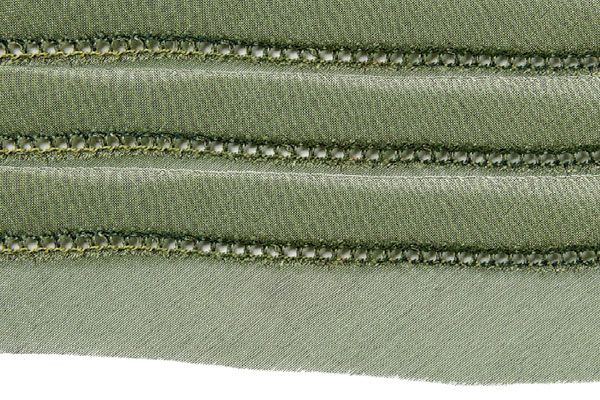
2. Pin the first strip along the top edge of the bustier foundation. Fold and press the second bias strip below the first bias strip. Align the fold just below the hemstitching on the first strip pinned to the bustier foundation. Pin the two strips together, following the contour of the bustier. Remove them from the bustier, and sew the second row of hemstitching 1/2 inch away from the second fold through both strips. On the wrong side, trim the seam allowance from the first strip.

Fold and pin the second bias strip below the first.
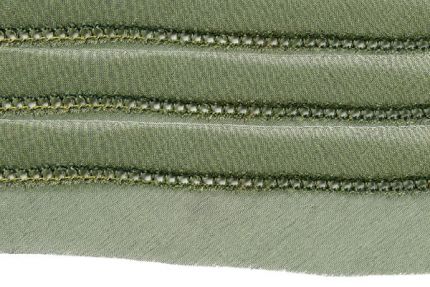
3. Continue adding strips. Pin the two bias strips back on the bustier. Add the third bias strip below the second as before, hemstitch, and trim the previous seam allowance. Sew all subsequent bias strips in the same manner. Sculpt the body shape strip by strip as you go. Once the bias strips cover the bustier, hand-sew them to the understructure.
Learn more on hemstitching.
Excerpted from “Seams on Stage” in Threads #138


Thanks for the well illustrated description of how to create this lovely embellishment without a specialized industrial machine. A little more detail on the hem stitch and appropriate foot would be helpful. I have a Babylock Quest. Can your staff identify the foot and stitch for my machine?
Many thanks.
EJCC
Lovely detail and a technique that's so useable.
I'm wondering how to keep the bias strips of organza shaped into the desired formation without sewing them to a foundation piece as you go? Organza is stiff and slippery. Even cut on the bias, it likes to retain a straight line rather than a curve. So, again, what makes it capable of remaining in the curved shape which is shown on the model's bodice? I can imagine so many great applications for this technique.
Awaiting a reply. Ymana
I agree with ejcc. I have never hemstiched, but I would like to learn how. Simply telling me to do it is not helpful at all. How about a video showing the hemstich foot, the wing needle, and what the process of sewing with both of those items actually loos like. I know we are all at different levels, but how can I advance in skills if I do not get a through explanation?
Count me in with ejcc too. At least show me what the stitch looks like so I can chose it on my machine. The stitch I have that looks similar to the picture would take a wing needle to create. My other hemstitch joins two separate pieces as it has a spacer. And, of course, the first thing that comes to all of our minds is the BLIND stitch and this isn't quite the way it works!!!
Thanks for a very clever idea and look forward to trying this but like the others I also have questions about the stitch itself what foot you used..photo please and although I do have a wing needle Others might not know what it is so a pix of that would be nice in the photo of the foot on the machine. Thanks in advance for a revision to this wonderful idea!
Very clever idea and can't wait to try it but I too have questions. Altho I know what a wing needle looks like (I have one) It would be nice to see a picture of the needle on the machime so we can see what foot you used and maybe the stitch setting on your machine so we can replicate that if we are unclear of what a hemstitch is. Thanks in advance for a revision to this great creative idea.
Very clever idea and can't wait to try it but I too have questions. Altho I know what a wing needle looks like (I have one) It would be nice to see a picture of the needle on the machime so we can see what foot you used and maybe the stitch setting on your machine so we can replicate that if we are unclear of what a hemstitch is. Thanks in advance for a revision to this great creative idea.
Very clever idea and can't wait to try it but I too have questions. Altho I know what a wing needle looks like (I have one) It would be nice to see a picture of the needle on the machime so we can see what foot you used and maybe the stitch setting on your machine so we can replicate that if we are unclear of what a hemstitch is. Thanks in advance for a revision to this great creative idea.
Hello , I too would like to see a bit more about the hem stitch please, as well as finding out how to get the curve
Thank you
Too cool! I just got a hemstitcher and I can't wait to try this.
For those of you wanting to do this on a conventional machine, the reason a specific stitch was not supplied is that it varies from brand to brand and machine to machine. The most common stitch used looks like a daisy with each pedal coming into a center hole. Almost any standard zigzag foot will work. The more advanced machines have many more options for the "hemstitch" stitch and may call it many other things including an entredeux stitch. My suggestion is to play and determine which stitch will work best on your machine. Use a larger needle to get a larger hole, even try a wing needle (a needle with flanges on two edges to make a larger hole in the fabric). Perhaps you need to increase your top tension. This stitch may require a finer thread to get a better look. There are so many variations. Check your owners’ manual, go on-line to your machine’s site and simply play.
For the lady with the Babylock Quest, as a starting point try #57 from Group 2 or try #37 or #57 from Group 4.
Good Luck,
rittab
o.k., let's be real here . . . nice technique, but not nearly enough information listed here for people to learn how to make it happen.
can we expect more, or are we going to be left hanging?
:-(
I love reading other readers' comments. I do not want advetising by other readers. They can sell their goods on many other online venues, but it has no place here.
Elizabeth
I just did this using a batiste and with my Bernina and large open center spaced needle and on setting I did it with the continuous diamond pattern and it turned out well. You need a foot that has a wide opening and a nice groove in the bottom. I used White batiste with silk 100 thread and it looks great. Thanks for the technique
For in-depth information on the hemstitch options and technique you can go to the book, FINE MACHINE SEWING by Carol Laflin Ahles. She is one of the experts on hemstitching techniques and gives you lots of information.
There are many sttches that can be used. A wing needle or a large needle can be used. Finer thread than you usually sew with helps a lot also. Stitching over a piece of stabilizer helps the holes to be clean and pronounced.
It helps to take scraps of the fabric you are using and experiment with different stitches, different lengths, widths and tension. Put little notes on the strips so you know what is what ... you'll be thankful you did after trying out ten of 'em!
I thought these directions were a little on the light side, if you've never done it, it's confusing.Get Carol Ahles book out of the library and try it out. It's very satisfying to learn this and you can create lots of lovely effects.
P.S. This wasn't advertising for Carol's book! It's a resource that is tremendously helpful. Carol has written a lot for Threads and her book is put out by Taunton Press( the publisher who puts out Threads)
I just wanted to give you the heads up that we have read your comments and questions. We have a great article from a past issue of Threads all about hemstitching that we'll be posting soon. We'll let you know when it's up.
To answer your questions on hemstitching, the article on hemstitching from a past issue of Threads is now live on the site. See the link at the bottom of the post above. I hope this helps!
This is a new idea and I love it, I have used the hemstitch foot on the sleeve of a blouse, I cut the sleeve of the pattern down the length of the sleeve and added one half inch to each side of the pattern and pressed under the half inch and used iron on stabalizer to keep my margin, the blouse was very pretty and I got many complements.one can always learn new things
My daughter fell in love with the bodice on this dress so we based her prom dress on it. I was able to duplicate it pretty well and she looks lovely in it. It's on my blog if you're interested in seeing it.
http://sewnotmyday.blogspot.com/2011/04/since-you-asked.html
Thanks for making the article so easy to understand! It made the construction of the bodice a lot easier.
Val