
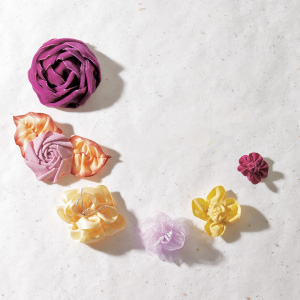
Fabric Flowers as Detachable Embellishments
Make a fabric and ribbon flower accessory that's easy to add to or remove from a garment.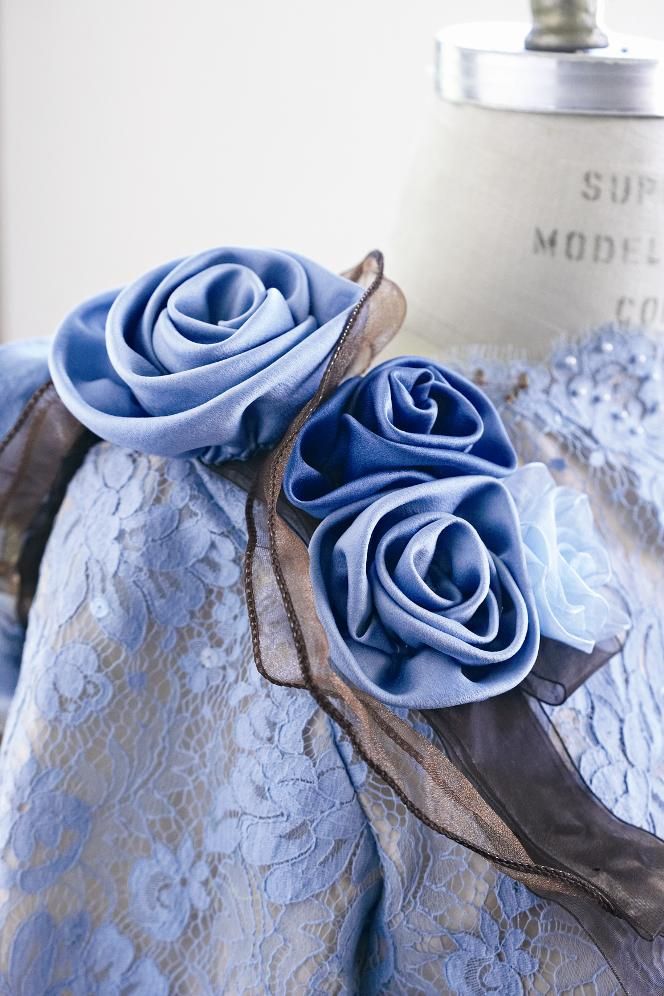
Making a detachable flower embellishment, a sort of fabric flower corsage, is simple.
Instead of attaching the blooms directly to the garment, I affix them to a backing (ribbon layers, in this case) and use snaps to attach the backing to the garment. Below, I’ll show you how to make the two types of flowers. I hope it inspires you to make rich and removable details.
There are several reasons why detachable embellishments are an excellent option for a garment:
- If the embellishment is large and three-dimensional, it could be stored separately and avoid being crushed in a closet or garment bag.
- You can clean the garment without fear of harming the embellishment.
- Instantly change the mood of your garment by adding or removing the adornment.
Fold a ribbon flower
The sheer ribbon rose is based on the free-form folded rose technique described by Helen Gibb in The Secrets of Fashioning Ribbon Flowers (Krause Publications, 1998). With a little practice, this flower is easy to make. I made mine with wire-edged ribbon.

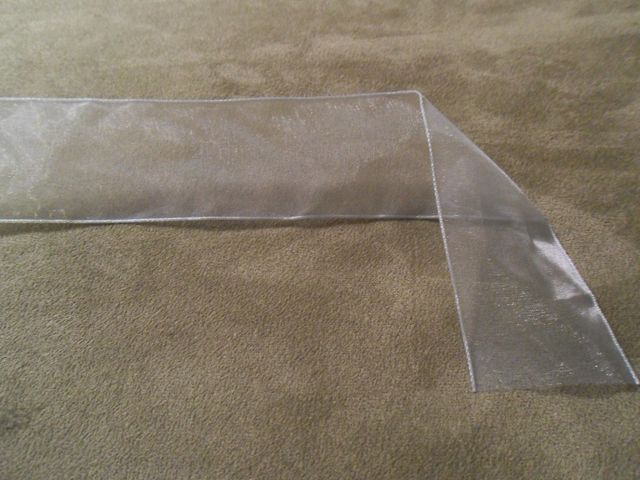
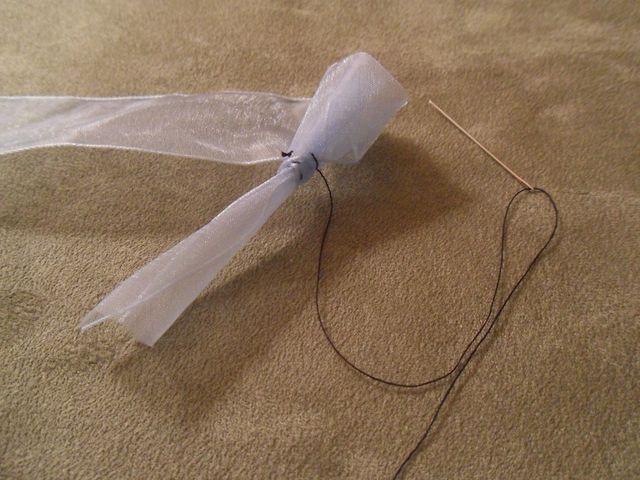
Start with a ribbon at least 12 inches long. You may wish to leave the ribbon long and just cut it when the rose reaches the size you wish. A folded ribbon flower can be made with wired or unwired ribbon. For the example, I used 1½-inch ribbon. For that width of ribbon, I usually use a ribbon piece 15 inches long.
Fold the ribbon at a right angle about 4 inches from an end.

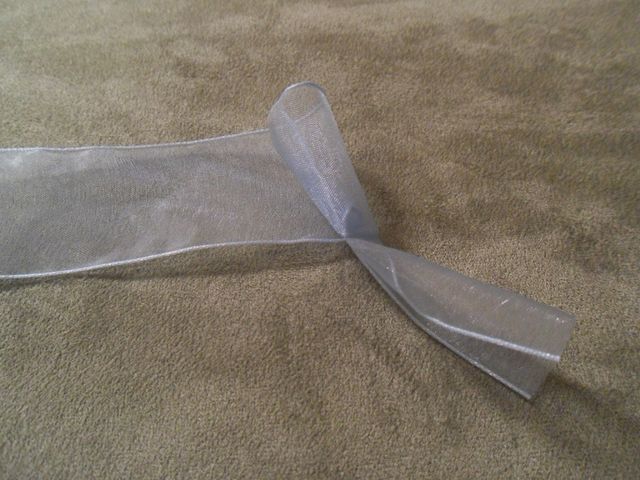
Roll the vertical ribbon to form the flower center and stem. This is the tightest part of the flower. As you fold and form the petals, remember that a natural rose has larger and larger petals as you move out from the center.

Stitch through the flower center base to secure it.

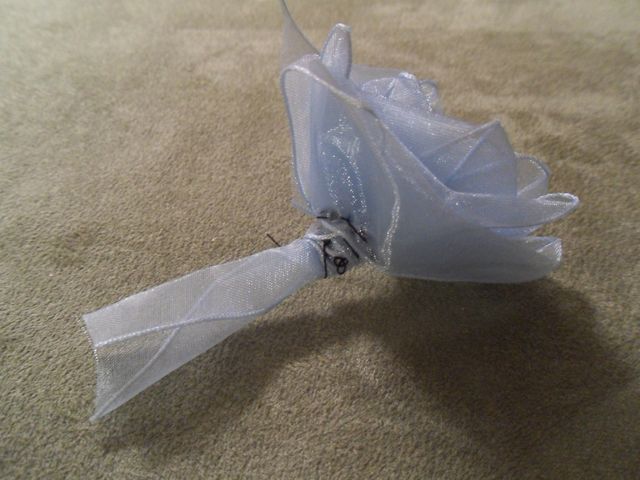
Turn the ribbon away from the flower at a 45-degree angle. Keep the angled fold soft and roll it loosely around the center with the fold perpendicular to the stem. The diagonal fold forms the edge of the petal. Stitch through the base to secure the petal. Repeat folding, wrapping, and stitching until your rose reaches the size you want.

Craft a modified Dior rose
I call this modified because I use two short petal sections to form the flower center. I like the fullness they add to the center.
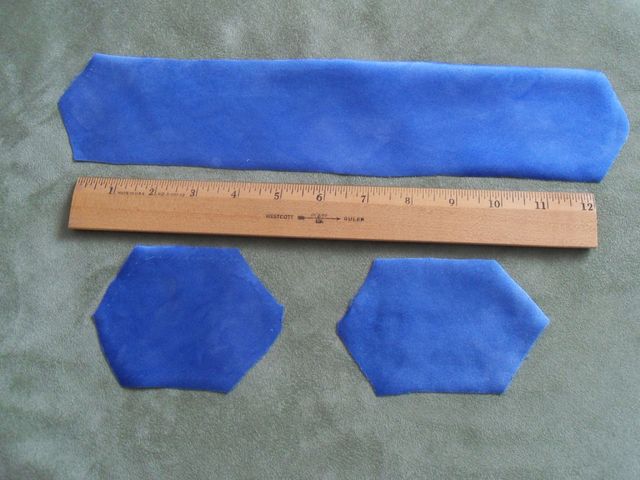
I made this flower from silk charmeuse. Cut three 3-inch-wide bias fabric strips. One strip is about 12 inches long, the others are each about 4 inches long. Taper the strips’ ends to a point, as shown.

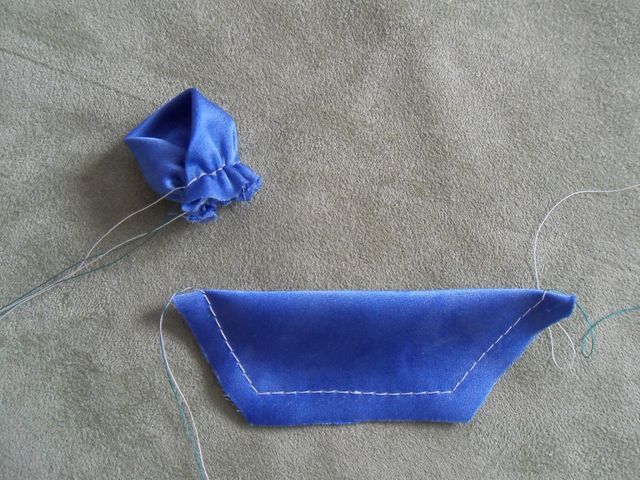
Fold the strips in half lengthwise, wrong sides together. Machine-baste 1/4 inch from the raw edges.

Take a short bias strip and pull the basting thread to gather it into a roll.

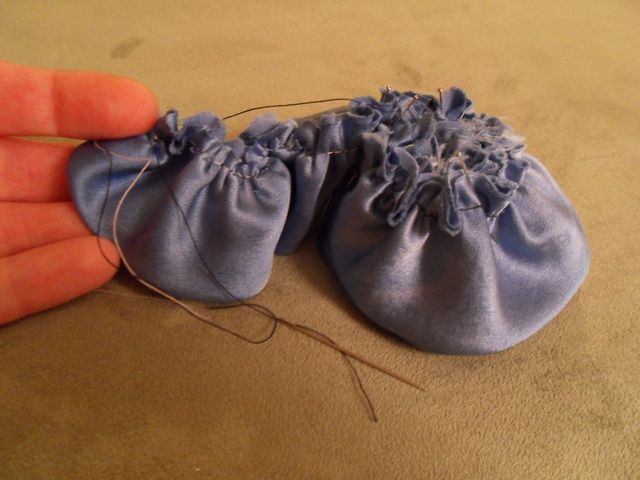
Keep the bottom of the roll flat. When the roll is shaped to your satisfaction, hand-stitch the bottom of the flower to secure it. Repeat with the second short bias strip, gathering, wrapping, and stitching it around the first to form the center bud. Then wrap the long bias strip around the bud, stitching as before to make the flower ready for its backing.
Keep the base of the flower flat as you wrap and stitch it.

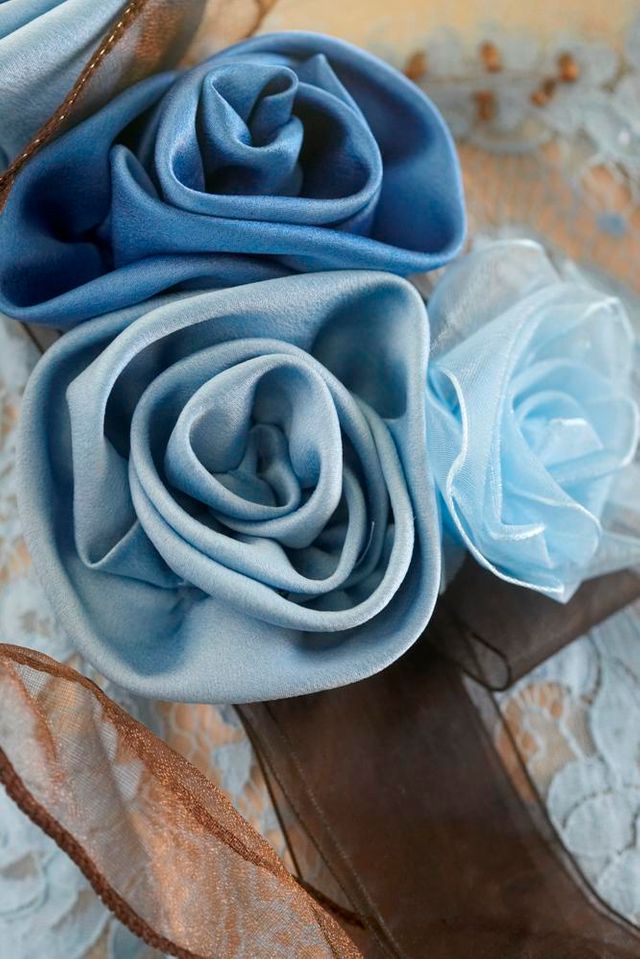
Don’t pinch or press the petal edge fold, but keep it soft and full for an attractive rose.
Back and attach
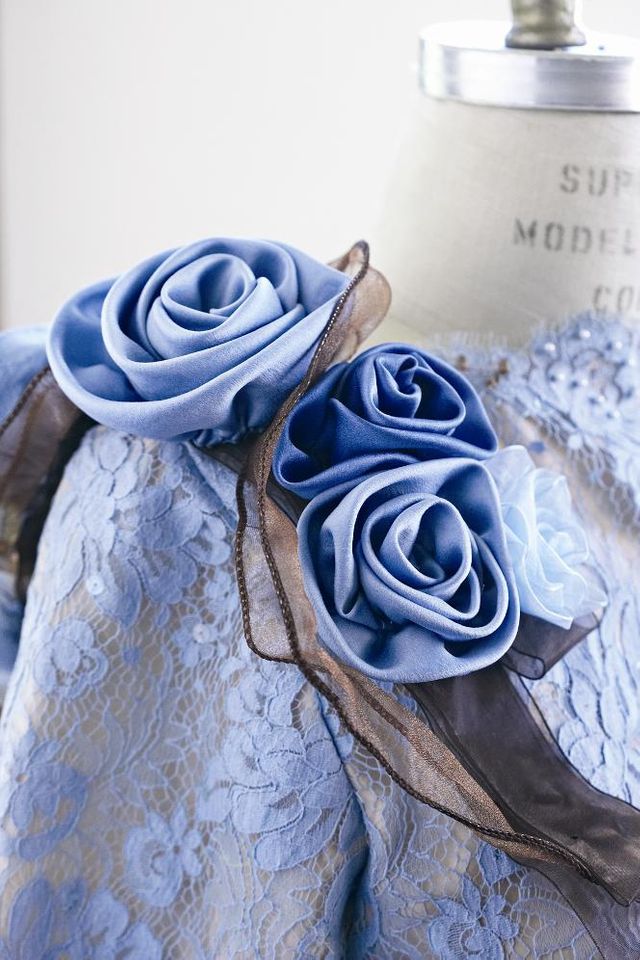
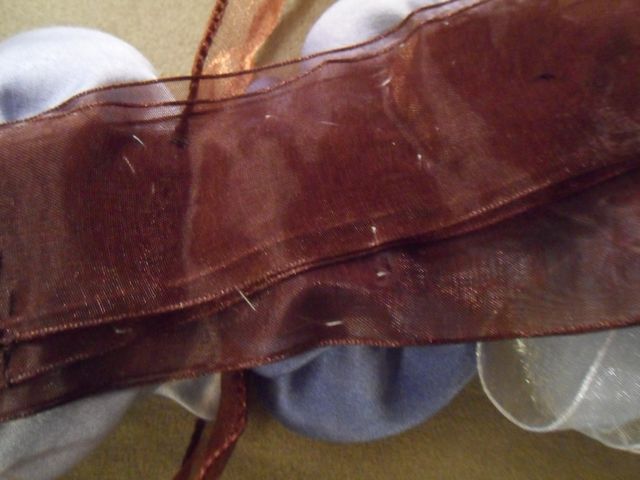
You may decide to keep the backing inconspicuous, but I chose to use layers of sheer wired ribbon, making the backing part of the embellishment itself.
I tacked the bases of the blossoms through the ribbon layers.

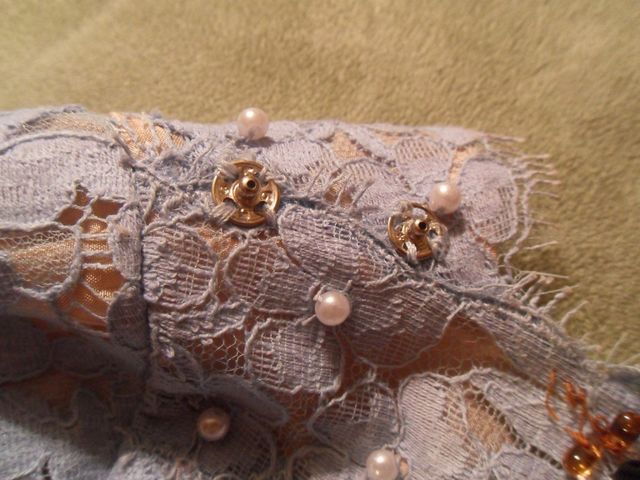
After checking the placement of the embellishment on the garment, I added two snap closures to attach it. The ball snaps are not visible on the garment and provide a secure hold for this relatively lightweight piece. If you prefer, try covered snaps.

This post is an extra to Susan Crane’s article, “Lace Adornment,” from Threads #150, Aug./Sept. 2010.
Learn more techniques for fabric and ribbon flowers:
Silk-Ribbon Embroidery: Five More Stitches


I love fabric flowers and enjoy making them also. These are so pretty and the color is fabulous. Thanks for the tutorial.
Nice idea. I will try them on my daughter's dresses as she wants the roses removed at her whim.
This is so gorgeous I had to sign up just so I could thank you for the posting.
I have used this embellishment often and love them. I do use the nylon invisible snaps for such occasions!
For a lighter weight flower I use a sheer synthetic fabric and instead of folding over the bias strip I leave a raw edge or a burned edge. I also add a few separate pedals to the flowers.
I have been looking for this type of instruction for a while. These instructions appear easy to follow. I am looking forward to trying this.
This is so apropo! I've been obsessing with silk ribbon embroidery and ribbon flowers for many years, and am glad to see a renewed interest in this beautiful art form!! I have many ribbon flower items in my ETSY shop if you'd like to take a peek!
This is so apropo! I've been obsessing with silk ribbon embroidery and ribbon flowers for years!! Nice to see a renewed interest in this beautiful art form!!
The silk ribbon flowers are so lovely. The snaps are a great idea!
This is a wow! This is the best ribbon roses I have seen to date. Thanks.
I wish there were additional photos to show how the ribbon rose was constructed. There is a big leap between photo #3 and photo #4. The verbal instructions are not clear to me: "Turn the ribbon away from the flower at a 45-degree angle..." etc. It would be much clearer if they provided a photo of that process instead of just words.
Love the fabric roses but find the instructions insufficient. Would appreciate more information and pictures to clarify the steps.
I agree with Whitebow. There is a big leap between the two pictures as well as the instructions could be more explicit. Guess I'll look to buy the ribbon flowers book.
If you think the directions are not clear enough, get out a ribbon, needle and thread and try it. It's very simple and loads of fun!
I have been making then with long bias cut strips of organza folded for years. I like the snap for attachment. I have backed the flower with a piece of matching felt then glued on a jewerly pin backing. It can be placed wherever you want this way.
You can add folds of green for leaves on the back or the velvet purchased ones.
I've had so many squished flowers from folded garments over the years, this is a great project, now I can remove the flower!
Sitting here with ribbon and a threaded needle and can't seem to get it. I'll keep trying though but the instructions need to be clearer and wish there were more pictures from other angles. :/
This looks sew cool! I have 2 try it!
It didn't come out nearly as nice. . . (sigh) oh well I'll have 2 try again another time. ;) really luv the idea. Thanx
I used to cut and make(glue or see thru tape)colored paper flowers,and I have found that
HI, I used to make colored-paper flowers,(with see thru tape or glue,)and I found that the more FIRM the paper or fabric is,the easier to roll into a flower shape--that would stay together.Also,look at a commercially made flower,even take one apart; that's good for finding simple patterns.--usually the simpler the better!!but very thin,filmy fabric is HARD.--I would start with firmer fabric, and don't be afraid to relax,and "fool around"with it. For a rose,usually a tight,rolled bud,in the middle,and large petals added,can work.--yes, use thread,glue(plenty of fabric glue now!!) and anything that works. I always had FUN making paper flowers cause I used any paper avail, and made it fun!!! THERE ARE NO FAILURES IN THIS,my opinion. try thick,or firm paper,also, very fun.