


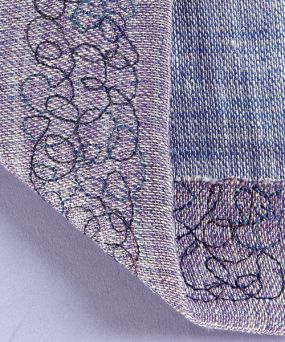
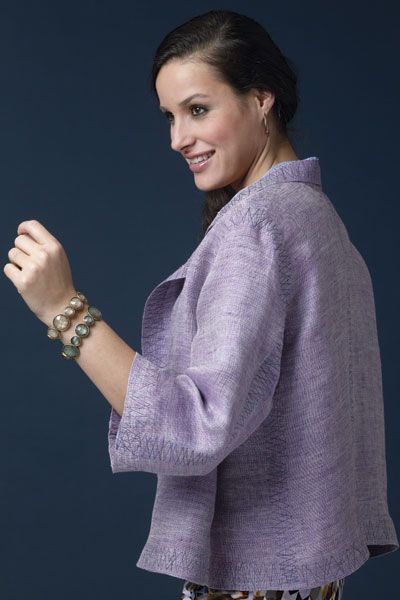
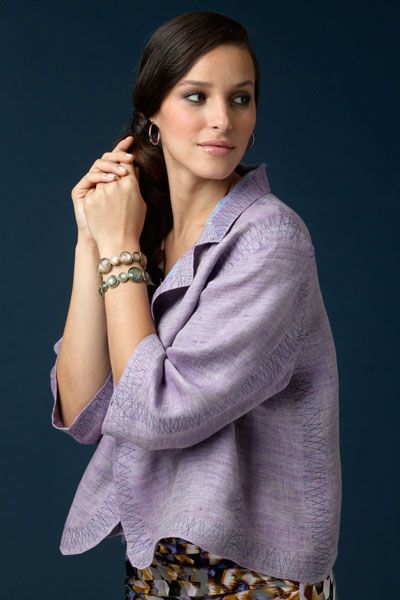
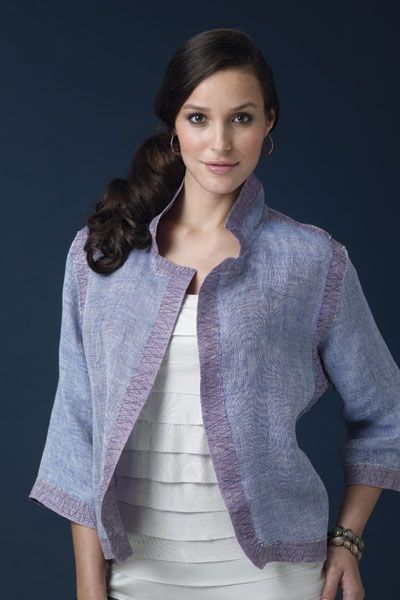
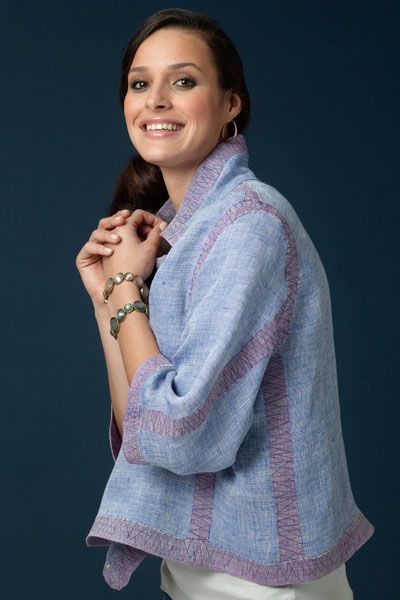
This edge and seam technique produces a relaxed double-duty jacket, the author's original design.
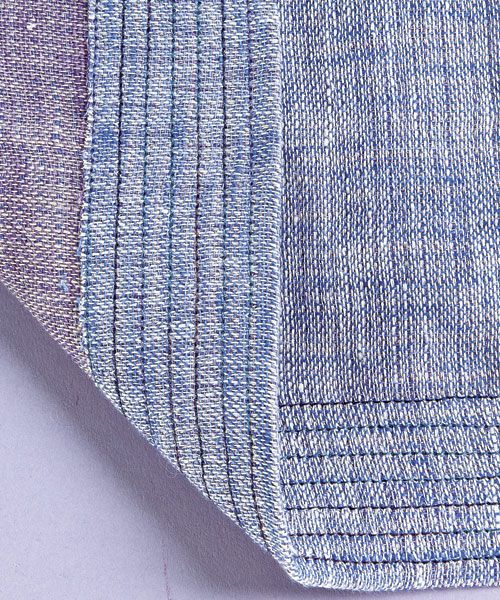
This linen (purchased at MarcyTilton.com) was woven so that each side is a different color. Though it is double-faced, the linen is not a double cloth. The results are determined by the way the seams and edges are managed. Instead of binding or tucking the raw edges, they are extended and turned to the one side, where they become a flattering, contrasting-color detail.
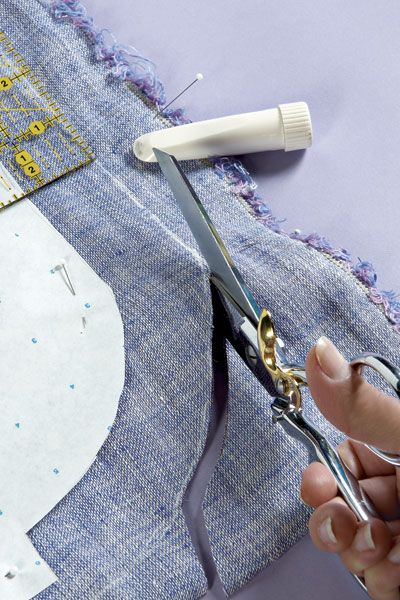
1. Cut all edges 1 1/4 inch wider than the pattern specifies. You don’t have to copy the pattern, just mark and cut 1 1/4 inch from the finished edge line on the pattern. Omit all of the facings.
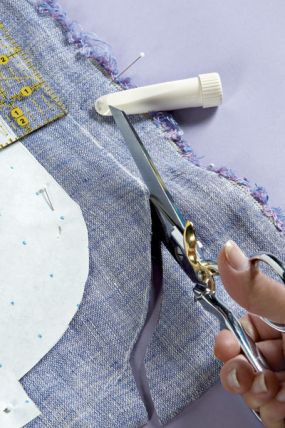
Mark and cut an extended edge.
2. Assemble the garment by sewing on the original seamline, with a 5⁄8-inch seam allowance. Position the fabric with same sides together (since both sides are right.) Press the seam allowances open as you go. Clip only as necessary to make the seam allowance or edge lie flat. When you do need to clip, balance the position of the clipping on each side (right and left) of the garment. Use a flat fell seam for the neckline.
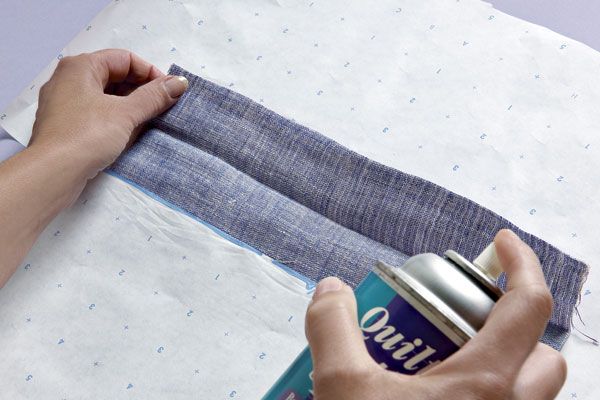
3. Affix the seam allowances and hem edges to the garment. Use either temporary spray adhesive or fusible tape to hold the edges while you stitch.
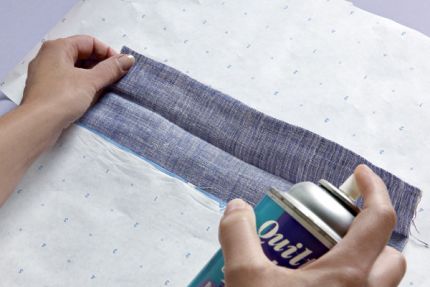
Temporary spray olds the edges while they are stitched, and paper masks the spray.
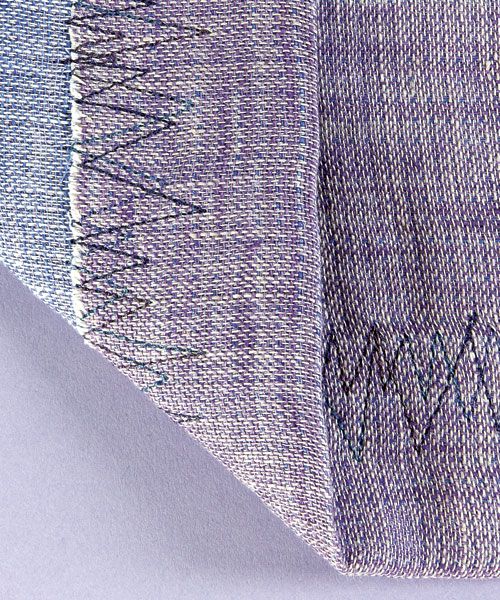
4. Free-motion topstitch the seam and hem allowances to the garment. On this jacket, variegated thread was used in a random zigzag pattern. You could alternatively channel stitch or free-motion stitch a border over the exposed seam and hem allowances to finish the edges.
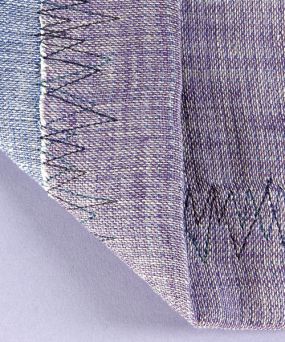
Random Zigzag Stitching
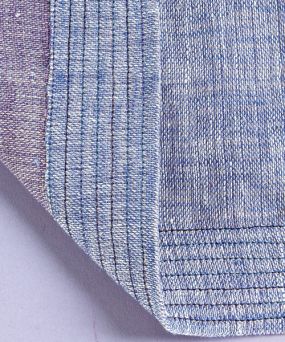
Channel Stitching
Free-motion Stitching
Excerpted from Threads Issue 152, p.56


NIce idea. Do you leave the edges raw and just decorative-stitch over them? Do you have a photo of a curved and clipped edge you could show?
Thanks!
This looks interesting.
I've two questions:
1. There is no photo of this spot so I'm wondering how does this look on the turned up side at the intersection of the hem and the front edge? (The first photo shows a curved front edge and a straight cut hem and the second photo shows both short ends of the hem cut straight)
2. The written instructions state: "balance the position of the clipping on each side (right and left) of the garment."
does this mean that the clips made on left and right sides should match/mirror each other?
Thanks in advance. I know technical instructions can be tricky to write :-)
I sthe pattern Marcy Tilton also? I love her things.
Maybe the garment has been cut all in one piece (front and back)like those sweaters knitted from side to side. That would eliminate the side seam problem and the stitching give garment some support; but that would not work for the sleeves' seams. Interesting.
PS: the sleeve seams were treated like the hem, I just noticed by switching images.
There is just NOT enough of the "photos" to understand the instructions! But I wish there was. I would love to try this.
I have a gorgeous piece of blanket-thick Italian wool that I plan to make a throw blanket for my nephew and his family to use in their tv room. This finish will be perfect for the edges. I really didn't want to use cheap-o blanket binding!
Thanks for the idea.
I will print these pictures out for my note book and future reference.
What a clever idea. A child's or toy's jacket would be fun also.
Thank you.
Here are a few answers for you:
Kathie510 asks if this is one of Marcy Tilton’s patterns. No, it is a pattern I have developed over the years. Any simple jacket pattern will work as long as the seams aren’t too complex.
AnnKiepe asks about the side seams: This pattern has two side seams one on each side of a side panel. There is also a regular under arm seam in the sleeve.
Artclothconsiglieri had two questions:
1. There is no photo of this spot so I'm wondering how does this look on the turned up side at the intersection of the hem and the front edge? (The first photo shows a curved front edge and a straight cut hem and the second photo shows both short ends of the hem cut straight) –Answer: You can see the front edge and hem meet on the first and second photo images. The blue jacket is the version with the seam allowances and hem allowances showing. The lavender jacket doesn’t show these allowances accept at the collar and lapel.
2. The written instructions state: "balance the position of the clipping on each side (right and left) of the garment."
does this mean that the clips made on left and right sides should match/mirror each other? Answer: Yes, that is exactly what it means. On this jacket the double sided linen was very forgiving and the clips into the curve didn’t show. But, just in case they do show I think it’s a good idea to make them look planned.
I think using this edge to finish a blanket is a great idea!
I am not clear on whether you press the seam allowances open and then stitch down or do you press both seam allowances in one direction and then stitch down...the armscye seam looks like the seam allowances have been pressed both toward the sleeve.