

In Threads no. 153, designer and instructor John Koch shared his techniques for making stunning hats by simple techniques. John had so many wonderful variations and trimmings for his hats that we’ve been sharing more of his embellishment techniques here on the Threads blog.
 More on creating stunning hats:
• How to Make a Hat Base
• Try Your Hand at Hat Trimming: Bows Without Tails
• Make a Bow with Tials – To Trim a Hat or Embellish a Garment
• The Dresden Shepherdess: Create a Bridal Hat
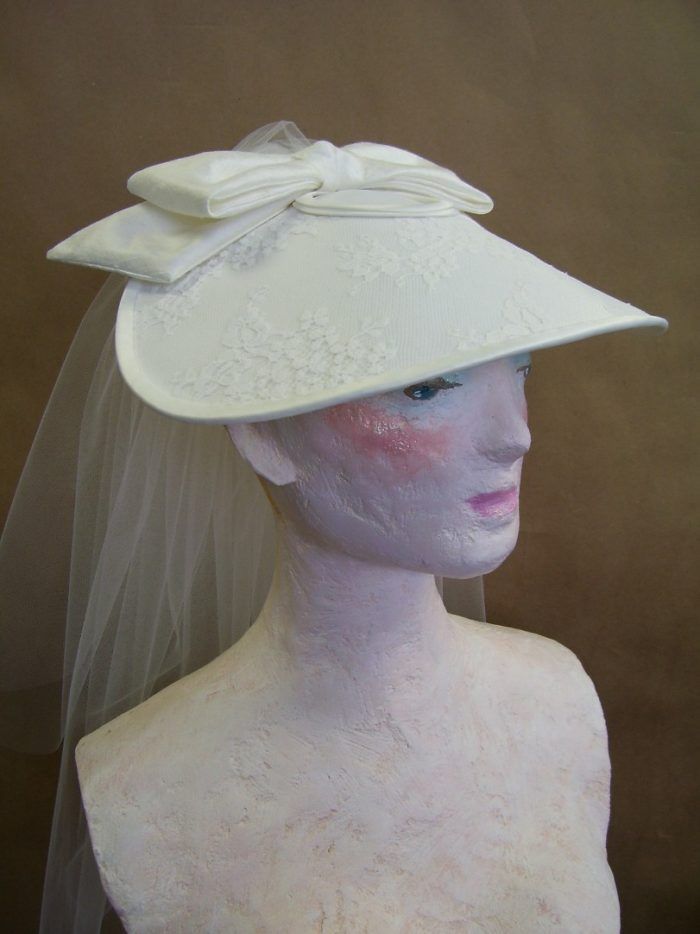
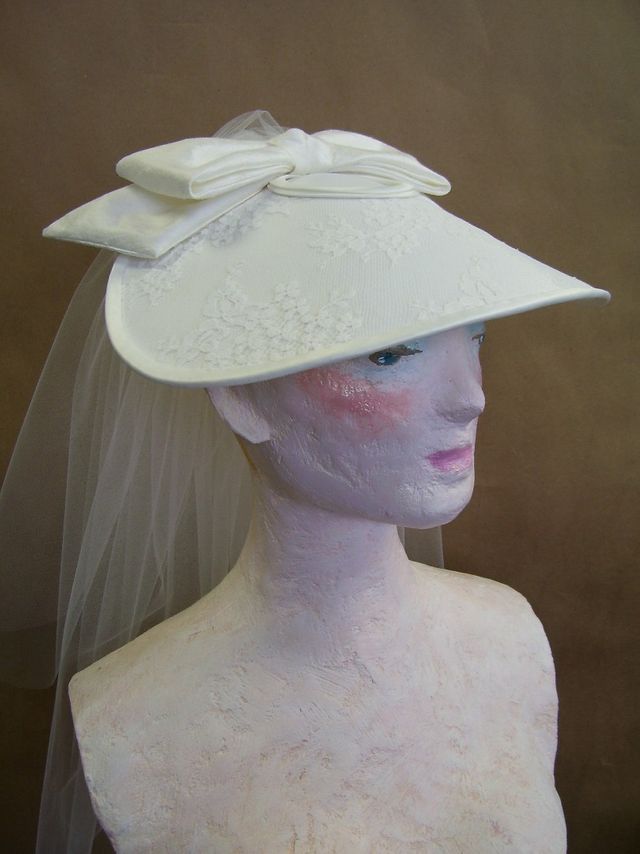
This post is the final entry in a series on John’s millinery techniques. It covers the creation of the delightful hat shown above. Known as The Dresden Shepherdess, it’s an unusual and stylish headpiece for the fashionable bride. The brim is an elliptical shape balanced on a basic “pod” and extended over the face. You will need to download a brim pattern for this hat, and reference previous posts to complete the hat base and make the bow embellishment. Links to the applicable posts are included below. Have fun!
Cut and attach the brim
1. Print out The Dresden Shepherdess brim pattern on white heavy buckram and cut it out.
2. Connect the brim. With the tip of your finger, moisten the left upper edge at the brim back and the lower right lower edge along slash. Place sides right over left 1¼ inch. Press the overlap with the iron’s tip to fuse.
3. Cut the fabric 1 inch larger than brim. (The wedding hat shown is two layers, satin and lace, each applied separately.) Position the fabric over the buckram, pinning in place, and gently stretching to remove ripples. Hand-stitch close to the outer and the inner edges. Cut excess fabric away from the center hole and the outer edge. Sew wire to the brim’s outer edge, and then cover the wired edge with a double-fold bias strip. (The techniques to cover the buckram brim with fabric, trim, then wire the edge, are covered visually in John’s story “Millinery Marvels” in Threads no. 153.)
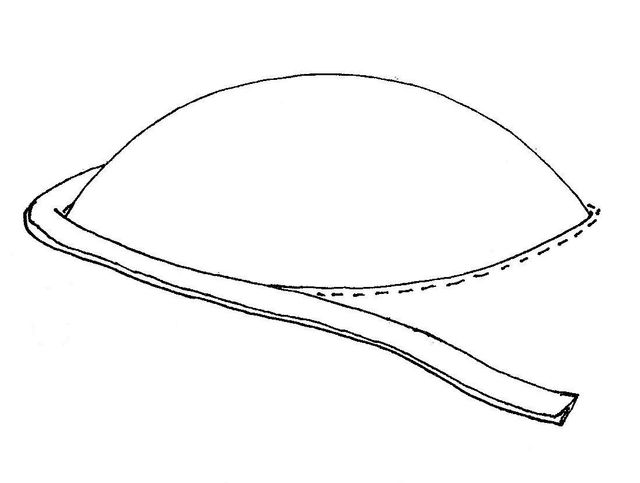
4. Position and secure the brim on a matching pod. To see how to make a pod, refer to the post “How to Make a Hat Base.” It is nearly impossible to pin the brim in place other than just putting pins straight through all layers. Try blue low-tack painter’s masking tape, removing pieces as you hand-sew the brim around the opening with small stitches.
5. Cover the raw edge on hat top with braid or double-fold bias tape. Glue the trim in place with Tacky Glue.

Add a trailing veil
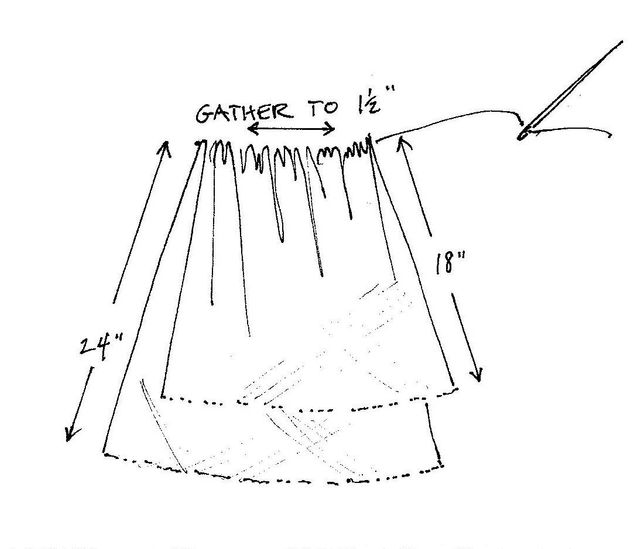
1. Cut a 3½-foot long maline (bridal veiling) piece. Fold 18 inches from one cut edge. Press the fold with a warm iron; you have an 18-inch tier over a 24-inch tier. Gather the fold with hand or machine-sewn basting to 1½ inches wide. Tack to the hat back, with the shorter tier outermost.

2. Assemble and add a bow – See the post “Make a Bow With Tails – To Trim a Hat or Embellish a Garment.” Place bow to overlap the veil’s gathered fold. Tack in place, then sew the bow knot to hat and and secure each bow end with few stitches near the hat edge.


I am very disappointed with the instructions, since picture shows one type of hat, with a flat hat base, but you send readers to a link with instructions of a concave hat. Please provide instructions according to picture. It's a lovely hat.
@MMCM: I think you're confusing the brim with the pod to which it is attached. The brim is what you see in the photo; the pod is what it sits on and the pod fits your head. Does that help? Beautiful hat! I'm going to suggest it to my niece for her wedding this summer.
Dear MMCM: KJRas' comment is correct - the pod (the convex hat base) is beneath the brim you see in the photo. The round area at the hat's peak is the pod's top. I don't have access to the hat today, but I'll take a few additional photos - including the underside of the hat - so that it is clearer. Thanks for reading!
Hi, The link to the pattern pdf isn't working. I get the message that its damaged. Could you please repair and post it back for download?
Thanks.
Hi, The link to the pattern pdf isn't working. I get the message that its damaged. Could you please repair and post it back for download?
Thanks.