


This binding is made up of small pieces of fabric sewn to the garment's edge, trimmed to create an irregular edge, and sewn in place with a satin stitch.
This technique was a problem solver for me when I was ready to finish the front and neck edges of a pieced and quilted jacket and I realized I didn’t have enough fabric to cut a bias binding. I didn’t want to face the jacket or introduce a new fabric to the piece either. However, I had enough scraps of the jacket fabrics to piece together a binding – if I didn’t obsess about cutting them on grain. And, I reasoned, appliquéing the binding in place would be a continuation of the collage piecing I had used in the jacket. In a later project, I used the same process and a collection of compatible fabrics to make the edge the focal point on a solid-color vest.
My technique for this binding is not definitive and it may vary depending on the fabrics I’m using and the shape of the garment edge. Because it’s somewhat of an artistic endeavor, I do a lot of building as I go, pinning in place first then stepping back to check the progress, editing along the way by adding or deleting pieces, and always trusting in my fabric choices. I want the final finish to be pleasing to the eye, but my dressmaking instincts require that it be flat, smooth, and supple. So I follow the same steps I would use in attaching a basic bias binding – carefully cutting the edges with a sharp scissor or rotary cutter, sewing straight using a seam guide, and pressing as I go.
The Process in a Nutshell
Seam the scraps together, cut the edge straight along one side, sew this strip to the wrong side of the jacket, and wrap it over the edge to the right side of the garment – just like sewing on a bias binding. But instead of turning under the remaining long edge and stitching it in place by hand or with a straight machine stitch, cut the edge to a desired shape with scissors, sometimes following the motifs in the fabric. Pin the cut edge in place and sew it to the garment using a machine satin stitch.

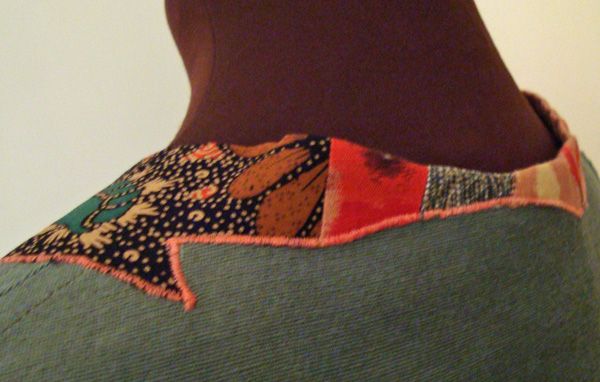
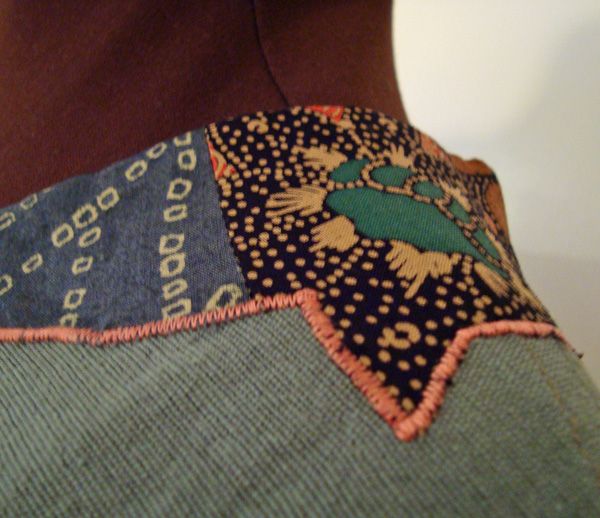
Fabrics with a clear motif create an embroidered effect.

These fabrics aren’t cut on the bias but they shape easily around the neckline curve because the outer edge is not folded under.

Satin stitching holds the binding in place and covers the raw edges so they don’t have to be turned under.
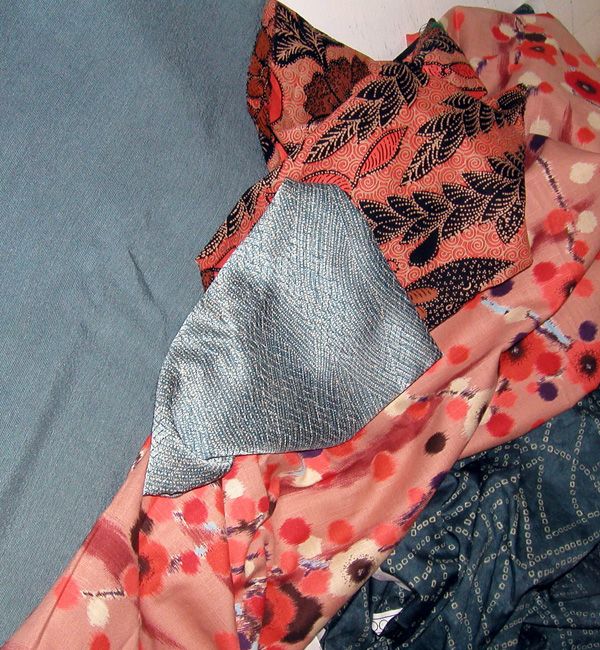
Choose Fabrics CarefullyFrom a design point of view, I choose fabrics that are cohesive with the garment, whether the binding is meant to merge or create a contrasting edge. For a collage binding, three to five fabrics are probably enough, and they should blend and work together in terms of color first. I look at pattern in the fabric, too, and try to vary the scale and visual texture. One or two of the fabrics should have a motif I can isolate to become the edge of my appliqué.
Structurally, smooth, tightly woven, stable fabrics work the best simply because they’re easier to sew. But, if a visual design choice is soft and loosely woven a little stabilizer can bulk up a fabric just enough to eliminate headaches. I prefer stabilizers that will disintegrate like heat soluble, water soluble, or spray-on stabilizers that can be washed away. However, if I can get away without using a stabilizer, I do. I thoroughly press the binding in place, then generously pin to hold in place with the pins perpendicular to the edge so I don’t have to remove them as I sew. And when the fabric tends to fray, I turn under the raw edge and satin stitch along the fold, or I stitch close to the raw edge with a straight stitch, letting the fabric fray to the stitching.

Choose fabrics that are compatible including one or two that have a distinct motif.
Step-by-Step:
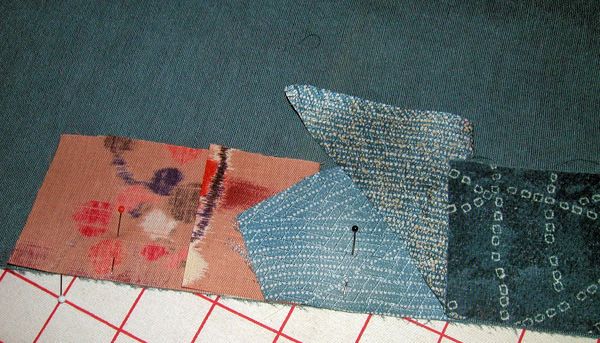
1. Cut fabric into random length pieces that are at least 2 in. wide. Pay more attention to the pattern or motifs in the fabric then to grain. Cut each piece straight along one edge, keeping in mind that you’ll place this straight edge on the reverse side of the garment. Pin the pieces in place, with right side of piece to wrong side of garment. Overlap as you pin, allowing enough to seam the pieces together. Pinning in place before you seam the pieces together lets you to check your layout and edit if necessary without ripping.

Pin the pieces along the garment’s edge to test the effect before you seam them together.
2. To ease in fullness around curves, like necklines, stretch fabric slightly and steam well to mold the binding piece to the shape of the curve. If necessary, make a tiny tuck of fold in the binding. I know this goes against the rules, but it does the job.

Some fullness may occur when shaping the binding around a curve. Steam pressing will take some of that away.
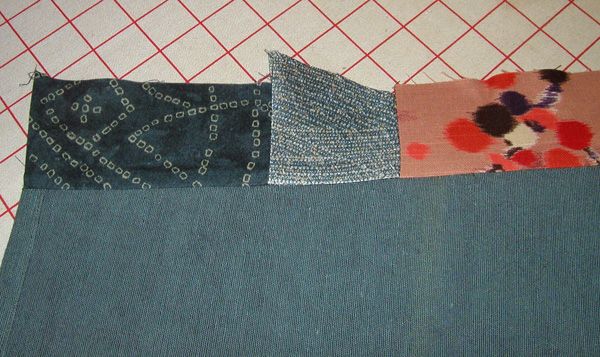
3. Complete the arrangement and seam the individual pieces together. Trim the seam allowances to about 1/4 in. and press open. Sew the pieced binding to the garment, 3/8 in. to 1/2 in. from the edge. Press the binding away from the stitching, wrap it around the edge of the garment, and press again.

Sew the pieces together to form the binding strip. Then sew the strip to the wrong side of the garment.
4. Cut the remaining binding edge to the desired shape and pin in place. Satin stitch along the cut edge.
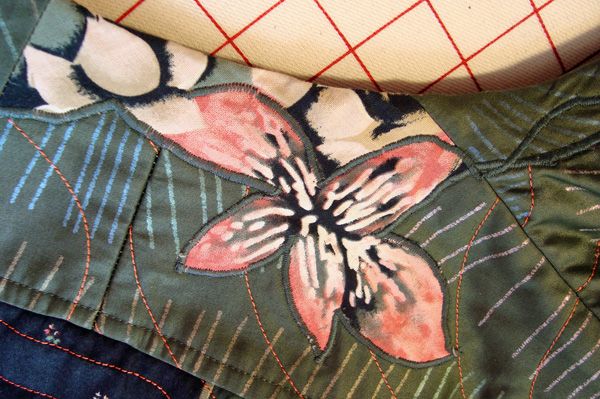
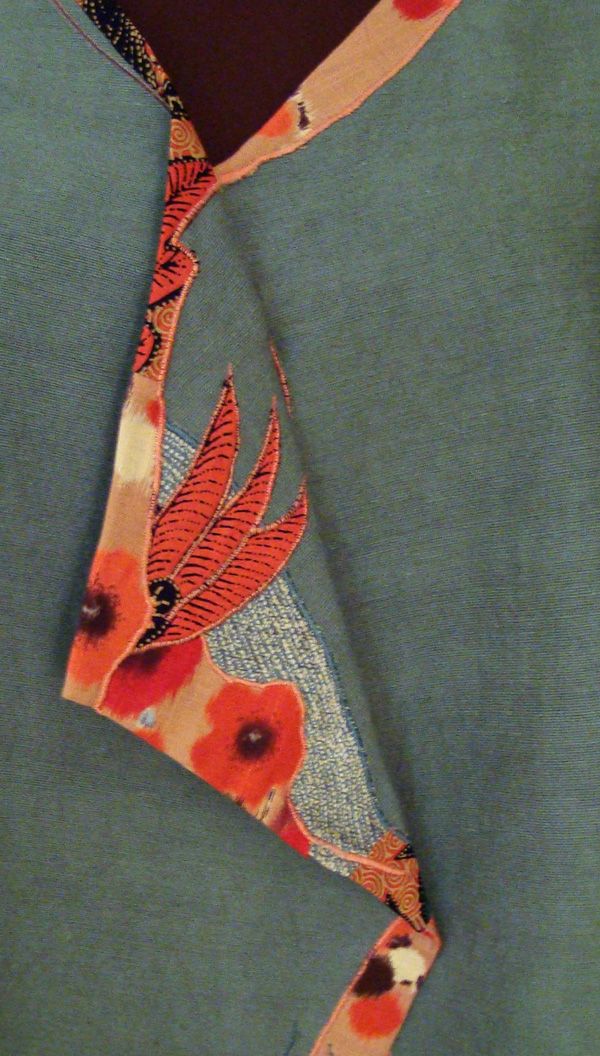
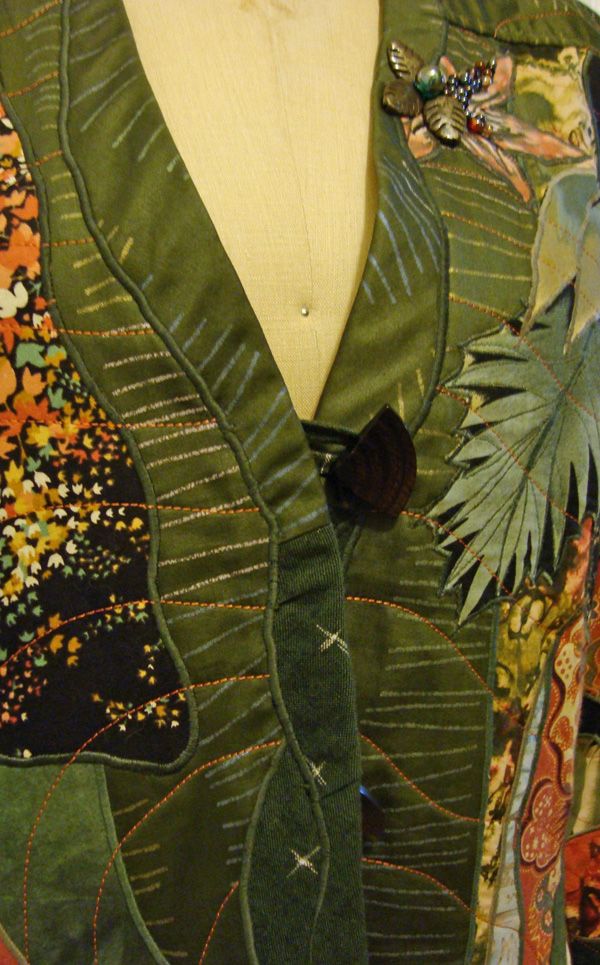
The pictures below show the finished binding on a collage-pieced jacket.

The binding blends in with the collage piecing on this quilted jacket.

The flower is part of the binding.
Reminder
When your garment has a revere or lapel (an extension of the front opening that folds back revealing the wrong side) you need to switch the face side of the binding from right side to wrong side at the end of the lapel’s roll line. Fold in the edge of the piece that ends at the roll line.

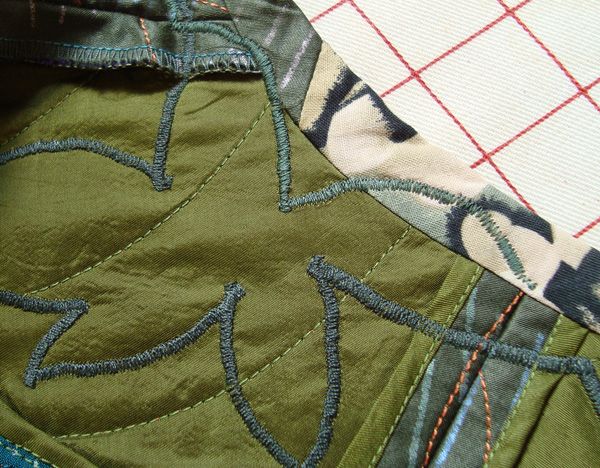
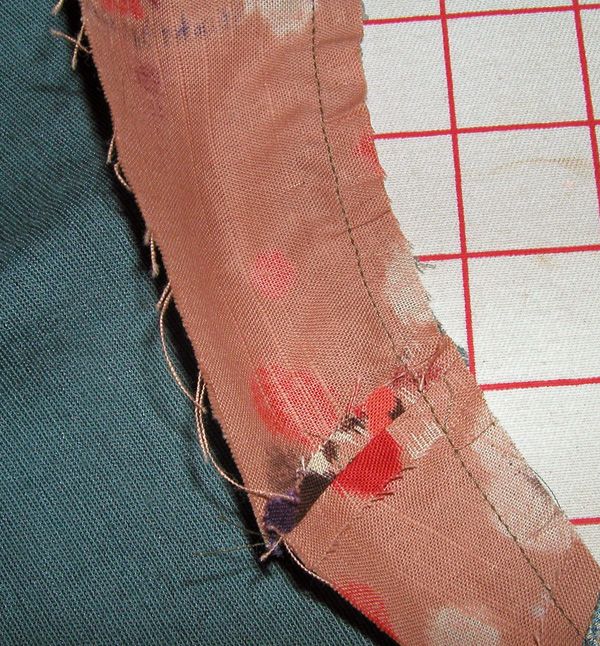
From the wrong side, the binding is straight and the outline of the satin stitching shows. If your garment has a lapel, be sure to apply the binding to the right side of the garment first in that area.


What a great idea!
Innovative, creative and beautiful!
Great technique. Thanks. Just curious, is that weft insertion interfacing underneath the binding on the corner?
I love the organic quality the irregular edge gives it. It is very artful and innovative. Nice work.
This is a wonderful custom effect, giving an opportunity to select fabric that beautifies the face as well as finishes the garment.
Very, very unique and creative. You'll love wearing that!
These are fantastic ideas! This is why I love this site! Thanks so much for more inspiring ideas!
Sewista,
It's not weft-insertion interfacing, but I can see why you would think that. It's a piece of silk fabric -- you can see it in a couple of the other photos -- that I believe is from a vintage Japanese kimono.
Mary Ray
Elegant, Mary Ray!! And innovative - what a great application for a quilt binding too.
I have wonderful older blazers that could use a more casual look. I think I will use this technigue, cut off the lapel, shorten lengths etc and put on this binding with materials to match some pants. I can also see this on regular quilts, placemats, purses, etc. I love this idea!
What an imaginative idea. Have been sewing since I was about nine years old. Am now 82 and though not sewing nearly as much I still enjoy being creative. Will try this technique soon. Thanks much.
How wonderfully clever! And what a great way to use those too-small-for-a-garment-but-too-beautiful-not-to-use fabrics! I also have a couple of tops with necks that are too low and this would be a great way to change the necklines. Thank you for so much inspiration!
What a great idea!
This is lovely! I remember seeing a similar type of edge-finishing application some years ago. Threads even had an article. I don't remember the author, but it was based more on using triangle pieces of fabric so it gave a jagged or prairie point look to the garment. Would be good with certain garments, but I thought that it was rather limited, depending upon the garment.
However, this is very nice in that it can be varied depending upon the sewer's desire and the design in the fabric used. Thanks so much for sharing this. I want to try it as soon as possible.
I love this idea - thank you for sharing your step-by-step. Regarding the fitting of the edge to the garment, I guess you could cut the seamed edge from a facing pattern piece. And I love the idea of using the technique to improve the shape of a garment - you could lengthen sleeves, pant legs, etc. I've just got the problem of a dress which no longer fits, so I'm thinking of using this as an insert in the seams as well as a neck edge - thank you so much!