

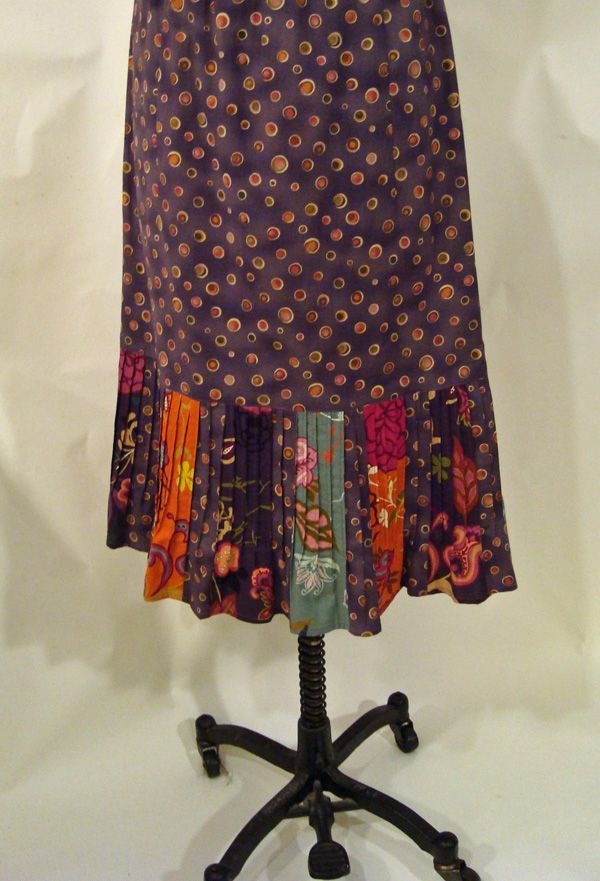
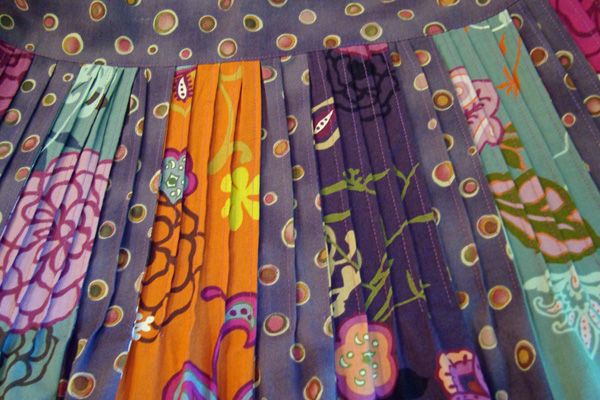
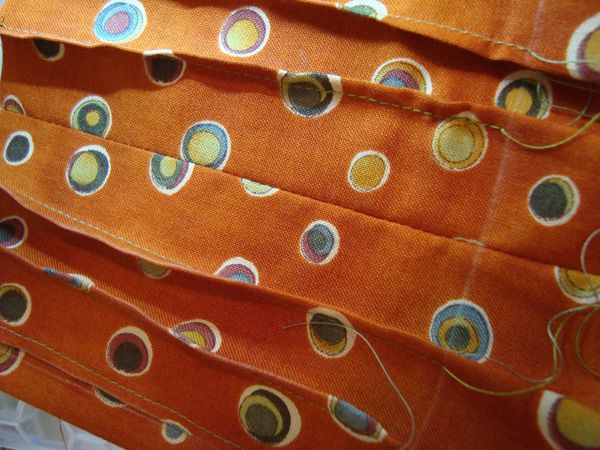
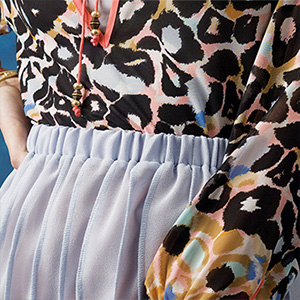
The hem on this skirt may look like pleats, but the effect is made with pin tucks. Sewing the pin tucks takes a little more time, but I love the effect. To make this skirt you can start with a straight or A-line skirt pattern and cut it so the lower edge (before adding the ruffle) ends above the knee. This keeps the skirt flat over the tummy and the hips and still allows for walking room. Then make the ruffle section as deep as you like for added length and fullness. The finished ruffle on my skirt is just shy of 9 inches, about one-third the total length of the skirt, which is a good balanced proportion. To add interest at the hemline, I stop the tucks a few inches from the hemline and that’s what really gives it the ruffled look.

Choosing fabric
I’ve used silk jersey and wool jersey for this technique, and it works beautifully with knits. For the skirt in this post, I used quilter’s cotton.” It’s the perfect fabric for easy summer garments and the prints are so irresistible. (Check out my article “Quilt-Fabric Fashion,” on using quilting fabrics for garments in SewStylish Spring 2011, if you want to learn more.)
Create the pin-tuck ruffle
1. Cut the band the width desired plus a seam allowance at the top and a narrow hem allowance at the bottom. (See “Doing the math,” below.) Keep in mind: If you cut the band across the width of the fabric, you’ll need to seam two or more sections to form a continuous strip. This is the way you should cut a knit, in order for the stretch to be horizontal—not vertical. You can cut one long strip along the lengthwise grain for most wovens, but this generally takes a lot more fabric.
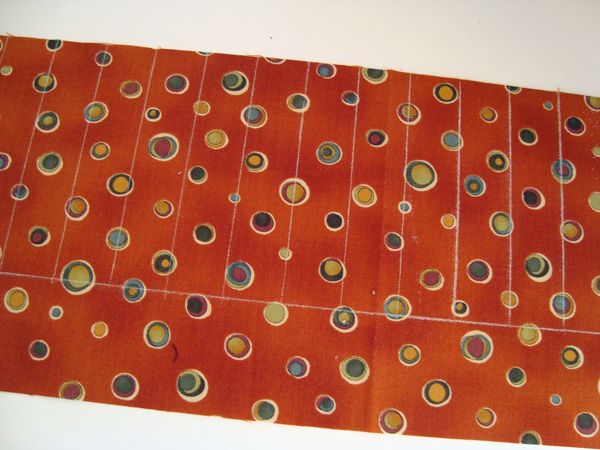
2. Mark the placement for the tucks on the right side of the fabric with an erasable marker. First draw a horizontal line 3 inches to 4 inches up from the hemline. Draw vertical lines for each tuck connecting the top edge of the band to the horizontal line.

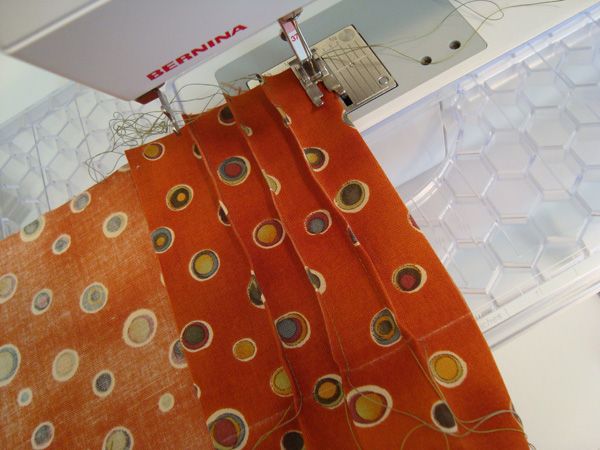
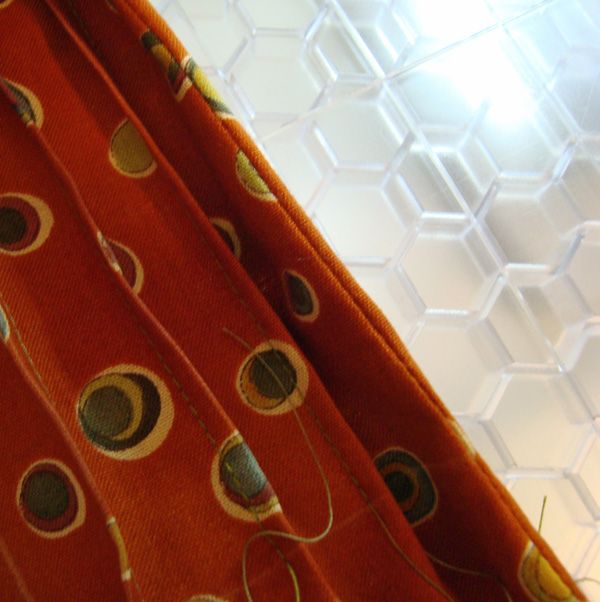
3. To make the tucks, fold along the vertical line and sew 1/8 inch away from the fold starting at the top edge and sewing to the horizontal line.

4. Tie off the threads at the bottom instead of backstitching for a neater finish.
5. To hide the seams, fold along the stitching line, after the seams are sewn, and sew the tuck.


6. Press all the tucks in one direction before attaching the band to the lower edge of the skirt.
Doing the math
This is not my favorite part of a project like this, and I rarely get it to come out exactly. Fabric is forgiving, and the tucked section eases into the skirt comfortably, but if you want a ballpark estimate, assemble your finished band based on this formula: hem+(hem x .25) don’t forget to add for seam allowances. I would suggest being a little generous when cutting and assembling the length of the band. Make the band long so you can cut some off at the ends before seaming if you need to. I like the band to end up slightly longer than the lower edge of the skirt so that it can be eased in slightly to fit, creating just a little more fullness.
More articles on tucks

• Video: How to Sew and Press Tucks
• Video: How to Create Curved Tucks
• How to Create a Notched Tuck


Love it. I was starting a skirt tomorrow and this will be added, for sure! I love the colorful band on the sample skirt. I think this will be great on skirts for my granddaughtgers, also. Thanks, Mary.
Having done similar treatments, I would suggest that you hem the piece to be attached before sewing the tucks, leaving unfinished a few inches at either end for making a clean join. Then just finish hemming that little bit. It is easier and faster to hem and press a long straight pieces with no gathers/tucks. Happy sewing, e-girl
Hi there Mary,
I hate the "maths" part too!!
Can you tell me what size did you allow for each pintuck?
Would you confirm then the formula for working out how much fabric is required for the pintuck section of the skirt.
Lovely finish and looking forward to trying it out.
Love this idea! I would agree with edogirl and hem before sewing the tucks.
-cheryl
Beautiful! And just think, one would not have to iron-to re-set pleats-after washing, since the pin tucks will hold their own. I love the pieced fabrics.
I'm planning on making a few cotton skirts for summer and I will definitely use this on one of them. Once again, Mary Ray shows her creativity and just plain cool ideas!
Fabulous technique. Right now I am working on slip covers and this will look great and use less fabric. Thank you for sharing.
Congratulations to Mary. While the rest of us look on, please continue to give us more creative ideas. Mary, you plant your ideas and hopefully the rest of us will help our own to grow. This skirt is really beautiful. I have something in mind that I think I'm going to make. Ideas are like flowers, you plant them, nourish them and watch them grow into something really beautiful. Congratulations once again, Mary. You did a wonderful job.
This is brilliant. I can't wait to use this technique on a child's garment. Fabulous!
I love ....LOVE this! I really like the soft unpleated little bottom hem of the skirt also. Really softens the shape. I am in love with quilters fabric and do not quilt but would be wonderful to make a skirt with all the beautiful fabric choices out there , especially for summer. Thanks so much and I am off to buy this latest issue of Sew Stylish Spring 2011!
....And what do they call them, fat quarters??? :)
Thanks Laurie,
Yes. Fat quarters are actually half of a half yard, so you get more of a square piece instead of the long narrow piece you get when you purchase a 1/4 yd. of fabric. It's a great way to indulge in a lot of beautiful pieces. And it's so much fun to mix and match. Quilt shops sell bundles of even smaller pieces, too.
Mary