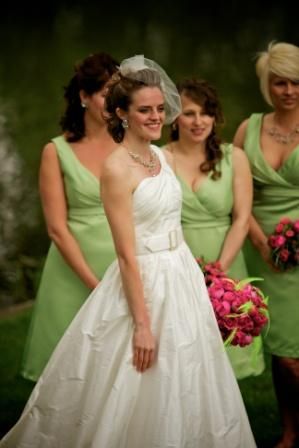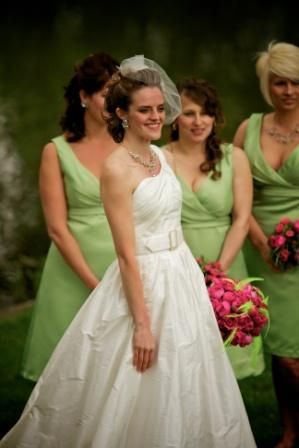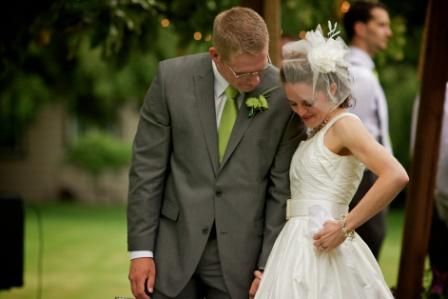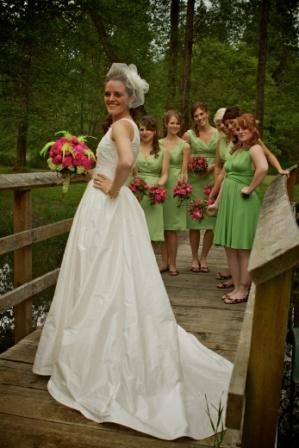
I, like most gals, had thought about my wedding dress way before I was even inolved with a potential groom, and had realized almost immediately that my taste way out did my budget. One day while admiring a saks 5th avenue catalog, I fell in love with a beautiful silk Etro dress and thought I can make that. In fact I came to the conclusion if someone else can make it so can I. So a started sewing. My mom got me started on a few basics, reading patterns, and putting in zippers. Pretty soon I was in way over my head trying to re-create that Etro dress, but I finished it eventually. And from then on I started trying different styles that i thought would be helpful in preparing me to make a wedding dress. When the time actually came my style had simplified a lot, but i had a pretty narrow idea of what I wanted- natural waist, not strappless, and pockets. Obviously the pattern wasn’t available at the local fabric store neither was the fabric, but my mom found a dress by jasmine bridal that fit into my style niche so that dress became my goal. I started with a pattern that was one shoulder and kept modifying, and modifying and modifying. The Muslin stage was a lot of fun and I hated to rip it apart in the end. It was fun and finally came together after about 6 months.


Any tips or tricks to working with Satin? All of a sudden I find myself making Bridesmaids dresses....What type of marking utensil for the fabric that won't leave a residue? Type of needle? Does anyone recommend making a muslin first for fitting? How much wiggle room between body measurements and the fit....1" or .5".....I only have 2 and 1/2 months to do this.
For me working with slick fabrics is jut about going slow and pinning well. As far as needles, I used a 60 needle on my machine to make sure that it didn't leave such a big whole I also used silk pins for pinning. I think the muslin is a must especially if you only have so much of the finish fabric. Plus then you can use whatever markings you want for your muslin and get all your techniques down and catch mistakes. As far as marking the actual fabric, it was time consuming, but I would make thread loops. So every where I had a marking I would have these thread tails that could easily be removed. As far as time for me I spent the most time on the muslin, the actual dress was quick. My dress took 6 months but i didn't have a pattern if you do, I think that you should have plenty of time.
To BJameson: Congratulations of a beautiful gown and your recent marriage!
To Geeze:
I made my own wedding dress in heavy bridal satin under the guidance of a wonderful dressmaking teacher.
The muslin is a MUST! If you get that right, the dress will be right.
If the muslin goes wrong... well, just start again with no tears! I had 20m of cotton for the muslin but only 10m of satin for the dress with no more available as it was the end of the roll.
All the pattern fit and design alterations were made at the muslin stage. We cut the muslin out using the pattern as it was. The fit alterations were made in the muslin then the pattern was altered to make the same changes as we went.
I used thread 'tailor tacking' for any markings. Later for stud positioning, I used a pale blue washaway marker specially made for sewing. Try not to get the fabric wet as it will show as water marks.
One REALLY IMPORTANT thing with satin is making sure the fabric "nap" all runs the same direction.
If not... you will get darker and lighter shades of colour showing as the light hits the fabric threads lying at different angles.
On my teacher's advice, I used a 90 needle. She told me to use a large needle for sewing satin to avoid the puckering frequently seen with satin and fine fabrics.
Her tip was that the large needle makes a larger hole which allows the tread to slip through effortlessly, instead of being pulled through under friction in a smaller hole.
The seams were beautiful. There was nothing to show a large needle had been used.
"Wriggle room" or ease that was required for my dress was 6cm at the bust and 8cm at the waist. My dress bodice was princess line, close fitting to the waist. I would not have wanted it any tighter. The pattern design will have a lot of influence on how much ease there is.
With pinning... I used new glass head pins and had to have the pins in place along the seam line. None came in from the side.
Pinning along the seamline actually made it much easier when sewing, particularly on curves. You just have to have the pins in the right way round... sharp end to the machine needle!!
Length of time to make the wedding dress: 11 weeks. Started 2 weeks before our engagement and completed the day before the wedding!
All the best and hope this helps you with sewing satin. I loved the fabric I used, and no, it did not try slipping away. It was a real delight to work with.
Bonne Chance!