


With just a few snips and added bias tape, an oversized vintage dress becomes a new, flattering favorite.
This dated, oversized dress gets a major style upgrade with an added lace inset, contrasting binding, and cropped hem. The waistline is then cinched with a satin sash for a more figure-flattering silhouette.
Hot Tip: When choosing a dress to reconstruct, opt for one larger and longer than the desired size. That way, you have more fabric to use.
SHOPPING LIST
• Dress, thrifted and oversized, with hook-and-eye back closure
• Fabric for contrasting bias binding and sash, 11⁄2 to 2 yards light- or medium-weight
• Fine net/lace, 1 yard
• Interfacing for sash, 1 yard lightweight
• Stabilizer or scrap tissue paper
• Thread to match dress and contrasting fabric
1) Prepare the dress. Remove any shoulder pads and any neckline closures at the back with a seam ripper.
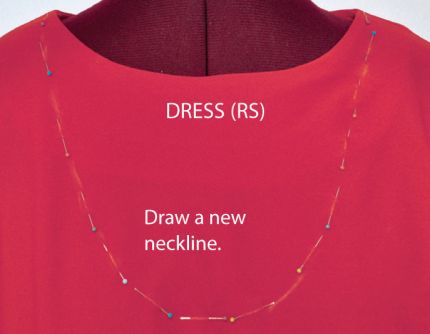
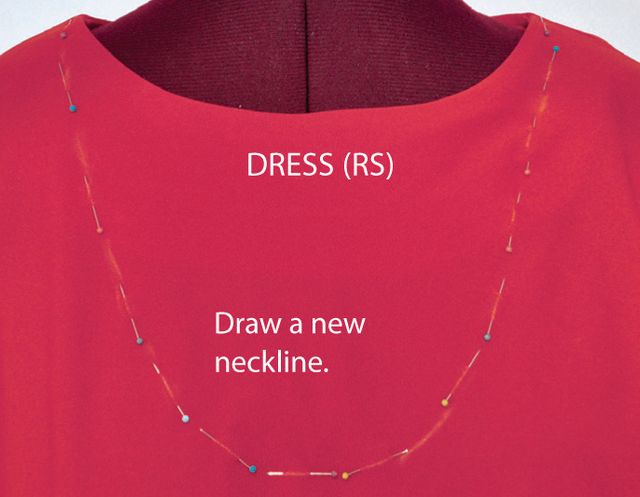
2) Adjust the neckline. Try on the dress, and mark a new scooped neckline with pins on the front, blending into the existing back neckline at the shoulders. Make sure it’s symmetrical. Smooth and trace the pin line with chalk; remove the pins. Remove the facing from the neckline. Cut the front neckline along the marked line. Staystitch the new neckline 1⁄4 inch from the cut edge; be sure to catch the lining in the staystitching.
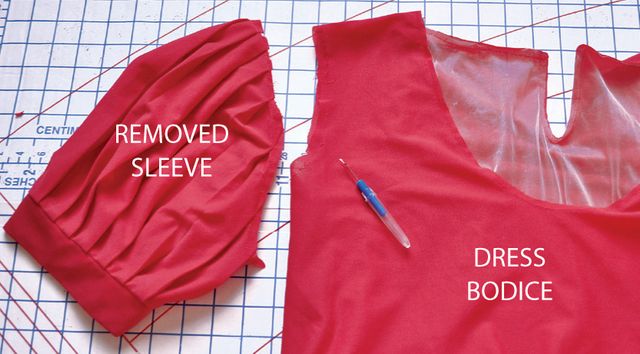
3) Adjust the sides. Remove the sleeves with a seam ripper. Try on the dress inside out. Pin a new side seam to fit. Make sure both sides are symmetrical. Mark each side seam with chalk, and sew the new side seams. Trim seam allowances to match the existing side seam allowance, and lightly press the seams open.

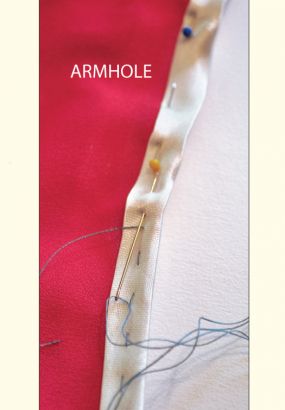
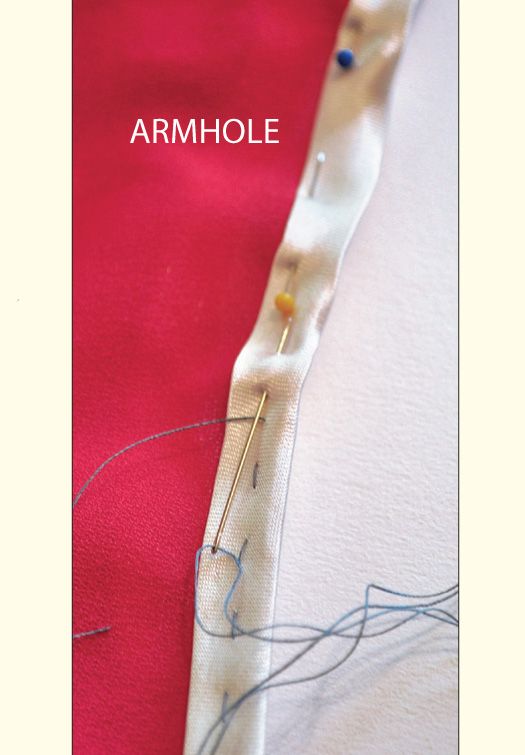
4) Adjust the armholes. Try on the dress right side out. Mark a new armhole line at the shoulder seam with pins. Shorten the shoulder seam at the armhole end, if needed, to bring the armhole edge to a flattering place on the shoulder. Blend the new armhole seamline at the side seam into the existing armhole. Repeat with the other armhole, making sure they are symmetrical. Mark with chalk, and staystitch around the armholes. Trim away the excess fabric outside the staystitching.

5) Cut the binding. Cut 1 3⁄4-inch bias strips of contrast fabric, joining, if necessary, to create a continuous strip that is long enough to bind the neckline and armholes.
6) Bind the edges. Pin bias binding to the armhole and neckline edges, folding under the ends. Place the ends at center back or at the underarm. Hand-baste in place. Then, sew close to the binding’s edge on the outside; catch the bias binding underneath as you stitch.
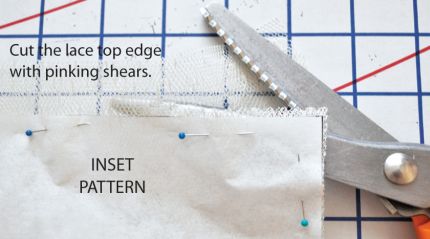
7) Make the inset pattern. Measure the desired neckline inset depth, at the center of the front neckline. Measure the width of the neckline from side to side at the widest level. Add 1 inch to both measurements. Cut out four layers of tulle to these dimensions using pinking shears for one long edge to create a decorative finish.
8) Arrange the inset. Stagger the top edges of the tulle: Place the second layer 1⁄4 inch from the first top edge. Repeat with the two other pieces. Trim off the excess 1 inch at the bottom. Pin together along the top and bottom edges.
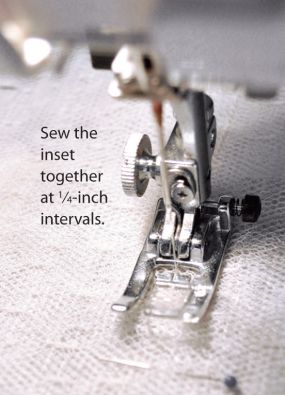
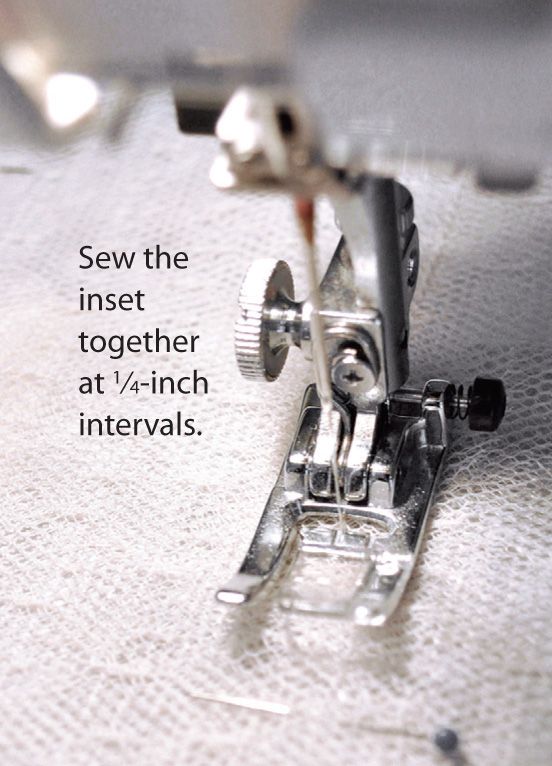
9) Assemble the inset. Place a piece of tear-away stabilizer or scrap tissue under the layered inset. Straight-stitch 1 inch down across the top edge. Using your presser foot as a guide, continue sewing straight, parallel rows 1⁄4 inch from the top edge of each layer. Remove the stabilizer.
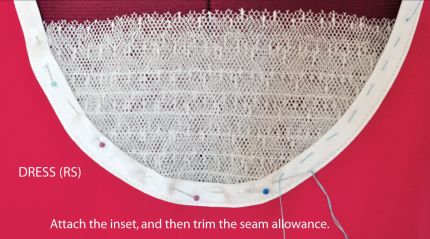
10) Attach the inset. Pin the inset inside the neckline at the level you desire. Hand-baste the inset in place, and remove the pins. Carefully machine-sew along the existing binding stitching. Shape and trim the tulle edges to match the neckline, 1⁄2 inch from the stitching inside the seamline.
11) Cut off the hem. Try on the dress, and mark the new hemline. Cut 2 inches below the desired hemline. Turn the cut edge 1 inch to the inside, and press. Turn under 1 inch again, and press. Hem by hand with matching thread.
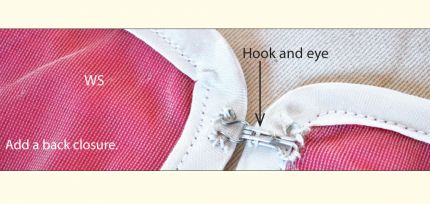
12) Close the back. Sew a hook and eye to the back neckline opening.
13) Make a sash. Measure your waist circumference. Cut fabric 9 inches by 34 inches (or more) longer than your waist measurement. Piece if necessary. Cut a piece of interfacing 4 inches wide by your waist circumference measurement.
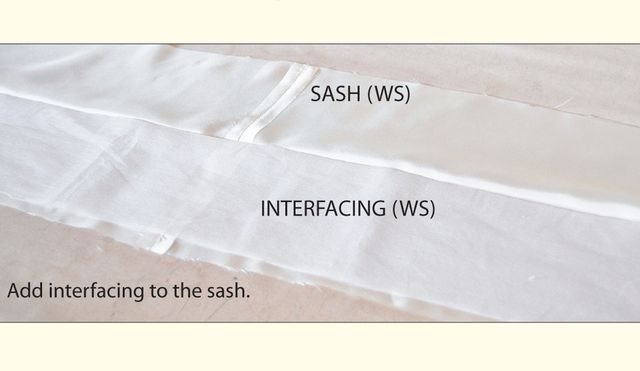
14) Fuse the interfacing. Fold the sash in half, wrong sides together and long edges aligned, and press a fold line into the fabric. Fuse interfacing to the sash’s wrong side, keeping the long straight edge along the fold line on one side and centering the interfacing along the length of the strip.

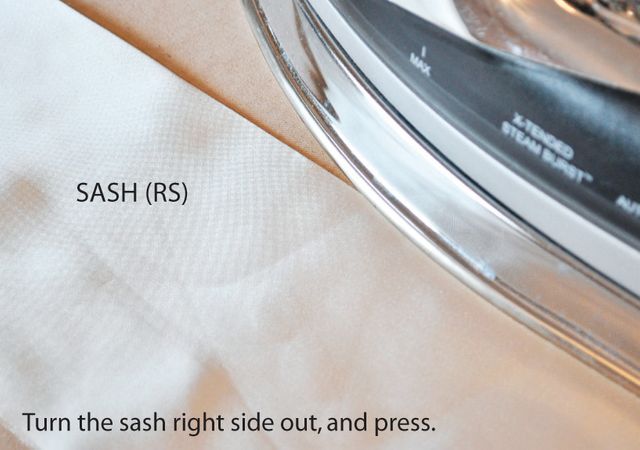
15) Sew the sash. With right sides together, fold the sash in half with the long edges aligned. Sew around the edges with a 1⁄2-inch seam allowance, leaving a 4-inch opening along the long side. Trim the seam allowance, turn right side out. Press.
16) Finish the sash. Turn the 4-inch opening seam allowances to the inside and slipstitch closed using a needle and single strand of thread. Press to finish.
Excerpted from Sew Stylish Spring 2011, page 60. You can purchase the latest issue of SewStylish on newsstands now, or visit our online store.


Log in or create an account to post a comment.
Sign up Log in