

Topstitching is as simple as sewing a straight stitch. However, since every stitch shows, fabric preparation, thread and needle choice, presser foot selection, and the proper technique are all critical to achieve a professional look.
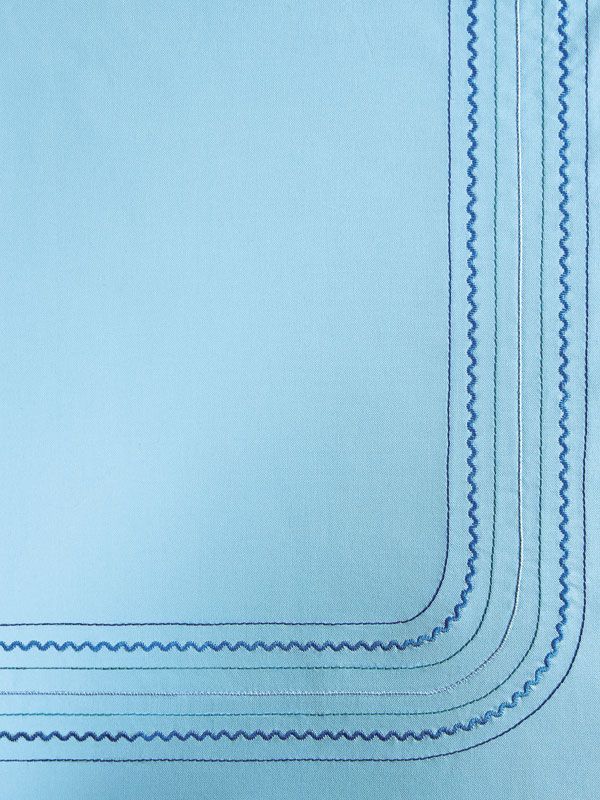
Topstitching is defined as one or more rows of stitching visible from the garment’s right side. Decorative and practical, this simple stitch has many uses. It holds fabric layers in place, such as seam allowances (this is often done with straight-stitched rows sewn on each side of the seam), facings (such as at the neckline), hems, collars, lapels, cuffs, pocket attachment, and so on. Topstitching adds texture and definition-similar to quilting, and gives decorative effects based on thread, stitch, and placement choices. Edgestitching is also topstitching that is sewn usually 1/16 inch to 1/8 inch from the edge.
With a little practice and the right tools, I’ll show you how you can achieve stunning topstitching results.
The Tools You Use Make All the Difference
Use these supplies and stitching hints to create truly fine topstitching.
Fabrics with body work best
Select your fabric with topstitching in mind. Fabrics with body are easier to stitch accurately. However, other fabrics can be used with the appropriate stabilization and a stitch that is not elaborate.
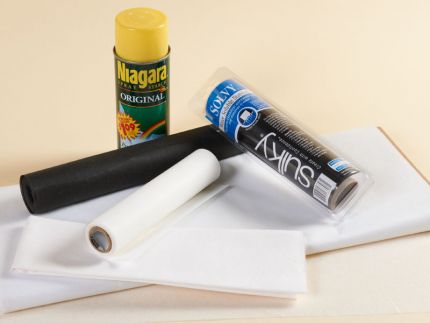
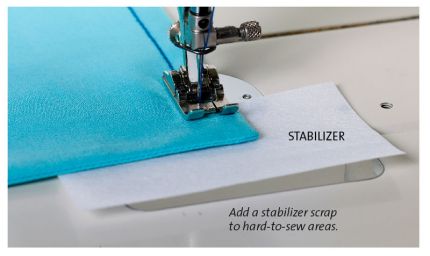
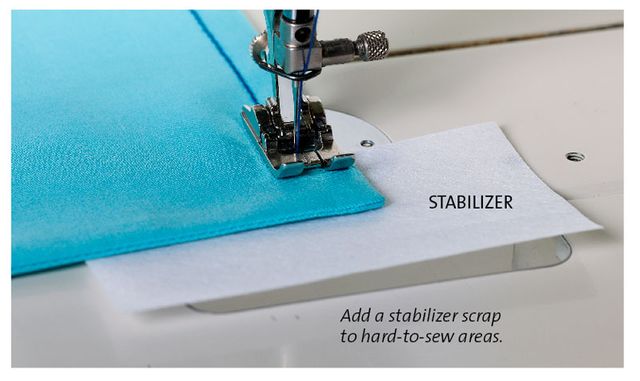
- Use starch or stabilizer to add body. Where appropriate (most wovens), use spray starch to make otherwise difficult-to-sew fabrics a breeze. You can also use interfacing or a removable stabilizer under tricky-to-sew areas. I often use one or more layers of lightweight, tear-away stabilizer.
- Take the time to carefully press before starting. First, press the seam while it is still closed. This is called setting the seam. Then, press the seam allowances open, and end by pressing them in the final desired direction.
Choose a needle based on fabric and thread type
Always use a new needle for topstitching to prevent skipped or pulled stitches.
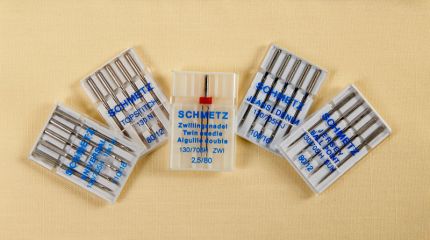
- Universal needles, the most commonly used, are adequate for many applications.
- Sharp pointed needles, such as Microtex or Topstitching, make the most precise stitches and should only be used on woven fabrics. They are inappropriate for knits as they leave holes or snag the material.
- Topstitching needles have a long eye to accommodate thicker threads.
- Embroidery needles have a wider eye to accommodate decorative threads and may be used on woven fabrics and most knits.
- Stretch/jersey ballpoint needles are for knits.
- Denim/jeans needles are designed to penetrate very thick woven materials.
- Twin/double needles create two parallel stitching rows on the fabric’s right side and a zigzag-like stitch on the wrong side. This needle is especially great for hemming knits.
Select thread with visibility in mind
Pick your thread based on the fabric type and your finished desired look.
- Choose the thread color and weight based on visibility. For a subtle look, select a regular to lightweight thread in the same color as the fabric or one shade darker. For more visibility, choose a heavier thread (but not too heavy for the fabric’s weight) and a contrasting color. Hint: Two regular-weight threads may be threaded through the needle eye for more obvious stitching. This may require a larger-eye needle, such as an embroidery or a topstitching needle.

- Select thread fiber content based on the fabric. For knits, polyester thread provides stretch and strength. For wovens, use any thread fiber that can withstand the intended use and care for the project. For example, polyester thread is stronger and more durable than cotton or rayon. Use it for projects that get tough wear and washing.
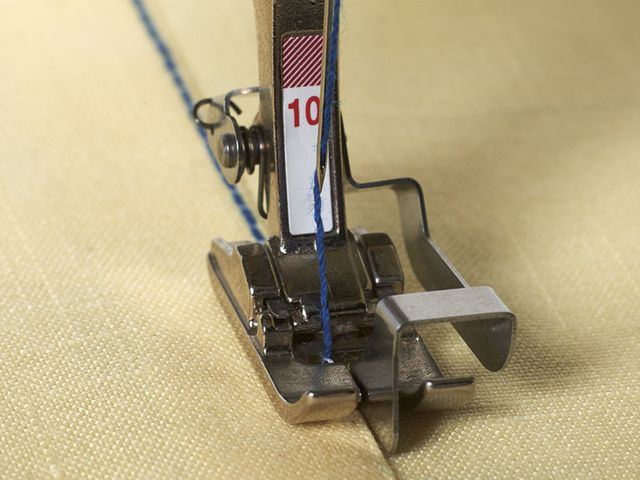
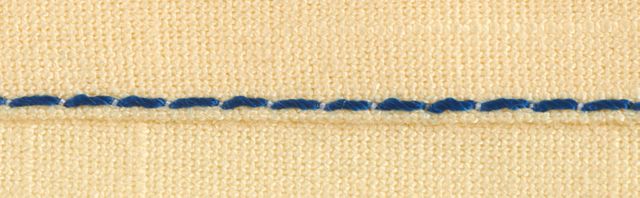
- Add cording for more visibility, color, and texture. A zigzag stitch couches the cord on top of the fabric. Use a fine thread in the needle and bobbin and a pearl cotton for the cording.

Experiment with stitches and stitch settings
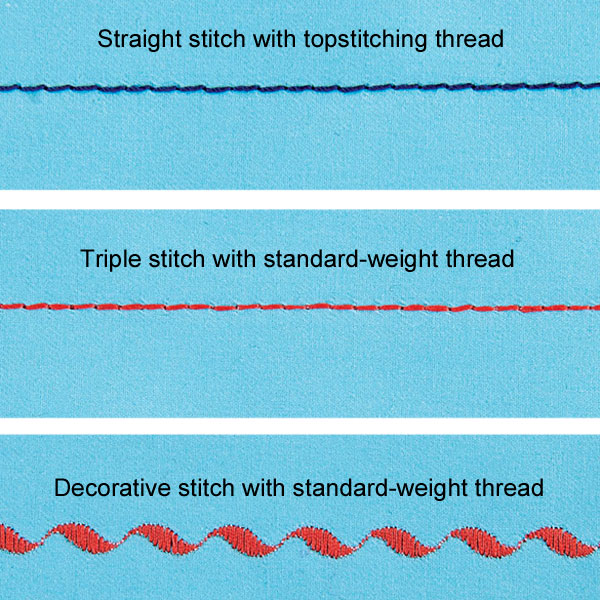
The stitch type dramatically changes the appearance of topstitching.
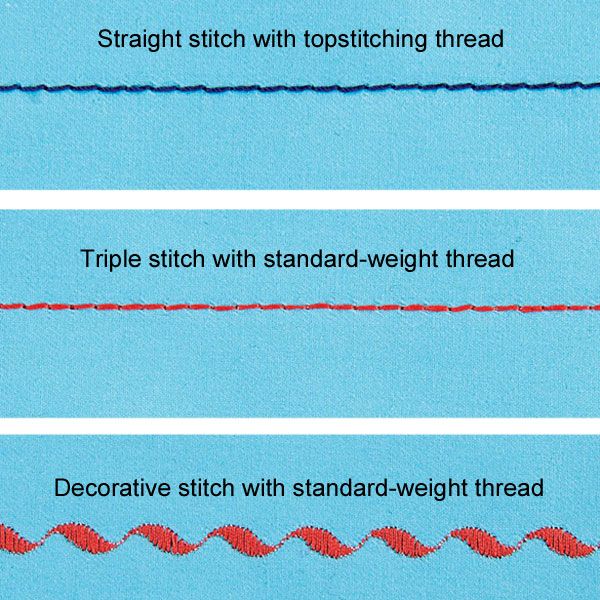
- Straight stitch. Use a longer stitch length than for seaming, especially for heavier fabric or thread. Longer stitches will lie smoother and be more visible.
- Triple stitch. A triple stitch gives a heavier look without a heavier thread. This can also be created with a feather stitch with the width set at zero.
- Decorative stitches. Decorative stitches can make beautiful topstitching; however, avoid dense stitches if using a heavier thread.
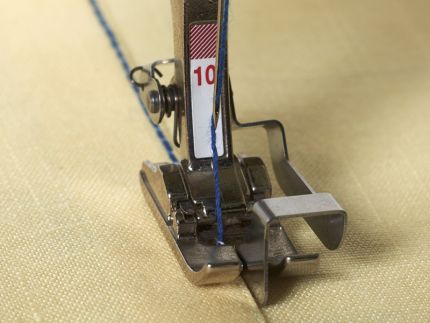
Try out different presser feet
Even the presser foot type can change the appearance of your stitching.
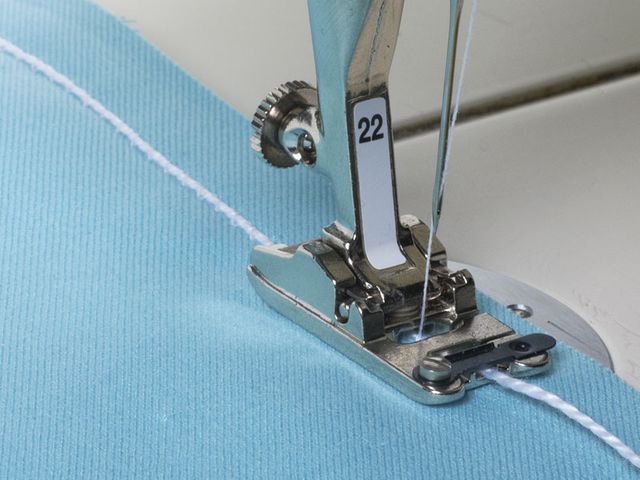
- Presser feet with fixed or adjustable vertical guides help with accuracy. An edgestitch foot (also known as an edge-joining or a stitch-in-the-ditch foot) has a center guide. When using these feet, move the needle position to place the stitching in the correct location.
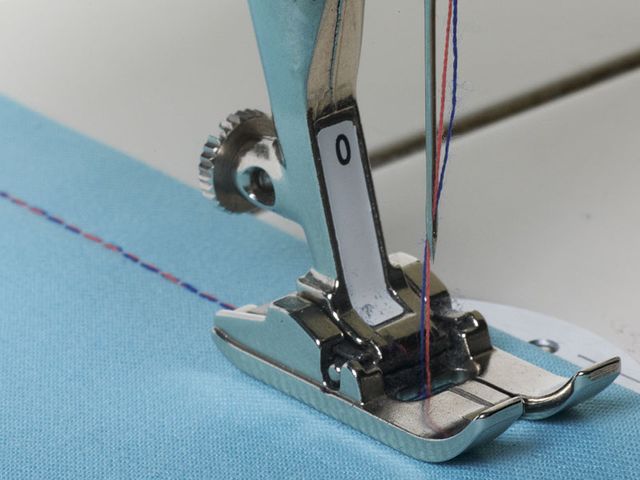
- A straight-stitch foot with a single-needle-hole opening and flat underside aids in better stitch quality. However, this foot can only be used for a straight stitch in the center needle position. Therefore, you cannot use the needle position to set the distance between topstitching rows. A 1⁄4-inch- or patchwork foot has a guide on the right for added precision.
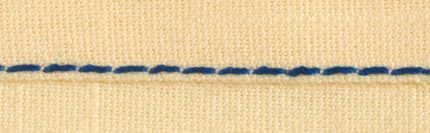
Edgestitching
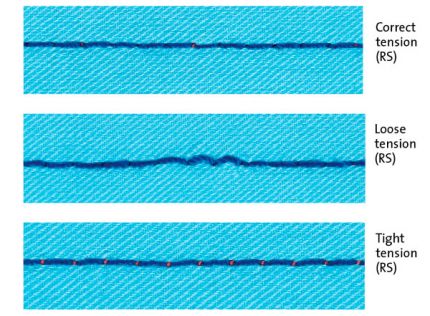
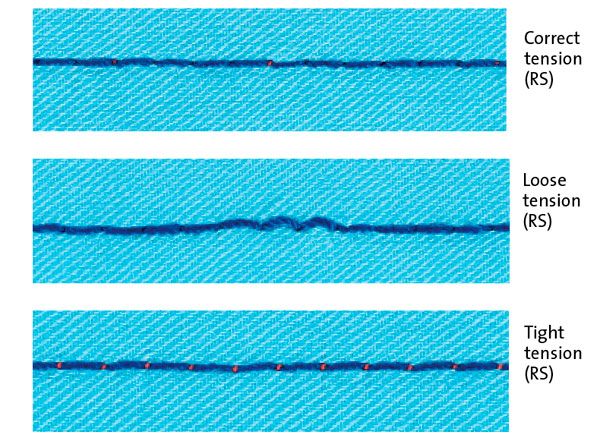
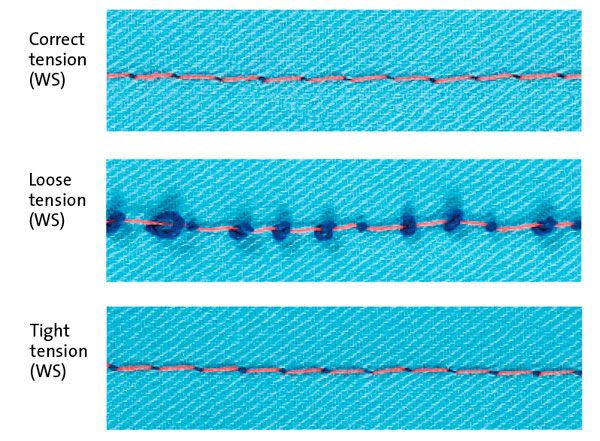
Find the correct tension
Before you topstitch, test the stitching on a fabric scrap with the same number of layers as your project using all the same elements-needle, thread, interfacing, and stitch type.
Don’t be afraid to adjust the upper tension for different effects. Change the tension setting to a slightly lower number to loosen (relax) the upper part of the stitch which, along with adding stabilizer, will reduce puckering. (Tip to remember: “L” for lower, equals looser.) A slightly higher number creates more pull on the upper thread making it tighter.

Perfect your technique
Use these helpful sewing tips for effortless topstitching.
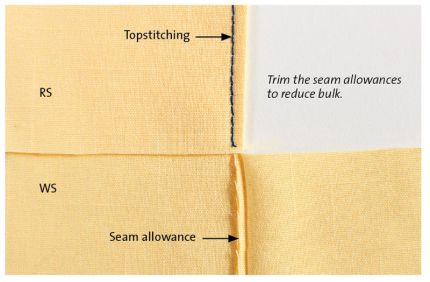
- For collars and cuffs, trim the seam allowances to 1⁄8 inch. From the right side, topstitch just beyond the distance of the seam allowance. This reduces bulk and allows the material to lay smoothly.
- Stitch with the right side up so the needle thread is visible. This allows you to see exactly what will be visible as you stitch. When possible, sew multiple rows in the same direction. This prevents puckering and rippling between the stitching rows.
- Sew with a slow to medium, even speed. Don’t “pump” the foot pedal. Sewing too fast can cause erratic stitching.
- Spot-stabilize any difficult areas, such as the beginning and ending, corners, especially if the entire area is not well stabilized. I keep small scraps of lightweight tear-away stabilizer handy to place under any area where it can help the feed dogs move the fabric.
- Watch the fabric at the guide, rather than watching the needle. For easy precision, use a guide on the foot or on the machine bed whenever possible. Then, especially with a straight stitch, move the needle position to stitch the exact spacing from the guide that you desire.
- Stop with the needle down as you stitch. The needle holds the fabric, prevents it from slipping, and keeps your stitching consistent.
- Draw any thread tails that aren’t hidden in a seam to the fabric’s wrong side at the beginning and the ending of the stitching. Using a hand needle, run the thread through the nearest seam for 1⁄2 inch, and cut the tail.
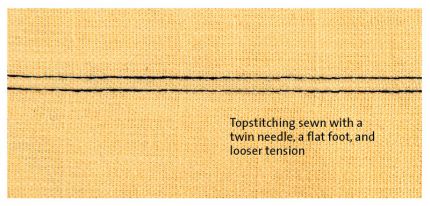
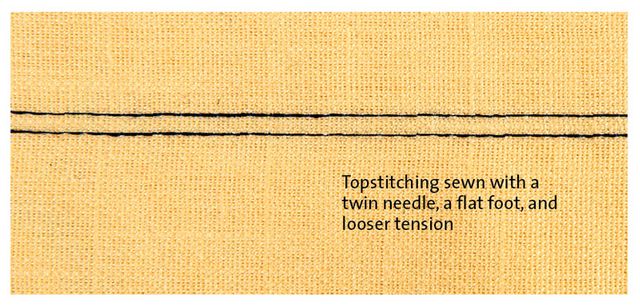
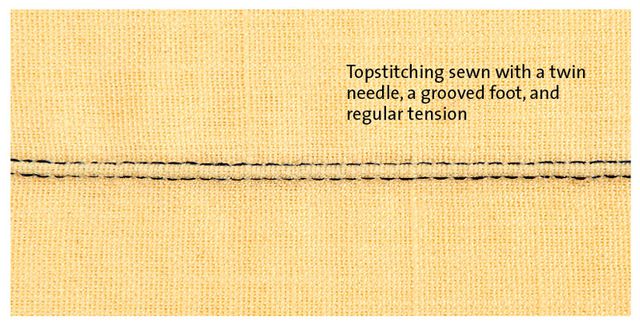
- If you want to create a raised effect with the twin needle, such as a pin tuck, use a foot with a grooved sole. For flat, smooth double-needle topstitching, use a foot with a flat sole and possibly loosen the upper tension.

by Carol Ahles
from Threads #162, p. 70


Once I discovered how well a twin needle works with hemming knits, my hems looks so much better! I wish I had known that earlier!
Yes, twin-needle hems can look very nice!
Fabulous information. Ms. Ahles is the queen of "fine machine sewing".
I've never done any topstitching before but can't wait to try it now. As usual your information is invaluable.
An excellent group of tips! Thank you so much!
I too just learned about the twin needle. I like to use it for top stitching certain projects, especially when you wish to top stitch both sides of a flat seam. Sew once and both sides are done evenly.
This was very helpful, especially the note about the triple stitch.
Thank you for the tips!
I am just learning to sew and I really appreciate this article! Thanks so much.
Thank you for that informative post! such a great tips & super helpful…