


These easy instructions from “Tucks Made Simple,” Threads magazine #171, explain how to sew tiny pin tucks and then how to create intersecting pin tucks. Follow the steps and you’ll create interesting designs with pin tucks in no time. If you’re interested in standard tucks, you can learn how to successfully fold, sew, and press them by watching this Threads Essential Techniques video.
Don’t miss other fabulous techniques by subscribing to Threads or by purchasing the tablet edition today.
Sew Tiny Pin Tucks
Pin tucks are standard tucks’ more delicate sister. Because they are sewn closer together, precision in spacing and stitching is critical. You can sew an easy version of these petite tucks with a double needle and a grooved pin-tuck foot. Make a few samples before beginning your project, so you can determine the best machine settings. The space between the double needles and the distance between the ridges on the pintuck foot should match.
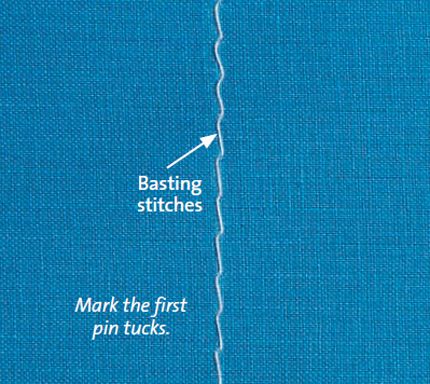
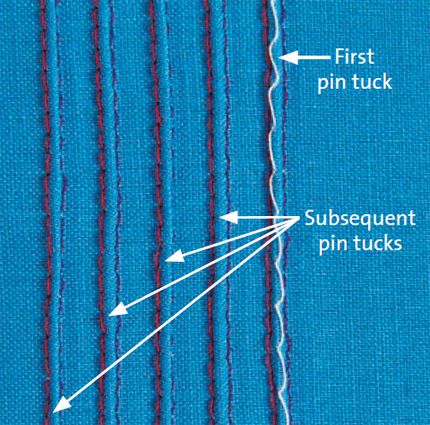
1. Mark the first pin tuck using chalk, a fine-tip fabric marker, or basting stitches. Plan how many pin tucks you want – generally odd numbers look best. However, you need to mark only the first pin tuck because the foot follows along the first tuck for subsequent, perfectly parallel tucks.

2. Sew the first pin tuck
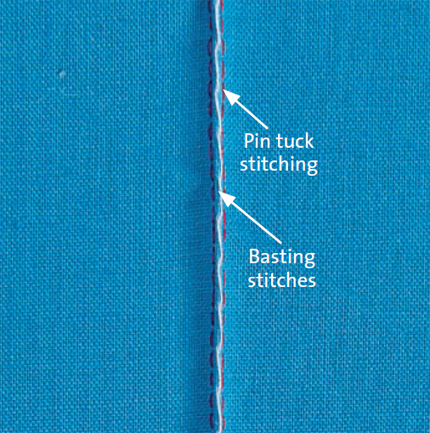
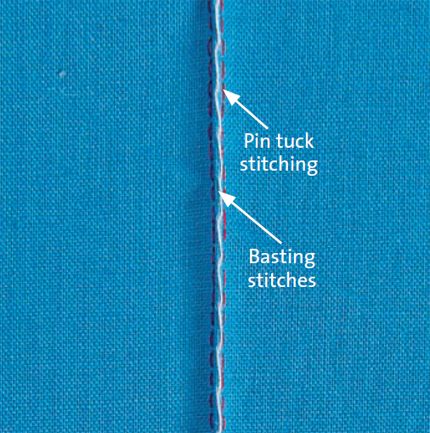
Place the fabric under the presser foot, aligning the marked tuck line between the double needles. As you sew, the bobbin thread pulls the stitching rows together to create the pin tuck within the groove.
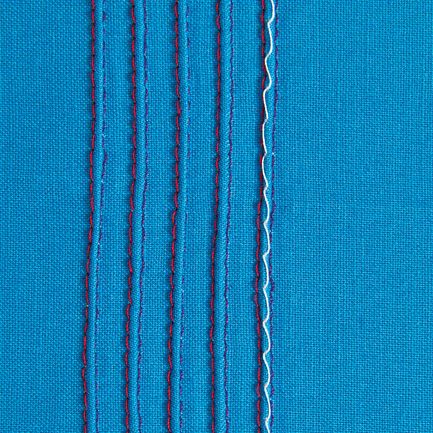
3. Stitch additional pin tucks. Align the tuck inside a presser-foot groove. Sew the next tuck as before; the foot uses the first pin tuck as a guide to create parallel pin tucks. Pull the pin tucks’ ends gently to raise the tucks before pressing them from the wrong side.

Make Pin Tucks Intersect
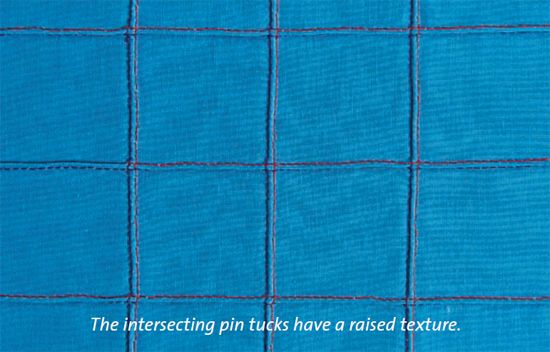
Create a grid-like design with crossed pin tucks. You can stitch just a few vertical and horizontal pin tucks for a subtle twist, or crosshatch multiple rows to create a one-of-a-kind fabric.
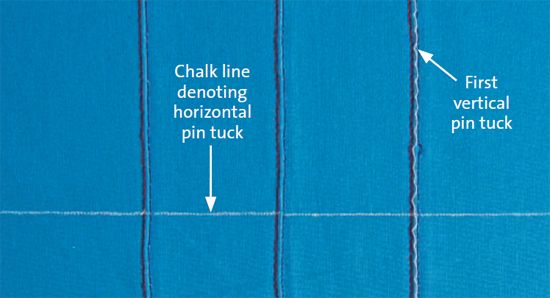
1. Sew with the fabric grain, and follow the pin tuck instructions above. Depending on your design, you may want to space the tucks farther apart than the width of the pin-tuck presser foot. If so, mark each tuck location before sewing.
2. After sewing and pressing the lengthwise tucks, mark the horizontal pin tucks following the fabric’s cross-grain. Use a clear ruler and chalk, a fabric marker, or a basting stitch.

3. Sew the horizontal tucks. As you sew across each vertical pin tuck, be careful to maintain the direction the tuck was pressed. When the design is complete, gently press from the fabric’s wrong side and then hover the iron over the fabric’s right side. As in step 3 above (in “Sew tiny pin tucks”), pull the pin tucks’ ends gently to raise them. After pressing, staystitch along the garment’s edges.


Get more articles on tucks:
• Video: How to Sew and Press Tucks
• Video: How to Create Curved Tucks
• Pintuck a Ruffle
• How to Create a Notched Tuck
Do you incorporate pin tucks in your sewing? Please share your tips or tricks in the comment section below.


Great instructions. Thanks
Very interesting!
I don't have a double needle. So, can some sewer out there try this and report back how this worked out for you?
Helen, do you have a pintuck foot?
You could use that instead of a twin needle.
You can get a twin needle at most fabric stores, and you need one for the foot to do its job.