


Angela Wolf shares how she changed the sleeve pattern to add a quilted section.
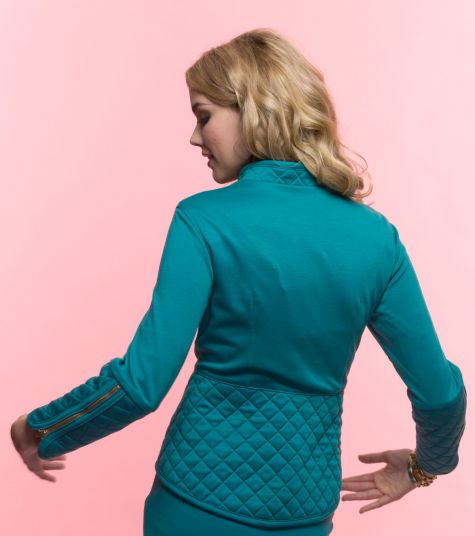
Designer Angela Wolf explains how to change a sleeve pattern to add a quilted cuff to complement a quilted jacket peplum. This change is an extra to Angela’s “Sporty Details” article published in the Spring 2014 edition of SewStylish. In that story, she walks through the steps to reshaping the Simplicity SewStylish 1467 jacket’s peplum into a quilted and curved panel.
The quilted lower sleeve has bound edges, and a zipper from the elbow to the sleeve hem. It’s a cute and edgy detail that is easy to add to a jacket sleeve.
How to change the sleeve pattern

Note: This pattern change is demonstrated with half-size copies of a sleeve pattern. If you are working with a multisize pattern, trace your sleeve size onto pattern paper, then make the changes to the traced copy. That way, you’ll still have the original sleeve pattern to work with in the future.

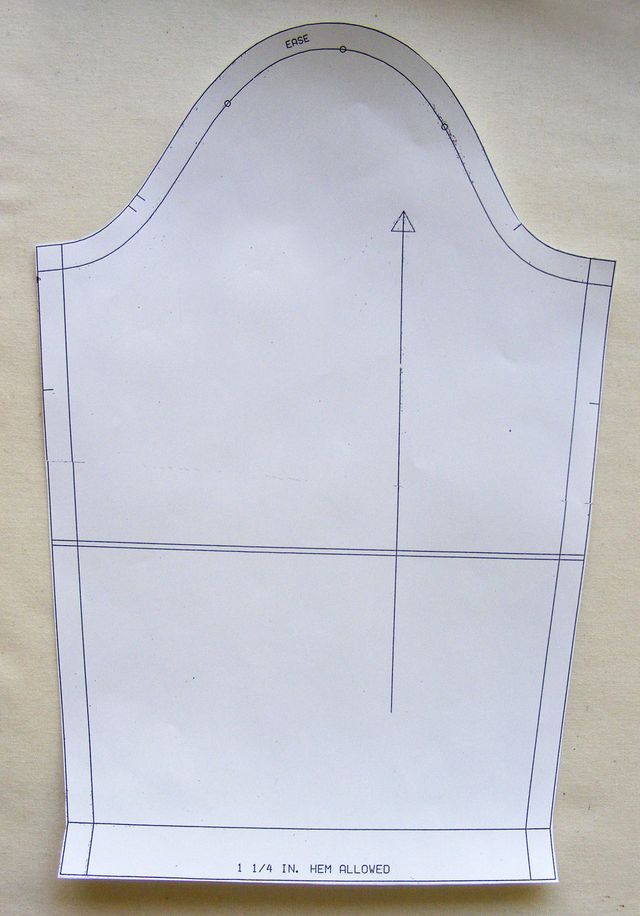
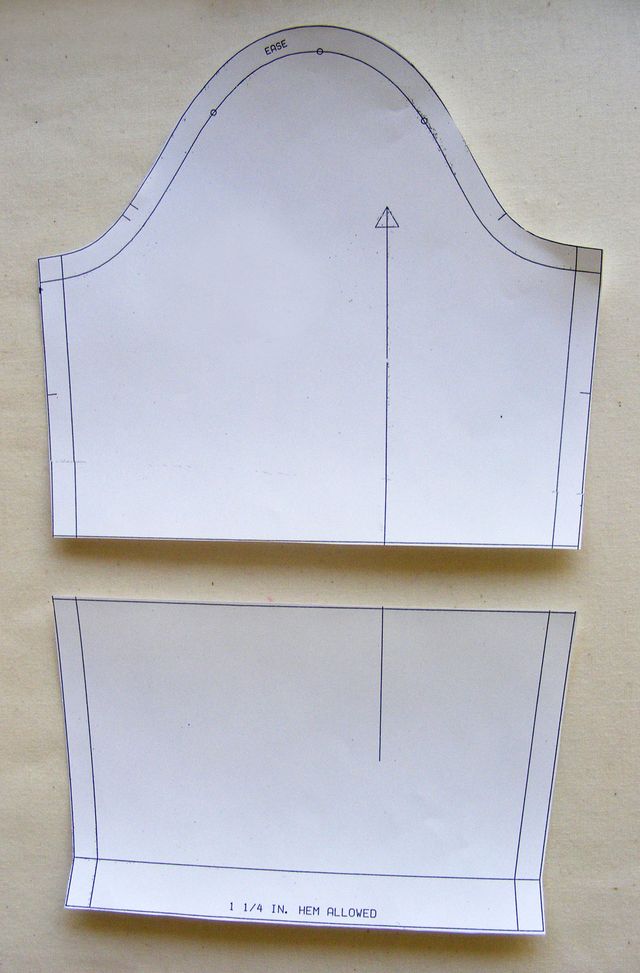
1. Cut the sleeve pattern into an upper and a lower sleeve pattern. Make the cut parallel to the sleeve hem. The exact distance of the cut from the hem is a style decision. The cut shown is at the lengthen/shorten line on this pattern copy, because it was at elbow level. It was also convenient to cut along the lines on the pattern copy.

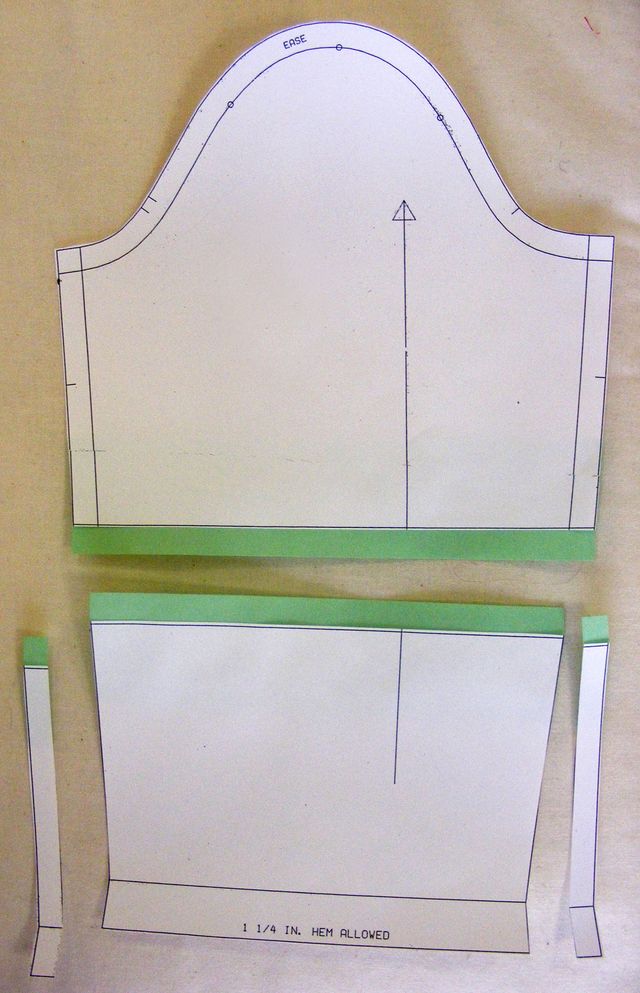
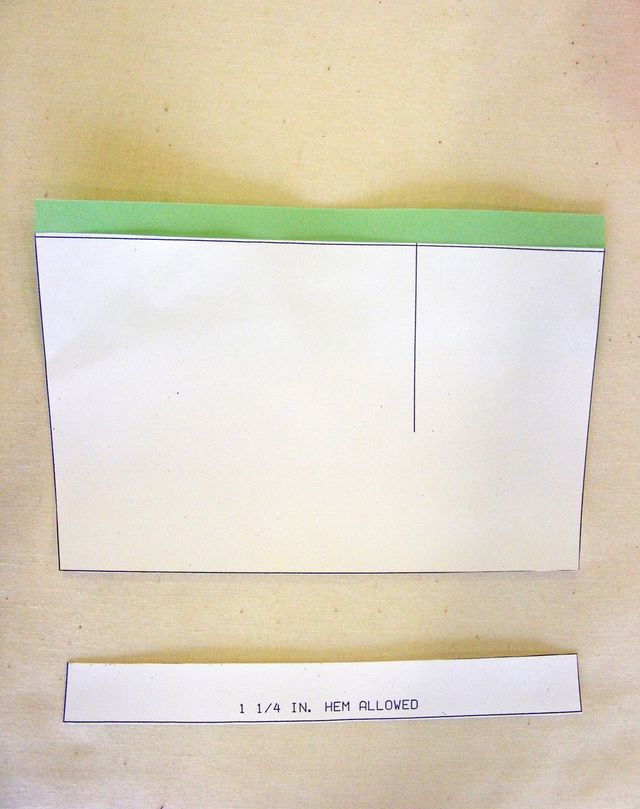
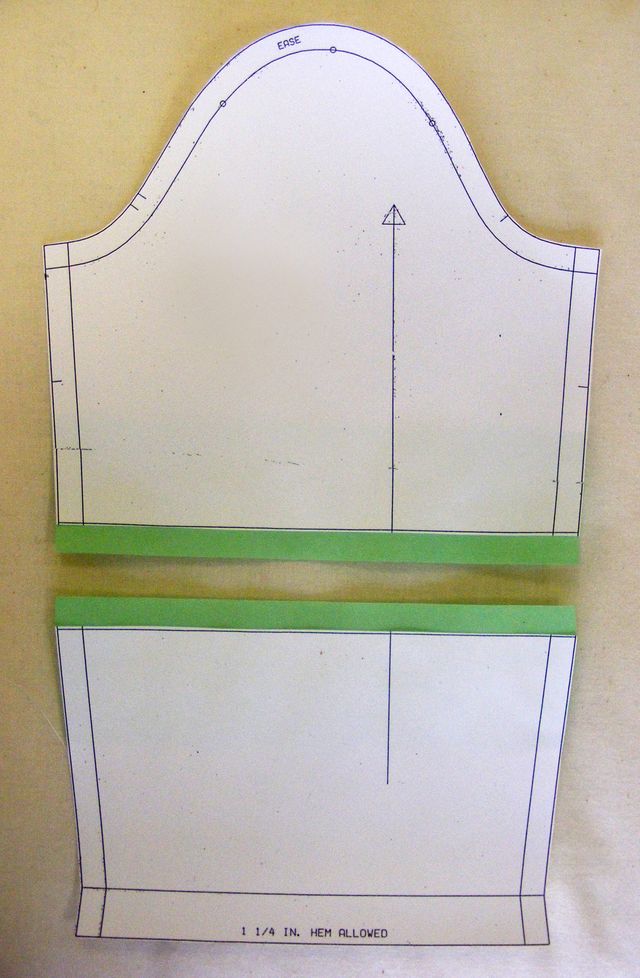
2. Add seam allowances to the cut edges. A seam is required to join the upper sleeve to the quilted lower sleeve. Here, green paper strips taped to the upper sleeve pattern and the lower sleeve pattern pieces represent 5/8-inch-wide seam allowances.

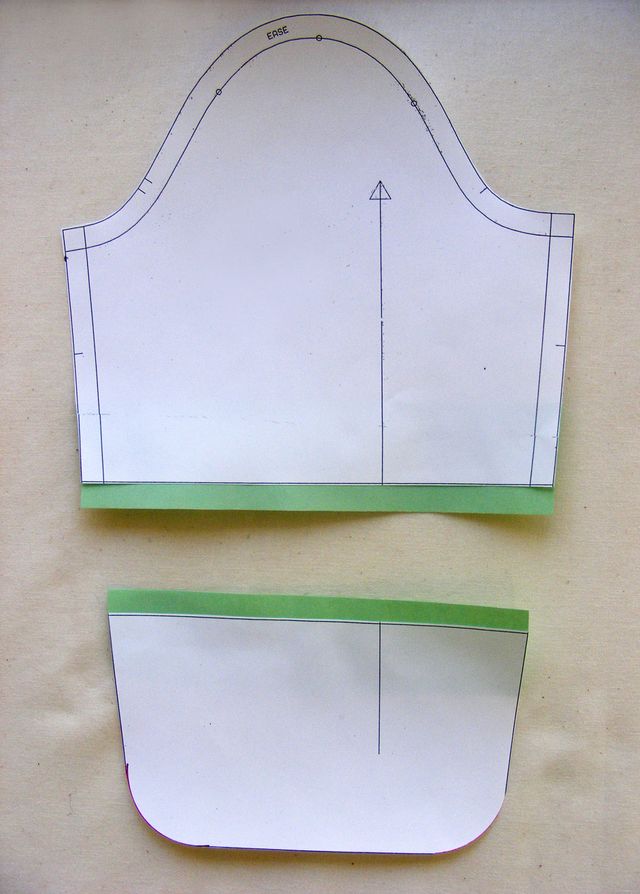
3. Trim the underarm seam allowances from the lower sleeve pattern. Because the quilted fabric is bulky, you don’t want to sew a seam there, joining two quilted fabric layers.
Instead, plan to bind each edge of the underarm seam. A zipper brings the bound edges together to close the underarm seam on the lower sleeve.

4. Trim the hem allowance from the lower sleeve pattern. The hem is bound as well, to avoid a bulky edge.
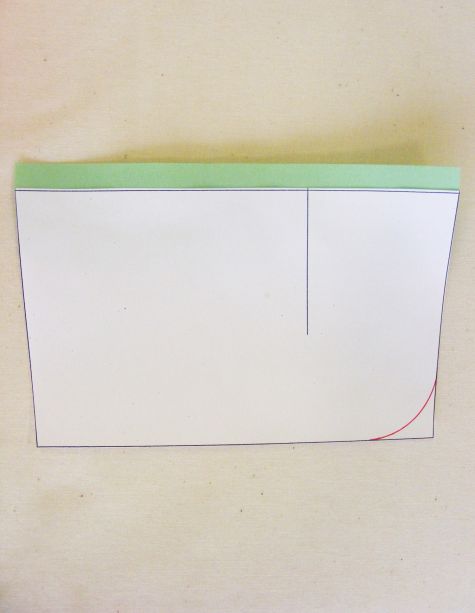
5. Round the hem corners of the lower sleeve pattern. When you apply binding, it should curve gracefully around this edge, and you won’t have to try to sew a tricky mitered corner. Also, the rounded edge happens to be a stylish touch that mimics the jacket’s peplum. Use a compass or trace something round such as a plate or mug to create matching curves at each hem corner.

6. Voila! You have a two-piece sleeve pattern for a sleeve in the style of the SewStylish jacket.
 Quilt the fabric
Follow the instructions in the story to quilt, cut, and sew the sleeve sections, just like the jacket’s quilted peplum featured in SewStylish Spring 2014. For additional information about making quilted garments, see “Fashionably Quilted,” by Mary Ray, Threads #103 (Oct./Nov. 2002).
Do you own home-sewn garments with quilted sleeves or zippered cuffs? If not, will you try this method?


I picked up this magazine as soon as I flipped through it and saw this modification. I love how Angela gave this pattern a completely different appearance! I'm really working to get out of the "by the pattern directions" mindset to be able to play with them and give them my own personal touch. Inspiring :)
Great tutorial!
Wow Nice design.............
Thank you so very much for such a wonderful article that really makes a plain jacket really special. You have shown me something really beautiful.
The best thing about it's not difficult. Thank you once again for everything.
Great one share I like your tutorial
The zipper from the elbow gives this jacket an outstanding look.