
Fashion Sketching for Untrained Artists
Industry shortcuts enable you to coax creative visions out of your head and onto paper.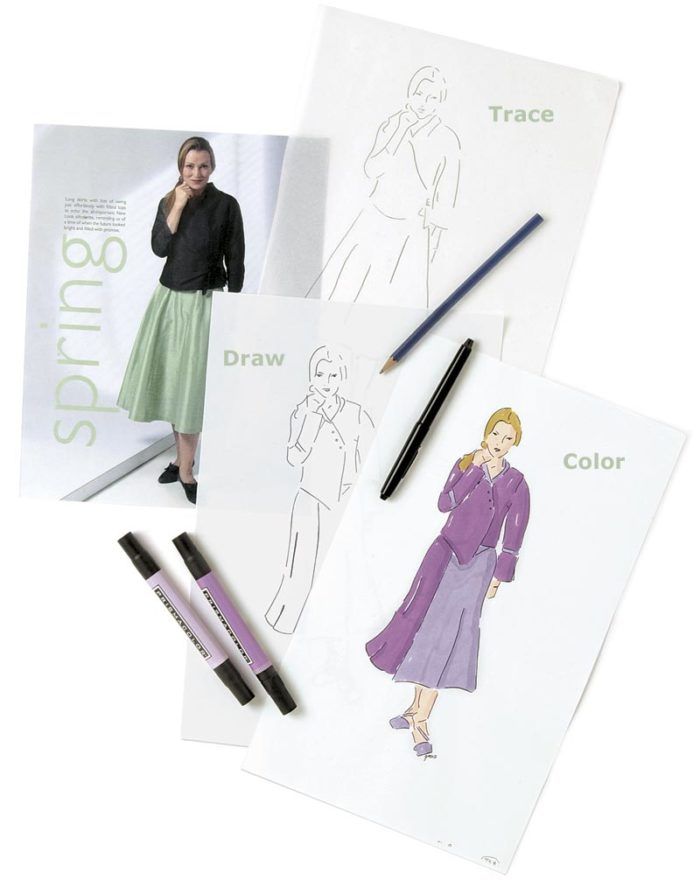
Sketching is an important tool for any sewer—it serves as a road map for all phases of garment creation, from fabric and color selection to construction. If you can sketch, you can record fashions seen on the street, work out design details, and communicate your ideas to others. To learn to make accurate, professional-looking, stylish drawings, read on.

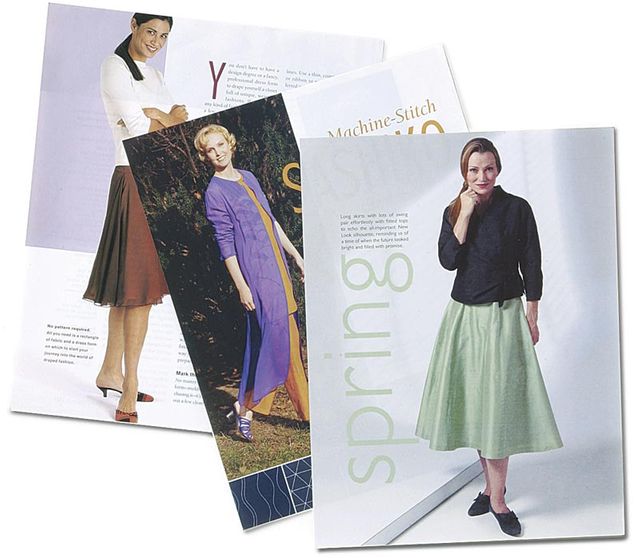
![]() Take a look at an ordinary pattern envelope, and you’ll see two different, but equally important, types of sketches at work. On the back of the envelope, schematic drawings show the flat outline of the garment, with style lines and construction details. In contrast, the more dynamic fashion illustrations on the envelope front depict the garment or ensemble on a body (typically an elongated, slender one), and give the illusion of three-dimensional form and movement.
Take a look at an ordinary pattern envelope, and you’ll see two different, but equally important, types of sketches at work. On the back of the envelope, schematic drawings show the flat outline of the garment, with style lines and construction details. In contrast, the more dynamic fashion illustrations on the envelope front depict the garment or ensemble on a body (typically an elongated, slender one), and give the illusion of three-dimensional form and movement.
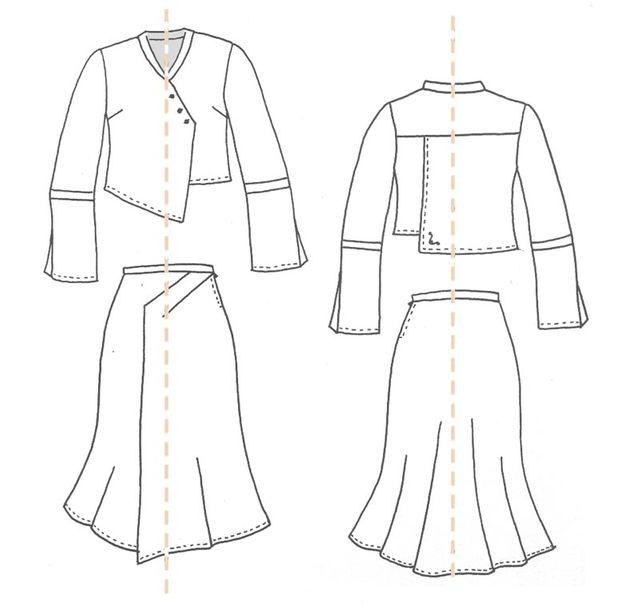
Flat schematics how-to
Place tracing paper over your croquis and mark the center-front line. Draw the left side of your garment only, then fold the tracing paper along the center front line, and trace your markings onto the right side; unfold and add asymmetrical details, such as zippers.

• Curve the back edge of the collar stand and the neckline seam, where the stand meets the facing or lining.
• Draw seamlines as solid lines and topstitching as fine, dotted lines.
• Indicate a zipper with a dotted line of topstitching. For an invisible zipper, draw only a zipper pull.
• Suggest fullness or gathers within a garment or along the hem by using curved, uneven lines.
• For conventional buttons and plackets, use the center-front line as a guide; a placket overlaps the center front slightly.
• Designate the inside of a garment or wrong side of a fabric by shading the area lightly.
• Recess the inside of a pleat or fold at the hem by drawing it shorter than the main body of the garment.
• Include at least a portion of the back view with your sketch.
The trace-and-fill approach
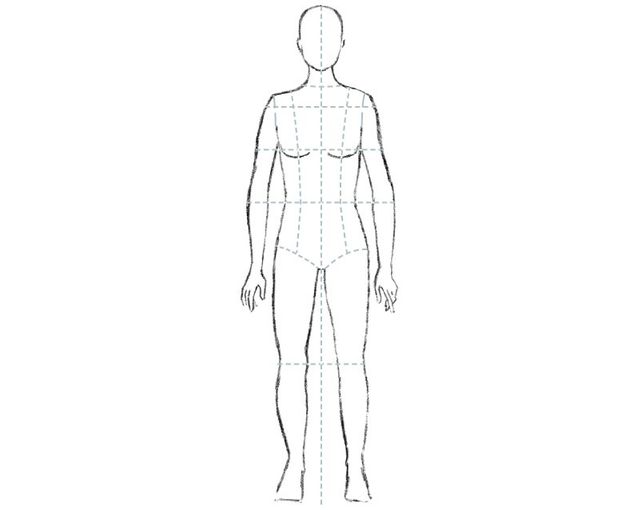
The basics of fashion sketching are simple: Slide an existing figure drawing under a blank sheet of paper, and draw the garment to fit the outlines of her figure. It’s the genre of the figure itself that will determine the look of the final drawing. For flat garment schematics, you’ll use a croquis, a schematic figure drawing with standard body proportions (see our version below). For dimensional fashion illustrations, you’ll use fashion photographs or illustrations from magazines or pattern envelopes as your basis (see above for details).

![]() A croquis is indispensable for creating flat garment sketches. You can download several versions here.
A croquis is indispensable for creating flat garment sketches. You can download several versions here.
![]() Along with tracing paper and pencils, you’ll need an eraser, drawing paper that’s not too opaque (computer printer paper works well), and colored pencils or markers. Don’t worry about making perfect sketches; your goal is to develop and communicate your ideas clearly and accurately. As many accomplished designers will confirm, sketching is a great first step to creating the garments of your dreams.
Along with tracing paper and pencils, you’ll need an eraser, drawing paper that’s not too opaque (computer printer paper works well), and colored pencils or markers. Don’t worry about making perfect sketches; your goal is to develop and communicate your ideas clearly and accurately. As many accomplished designers will confirm, sketching is a great first step to creating the garments of your dreams.
Fashion illustrations made easy
Start a fashion rendering with a photograph or illustration with a silhouette similar to the garment you want to sketch. Reduce or enlarge it on a photocopier if desired.

• Trace a photo. Trace the outline and major lines of the figure and clothing from the image onto a sheet of tracing paper, using quick pencil strokes. Include facial features if desired.
• Draw your design. Lay another piece of tracing paper over your traced figure. Draw your own design, following the original silhouette where appropriate. Fill in the rest of the illustration by retracing the head, feet, and any details from your first tracing. Finish by darkening your pencil lines.
• Color and notate. Lay drawing paper over your last tracing and trace the pencil lines with a fine-point marker. Add color, texture, and shadows if desired. Annotate the sketch and label details.
Click here to download croquis for a variety of figure types, including plus-size, petite, and male.
This article was originally published in Threads #105, pp. 54-55.
Croquis illustration: Robert Boston; schematics and fashion illustrations: Jennifer Sauer; pattern envelope photo: Jack Deutsch


Log in or create an account to post a comment.
Sign up Log in