
No fancy equipment, no dangerous chemicals. Removing color with bleach may be the easiest surface-design technique yet.
The idea of creating uniquely colored or patterned fabrics with dye or paint is certainly appealing, whether you’re a garment maker or a fabric artist. If you’ve hesitated to get involved, or are looking for a new slant on the subject, consider this much simpler, almost equally provocative, surface-altering method: removing color instead of adding it.
There is a variety of ways to remove color (the technical term is discharge) from dyed fabric, but for controlled results on all kinds of fabric you generally need lots of experience and testing, plus some highly toxic chemicals. I find it much safer, and certainly a lot more fun, to simply experiment with the less-predictable but still compelling effects of applying ordinary household bleach to dark, natural-fiber fabrics, either by spraying or brushing the bleach on flat fabric (Resist-and-spray technique), or by dipping the fabric in it, after protecting part of the surface in some way from contact with the bleach (Wrap-and-dip and Pipe-wrapping techniques). That’s how I created all the patterned fabrics shown here. Let’s look closer at a few of the many simple, spontaneous ways to create discharge patterns with bleach, starting with the fabrics most likely to respond well.
 |
 |
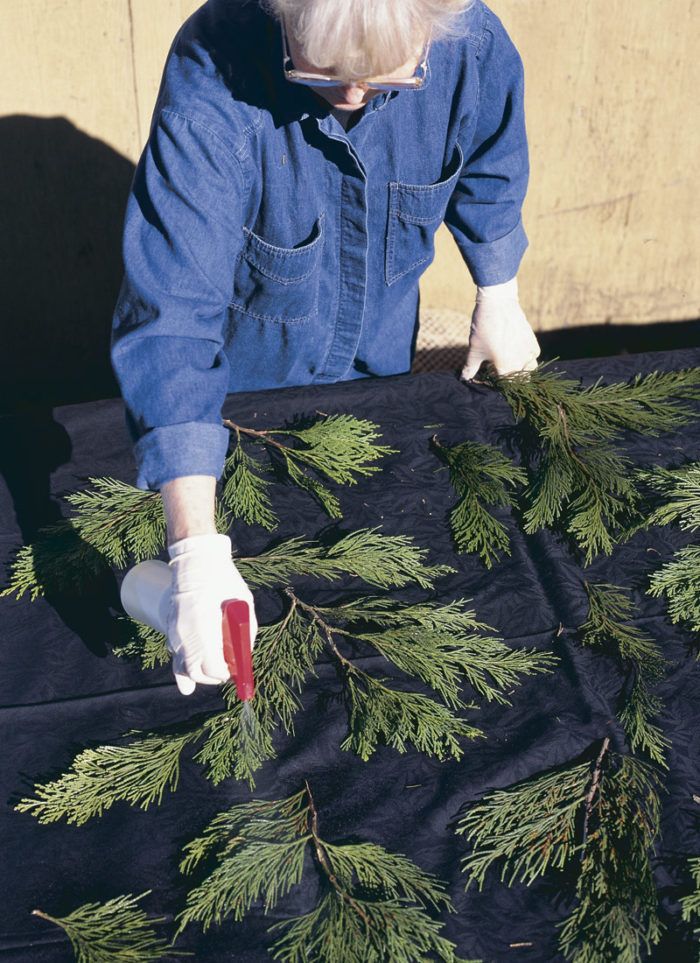
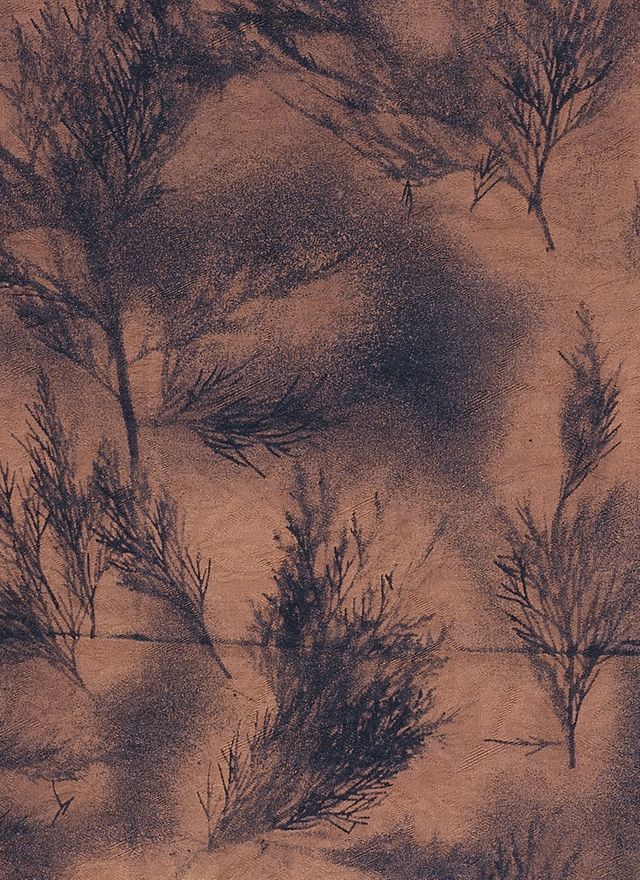
No fancy equipment. Removing color with bleach may be the easiest surface-design technique yet. The fabric at right resulted from spraying a bleach solution over cedar boughs arranged artfully on the cloth (left).
Natural fibers only
Bleach is an effective color remover as long as you confine yourself to natural fibers like cotton, linen, and rayon. If the fabric contains polyester, the color may not discharge, since polyester is usually colorfast. This is hardly a limitation, considering how many types just of cotton there are-knits, broadcloth, denim, piqué, gauze, velveteen, corduroy, and jacquard (my favorite because there’s a subtle pattern already woven in).
Black bleaches best
Obviously, the darker the fabric is to start with, the more dramatic the results will be. I tend to concentrate on black fabrics not only because they provide maximum contrast after bleaching, but because it’s often surprising what colors you’ll discover underneath the black as you begin to remove dye. Perhaps you’ve noticed how hard it is to match blacks? The reason is that fabric is dyed black in many different ways, most involving multiple dye applications starting with a wide variety of undercolors. As you remove the top layers of dye from black fabrics, expect to see white, cream, gold, pink, peach, raspberry, green, blue, brown, or gray revealed underneath, as in the many examples shown here.
I usually choose fabric in plain colors so that whatever discharge pattern I create is clearly defined, but bleaching can work on prints, too. Of course, you should experiment with any dark or medium-toned, solid, textured, or patterned fabrics you like, always being prepared for surprising (and occasionally disappointing) results as you remove color.
With a little preplanning, you can avoid having to buy the fabric to test it. When I shop for fabric to bleach, I set out with a bleach-soaked paper towel in a zip-lock bag. In the fabric store I ask for swatches of the pieces I’m considering, take the samples to the car, and wet them with the paper towel to make sure I like the colors underneath. To test fabrics you already own or have swatches of, just splash a little bleach on them in the sink, trying not to soak the whole swatch. Let them sit for a few minutes to see the discharge effect, which you can stop at any point as I’ll explain below.

Yardage or garments?
I usually work with yardage as opposed to completed garments, with the exception of cotton T-shirts (children especially enjoy doing those). I like to cut out the pattern pieces to take maximum advantage of the design I discover after bleaching. But there’s no reason (other than cost, perhaps) not to experiment with bleaching washable natural-fiber garments.
Assuming that your work area is big enough, I suggest you bleach lengths no more than 2 yd. long when you’re working flat, so the first part you treat won’t be ready to neutralize before you’re done with the rest. Depending on the thickness of your fabric and your technique for keeping the bleach from the protected portions of the fabric, dipping applications may allow you to use longer pieces. When experimenting with a new technique, I like to use small pieces of fabric until I get an effect I want, but I usually work with at least 1/2-yd. pieces so they’re large enough to serve as part of a garment in case they’re spectacular.
The fabric can be prewashed or not; if the sizing is still in it, the bleaching solution may bead up on the surface, which could yield terrific results. The solution may be applied on dry fabric or wet. This is definitely a technique that requires play. It’s difficult to have a failure, short of removing all the color; every piece is unique and has potential, since you can always bleach again, or add color back to the fabric after bleaching, using permanent markers, paints, or dyes.
Basic supplies, and extras
Here’s the list of equipment I use for all bleaching experiments:
- Three 5-gal. or larger buckets (four if bleaching by dipping)
- Plastic sheeting or trash bags to cover the work surface
- Rubber gloves
- 1 qt. to 1/2 gal. fresh household bleach (different brands can give different results, so try several)
- Bleach-neutralizing chemical, such as Bleach Stop (www.dharmatrading.com) or AntiChlor (www.prochemical.com)
- Plastic spray bottle with an adjustable nozzle
- Paper towels
- Old clothes
Optional equipment, whether you spray the bleach on or dip the fabric in it, includes anything that will help you apply the bleach or protect the fabric from the bleach in interesting ways. I’ve used brushes, sponges, syringes or plastic squeeze bottles with narrow openings, string, pieces of wood, metal clamps, cardboard, leaves or other natural materials, lace, cheesecloth, paper cutouts, clothespins, paper clips, pieces of chain. And as you play you’ll think of and discover other things that will create beautiful designs.

In warm weather I like to work outside. I put a 4- by 8-ft. piece of plywood on sawhorses, and cover it with plastic dropcloths or large trash bags taped together. If you work indoors, make sure your space is well ventilated, and that your floors and other nearby surfaces can take an occasional splash of bleach. Wear rubber gloves and old clothes. And mop up the plastic covering after each masterpiece, so leftover bleach won’t interfere with your next experiment.

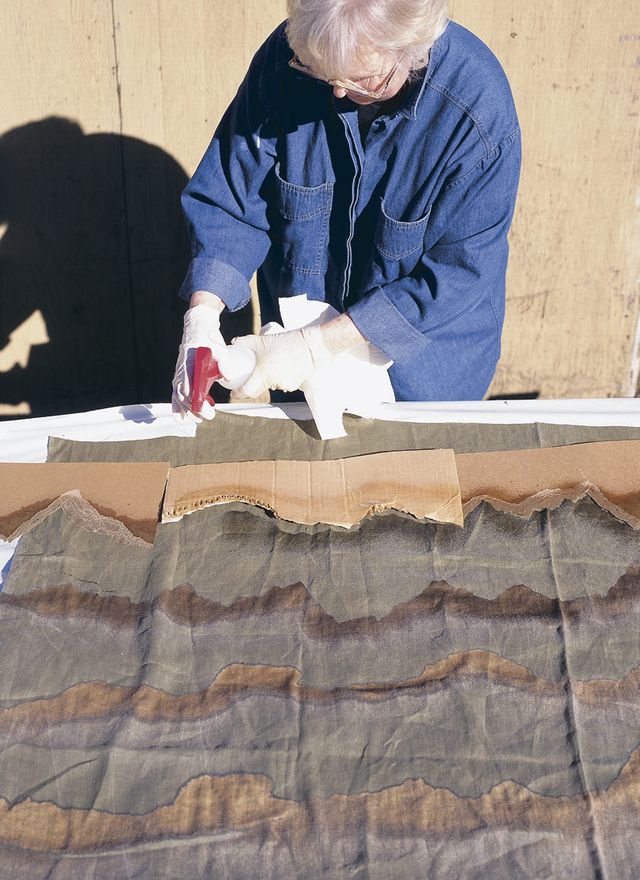
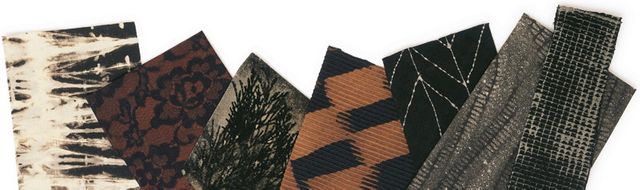
Resist, brushed, and drawn techniques create controlled patterns much different from the random effects of dipped techniques that formed the tie-dyed swatch. Photo: Scott Phillips.
Bleaching and neutralizing recipes
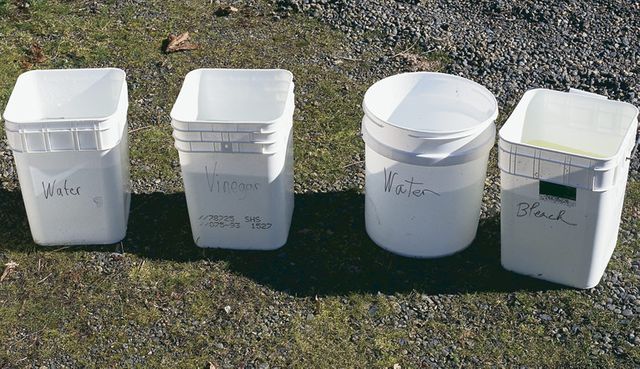
Bleaching recipes vary depending on how you’ll apply the bleach, as described below. But as soon as you’ve applied the bleach using either method and you’re ready to stop the action, you’ll rinse the fabric in water, soak it in a neutralizing solution for five or ten minutes, then rinse it again. This is where the buckets come in: you’ll need two filled with plain water, and one with 4 gallons of neutralizing solution, mixed according to the instructions on the neutralizing chemical package. I set mine up in the order I’ll use them, clearly labeled to avoid any mix-ups. After the last rinsing, you can wash and dry the fabric so that it’s ready to iron and cut.
If you plan to dip your fabric in bleach (check out the Wrap-and-dip and Pipe-wrapping samples to see if you like the sort of effects this produces), you’ll need to fill a fourth bucket with diluted bleach. The solution I recommend is 1 part bleach to 4 or 5 parts water. Since the fabric will be submerged, the solution doesn’t need to be as strong as when the bleach is sprayed or brushed on.
For brushing or spraying, use a solution of 1 part bleach to 2 parts water. For all methods, always use fresh bleach, since it will work much more quickly; it’s cheap, so treat yourself to a new bottle for each bleaching session. Note that bleach discharging is not an exact science; approximate measures are close enough.
How long to bleach
I’ve never had a problem with bleach damaging fabric, probably because I use fairly weak solutions, so my only concern is not to remove too much color, either by soaking too long or by overspraying. After the bleach is applied, nothing much happens in under two minutes, and I never leave anything longer than eight to ten minutes. In every case, I let my eyes tell me when the fabric looks done, keeping in mind that when the fabric is wet, it will appear darker than when it’s dry.
Lots of factors, including temperature and humidity, the age of the bleach, and, of course, the fabric you’re using, have an impact on how quickly the bleach will act. But if you’re set up with buckets handy and have tested your intended methods and fabrics even minimally (i.e., in the sink), there’s not much that can go wrong.
In related articles, you’ll find demonstrations of Resist-and-spray, Wrap-and-dip, and Pipe-wrapping-my favorite techniques for bleaching, along with the fairly typical results I got: some examples worked well enough to go right into garments and some (we spared you these) went into the “later” file. The whole process was done, from wrapping fabric to packing up, in under four hours. Why not give it a try?
Photos, except where noted: David Page Coffin


I like your methods of using natural shapes to make your stencils. Your patterns are lovely.
I've read that vinegar is not a safe alternative for neutralizing bleach. The chemical reaction does break down the hypochlorate, but in the process it releases an even stronger acid and chlorine gas. Peroxide is a safe alternative, though more expensive than some commercial products listed below.
This I found on sites about neutralizing bleach:
http://www.pburch.net/dyeing/FAQ/neutralizingdischarge.shtml
"Whatever you do, never use vinegar or any other acid in an attempt to neutralize your chlorine bleach. It will destroy the hypochlorite that is the active ingredient of chlorine bleach, but only by turning it into much more caustic and dangerous chemicals, including deadly chlorine gas. (The amount of chlorine gas produced by a mild acid such as vinegar is small, but it won't do your fabric any good, and stronger acids can produce lethal amounts.) "
Bisulfite, or metabisulfite, is the most economical choice. It is widely sold under the name Anti-Chlor by dye suppliers.
Sodium thiosulfate, also known as Bleach Stop.
Thiosulfate is commonly used in developing photographs, so you may be able to find a local supplier in the form of a photography supply store. The reaction between thiosulfate and hypochlorite is as follows:
4 NaClO + Na2S2O3 + 2 NaOH → 4 NaCl + 2 Na2SO4 + H2O
Hydrogen peroxide is a third choice, perhaps preferable for asthmatics who are sensitive to the effects of sulfur-containing chemicals.The chemical reaction between hypochlorite (the active ingredient in chlorine bleach) and hydrogen peroxide is as follows:
OCl- + H2O2 -> Cl- + H2O + O2
hi, my name is bonnie~ im currently a year 12 student in australia studying textiles
i was wondering is there ANY ANY ANY way to bleach POLYESTER velvet? because i read somewhere else that polyester would be good for Devouring on velvet however i can not reach any of the paste in australia. My garment is polyester velvet and i would really like to bleach out my pattern but it's not working...
could anyone please give me some help or handy tips. it would be very much appreciated~
What a fabulous article! I teach textiles and will get my students to use your techniques. Thank you so much.
I was in Minneapolis at Quilt Market and discovered a new product called deColourant and DeColourant plus that you do not have to mix. You can remover color and add new colors. It is available in a jar as a creme and in spray bottle. Great with stencils and rubberstamps!
It was an amazing work done by u .Thanks for the informative post.We are the manufacturers of 100% Bleached Cotton and Absorbent Cotton for Surgical and Medical Care centers in India.
иркутские девушки знакомства секс знакомства на ночь Заволжск знакомства атяшево елена щелковская знакомства 30 исламске знакомства
jobig
_мужские интим развлечения развлечения на петровско-разумовской достопримечательства и развлечения железноводского санатория
It is erroneous to say bleach is a toxic chemical and can be problematic for people with asthma or other lung issues especially, but can be tough in anyone's lungs. It must be used with lots of ventilation and protection for the skin especially the skin. It would be good if a caution is added to this article so no one is hurt using bleach improperly.
Good point, designs. Safety first.
It is amazing to see these results, and it looks not so hard to recreate.
Patterned technique looks so much nicer than the dip in method. My opinion.
Looks really clever. I should try this for sure but with Batman Logos :)
Bleach IS a TOXIC chemical product.. (you can read it on the container) it is harmfull for nature. I think this article is not clear about that and makes us believe bleach is eco friendly because it is a household product!
Even though the result is nice, I feel it is paradoxal to use it in order to print nature in fabric..
isn't it?
And most important, could you rectify in your article that bleach IS toxic, please? For our planet's sake? And to be able to continue with eco friendly print techniques in the future?
Thank you,
Maelle
This is quite interesting...would love to do it!!!
Hi all
Anybody know if different bleach concentrations make visibake variations in color changing the same dark fabric?