
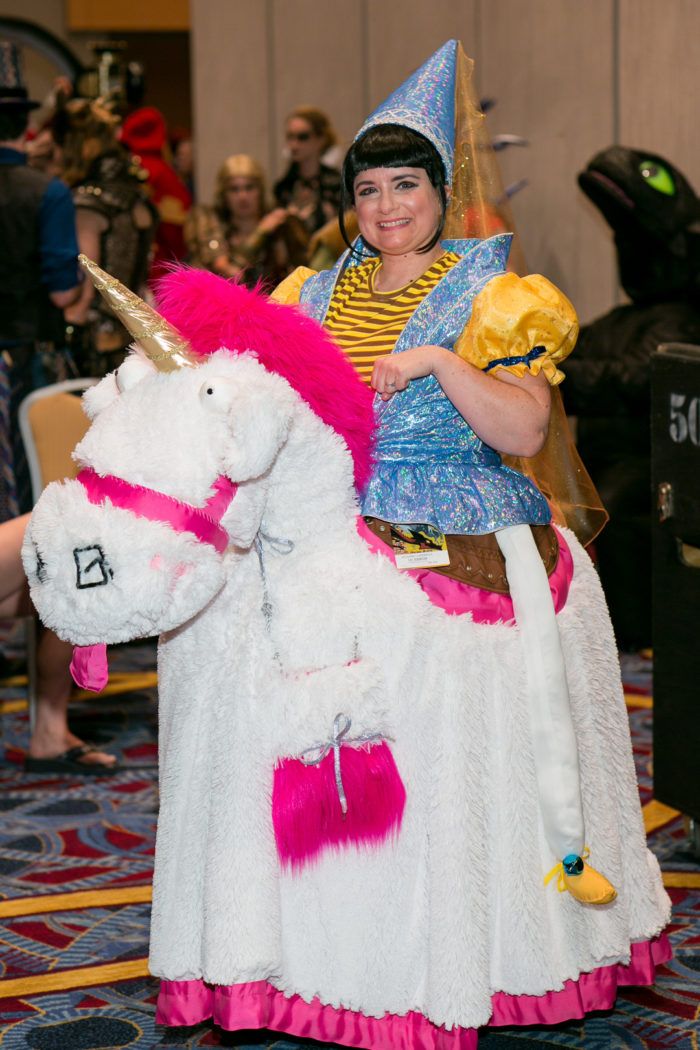
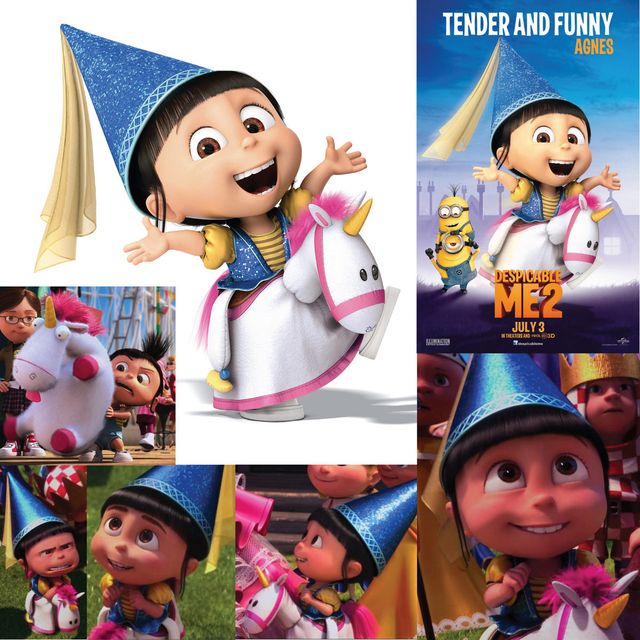
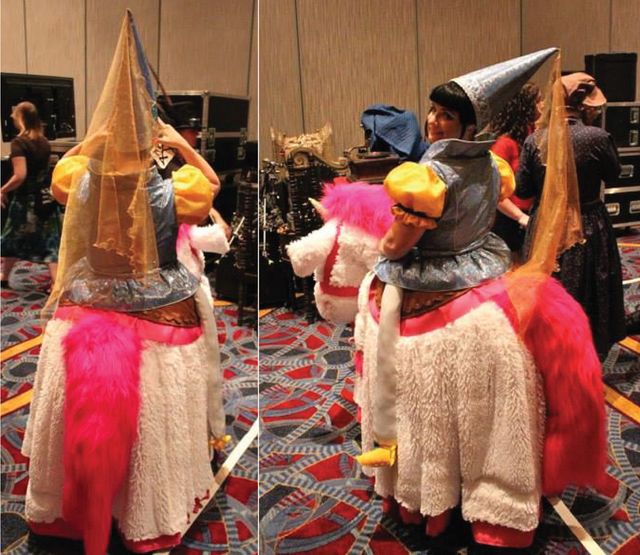
Cosplaying as my favorite character from Despicable Me 2, Agnes in her Unicorn Princess costume from her birthday party.
Unicorn Princess Agnes from Despicable Me 2
Inspiration: Agnes is my favorite character from the Despicable Me movies. And when I saw her in this costume the first time I saw the second movie, I knew I had to make it! I love making costumes, but this one brought me true joy the entire time. I cannot wait to wear it again for Halloween!
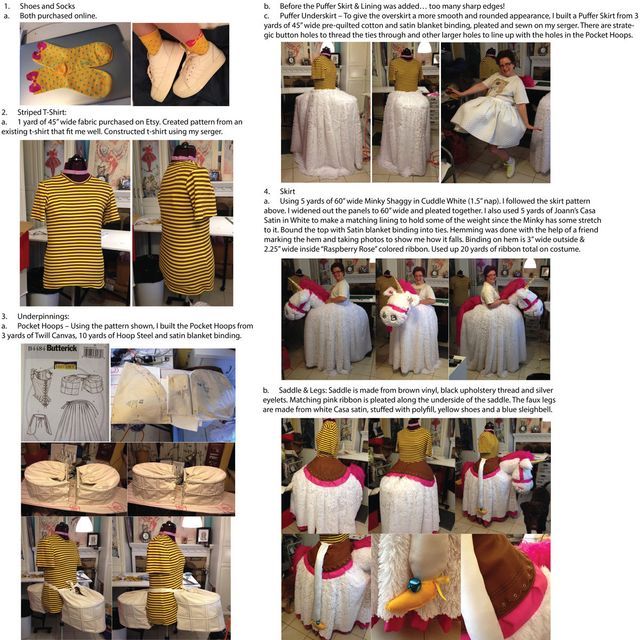
1. Shoes and Socks: Both purchased online.
2. Striped T-Shirt: 1 yard of 45″ wide fabric purchased on Etsy. Created pattern from an existing t-shirt that fit me well. Constructed t-shirt using my serger.
3. Underpinnings:
a. Pocket Hoops – Using the pattern 4484 Butterick historical pattern, I built the Pocket Hoops from 3 yards of Twill Canvas, 10 yards of Hoop Steel and satin blanket binding.
b. Before the Puffer Skirt & Lining was added… too many sharp edges!
c. Puffer Underskirt – To give the overskirt a more smooth and rounded appearance, I built a Puffer Skirt from 3 yards of 45″ wide pre-quilted cotton and satin blanket binding, pleated and sewn on my serger. There are strategic button holes to thread the ties through and other larger holes to line up with the holes in the Pocket Hoops.
4. Skirt a. Using 5 yards of 60″ wide Minky Shaggy in Cuddle White (1.5″ nap). I followed the skirt pattern on the 4484 Butterick Historical pattern. I widened out the panels to 60″ wide and pleated together. I also used 5 yards of Joann’s Casa Satin in White to make a matching lining to hold some of the weight since the Minky has some stretch to it. Bound the top with Satin blanket binding into ties. Hemming was done with the help of a friend marking the hem and taking photos to show me how it falls. Binding on hem is 3″ wide outside & 2.25″ wide inside “Raspberry Rose” colored ribbon. Used up 20 yards of ribbon total on costume. b. Saddle & Legs: Saddle is made from brown vinyl, black upholstery thread and silver eyelets. Matching pink ribbon is pleated along the underside of the saddle. The faux legs are made from white Casa satin, stuffed with polyfill, yellow shoes and a blue sleighbell.
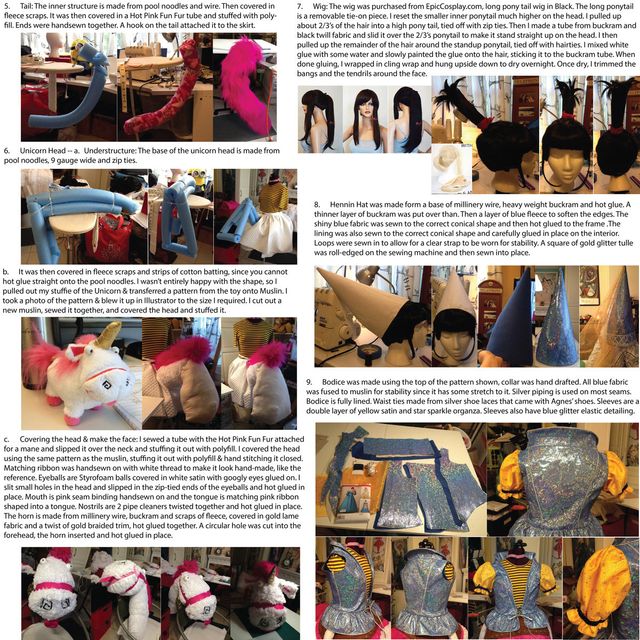
5. Tail: The inner structure is made from pool noodles and wire. Then covered in fleece scraps. It was then covered in a Hot Pink Fun Fur tube and stuffed with polyfill. Ends were handsewn together. A hook on the tail attached it to the skirt.
6. Unicorn Head
a. Understructure: The base of the unicorn head is made from pool noodles, 9 gauge wire and zip ties.
b. It was then covered in fleece scraps and strips of cotton batting, since you cannot hot glue straight onto the pool noodles. I wasn’t entirely happy with the shape, so I pulled out my stuffie of the Unicorn & transferred a pattern from the toy onto Muslin. I took a photo of the pattern & blew it up in Illustrator to the size I required. I cut out a new muslin, sewed it together, and covered the head and stuffed it.
c. Covering the head & make the face: I sewed a tube with the Hot Pink Fun Fur attached for a mane and slipped it over the neck and stuffing it out with polyfill. I covered the head using the same pattern as the muslin, stuffing it out with polyfill & hand stitching it closed. Matching ribbon was handsewn on with white thread to make it look hand-made, like the reference. Eyeballs are Styrofoam balls covered in white satin with googly eyes glued on. I slit small holes in the head and slipped in the zip-tied ends of the eyeballs and hot glued in place. Mouth is pink seam binding handsewn on and the tongue is matching pink ribbon shaped into a tongue. Nostrils are 2 pipe cleaners twisted together and hot glued in place. The horn is made from millinery wire, buckram and scraps of fleece, covered in gold lame fabric and a twist of gold braided trim, hot glued together. A circular hole was cut into the forehead, the horn inserted and hot glued in place.
7. Wig: The wig was purchased from EpicCosplay.com, long pony tail wig in Black. The long ponytail is a removable tie-on piece. I reset the smaller inner ponytail much higher on the head. I pulled up about 2/3’s of the hair into a high pony tail, tied off with zip ties. Then I made a tube from buckram and black twill fabric and slid it over the 2/3’s ponytail to make it stand straight up on the head. I then pulled up the remainder of the hair around the standup ponytail, tied off with hairties. I mixed white glue with some water and slowly painted the glue onto the hair, sticking it to the buckram tube. When done gluing, I wrapped in cling wrap and hung upside down to dry overnight. Once dry, I trimmed the bangs and the tendrils around the face.
8. Hennin Hat was made form a base of millinery wire, heavy weight buckram and hot glue. A thinner layer of buckram was put over than. Then a layer of blue fleece to soften the edges. The shiny blue fabric was sewn to the correct conical shape and then hot glued to the frame .The lining was also sewn to the correct conical shape and carefully glued in place on the interior. Loops were sewn in to allow for a clear strap to be worn for stability. A square of gold glitter tulle was roll-edged on the sewing machine and then sewn into place.
9. Bodice was made using the top of Simplicity 1728 costume pattern, collar was hand drafted. All blue fabric was fused to muslin for stability since it has some stretch to it. Silver piping is used on most seams. Bodice is fully lined. Waist ties made from silver shoe laces that came with Agnes’ shoes. Sleeves are a double layer of yellow satin and star sparkle organza. Sleeves also have blue glitter elastic detailing.


Log in or create an account to post a comment.
Sign up Log in