

Zipper installation can be tricky, especially with no seam to work with. In this Web Extra from “Exposed Zipper” by Jacque Goldsmith, SewStylish Spring Fashion 2015, we show you how to create an opening for an exposed zipper even in the absence of a seamline. Don’t miss any of the 2015 spring trends and techniques by ordering a copy or purchasing the tablet edition.
 More on Zippers:
• 8 Zipper Installation Techniques
• Lapped Zippers Rule
• A Handpicked Zipper is Worth the Effort
• Move a Zipper’s Location
Use this method to create and prepare an opening for an exposed zipper anywhere on a design where there is no seamline, such as at a neckline. The measurements given here are for a no. 3 zipper.
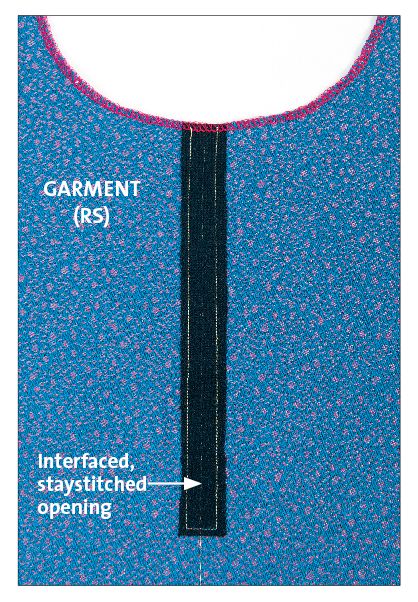
1. Mark the position of the desired opening. Make marks at the opening’s top and bottom on the garment’s wrong side. Sew basting stitches along the marked line.
2. Cut one strip of lightweight fusible interfacing 3⁄4 inch wide and 1⁄4 inch longer than the opening. Center the interfacing over the basted line on the garment’s right side. Fuse the interfacing to the fabric.
3. Staystitch 1⁄4 inch on each side of the basted opening. Begin at the opening’s top, pivot and stitch 1⁄2 inch across the basting line at the bottom of the opening, pivot again, and continue stitching up the opposite side.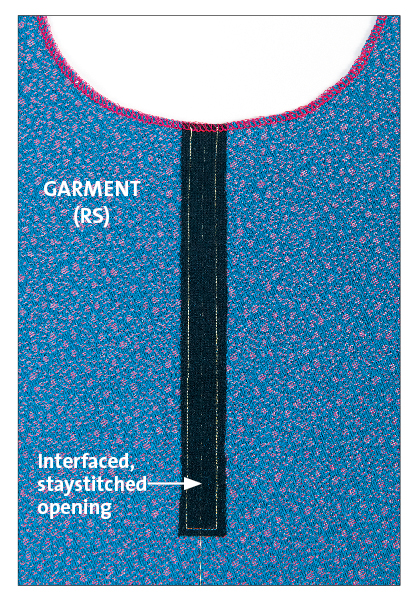 4. Cut between the staystitching, following the basting stitches on the garment’s wrong side. Stop 1⁄2 inch from the bottom. Clip diagonally into the bottom corners to the staystitching.
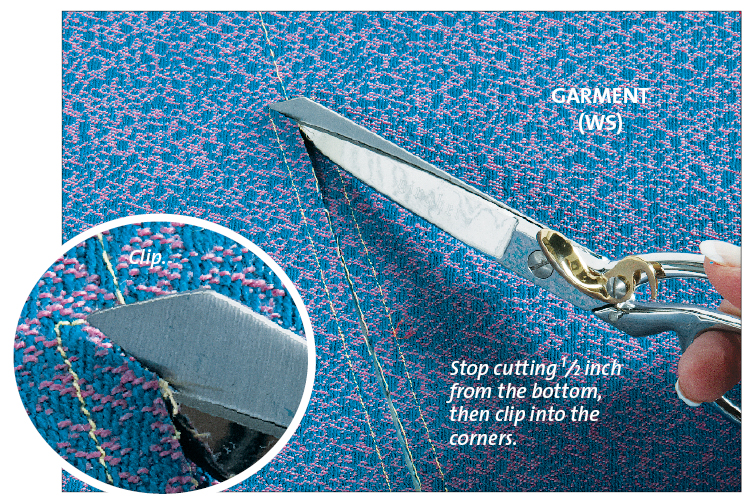
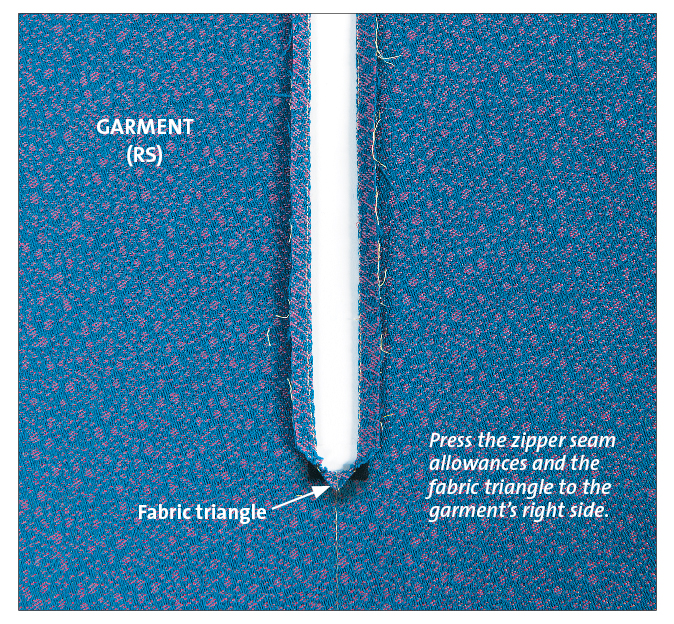
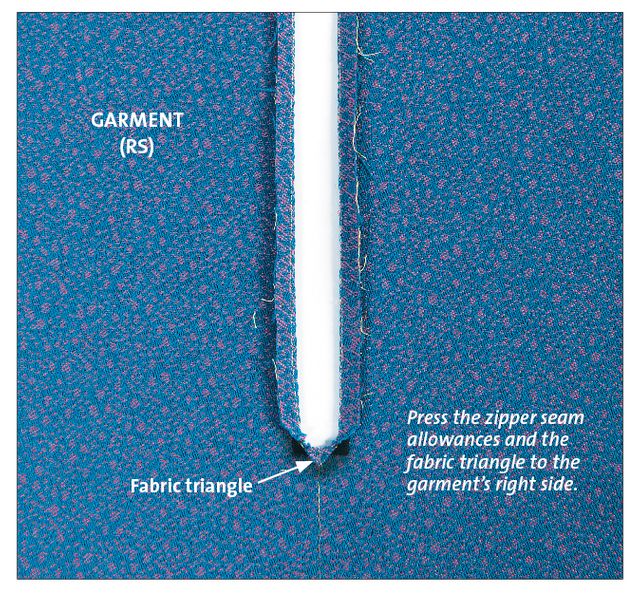
5. Press the cut edges to the garment’s right side along the staystitching. Press the triangle at the opening’s bottom to the right side. The mitered zipper opening is ready for zipper installation.
Will you try this technique? What is your favorite method for installing an exposed zipper?


You could also use the fusible interfacing in such a way as to make a clean edge by sewing the fusible to the fabric, cutting and clipping then turning and fusing the seam down on the wrong side. Right side of fusing to right side of fabric. draw your 1/4 " seam allowance box. Sew the lines then cut the centre and the two clips to the corner. turn through then press. You have a neat edge to sew to the zipper.
I don't do exposed zippers. UGLY.
Too hard to open artiicle completely
Where is the rest of this article. It seems to end with pressing the cut edges to the right side. What happens next? I need to know the end of the story! :-) Seriously, is there a second part or something I'm missing here?
There is "exposed" and then there is "really exposed". I do not understand this article either. The complete zipper tape would show on the right side.
I am going to put a zipper in using this method, in a T shirt for myself.
Why are you pressing to the right side of the fabric? This makes no sense to me. I would press wrong sides together for a clean edge, then sew the zipper along the edge. The cut edge of the fabric would then be on the underside of the garment.
This direction seems to me to be leaving the cut edge showing. Am I missing something here?
I've been instructed to add a zipper when altering a costume for the local theater and I've been puzzled how to proceed so this will be very useful to me. I'd probably turn and press to the inside for the cleaner finish - but I can see the design possibilities here.
If you don't want an exposed zipper, I should think that you could add an overlap if you can get enough fabric out a hem. Long folded rectangle, using your preferred method to stitch as invisibly as possible down one side and across the bottom.
I'd be interested to hear other ideas on this.
Yeah, nooo. I think if all the "right side"s in the article were changed to "wrong side"s, it makes sense. Otherwise, unless you're going for a particular inside-out aesthetic, this makes no sense with most zippers. The decorative zipper-tape zippers, maybe okay. Perhaps. I've yet to use one.
Yes ... I'm going to try this and am intrigued with the idea of doing it from the right side. the raw edges of the fabric will be under the zipper tape so the application will be neater from the wrong side. Wahoo... thank you!