

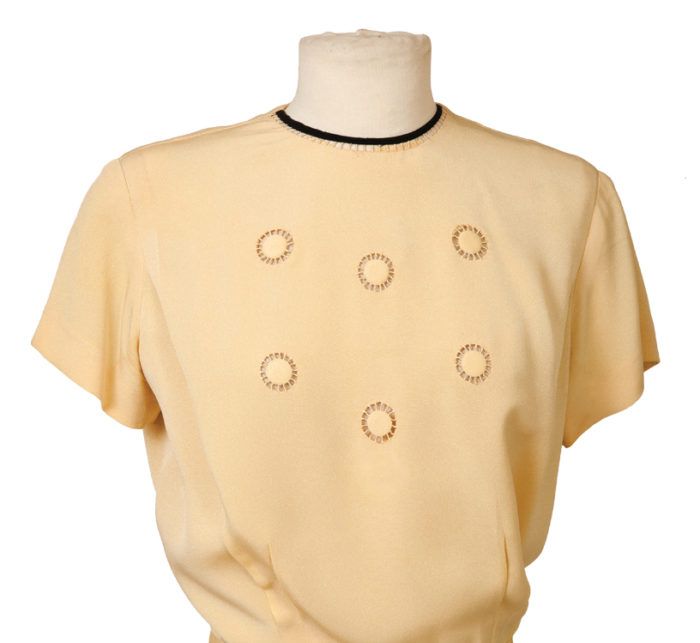
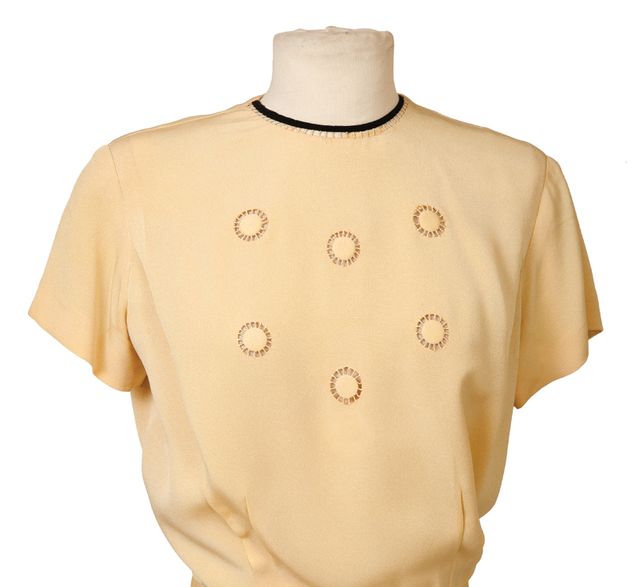
In a recent issue of Threads (#180, Aug./Sept. 2015), Judith Neukam shows how to re-create lovely vintage details on blouses. One of the blouses includes a bias neckband, which is joined to the garment with a ladder-like fagoting stitch.
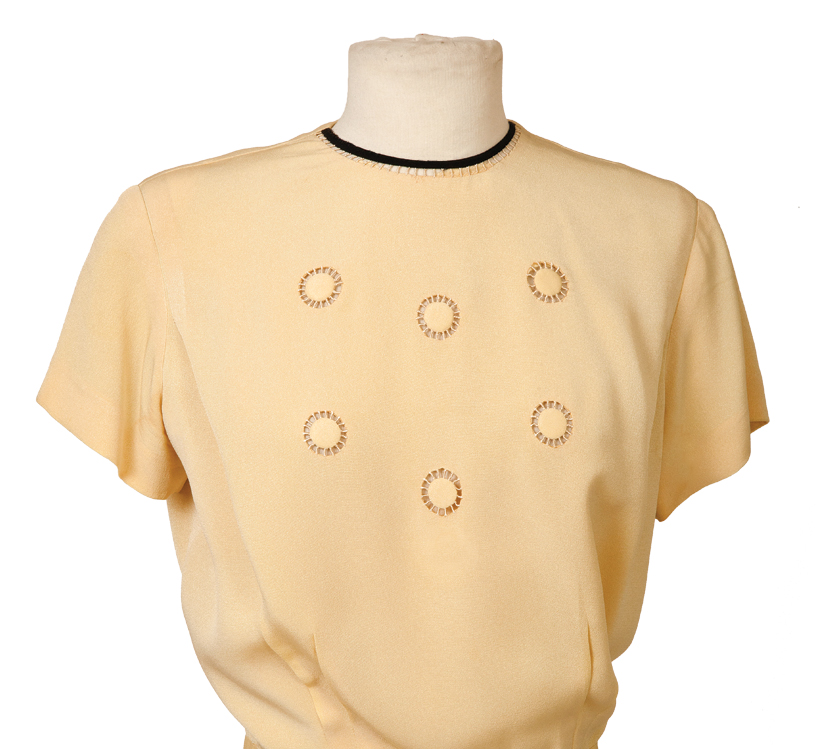
This delicate feature is easy to do yourself, whether or not you decide to include the spoked circle insets. Here’s how.
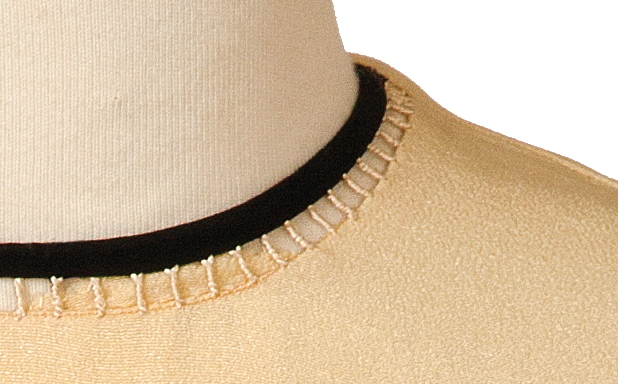
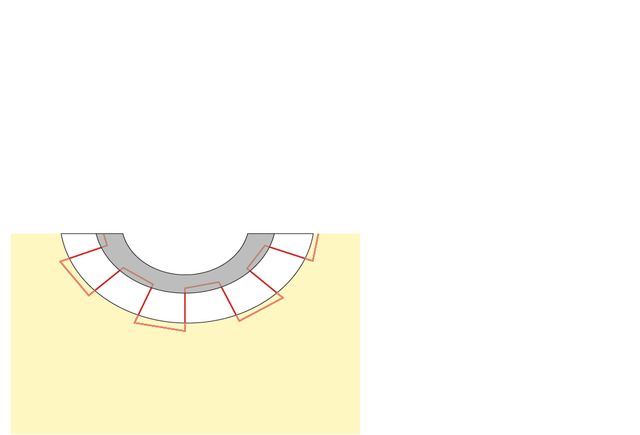
1. Prepare the band. Cut a contrasting bias strip for the front neckline. The finished neckband should be 1/4 inch to 3/8 inch wide, so start with a strip 1 1/2 inches to 2 inches wide. It should be at least as long as the neckline circumference; you’ll cut off any excess later. With right sides together, fold it in half lengthwise and sew 1/4 inch from the fold with a narrow and short zigzag stitch. Pull the strip to remove most of the stretch as you sew it. Turn it right side out and press it with the seam on the outside curve. Press the curve to match the original neckline seam.
2. Prepare the neckline. Staystitch the neckline 1/2 inch from the seamline, within the body of the garment (not in the seam allowance). Cut off the original seam allowance and press the remaining 1/2-inch-wide allowance (between the stitching line and the cut edge) to the wrong side. The staystitching line should roll just to the garment’s wrong side.
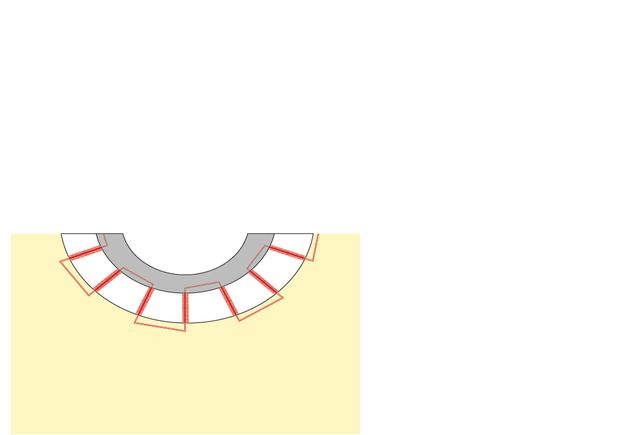
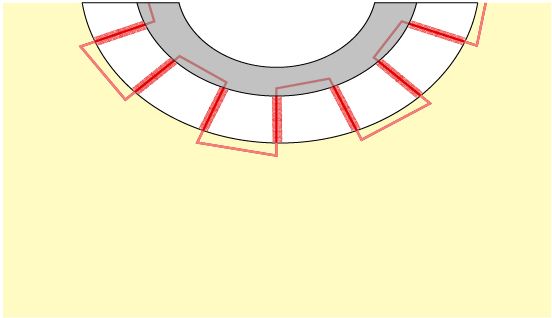
3. Attach the neckband. Thread a needle with a doubled strand of all-purpose thread. Sew the neckband to the neckline with a ladder stitch like the stitching used to insert the small circles into the blouse openings on the original garment. The “rungs” of the ladder should be approximately 1/4 inch long. This first pass of stitches joins the band to the neckline.
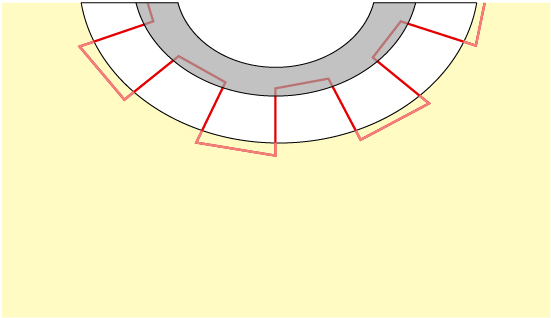
4. Complete the stitching. Thread the needle with silk buttonhole twist, and wrap each “rung” with a spiral of thread. Make sure the thread is tightly wrapped so that the initial rung is completely covered. Move from one rung to the next by sliding the needle through either the neckline fold, or through the neckband’s edge. Knot the thread ends unobtrusively on the wrong side when you’ve finished.

5. Finish the band ends. At the blouse’s center-back opening, cut off any excess neckband, leaving a 1/4-inch-long allowance at each end. Tuck this into the band ends and invisibly sew the ends closed. Sew on a hook and eye as a closure.


Lovely, but I can't help but think this would be easier with a traditional bullion stitch. I will have to give it a try.
Gorgeous - a decorative technique I could actually see myself using. Well done!
@ Carol Fresia: You make this look easy. Nevertheless, I think the technique is for someone more adept with needle and thread than I am...
I will try this vintage-inspired neckband on one of my favorite blouses. It seams like a great idea for the blouse that have a neckline a little lower in the front than I like to wear.
Do you have any suggestions on how to keep the "ladder stitches" even? I thought of paper backing but the curve might make it hard to do. Cut a paper backing from the pattern? What do you suggest?
So cute! I love when the clothes are simple and elegant but have a bit of a detailing going on. This totally changes the looks of it. But the most important part are the colours - it's best if you add complicated detailing with the similar colour and simple detailing with a complimentary one.