
Protect and safely transport your yoga mat in a sturdy bag that also has room for a sweatshirt, water bottle, and other personal items.
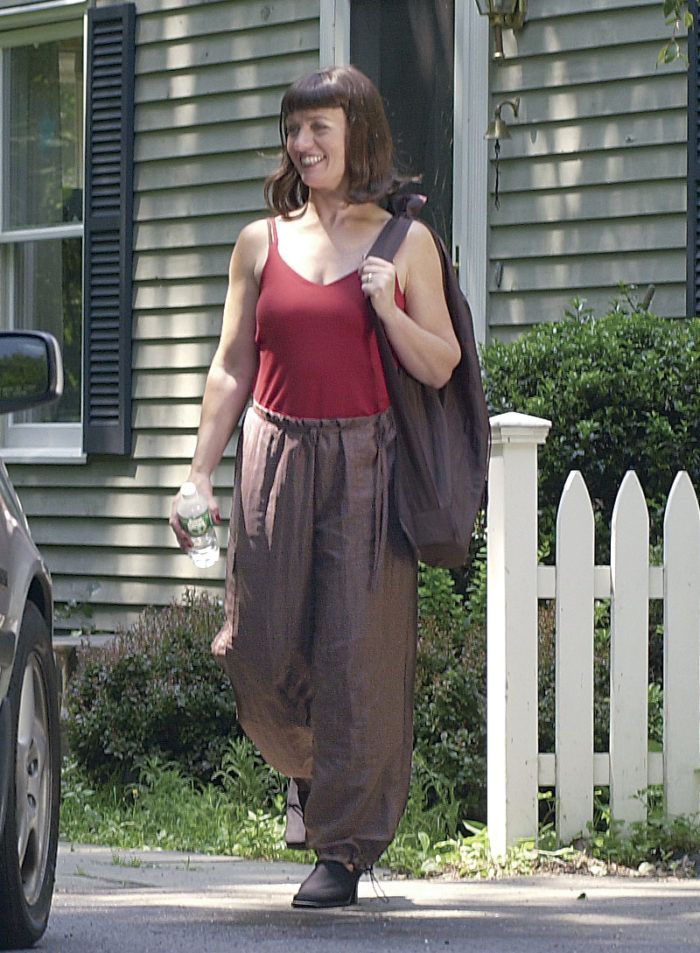
Having a well-designed, yoga-friendly wardrobe, as described in my “Poised to Stretch” article in the October/November 2003 issue of Threads (#109), is a smart idea for any busy woman who desires easy, comfortable garments that are also stylish and flattering. A coordinating bag, shaped to carry a yoga mat, completes the casual look, and can be drafted, cut, and sewn in just a few hours.
Draft and customize
A mat carrier is very useful if you practice yoga regularly. A yoga mat is notoriously hard to handle: it’s awkward to carry (even tightly rolled), it’s made of a soft, foamy material that can easily tear or shred, and because the mat is designed to secure your hands and feet in various yoga positions, it’s slightly sticky and is therefore a magnet for dust and dirt.
Over the years, I’ve tried various yoga mat bags on the market, but I’ve found that they’re expensive and often made of flimsy fabric. Their sporty cylinder shape is always too snug, making it a struggle to get the rolled mat into the bag. So I took it upon myself to design an attractive, sturdy, good-sized bag that’s easy to draft and sew. My bag is significantly larger than the dimensions of a standard rolled yoga mat, so I can slip the mat in and out easily (and the roomy size allows me to also fit in clothes, a water bottle, etc.). I also reinforce the bottom by quilting a second layer of fabric to the right side of the bag fabric. I’ve provided simple Pattern specs, but feel free to change the dimensions to suit your specific needs. If you like, you can also add interior or exterior pockets and loops to hold keys, your wallet, and other personal items.
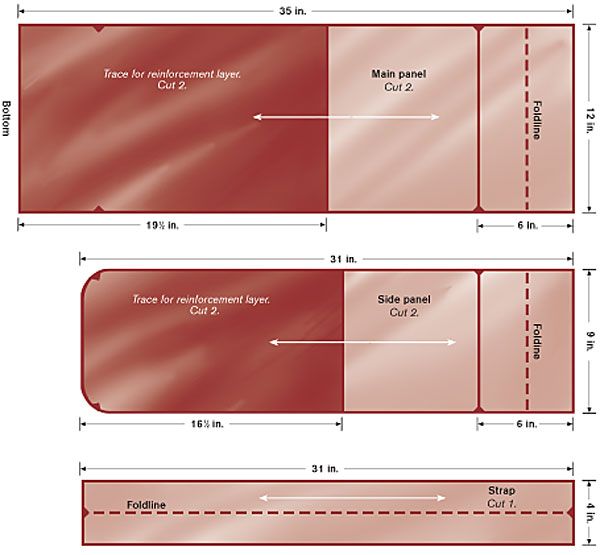
Yoga mat carrier pattern specs: a simple 3-piece pattern

Add seam allowances to each pattern piece before you cut your fabric. For an extra-sturdy bag, you can eliminate the bottom seam: simply align the bottom edge of the main panel pattern, and of its reinforcement layer, on the fold, and then cut 1 for each.
Cut, layer, and quilt
After you’ve drafted the pattern, choose a fabric (a tightly woven, sturdy, easy-to-clean fabric, such as nylon ripstop, cotton duck, or hemp canvas, is your best choice), figure out how much yardage you’ll need, then lay out and cut the bag pieces. Press under the seam allowance along the top edges of the reinforcement layers, then lay the main panels and side panels right side up on a flat surface, and pin each corresponding reinforcement layer on top, also right side up. Quilt the layers together using any design and thread color.

Sew it all together
The bag is a cinch to construct. First sew the bottom edges of the main panels right sides together, then press the seam allowances open. Fold the strap in half lengthwise, right sides together, and sew the long unfolded edge; turn the strap right side out, press, then topstitch along the edges if desired. Center the strap on the right side of one side panel; baste at the top and bottom edges. Sew the side panels to the main panel, right sides together, matching the notches. Press the seam allowances to one side, and serge-finish or bind all raw edges.
Next, finish the top of the bag and create the drawstring casing. With an erasable marker, draw a line on the wrong side of the fabric at notch level. In the center of one main panel, right above the drawn line, sew a 1/2-inch-long vertical buttonhole. Press under the seam allowance at the top of the bag, then pin the pressed edge just over the drawn line, making sure the strap lies flat and straight. Stitch along the line, catching all layers. Parallel to and about 5/8 inch above this stitching, sew again to complete the drawstring casing. If desired, further secure the strap at the top of the bag with topstitching. Insert a length of cord into the buttonhole and thread it through the casing. Secure the cord with a slide toggle, and the bag is complete. Just insert your yoga mat, swing the bag over your shoulder, and off you go.
Paddye Mann practices yoga and designs clothes in Pakenham, Ontario, Canada.


Please can we also have a pattern for these lovley loose pants as i am going to join a yoga group this year.
Hi there,
I would love to sew a yoga mat carrier for myself. I love your design idea with quilted reinforced layer/bottom for sturdiness. But your instruction is a little bit confusing. I wonder whether your carrier "tub" is made of two main panels (thus about 12x2 inches round) or with the side panel (12x2+9 around)? If the former, the side panel must be on top of of the main panel, but the instruction said "Sew the side panels to the main panel, right sides together, matching the notches. " which makes me think the side panel is part of the tube, but since it's length is shorter, I thought it should be sewed on top of the main panel.
Also, I need extra fabric for the reinforcement part, right?
Thanks for sharing your wonderful ideas!
Alright, Microsoft Office 2010 i have microsoft office 2007 Office Professional Plus 2007 Key and microsoft office 2010. Windows 7 Professional Activation So, whenever i open my old documents it Office Professional Plus 2007 Key automatically uses 2010 word instead Windows 7 of word 2007 which it was.
Thank you for your halp!
Thank you for your halp!