

Have you ever prewashed fabric only to find that part of its beautiful print has bled onto other areas of the fabric?
Every once in a while, your Threads editors plan an article that doesn’t work out as expected. Sometimes it’s still a viable option for the magazine. Other times, the article has to be scrapped. In those cases, it’s valuable to figure out what went wrong and decide whether it was the technique, the user, the materials, or a combination of all three that failed.
Take, for example, an article we had planned for a recent issue’s Sewing Saves–a department we created in 2016 to offer suggestions for saving projects when they go wrong (because sometimes they do). Well, this Sewing Saves article went wrong. We thought we’d share with our online readers a peek behind the scenes at Threads and the results of our “Sewing Saves: Dye Disasters” failure.
The intent was to show readers several solutions for mitigating the effect of dye bleed on fabric to prevent the total loss of the fabric. Perhaps you’ve experienced one of the following scenarios:
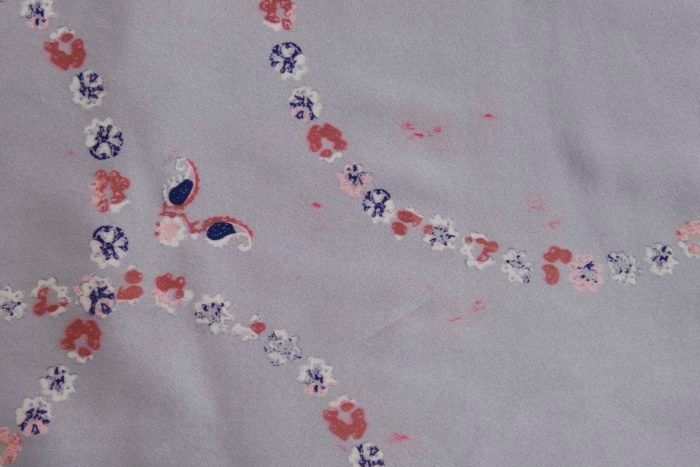
A) You dutifully prewash and dry new fabric only to find that the dyes have run and resettled elsewhere on the yardage.
This happened to me with a lovely floral-printed, silver-gray silk charmeuse I picked up inexpensively at a local shop. The cinnabar-red flowers that formed part of the print proved as fugitive as red often does. The fabric released the color in the wash, and it transferred to other spots on the fabric. I didn’t notice until the fabric was dry, effectively setting the faded red stains.
B) Water floods your fabric storage area, soaking stored yardage. The colors from one (or more) fabrics run onto other fabrics and stain them.
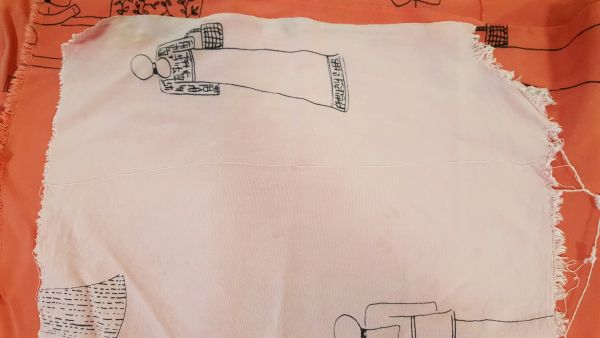
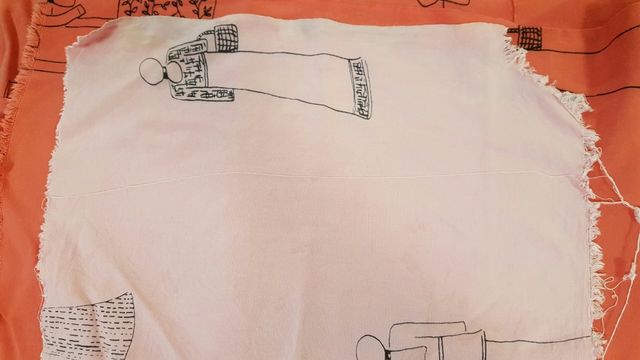
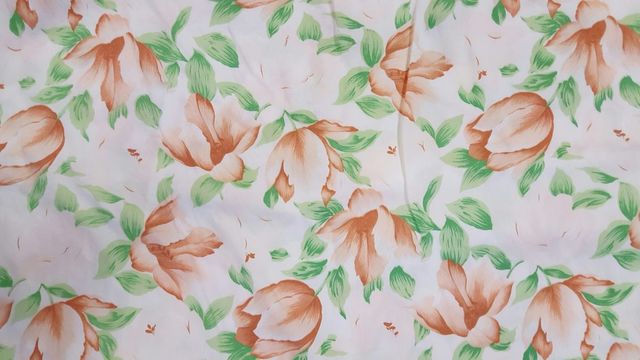
This happened to another Threads editor, the poor dear. The dark dyes from a rayon challis bled onto two fabrics stored with it: another dark pink, printed rayon and a cheerful white, pink, and red floral sateen, leaving blue-black clouds of discoloration. A spin through the wash didn’t remove the stains from either fabric.
C) You didn’t use enough dye powder in your dye solution, and the results were splotchy.
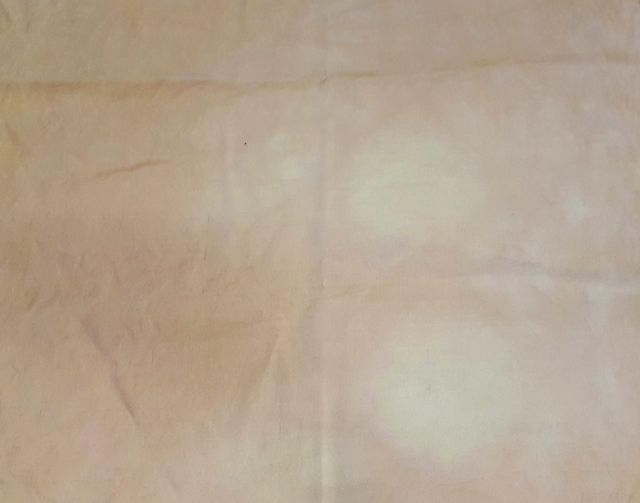
This also happened to me with a long cut of periwinkle-colored silk shantung I had dyed deep amethyst. The dye distributed evenly throughout most of the length, but here and there, the color was fractured and splotchy.
These kinds of accidents can happen to anyone, and this should have made an excellent subject for the magazine’s Sewing Saves section. Unfortunately, when I tested the recommended fixes for the aforementioned problems, they either didn’t work well enough, or they worked a little TOO well; in two instances, both at once. Here’s what happened:
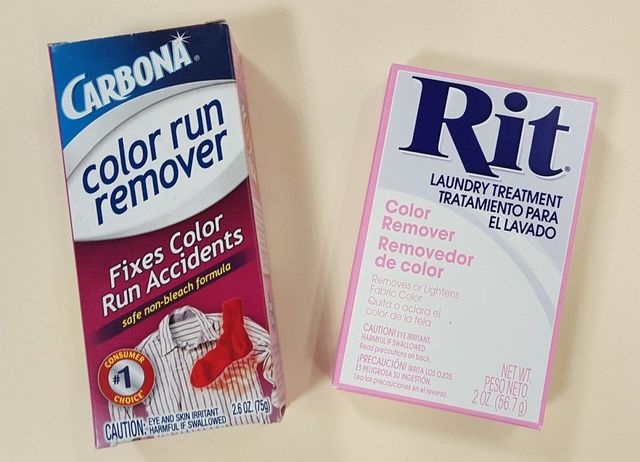
Color run remover
Some color remover products, such as Carbona Color Run Remover, are formulated to lift dyes that have run or bled onto fabric. It’s important to note that this type of product is only guaranteed to work on color-fast fabrics and are not recommended for fabrics that have bled onto themselves (an indication that the dyes were not properly set). If you choose to use Carbona’s color remover on a noncolorfast fabric, both the bled dyes and the fabric’s original dyes may be removed; this at least opens the door to overdyeing the fabric.
I hoped that Carbona Color Run Remover would fix the two fabrics from scenario B explained above. Following the instructions precisely, I mixed the powder into water, immersed the rayon fabric and swished it around for the recommended time, and pulled it out. Ideally the product would lift the blue-black stains and leave the rosy background color intact. It did neither. The black streaks faded, and the background color lightened to a pale pink.
The same product and method used on the floral-print sateen gave the same results: The black splotches faded but were not removed, and the pink, red, and green colors of the floral print lightened dramatically. Luckily, the fabric’s owner can cut around the black splotches, and even faded, the fabric is still pretty enough to use.

Shorter immersion time would have left the fabric colors intact, but would not have reduced the staining.
This failure could have been caused by the fabrics’ ability to hold color, or the fact that any red-based dyes tend to be fugitive (that is, unstable; not fast).
Textile Detergent
Using a textile detergent intended for preparing fabric for dyeing, such as Synthrapol or Dharma Professional Textile Detergent, may assist in mitigating a print bleed or dye transfer. A textile detergent keeps dye particles in suspension in the wash water, preventing them from resettling on the fabric.
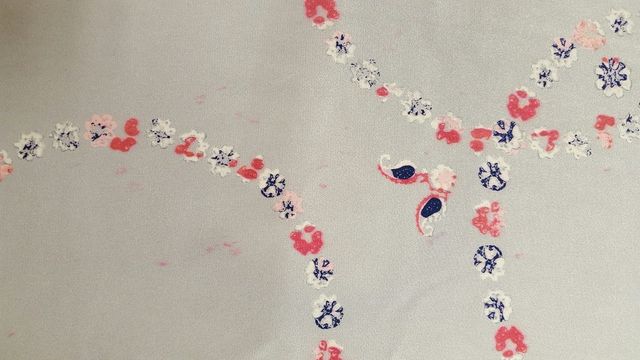
I used this method to try and correct my now red-freckled gray silk print, and it worked OK. A spin through the wash in warm water couldn’t remove all the transferred red dye, but it did reduce the appearance of the faded red stains to the point where I can use the fabric for its intended project with some strategic pattern placement. If I had tried the textile detergent immediately after discovering the fabric had bled onto itself, it might have removed even more of the stains.

Bleaching Agents
Non-chlorine bleaching agents, such as RIT Color Remover, are formulated to reduce a fabric’s colors to cream or off-white (depending on the original color) in preparation for dyeing. Non-chlorine bleaching agents are less damaging to fibers and can be used on most washable fabrics. If dye from one fabric has transferred to another fabric, consider stripping all the color from the damaged fabric with a bleaching agent and over dyeing it a new color. Even if the dye-stained fabric is printed, rather than solid-colored, this might be preferable to throwing it away.
I tried this method on my splotchy stovetop-dyed silk shantung with moderately favorable results. The dyed color was a very rich, vibrant purple-blue over a light periwinkle, so that was a lot of dye to remove. The fabric swatch I washed with RIT Color Remover came out still splotchy, but faded all over to a pink-beige. Another treatment with the same method might have removed even more of the color.

Conclusion
If you have fabric with stains from running dye, one of these methods for correcting or mitigating the damage might work for you. But here are some things to remember:
1. Test a small swatch first to see what results are possible with your fabric before committing the whole yardage to a color-removing bath.
2. Follow the product instructions precisely, but also read customer reviews online to see if other users have tips for success.
3. Consider cutting around the dye stains.
4. If your attempts at dye-bleed remediation don’t work as well as expected, or it’s not possible to cut around the dye stains, consider getting creative with the yardage. After all, you won’t use the fabric in its stained condition. Why not take the chance that you can turn it into something more beautiful and useful? Use textile paints or liquid dyes to create your own design on the stained fabric.

What do you do with fabric that’s been stained by bleeding dyes? Have you had experience with any of the mentioned fabric color-correction products? Share your solutions, tips, and creative turnarounds in the comments!


I always had problems with cleaning dye. Thank you for this article!
The question was about a possible "sewing" blunder which I had and my daughter solved.
I was sewing machine embroidery designs of TAZ on a shirt and got the collar caught under the hoop.
My daughter's solution was to cut a chunk from the collar to make it look as though TAZ had chewed it! Too cool!
I was 12 years old, and a member of 4-H sewing. I was competing in fairs with my dresses, blouses, and skirts that I had sewn. I had made this great dress out of a rayon type fabric, navy blue with flowers. It had a round neckline, and a dropped waistline that was midway between my knees and rear. It had french darts, the first I had every used, and what my 4-H teacher called oval darts in the back. It was also the first time I had put in a lapped zipper, meaning instead of the zipper being in the middle of the seam, it had a lap of one side over the other. I had matched the flowers at the seams, both the sides, the back, and the skirt. It had regular facings. On Friday, it was entered in the small 4-H exhibit we had. I got a second on it, because my neck facings were sewn a little crooked. In 4-H, the inside must be as perfect as the outside. So as I was reverse sewing, pulling on the bodice to pull the facing away so that the seam ripper could do it' job, the bodice tore. 8 inches down into the front. I had no more fabric, and I had to have this dress in to the next fair no later then 3 pm the next day. I had to figure out how to fix this dress so that it looked correct. I ended up making a faux placket, redesigning the facings, and hiding the tear in the fold of the placket. I took a very small 1/4" seam, and 1/2" placket fold. I had some small flower shaped buttons, and I sewed them on. It still fit me because it was a little big. I got not only a blue ribbon on it at the county fair, but it was also Best of Show. I entered it into the State Fair, and also won Best of Show there. It taught me the most valuable of lessons. Never give up, and if something happens, there is most likely a solution. Thanks for letting me share.
Oxi-Clean works very well, and possibly would have helped in those situations.
I had a stack of completed spiral quilt blocks, which were deep rich reds, golden yellows and blacks, still with their foundation backing attached. My water spray bottle for ironing tipped over and leaked on to the stack, which I did not notice. When I did, the blocks were dry, but 5 or 6 of them had red splotches on the yellow sections. Note that all the quilting fabric had been pre-washed. I believe it was because they were stacked that the problem occurred as there was no bleeding of the red into the gold.
Horrified (this represented HOURS of work)
But I had perfect results when I soaked them in Oxi-Clean for about 3-4 hours. All the red dye was removed, and there was no colour fading whatsoever in the red and black fabric. This was the first time I used it and it now is a permanent fixture in my laundry room, having made great saves with food stains as well!
My sewing blunder, rescue and lesson: I was sewing my daughter's dress for her school's annual Valentines Ball - her first ball, my first ball gown to sew. It was a strapless, corset-type top with a wide skirt, which, worn together, looked like a ball gown. The top was to have a zipper closure at the back. Because it was shoulderless, it had to fit really closely. When I fit it on her, it was way too wide at the back. I measured and cut off the excess. To this day I don't know how I made the mistake (tired, maybe?), but when I fit it again, it was way too small, with not enough fabric to even have the edges touch at center back, let alone a seam allowance. Panic stations!! It was after midnight, the dance was the next evening, there was still much to do to finish the dress and I had to be at work in a few hours. So the closure became a lace-up back - my first to sew, with no instructions at hand and not enough dress fabric left to make bias strips for either the loops or the lacing. Necessity is the mother of invention, as the saying goes. So I separated the two sides of the invisible zipper, cut off the tape next to the zipper coils and used the 2 nylon coils to make the loops. I had just enough dress fabric left to sew a modesty panel to cover the strapless bra closure. After work I bought some ribbon in the right colour to do the lacing-up, a few last minute touches, and the dress was finished just in time for my daughter to make a timely entrance at the ball.
The lesson learnt: measure meticulously, mark carefully and fit again before cutting anything off - double check yourself!