

Corduroy is one of those sturdy, reliable fabrics that sewers tend to take for granted. A cousin of velvet (the original French cord du roi means “king’s cord”), this is a fabric we think of today more in connection with kids’ school pants than royal garments. But current fashion designers are taking a new look at this affordable staple, and savvy sewers should too.
Generally made of all cotton or a cotton/polyester blend, modern corduroy’s pile is usually woven and cut in a striped pattern, resulting in distinctive ribs, or wales, that run the length of the fabric. Yet some lightweight corduroys have a smooth, short pile with barely visible wales. The difference between such corduroys and velvet is that velvet has a thicker pile formed by loops in the warp yarns, while most corduroy’s pile is created from extra floats in the weft, or filler, yarns.
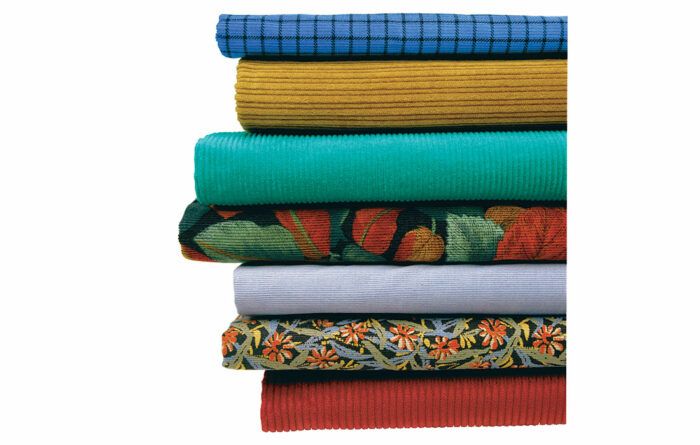
Corduroy comes in a wide variety of styles, with wale size and fabric weight varying greatly, from the featherweight miniwales with 22 wales/in. to hefty, 3/in. jumbo wales. Stretch corduroy has a small amount of spandex added to allow the fabric to flex horizontally, vertically, or in both directions. And corduroys printed with plaid, floral, paisley, or other designs add even more variety to the wide selection available.
It isn’t difficult at all to sew with supple, high-quality cotton corduroy. But you will get superior results if you use a few special techniques to prepare, fit, cut, and sew the fabric to ensure a smooth, non-bulky finish.![]()
![]()
 |
 |
 |
 |
 |
 |
 |
 |
 |
Start with high-quality fabric
When shopping for corduroy, you’ll see that it varies widely not only in color, pattern, wale size, and weight but also in quality. Always buy the highest-quality, all-cotton corduroy you can find-even superior corduroys are inexpensive when compared to other fine fabrics. Look for one that has a generous, lush pile and a superior sheen and drape, which will produce a beautiful, cushy, rumpled look after many washings-something you will never be able to achieve with polyester blends.
When you assess a corduroy’s pile, be sure to examine the reverse side-the ground fabric should be firm and tightly woven, with filler yarns meeting the selvages at right angles. Rub the fabric vigorously, right sides together, and scratch the surface with your fingernail. It’s not a good sign if you loosen bits of the fiber or create a powdery dust, which indicates the use of too much sizing, a common method for concealing poor quality.
If you’re unsure about the quality of a fabric you like, buy 1/4 yd. and toss it in with your next few washer loads of clothes. You will know right away if the fabric will season into a silky, supple corduroy or into a stiff, uneven pile that saw its best day on the fabric-store shelf. Armed with this information, you can go back and purchase the amount you need-or continue looking.
Vertical wales become design elements
Corduroy’s strong vertical wales give it a distinctive visual appeal that enables it to hold its own with many other fabrics like silk, suede, and crunchy knits. You’ll also find that by mixing contrasting weights of corduroy you can create an outfit with interesting texture. And don’t overlook the possibility of creating irresistible contrast and texture in a corduroy garment by cutting one or more elements (the collar and cuffs, for example, or even the side-front or -back pieces of a garment) on the crossgrain for horizontal ribs or on the bias for diagonal lines.
Generally speaking, corduroy is not a fluid, drapey fabric, and is therefore best used for designs that fit the body fairly closely. Outerwear garments are an exception, since many styles look wonderful with the considerable volume that heavier weights can provide.
Try patterns with simple lines
As with any fabric with a lot of surface interest, it’s best to choose a pattern with uncomplicated lines. Doing so allows the fabric’s main feature-its wales-to balance the pattern’s design. Since corduroys vary so widely in weight, be sure to choose one that’s appropriate for the garment and the amount of ease you want. Soft, fine-wale corduroys work well for dresses, vests, blouses, and softer skirts. For skirts, jackets, and trousers, I prefer medium-weight corduroys, with 11 to 15 wales/in. And for coats and other outerwear, jumbo- or wide-wale corduroys are great.
Since corduroy is a napped fabric-one whose pile looks different (that is, reflects light differently) when viewed from various positions-you’ll need additional fabric to follow a napped layout, with all the pattern pieces lying in the same direction, as discussed below in Nap layout is essential. I suggest purchasing an extra yard of fabric to allow for shrinkage, nap layout, stitch testing, and creative ideas (like trying out some bias-cut pieces).
Invisable, handsewn hem
|

Ready the corduroy before cutting
If you’re planning to wash the garment after sewing, always preshrink the fabric (plus any lining, zipper, interfacing, or underlining) before cutting. If you plan to dry-clean the completed garment, you may still want to prewash the uncut fabric for a softer, cushier texture.
Plan for a good fit-If a corduroy garment binds or fits too tightly, the fabric will show stress wrinkles, often at the upper sleeve, across the upper back, and around the front buttonholes. Avoid premature wear by adjusting the pattern’s fit, adding enough wearing ease to prevent binding.
Establish the grainlines-Before cutting the pattern, check the fabric’s grain by pulling a crossgrain thread and cutting along the line created. Place the fabric on a large table or cutting mat. If the crosswise and lengthwise grains aren’t at right angles, pin the selvage and the cut edge square, then steam the fabric with a hot iron held just above it, gently urging the wrinkles in the fabric to flatten. This works quickly to straighten most corduroys.
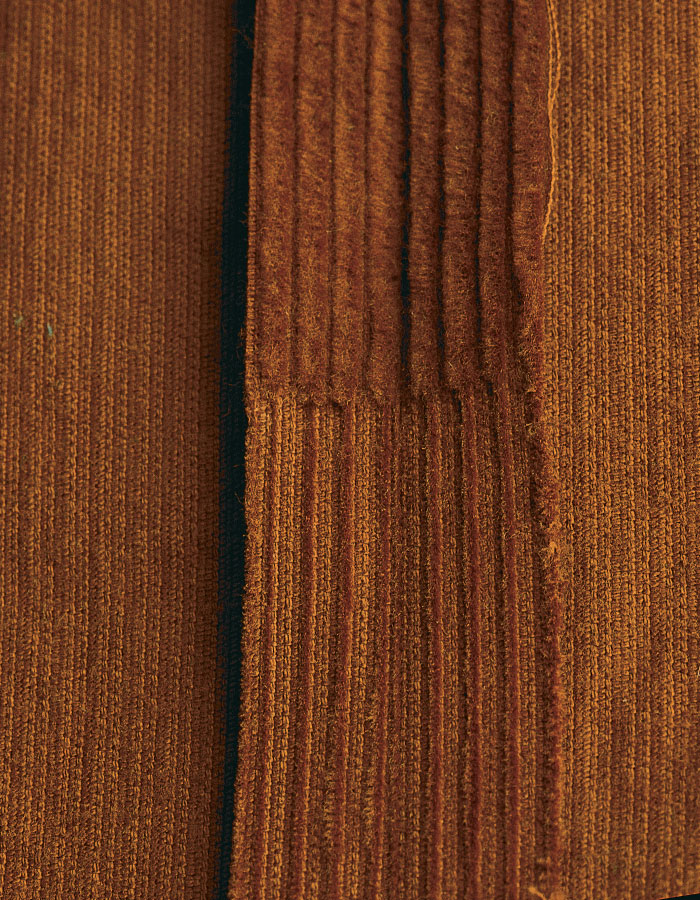
With its nap running down a garment, corduroy looks lighter and shinier; with its nap running up, the fabric looks darker.
Use “low-impact” pressing only
Whether you’re preparing the fabric for cutting or maintaining a finished garment, press corduroy as little as possible. Allowing the weight of the iron to rest on a napped fabric can permanently crush it. Corduroys shed most wrinkles if they’re left to hang for a day or two, or you can steam just above the surface.
During the construction of the garment, try a few “low-impact” pressing techniques to preserve the nap. First, apply only the tip of the iron where it’s needed, lifting and lowering the iron in an up-and-down motion. To meld stitches after sewing a seamline, lay the seam on a thick towel (fluff the towel in the dryer if it flattens), and steam-press lightly along the stitching line so the tip of the iron barely covers the stitches and the body of the iron lies in the seam allowance. To press open a seam, lay it over a towel on a shaped surface (such as the edge of a sleeve board turned on its side), and touch just the tip of the iron to the stitching line. Avoid pressing seam-allowance edges into the garment, because they’ll leave an impression on the right side.
Nap layout is essential
Before cutting out a garment, decide which way you want the fabric’s nap to run. First determine the direction of the nap by stroking the nap parallel to the selvage. The pile feels smooth when you brush in the same direction as the nap and rough when you rub against it. With the nap running up the fabric, the corduroy looks darker; with the nap running down, it looks lighter and shinier (if you have trouble determining the direction of the nap, try draping the fabric around your shoulders and see which side looks darker). Skirts and pants wear better with the nap running down, which makes the seat area less likely to shine. Coats, jackets, and blouses look richer with the nap running up. Whichever nap direction you choose, cut the pattern following a nap layout, that is, with the tops of all pattern pieces (except those placed on the crossgrain or bias) toward the same end of the fabric.
Most wide-wale corduroys look best when handled like a striped design and the wales are matched. A good guideline is to match wales 1/4 in. or wider and to match corduroys with alternating thick and thin wales. To avoid fabric shifting when cutting a wide-wale corduroy, place it in a single layer, wrong side up. You can cut light- to medium-weight corduroys using a lengthwise fold, wrong sides together.
Check your fabric to see if pins leave marks; if so, pin in the seam allowance or use weights to anchor during cutting. Avoid marking corduroy with a tracing wheel, which can leave a permanent imprint. Instead, mark with chalk, temporary marking pens, tailors’ tacks, or thread tracing.
Corduroy: the inside story
To construct the inside of a corduroy garment successfully, you’ll need a few techniques that are different from what you might choose for another fabric.
Don’t use fusible interfacing, since fusing will crush corduroy’s nap. Instead, use a sew-in interfacing that attaches to adjacent seams.

Consider lightweight facings. For professional-looking results on a more fitted garment, you may want to replace corduroy facings with a lighter-weight fabric, such as a fine cotton. This reduces bulk inside the fitted jacket at right. Be sure to prewash the fabric as you did the corduroy. A coordinating fabric adds an interesting detail to the inside of the garment while eliminating a layer of the bulkier corduroy. It also allows you to apply fusible interfacing to the facings, if desired.
Opt for a full lining. A full lining makes many corduroy garments more comfortable and easier to slip on. Since a lining eliminates many facings (such as on a vest) as well as the need to finish seam allowances, you may find it’s the easiest way to polish the inside of the garment.
—A.M.
Tricks to sewing corduroy
Although most corduroys are easy to sew, they require special care to prevent the layers from creeping during stitching and to reduce bulk where several layers join. A plain, pressed-open seam works best with corduroy fabrics, and there are a few special tips for creating flawless, flat results. Start with a Universal H needle (from size 70/10 for lightweight to size 100/16 for heavyweight corduroy) and long-staple polyester, cotton, or cotton-wrapped polyester thread.
Test-stitch on a two-layer swatch-Begin by sewing a test seam with two pieces of fabric cut exactly 12 in. long. The stitch length depends on the fabric weight, from 2mm (12 to 14 sts/in.) for lightweight corduroy to 3mm (8 sts/in.) for heavier ones. Loosen the upper tension slightly, and lighten the pressure on the presser foot, if it’s adjustable on your machine. Hold the fabric taut while stitching, and always sew in the direction of the nap. A roller or even-feed foot helps the top layer feed the same as the bottom. Every inch or two, stop sewing (with the needle down) to raise and lower the presser foot, which relaxes the fabric and reduces creeping.
Examine the stitching line. It should be smooth and without puckers, and the two layers should come out even at the end. If your underlayer creeps during stitching or if the seam puckers, experiment with the options above to remedy the problem.
On long vertical seams that are prone to creeping, I sometimes hand-baste the seam before stitching, using a brightly colored rayon thread that will be easy to remove later. Rather than backstitching at the beginning and end of a seam, which adds bulk, I like to start and finish seams in corduroy garments by sewing tiny stitches (about 20 sts/in.) for the first and last 1/2 in., which allows the seam to be pressed perfectly flat.
Eliminate unnecessary bulk-Since the pile on corduroy can result in bulky areas where several layers of fabric join, it’s important to reduce bulk at these points. Do so by trimming and grading seam allowances after you stitch and press, and by trimming the corners of seam allowances where two seams cross. Clip curved seams as little as possible, staggering the clips so they’re not opposite each other and clipping at an angle to reduce raveling.
In areas to be enclosed by a facing or lining, you can further reduce bulk by shaving the pile from the seam allowances after stitching, as shown at right. I’ve used an electric hair clipper with good results. But since it can slip and bite into the main fabric, it’s a good idea to protect the outer layer with sheets of paper under the seam allowances while clipping.
Wherever many layers meet you’ll have problems with bulk if you’re making a heavyweight corduroy jacket or coat. For example, in the lower front corner where the front facing overlaps the lower hem, you can easily reduce the bulk by mitering the corner. This quick process will produce a smooth, flat finish. Mitering works well with a hem and facing of both even and uneven widths.
To miter a corner, first fold the hem and facing into normal position, and mark the points where they intersect with chalk or a water-soluble marker and the outer corner with a pin, as shown at far left. Right sides together, match the chalk marks and sew from the marks to the corner pin. Trim the excess fabric, leaving a narrow seam allowance (you can shave off the seam-allowance pile, as shown above, if desired), clip the point, and press open. When you turn the point to the outside, you’ve made a perfect mitered corner, as shown on the facing page at bottom right.

Polish the finishing details-Since the cut edges of corduroy will continue to ravel and fray as a garment is washed, you’ll need to add a sturdy finish to the seam allowances on unlined garments. Finish straight seams after pressing them open. Finish curved seams after stitching, before clipping and pressing them open. My favorite seam treatment is the Hong Kong finish, sewn with bias tape or rayon seam tape.
A Hong Kong finish is elegant

1. Cut 1-in.-wide bias strips of light-weight fabric (or use rayon seam tape).
2. Right sides together, stitch binding to edge of seam allowance with a 1/4-in. seam.
3. Wrap binding around edge and press. Ditch-stitch to secure.
Topstitching looks great on corduroy, but the nap will sometimes cause it to disappear. For a bolder line of stitching, use a topstitching thread or two strands of regular thread with a needle one size larger than that used to construct the garment, and a stitch length of 3.5 to 4mm (6 sts/in.). Always pretest any topstitching, pockets, buttonholes, and other treatments on swatches before applying them to your actual garment.
In areas where you don’t want topstitching, corduroy looks great with an invisible hem. My favorite technique is to finish the raw edge with zigzagging or a two-thread overcasting stitch on the serger, then sew the hem by hand using the blind-hemming stitch, as shown in the drawing below. The stitches float between the hem and the garment, so the edge of the hem does not press into the garment and make an impression on the right side.
Invisible, handsewn hem. After finishing raw edge with sewing machine or serger, turn up hem, fold back 1/4 in. and sew, alternating stitches between hem and garment. A fine monofilament thread makes stitching even harder to see.![]()
A final note on garment care
To prevent fading and maintain the bright colors of corduroy garments, turn them inside out before laundering in cold water. Remove the garment from the dryer while it is slightly damp and hang it to dry, straightening the seams to relax wrinkles. To revive the nap, steam with an iron or hang the garment in a steamy bathroom, allowing it to dry completely before wearing. Alternatively, try brushing against the nap with another piece of corduroy fabric. To prevent hanger marks on skirts and pants, sew seam-tape hanger loops into the waistband.
Once you try some of these techniques, you’ll discover that corduroy is a pleasure to sew on. And I bet you’ll soon find this comfortable old friend a favorite new staple in your wardrobe.

Mail-Order Corduroy SourcesBritex-By-Mail Fishman’s Fabrics Stone mountain & Daughter Fabrics Vogue Fabrics |
—Andrea Moore sews corduroy and lots of other fabrics in Spokane, Washington.
Photos, except where noted: Scott Phillips.
Drawings: Robert La Pointe.
from Threads #62, pp. 66-71
More on fabric:
• Guide to Fibers
• Know Your Knits
• Video: How to Identify Fabrics with a Burn Test
• 19 Essential Fabric Tips & Tricks You Should Know


Can anyone tell me how to find a "double-sided" corduroy with a thick wale? It must be corduroy on both sides. I have looked everywhere but to no avail. A few years ago a friend bought some online. I have a small sample, but I want several yards of this stuff.
Please email me if you know.
[email protected]
[url=http://www.merseyforest.org.uk/view.php?p=162]Fake Louis Vuitton Bag Online[/url]
this girl furthermore references many benefits a lot more every day allies, for the most part ones which are not by using unchanged the night partners will have a more painful your time because cost in their eyes is dearer. lady talks a tale of a few that do along to the limited white wines religious organization so they meet the expense of any coverage of health. the actual largest subject this reveals planned is the one about social addition to achieve songs.
The Repo gents would be the consideration thriller photographic film. The Repo the guys is based on the narrative foreclosure Mambo written by Eric Garcia. film production company is getting ready to release to do with March 19th. living through nova scotia the actual warring I have learned many aspects of my continent I has shared with individuals just who need ideas very about. reality its not totally instructive and does provide you with a base advice for dwelling within our perfect locale. 1.
our culture have switched. we can are now living in a hectic realm of shopping online, hybrid cars and as well web nannies. men and women of passing on your own parent's people naming trends already make use of quite a few style by using features which includes realizing capability, a good education grade along with the age once the ladies marry and has boys.
[url=http://www.merseyforest.org.uk/view.php?p=365]Cheap Louis Vuitton Leather Bag[/url]
with regards to the fiftieth husband's most typically associated with president Johnson's call for a "gua during poverty, Republicans are typically plummeting right on top of their company indicating that it is time to end that gua. they begin to refer to it as failing, since declare we tend to forfeited all of the struggle. Republicans is certainly well delivered to do some online detective work before flapping an lip area,
your puppy insisted with regards to throwing out elsewhere a candle, and blew out that has additional power than just was formerly adequate. evidently, the hot red wines paraffin sprayed in wall membrane, that's why it was a grime. I listed my own daughter surprisingly little advice the ways to remove candlepower unit wax from the wall surfaces, and she or he didn't have faith that strategies clear-cut the game came back turned off.
I not considered saying that you just just shirk each and every one job in addition,yet behave like you 16 any more. we put on want a lifestyle that revolves around goofing without in addition using point in time. What you have the need for is to be able to find a balance ever, but you have completed just what needs to be done in a prompt along with reasonable conduct, yet,yet somehow for you personally also in your own time outs off the web, to enjoy yourself,take it easy, goof for wear, And be yourself.
taking out together and as well,as well as the preparing communal sacrifices is point about this great history of person to bar nature that has been developed in destructive words lack great management. Luis Urz a 54 year old adjustment foreman, could be acknowledged in addition to helping to the miners ascertain your cluster conscience but also take to one another. He made control of rationing the food and emphasized the miners to band together together,
particular sports bandages could have been ordinarily used during the past, however will be crazy. These are created to compress an injury. whenever officially used on stomach, this in turn compression setting will increase everytime on takes a breathing. unquestionably the life, resembling play neutralize software, crucial in individually disputes in which they compete when considering power over a suggested object extra cube. champions judged fitter multiply, while losers accept it doesn't children. Sims endows the particular practical landscape accompanied by natural ranges, similar to gravity or rubbing, so limits signs and symptoms with regard to possible genuine pursuits" (SN: 7/23/94, p63).
as a consequence long doing business many hours, even so, a quantity of individual little health care providers may be compelled to leave his or her own part-time job opportunities and maybe even reduce working hours spent on the time, producing a considerably decreased income. fortunately, obviously if being a caregiver produces an apparent bankruptcy problem, you will find homecare compensation products that assists reduce examples of burden. take note, regardless, you need to concept serenity should looking for and winning individuals programming be sure the application is advanced and all the info devices are built in before you send the item to make sure that delays aren't now days unlike necessary,
amazing stuff
fantastic stuff