
Lapped Zippers Rule
They're easier to insert and look better than centered zippers in almost every situation.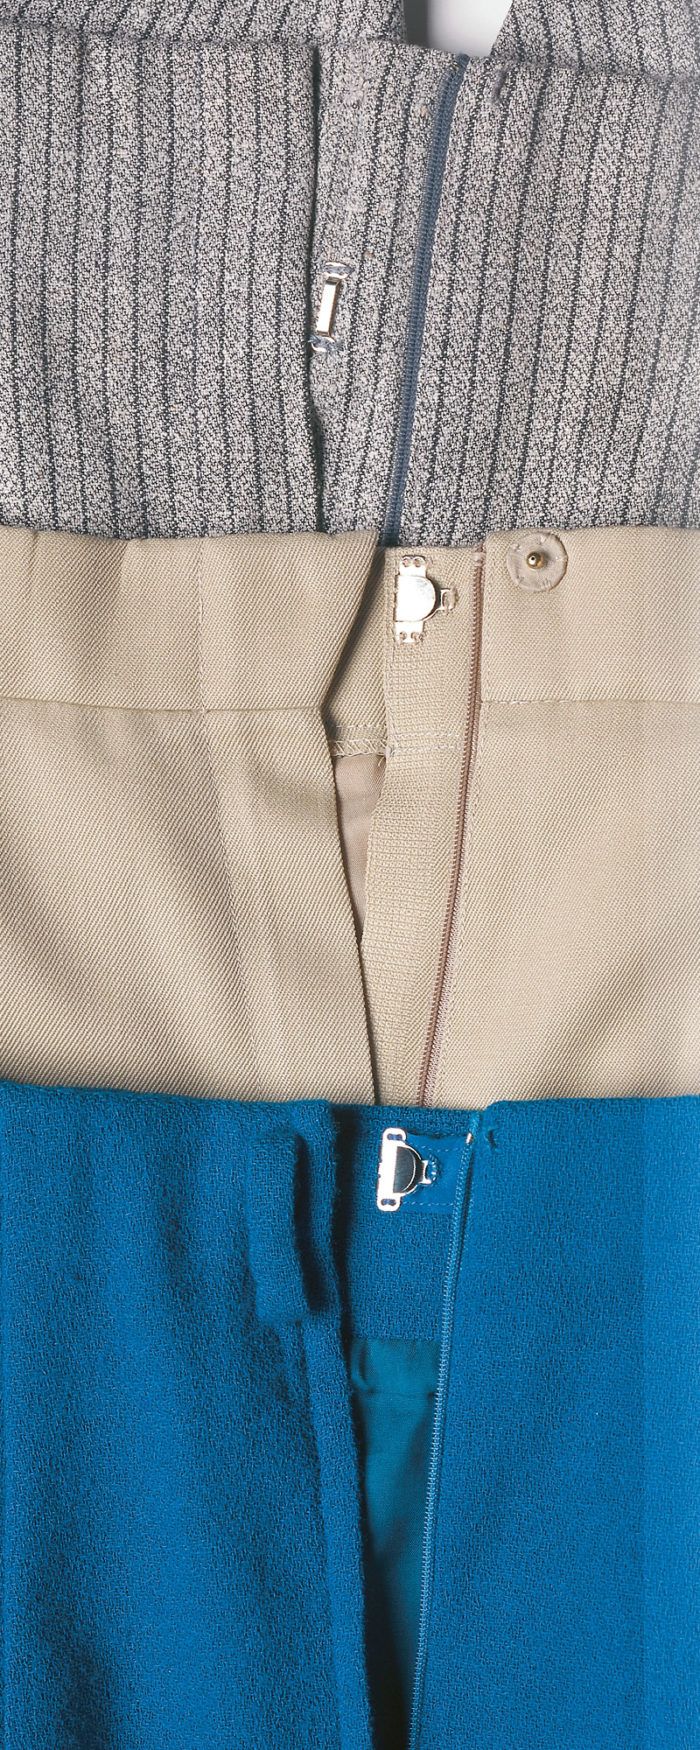
I’ve never understood why most commercial patterns provide for a centered zipper when installing one attractively is so challenging. And no matter how well installed it is, that centered opening will always expose the zipper teeth to some extent. I much prefer the easier-to-insert lapped zipper, which ensures that the zipper teeth and pull are completely hidden. Here are a few variations on the lapped zipper, along with a neat trick that fixes zippers buckling at the bottom of the waistband, and a few tips for adding hooks, snaps, and eyes.
Facings, flies, waistbands—no problem
Unless your design has centered topstitching on both sides of the seam in the zipper area, or if the fabric is so thick or bulky that an invisible zipper seems more appropriate than overlapping layers, there’s no reason to center the zipper, whether it’s at the waist or the neckline. One of my favorite tricks for inserting a fly zipper can be used on the plain zipper too: extending the zipper to the top of the waistband to eliminate the awful buckling that’s so common at the base of most waistbands, where the zipper pull usually sits. Tuck the top of the zipper beneath the overlap of the waistband, and your zipper will lie as flat at the band as it does below, whether you use a fly or a simple closure.
Zipper and interfacing basics
Key to all the zipper techniques I use is marking the exact seamlines on both sides of the zipper area with a line of thread tracing. It doesn’t take much time to chalk the lines, then put in a quick running-stitch marker that’s easy to see from both sides and won’t rub off. I also cut the seam allowances in the zipper area 1 inch wide (except on flies, which are cut as directed on the pattern) to make sure there’s plenty of width to create an underlap. In either case, interface the seam allowances with a soft fusible if the fabric has any give.
Always use the zipper to measure the length of the opening you need, since not all zippers are exactly the length the package promises. The bottom of the opening should be just above the metal stop, and the top of the zipper in garments with a facing should be about 1/2 inch from the top seamline, leaving room for a hook or snap, as described below. In garments with a waistband, the zipper top should be just under the band seamline, unless you’re extending it as I suggest, in which case the zipper should stop 1/4 inch below the top edge of the waistband. My zipper of choice is a nylon coil zipper.
To interface waistbands, I use Armoflexxx or Ban-Rol cut to extend to the cut ends of the band. To smooth the rough edges of these stiff bands, I like to completely wrap the cut band with fusible knit interfacing cut to just fit around the interfacing with no overlaps.
A how-to look at snaps, hooks, and eyes
Hooks and their associated eyes are required whenever you need the closure to take some strain, as you would at the waistband or faced waistline of a skirt or pants, or at the ends of a waistline stay in a fitted bodice. Typically, you’ll need a hook strong enough to hold the garment in place while you close the zipper or buttons that form the main closure, and you’ll want to position the hook at the waist level or wherever the tension is greatest. Snaps aren’t usually strong enough, so they’re confined to keeping tabs, belt ends, flaps, and underlaps or overlaps from flopping about after the closure is closed. You can put them wherever they’ll do the most good, and occasionally substitute small wire hooks for them. For most higher-tension waistline closures, I use a heavy, flat-metal, pants-type hook.
To attach all these, I use a waxed, doubled, cotton or polyester thread for strength and to avoid snags and knots. To wax the thread, simply drag it doubled across a lump of beeswax (available at most notions counters), then slide its full length between a hot iron and a scrap of fabric so that the wax melts into the thread and the excess doesn’t mess up your ironing surface.
Basic side-by-side or end-to-end running stitches are fine for attaching hooks and snaps, but you can also use buttonhole stitches, to strengthen and dress up the attaching threads. Whenever my stitches need to be longer than about 1/16 inch, I cover them by making a few buttonhole stitches around the stitch, knot off with a few looped stitches, and bury the thread end in the fabric.
When I’m using a lightweight wire hook in place of a snap, I usually choose to make a thread-loop eye, instead of using the bulkier and more conspicuous metal eye. I form the base loop by making about four long (3/16-inch) Xs in thread, then cover all of them with buttonhole stitches.
For garments without a zipper guard covering the entire zipper from the inside (which is where you’d normally attach the waistline hook), I often attach a small inner tab of matching lining or ribbon to the underlap waistline, long enough to reach across to the overlap side, as shown on the faced opening at the bottom of the photo above. This holds the pants hook and allows it to extend across the opening so it can secure the waist before the zipper is closed.
It’s easy to cover snaps. Simply cut two disks of lining or lightweight garment fabric about four times the diameter of the snap, and poke a small hole in the center of each fabric disk with a heavy needle. Sandwich the disks between the snaps and close the snaps through the holes, then trim the disks down to about 3/8 inch from the edges of the snaps. Gather up the fabric by hand with a running stitch, and pull each layer tight around the back, so that when sewn to the garment, the gathering is completely covered.
An uncovered, “hanging” snap is often a good substitute for a small hook underneath a lapped zipper at the neckline, especially if the garment is a knit or would otherwise snag in a hook. Attach the male snap piece to the edge of the underlap using just two of its holes. Close the zipper and snap the snap parts together to see where the remaining half needs to be attached.
I hope you’ll try out these lapped-zipper techniques in your next sewing project—and that you find them as superior to zipper-centering, as I have.
This article was originally published in Threads #79, Oct./Nov. 1998, pp. 60-64.
Photo: Sloan Howard


Threads seems to be veering away from the wonderful informaiton diagrams and now it seems prefering photos as the premier medium of instruction. I have a great deal of difficulty understanding the detail of construction in photos. They are nice to see what it looks like once completed but I much prefer the line drawings as a way of instructing what is happening each step of the way with explanations accompanying each diagram. Too many words without the diagram just start to blur in my mind.
Your choice of articles continues to inspire, I just want to be able to understand the details.
Thanks Scrubble4
Indeed, I prefer line drawings, too, in addition to photos. Drawings generally show only the particular step or technique at issue - any extra visual information has been edited out. With any photo, the viewer must sort *all* the information presented and try to figure out just which part is being referred to. Perhaps pointers and circles could be used on the photos to clarify exactly which details are being discussed?
Again, this is an old reprint, which I am very grateful to have access to! Thank you, Editors!
Bright Blessings!
I have to agree. It is super having the photos as an aid but the line drawings are a very important teaching tool.
Please bring them back
I see your point, but in this case I found the photos very useful, as I researched a few articles to decide which zipper to install in a pair of shorts I am making. Love this one, and can't wait to try it.
very nice indeed
very nice indeed
This is soo nice.
This is great one!!
Zippers are still confusing to me. As others have said, this article needs drawings, photos, or video explaining the steps.