

Learn how to transform plain, flat fabric into a dimensional surface, like a quilt without the batting, as you can see here. This new fabric has body, yet drapes, and is very travel-friendly. It can be used for garments; accents on garments, like collars and cuffs; accessories, such as evening bags; and home-decorating accents, like place mats, pillows, and valances.
by Anna Carlson
from Threads #93, pp. 26-29
I’ve always loved that wonderful pebbled texture that old quilts develop when they’ve been washed over and over again. As a designer, I’m interested in changing the way fabric looks and feels, and lately I’ve been exploring similar pebbled effects. By stitching two or three layers of fabric together, one or more of which is not prewashed, and then washing and drying the layers several times, I’ve been transforming plain, flat fabric into a dimensional surface, like a quilt without the batting, as you can see here. This new fabric has body, yet drapes, and is very travel-friendly. It can be used for garments; accents on garments, like collars and cuffs; accessories, such as evening bags; and home-decorating accents, like place mats, pillows, and valances. I’ll take you through the process I use to achieve these effects, share with you some of my results, and pass along some further suggestions for ideas you may want to explore on your own.
![]()
![]()
![]()
![]()
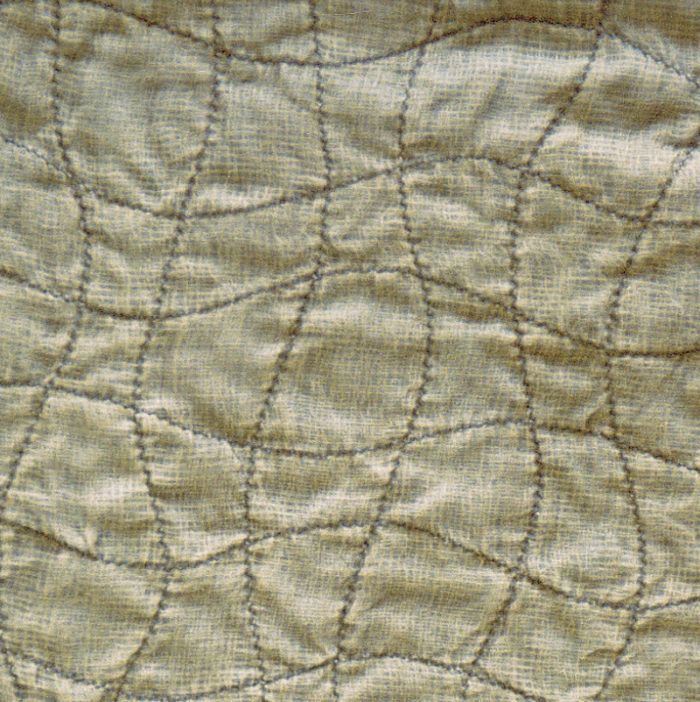
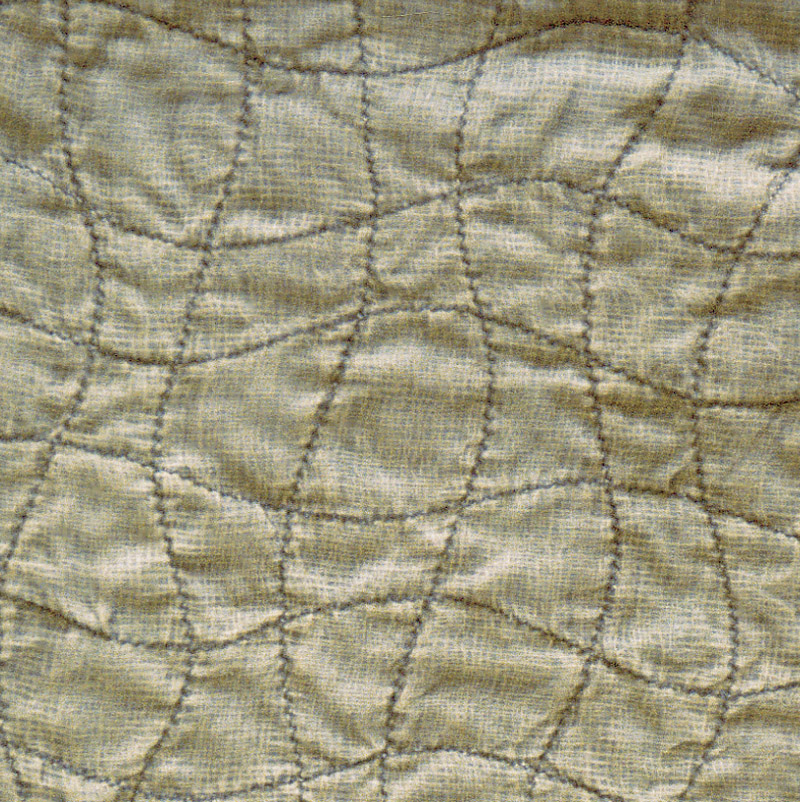
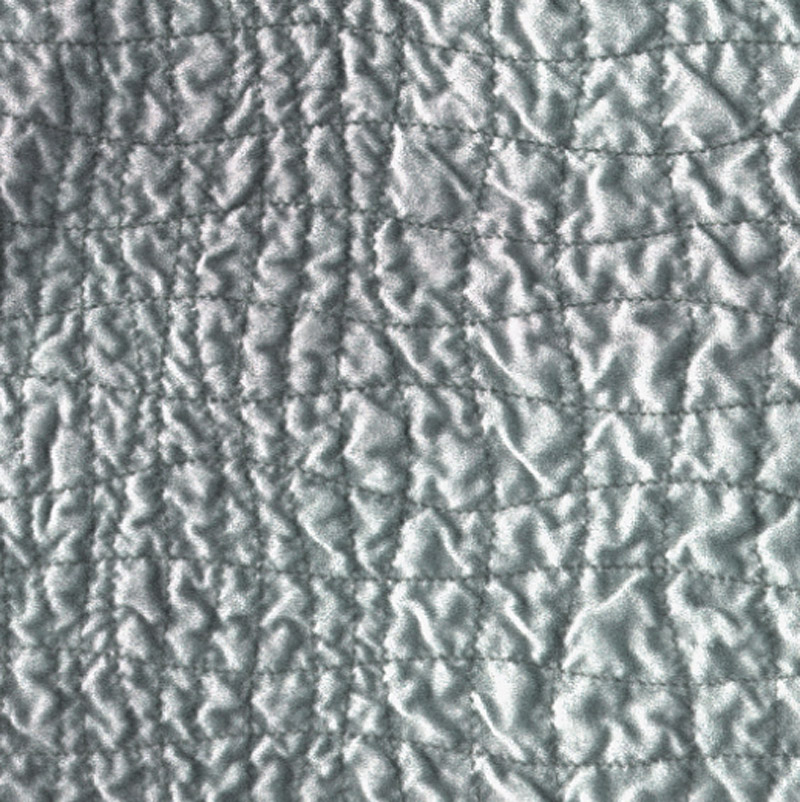
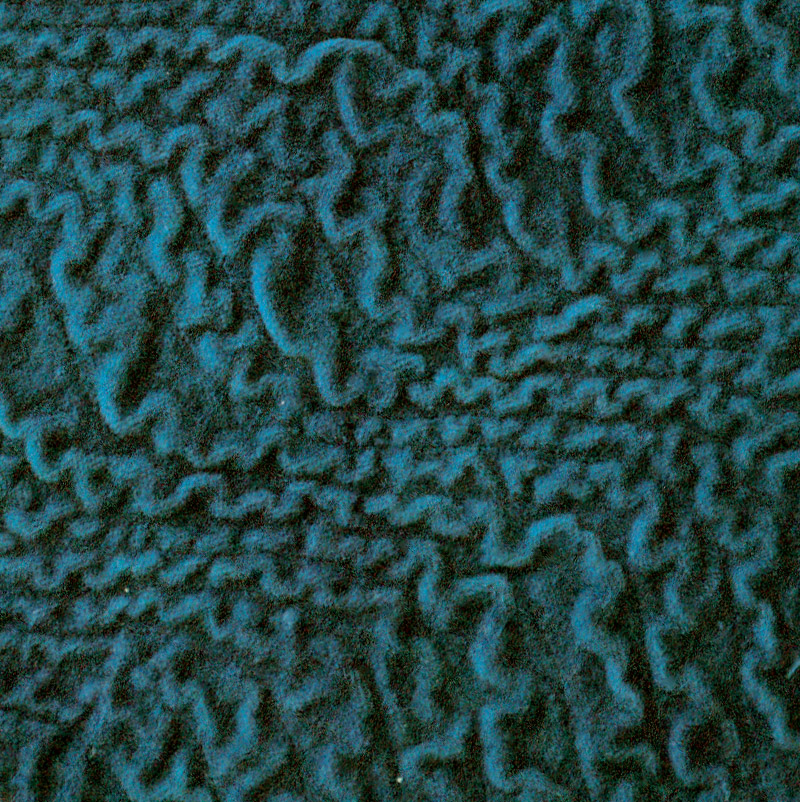
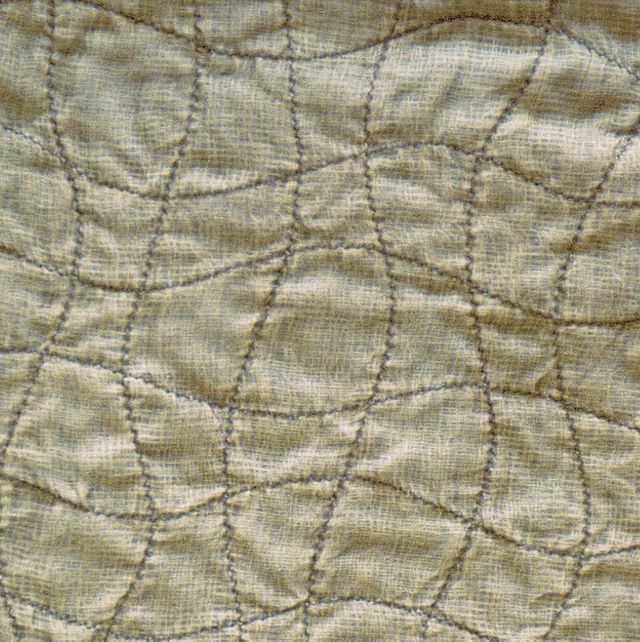
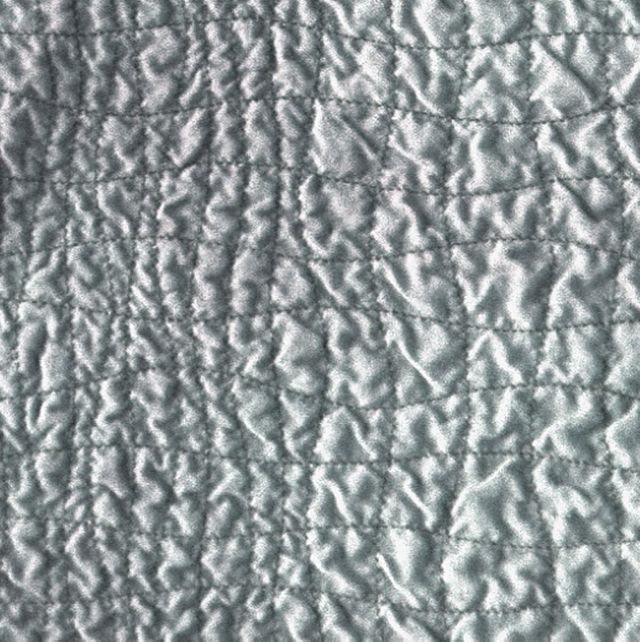
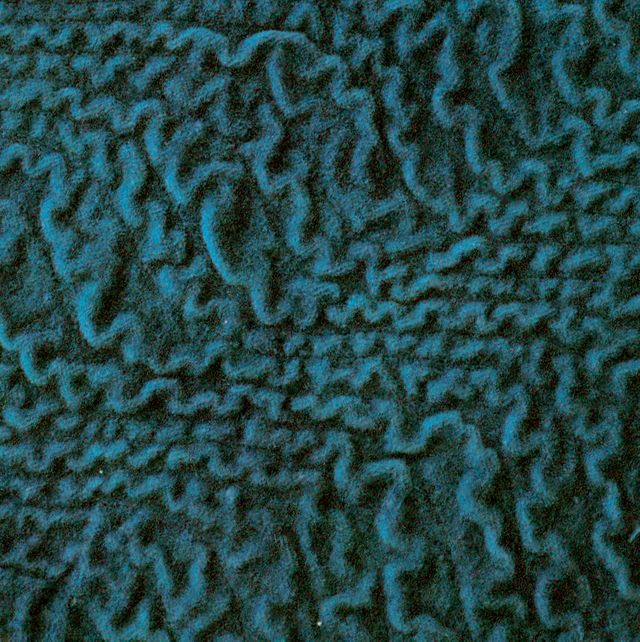
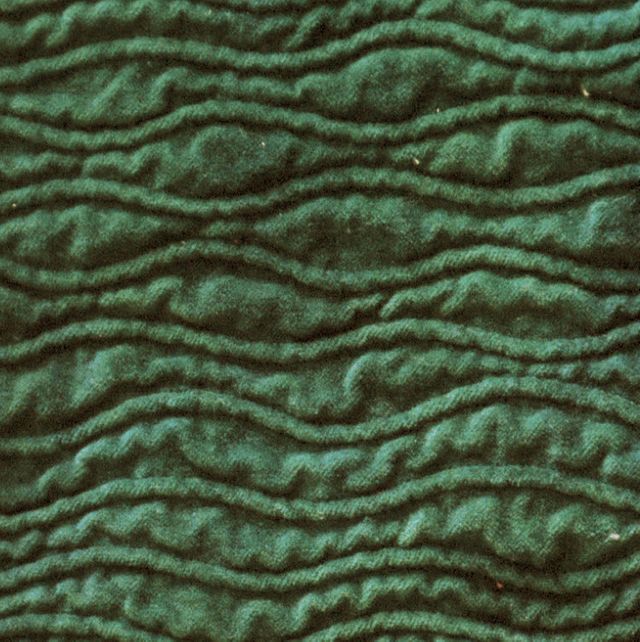
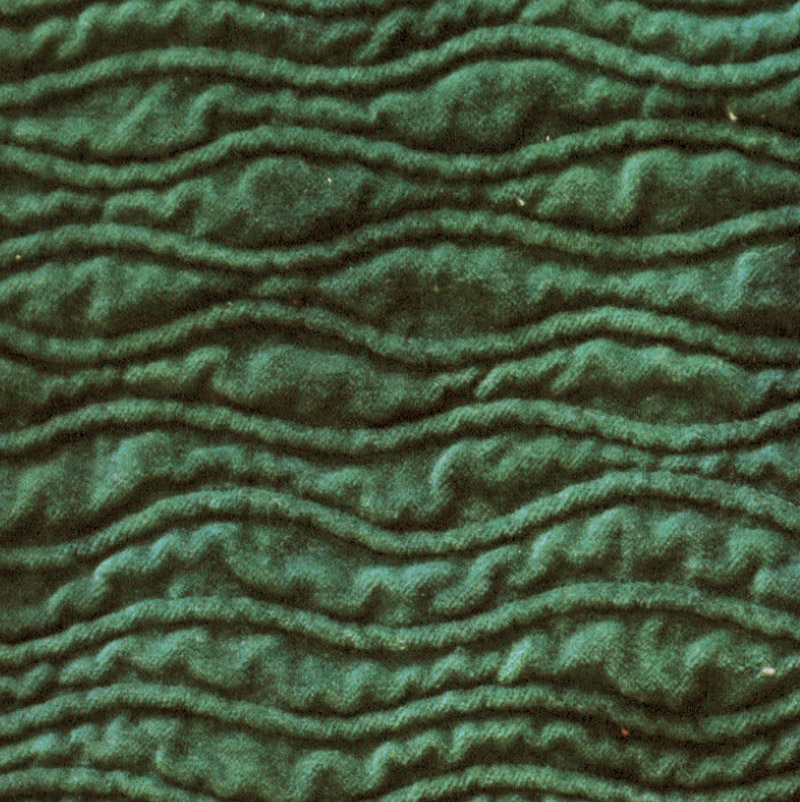 The stitching pattern and fabric choice combine to produce the texture. From top, silk organdy over cotton gauze with a wavy stitched grid; the same grid on velveteen over muslin; parallel waves on velveteen; random, double-needle waves on velveteen.
Shrink different
The two main variables in the creation of a shrink-textured fabric are the fabrics you choose to layer, and the stitching patterns you use to join them. First, you must choose a top, or “face,” fabric that can handle being washed in hot water and dried in a dryer on a medium to high setting. The face fabric must either be nonshrinkable, like polyester, or be prewashed several times before layering to be sure that it won’t shrink any further. Actually, I recommend prewashing even nonshrinking fabrics to be certain they don’t change shape.
I’ve used a variety of fabrics, from silk organza to cotton velveteen, for the face fabric, as you can see above. Cotton velveteen creates a luxurious, almost fur-like fabric when textured. Linen distresses wonderfully, and light silks can produce surprising special effects. Any patterned fabric becomes more complex as the pattern gets distorted. Wools, however, are not suitable, since most will continue to shrink and even felt when repeatedly washed.
Next, choose a suitable-weight fabric to layer on the back. You want this fabric to shrink when washed with the face fabric, so use a shrinkable material that you know has not been prewashed and does not have a shrink-resistant or permanent-press finish. To back a lightweight face fabric, I usually choose all-cotton gauze, voile, or batiste. A medium-weight face fabric works well with batiste or muslin, and heavier fabrics will require at least muslin to create enough texture; I mostly use an unbleached, all-cotton muslin (available at quilt stores). Cotton batiste and voile can be ordered through most specialty fabric suppliers, if your fabric store doesn’t have them. Cotton gauze, or cheesecloth, is available at paint suppliers or in hardware/houseware departments of stores like Kmart and Target (be sure you are getting 100% cotton!).
If you want the shrinking fabric to be the lining also, you can choose a cotton print or colored solid, but these may not shrink as much as the fabrics mentioned above. Make a sample to see if enough texture is created, as described below. You can also sandwich the shrinking fabric between the face fabric and a lining. Either approach works well if you’re making place mats or a simple jacket, for example, and don’t want the extra step of lining the project.
Stitch regular
The second variable when creating a stitched texture is the stitching. Because the nonshrinking face fabric is free to bubble up only where it’s not stitched, the stitches and arrangements of stitched lines you use to join the layers together will determine the pattern of the textures that are created. So, to get consistent, controlled results, I stitch in a consistent way and preplan my stitching lines, as I’ll describe in a moment.
I’ve effectively used plain straight stitch, various zigzags and serpentines, and many other decorative patterns. Keep in mind that the more densely you pack the stitching or stitch pattern, the more you’ll stiffen the fabric. Arrangements I’ve used include grids, free-motion random patterns, parallel lines, and following the pattern in a printed fabric. A regular grid pattern creates an even, allover texture pattern. Parallel lines create a directional orientation, either vertical, horizontal, or diagonal, as shown in the swatches above.
Prep samples
Prewash the face fabric in hot water with some detergent and dry it on a medium-high dryer setting. If you’re using a fabric that may have residual shrinking, like cotton or linen, repeat the process two or three times. I generally don’t add any more detergent after the first wash. Do not press the fabric! Remove it from the dryer immediately to reduce wrinkles and roll it loosely on a tube until ready to use.
Cut pieces at least 10 in. sq. for your samples, so you can get a good look at the effect of shrinking. If you like the texture, the exact amount of shrinkage isn’t very important, because when you’re making fabric to use, you’ll be adding extra seam allowance to the pattern pieces and trimming to size later (as shown at center above).
Lay the face fabric right side down on a gridded mat, oriented so that the bottom edge and one side line up with the lines on the mat, then lay the shrinking fabric on top with the bottom edge and one side aligned. Tape the corners to your mat to keep everything in place; pins cause bumps under the ruler when marking the stitching lines, so don’t use them. Tape down every 10 in. or so on larger pieces to keep them from shifting.
Draw guidelines
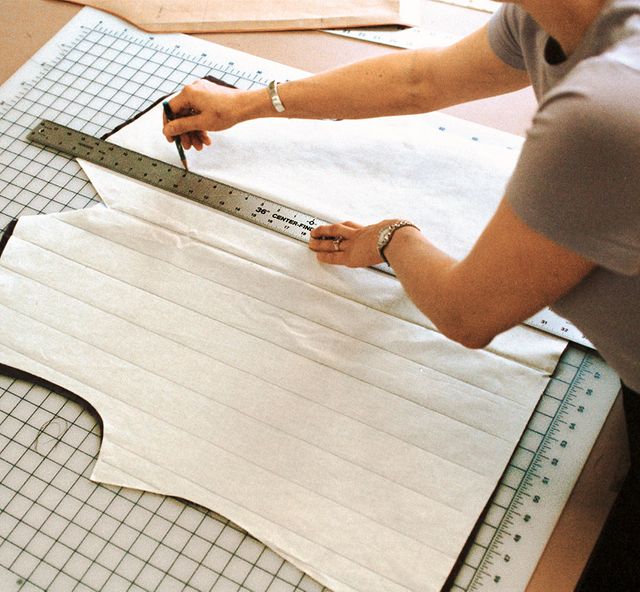
Next, draw or mark the stitching lines you plan to follow on the back of the shrinking fabric, using a wash-out marker if the backing fabric is also the lining. Marking on cotton gauze can be challenging—I found a felt-tip pen and light pressure work best. For straight lines, I use a ruler and the 1-in. gridlines on the mat as guides, as shown at left. Hold the ruler down firmly and release pressure on your drawing tool every 6 in. or so to allow the fabric to relax.
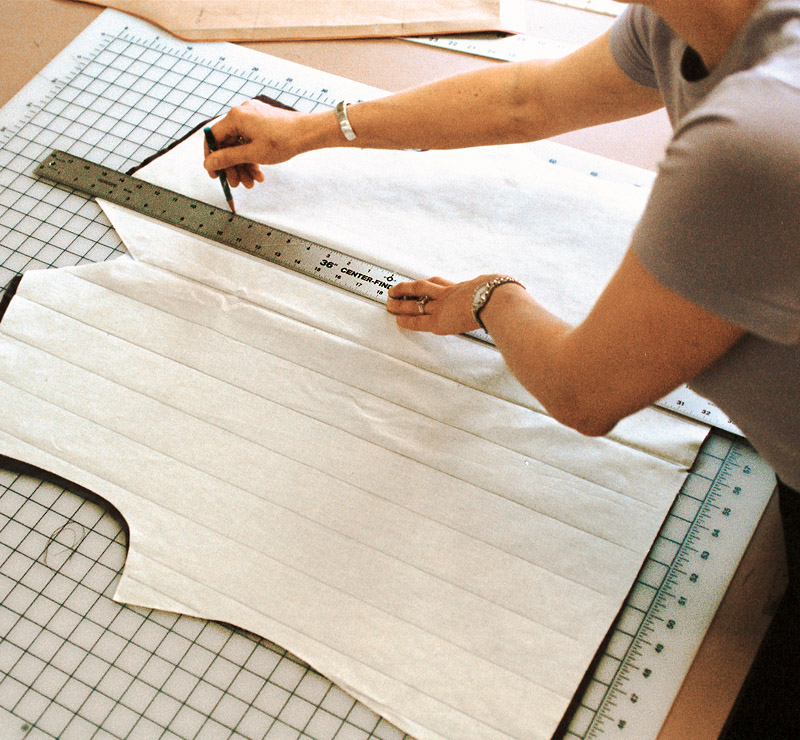
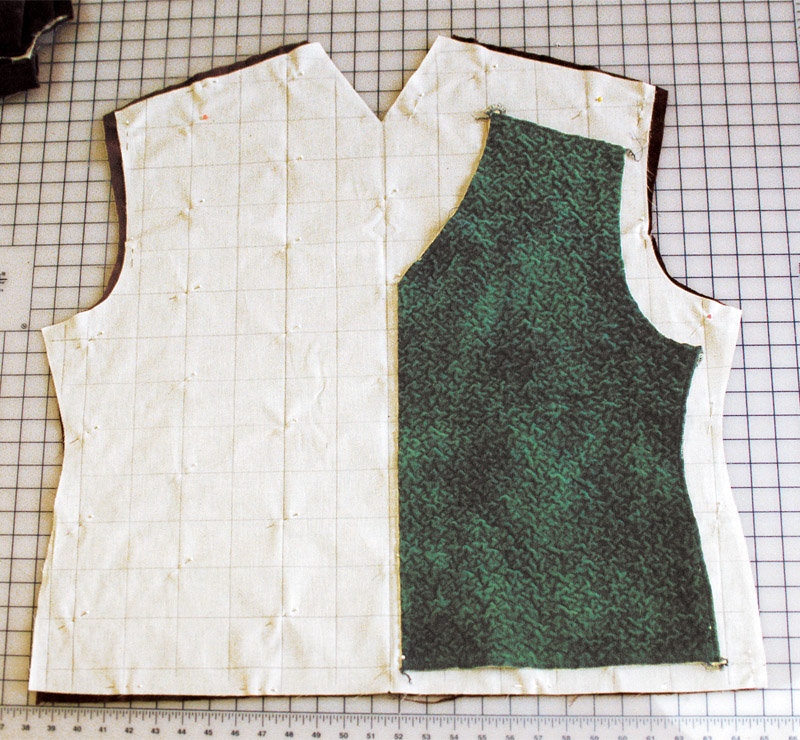
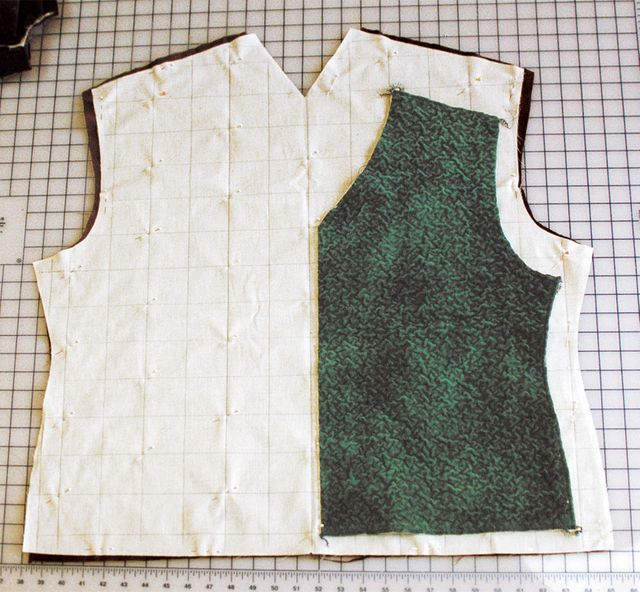
To mark stitching lines on layered fabric, align garment centers to gridlines (left). Although the fronts will be separated and trimmed to the pattern shape after shrinking (see a shrunken, trimmed front at right), Carlson keeps them together at this stage, so marking and stitching will match across the center line, later marked with clips or large notches top and bottom. The mat’s gridlines simplify ruler placement during marking.
For regular wavy lines, or anything other than a straight line that I want to repeat, I make a template out of thin cardboard, shifting it over every 1/4 in. to 1 in., depending on how close I want the lines to be. To keep the spacing regular, I line up the template with orientation marks, such as the gridlines on the mat or ones I’ve drawn in. Sometimes I’ll shift the template a little each time in order to offset the guideline. For irregular wavy lines (my favorite variation), I’ll draw straight lines in even increments, as if for a grid or parallel line design, but as I’m stitching over each line, I just wave the fabric to and fro to create evenly spaced waves.
![]()
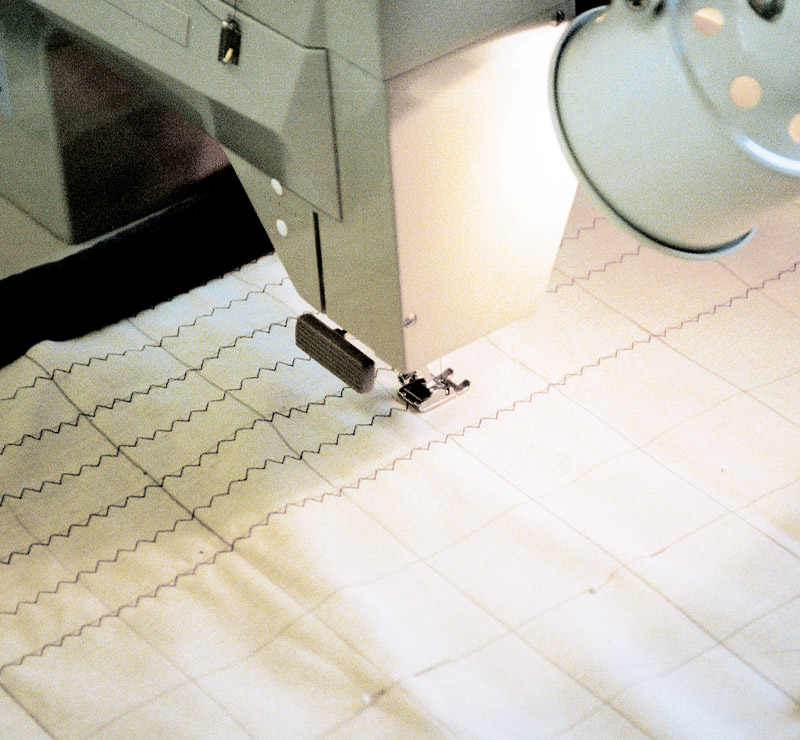 Keep layered pieces rolled for smooth handling under the machine. Carlson usually marks every other stitching line, stitches over marked gridlines first, then goes back and stitches in between, making it easier to judge the placement of the unmarked stitching lines. Stitch and shrink
After marking, pin or baste every 4 in. all over the pieces to hold the layers together, then remove them from the mat and machine-baste along the bottom edge only. To create the maximum texture, especially on lighter-weight fabrics, adjust the tension on both your bobbin thread (if you can) and the top thread as tight as you can make it, without pulling the stitch out of balance. If you’re using a decorative stitch, check to be sure it looks good on the face side.
Stitch all of your parallel lines in the same direction, starting at the same edge each time; if you switch directions, the texture may appear irregular after being washed. Check the right side frequently for tucks, and roll the fabric as you go to keep it moving smoothly through the machine. When you’ve finished stitching all the lines, sew around the edge of the fabric and clip any loose threads.
Now you’re ready to shrink it. For samples, a bucket of hot water and a few drops of detergent will do—just swish them around, and let them soak at least 30 minutes, then rinse and dry in the dryer on high, repeating the process if you plan to do so for your finished project.
Making the real thing
When you’ve decided on your stitching pattern and backing fabric, you’re ready to begin. Cut your pattern pieces out of the face fabric, adding approximately 2 in. all around for shrinkage, plus an extra 1 in. on the lengthwise grain for each piece (since most fabrics tend to shrink more in length than in width), and even more if your fabric frays a lot. Cut the same size pieces from the shrinking fabric.
Whenever possible, I like to place pattern pieces that have an on-grain seam or closure in common, such as two jacket fronts, together on a fold and stitch across both before separating them, so the stitching lines will match across the garment. Mark both the face fabric and the shrinking fabric with a clip at center, top, and bottom to help align the layered fabrics to the grid beneath, as shown at left above. Mark and stitch each piece as you did for the sample. I recommend allowing most of a day to do the stitching on a jacket-sized project.
When all the pieces have been stitched, baste all major symmetrical pieces—such as the two sleeves, and the fronts and the back of a jacket— right sides together, stitching around the edges. This will keep the front surfaces from getting washed-in foldlines. Wash and dry everything just as you did the sample, repeating if necessary. After everything has dried, remove the bastings and give each piece a light steaming, face down on the ironing board, just enough to flatten them for cutting—don’t press out the wonderful texture you have just created. Hang the pieces over-night as you would for a knit, as they may stretch slightly.
Tips for textured fabric
When sewing, handle the textured fabric as you would a velvet: Don’t press hard, and use steam and your fingers to open seam allowances. To prevent fraying, finish seam allowances by serging or with a bound (or Hong-Kong) finish, even if the garment is lined. Before seaming, always staystitch each piece just inside the seam allowance with the right side down toward the feed dogs. This will evenly distribute the excess face fabric so you won’t get tucks in the seam.
To add more interest to your textured fabric, try stitching over some of the bubbles to flatten them. Consider adding appliqué, embroidered designs, or couched yarn. Beads sewn onto the stitching lines or into a bubble can make wonderful additions to textured accessories and accents. Have fun!
Anna Carlson designs and writes from her studio in St. Paul, Minn.
Photos: David Page Coffin


Anna: I love this work. I am addicted to texture, loving the shade on shade effect. I would have enjoyed seeing some finished outfits of this work. I would think the heavier pieces such as cotton velvet would make excellent purses and vests. A blouse from the silk? Samples of finished garmets would be super. Great Idea! Thanks for sharing!
Scrubble4
What a great idea. I love working with texture. I will deffinately have to make some samples as I can easily see this technique incorperated in my work. Really exciting :-)
Birgitte
http://www.SewDanish.etsy.com
Scandinavian Textile Art, Unique Handmade Supplies
i used this technique for a vest that i made mt son when he was four, he wore the vest for as long as he could, and he further instructed me that 'i could never give it away'. I used a fabric with assorted vehicles that were on a green background and i made the lower part of the vest in black wide wale corduroy. i think he looked very fetching in it.
i've also used this technique to remake fabric for other projects, yeah, it is time consuming, but the accolades are worth it in the end.
I love this idea! As soon as the holidays are over, I'm going to make a jacket using this idea & tenique.....I can't wait to purchase my fabrics!
Thanks so much for your article and inspiration.
this is FABULOUS! I am going right to my table and start stitching and shrinking. I think I am going to make a small bag first, then work on a top. I need a new travel friendly summer top and this looks like just what I need. ;D
Very pleased to have found this article, I've spent all day going through back issues only to find it in No. 93, one of the few issues I don't have.
Can't wait to experiment!
Love your work