

Fabric rolls are the perfect way to manage unusually shaped or silky fabric pieces.
Get your fabric stash in order
It’s nice to imagine your entire fabric stash folded flawlessly on shelves or uniformly stacked in color order. But when stash fabrics come in different shapes and sizes, this vision can seem far-fetched. Some fabrics hold their lovely folded shape when set aside, but there are those that seem to instantly expand, unroll, and topple over before your eyes. That’s why you’ll want to avoid limiting yourself to one organization method. Often, a variety of techniques are necessary to create the organization system of your dreams. I’ll share some tips to help you get started.
1. Sort, sort, sort!
While it may be overwhelming to go through all your fabric piece by piece, it is the only way to know what you have and how best to manage it. As I was going through my hefty stash, for instance, I found multiple scraps of the same fabric in various places. This discovery helped me know exactly what I was dealing with before moving on to the next steps. Once you sort the fabric, you can determine which organizational methods works best for you.
Begin sorting by placing textiles in groups according to fabric type. (If the majority of your projects are color-based, however, you may choose this route, instead.) This means you can make a pile for cottons, knits, denims, wools, silks, satins, flannels, linings, etc., so that everything is accounted for. If you come across a piece of specialty fabric, simply assign it to a “miscellaneous” pile. Now also is a good time to create a scrap bin for fabric pieces that are too small for projects or that have minimal yardage. Alternatively, fabric pieces that are too small to use can be discarded. In addition, consider parting ways with any fabric that you never really liked or can’t see yourself using. I realize this is a big step, but if the fabric is just taking up valuable space, it might be worth getting rid of.

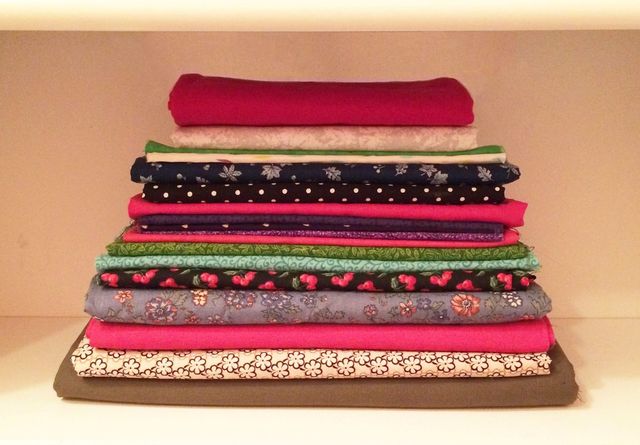
This is one portion of my fabric stash that clearly needed attention after multiple moves.
2. Fold bulky fabrics with lots of yardage and thin, easy-to-manage fabrics.
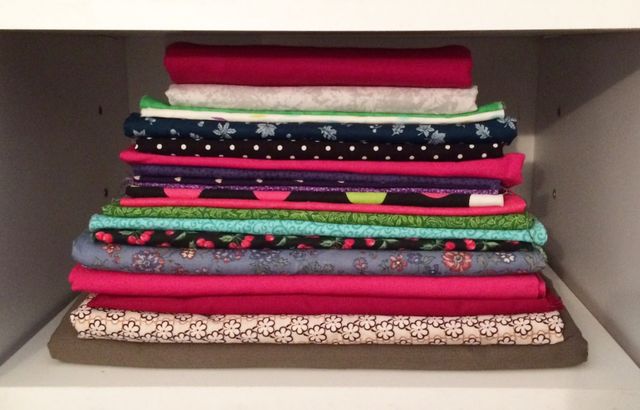
Once you’ve determined how much of each fabric you have, it should be easier to figure out how to manage the categories.
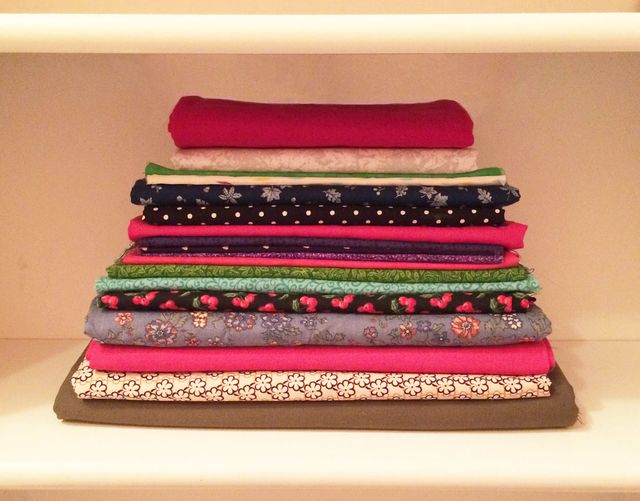
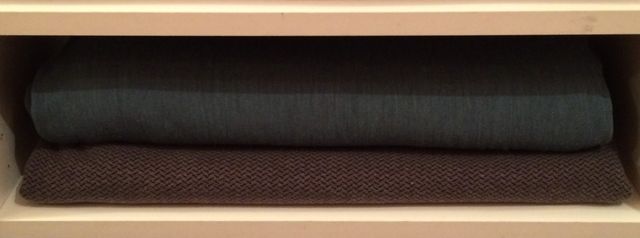
Bulky fabrics, for instance, take up a lot of space and cannot easily be hidden in baskets or bins. The best thing to do is to fold these textiles as uniformly as possible and stack them on shelves to accommodate their volume. If you have fabrics on bolts, however, feel free to keep them as is. Bolts can be stored easily in a closet, on shelves, or neatly lined up in a row.

These bulky knit and wool fabrics fit perfectly on this wide bookshelf.
Thin, easy-to-manage fabrics are a pleasure to fold, and the little rectangles stay intact once they’re set aside. Better still, they don’t take up much space. Once folded, stack these textiles on shelves or place them in an appropriately sized basket for maximum visibility.
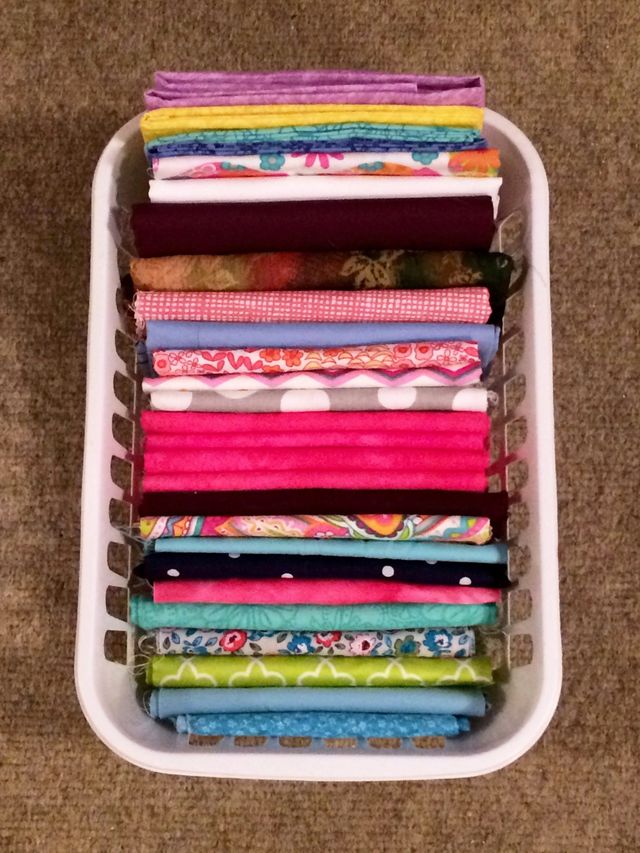
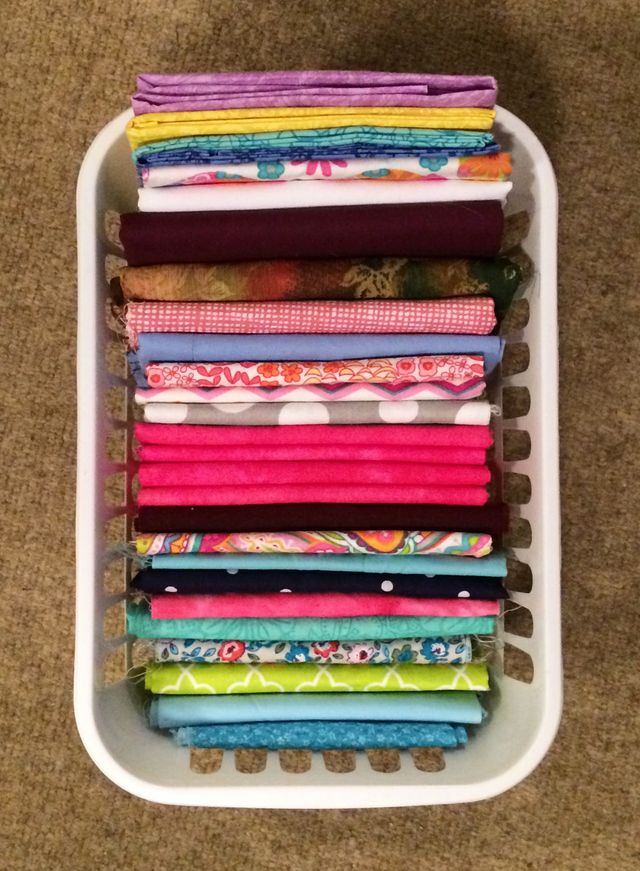
 This 10-inch by 6-inch plastic basket can house a number of thin, folded fabrics.
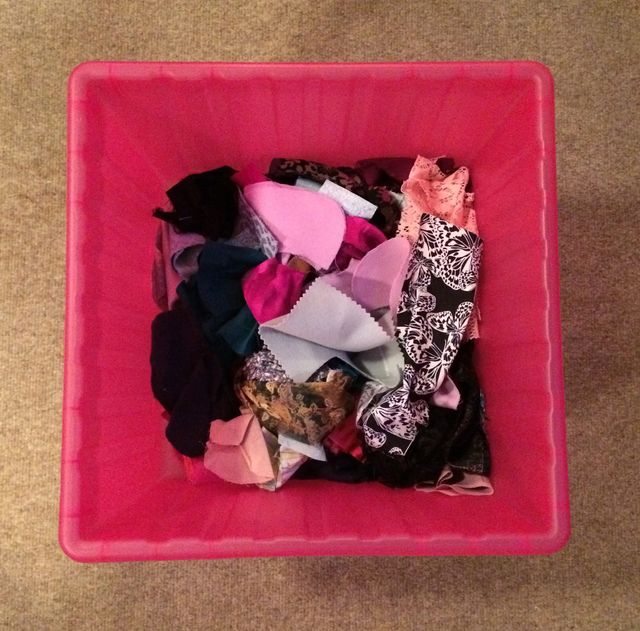
3. Keep tiny scraps in open bowls or bins.
The easiest way to keep small scraps together and organized is to place them all in a large bowl or bin. This enables you to sift through one container to find exactly what you need. Be sure the container isn’t overflowing and that there’s plenty of room for more scraps.
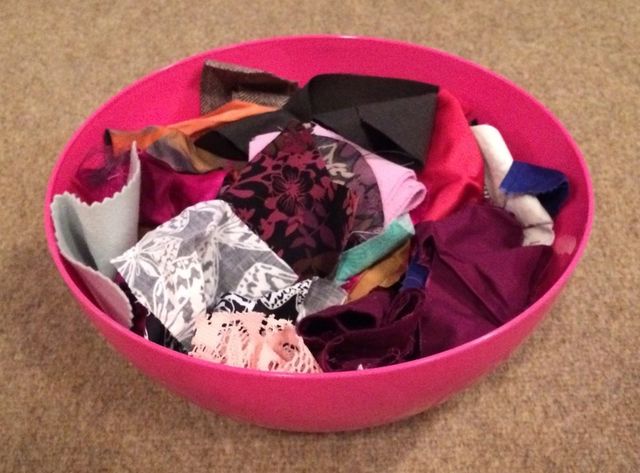
 For small fabric stashes, a medium-sized bowl may be all you need.
  This wheelable storage crate from IKEA provides plenty of room for my ever-growing fabric scrap collection.
4. Make everything as visible as possible.
Organization is about knowing what you have and being able to find it when needed. That’s why it’s so important to keep everything in your newly organized fabric stash as visible as possible. You may be able to say bye-bye to those last-minute fabric shopping trips and use what you have, now that you can see it.

If only I had known I had this much pink cotton fabric, I probably wouldn’t have needed to purchase more.
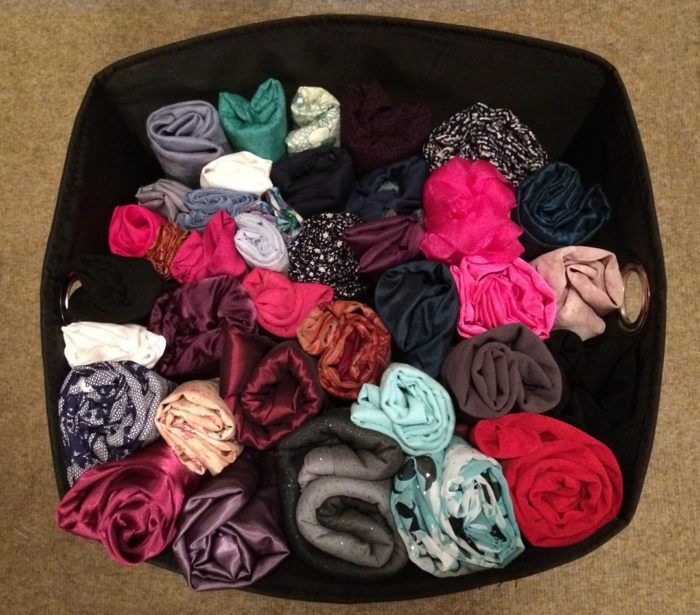
5. Roll oddly shaped or silky fabric pieces.
It’s frustrating to make oddly shaped or silky fabric pieces look tidy and organized. I recommend rolling them into bundles that look neat and stay together.
In the following example, I took five pieces of the same fabric and bundled them into a single roll. Everything remains in one place and can easily be found.
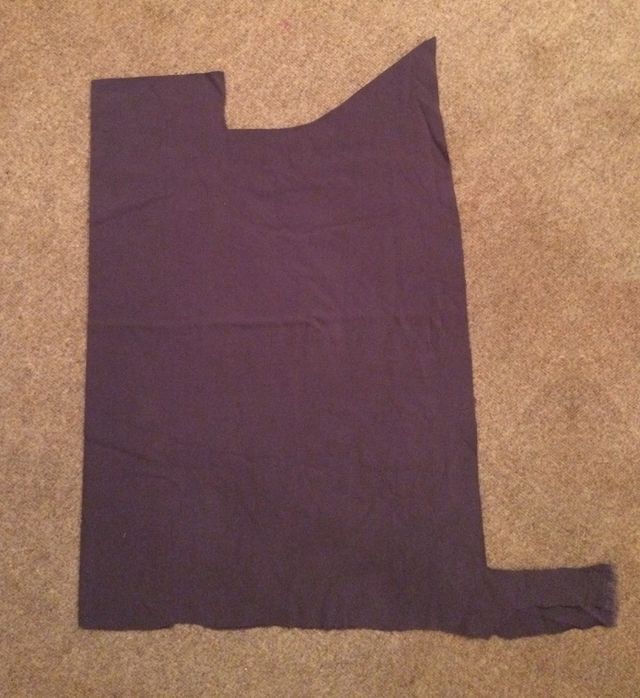
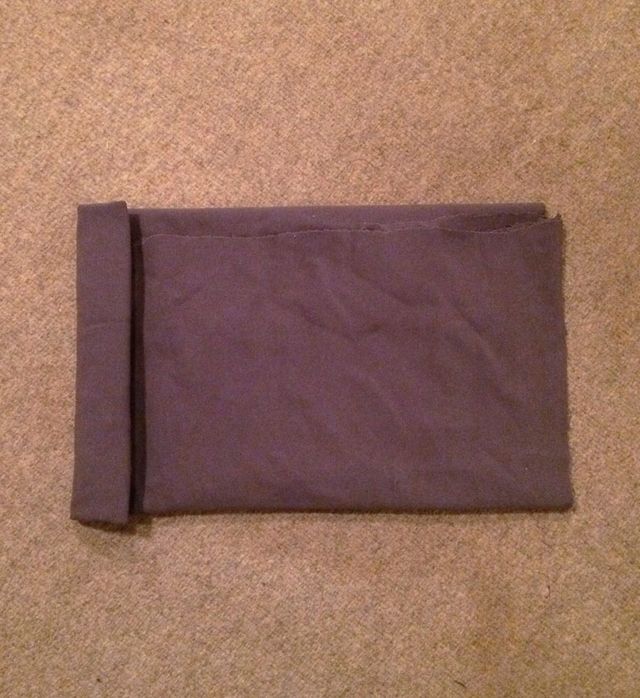
a. To begin, lay the largest fabric piece on a flat surface. Smooth out any wrinkles. Note: A loose fabric strip was used to tie the roll together in the final step. If desired, cut a thin fabric strip from this or another fabric piece now. Otherwise, use an alternative method to bind the roll together.

Feel free to fold in or cut off irregular scrap sections, such as the one at the bottom right corner of this piece.
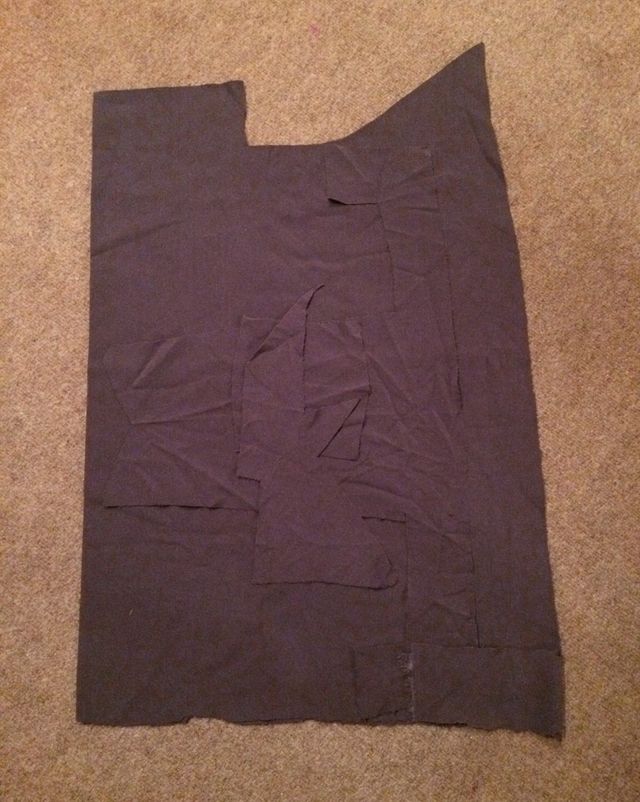
b. If applicable, place additional scraps on top of the largest piece. It’s OK if they hang over the edges.
 Try to spread out the pieces so no one area contains too much bulk.
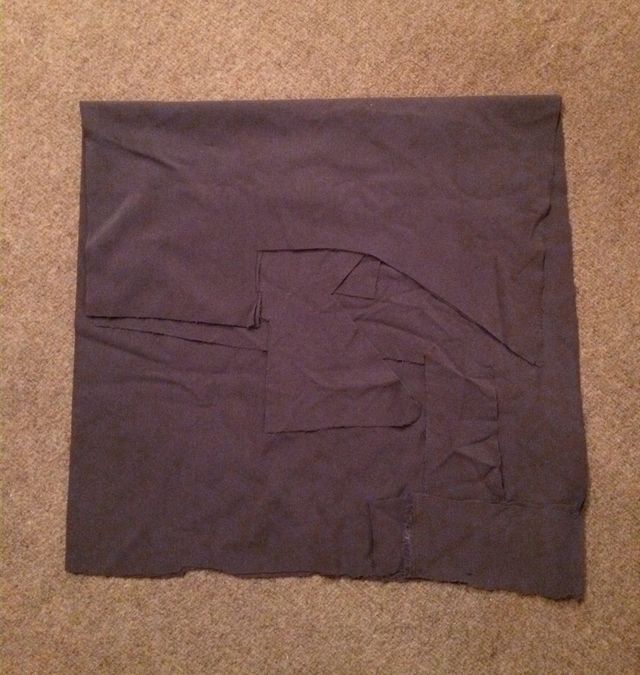
c. Fold down the entire top section as far as desired to create a straight edge.
 The farther down the fold is, the shorter the roll becomes.
d. Fold up the bottom section until it almost meets the top edge.
 This step may vary based on the fabric’s size and can be adjusted as necessary.
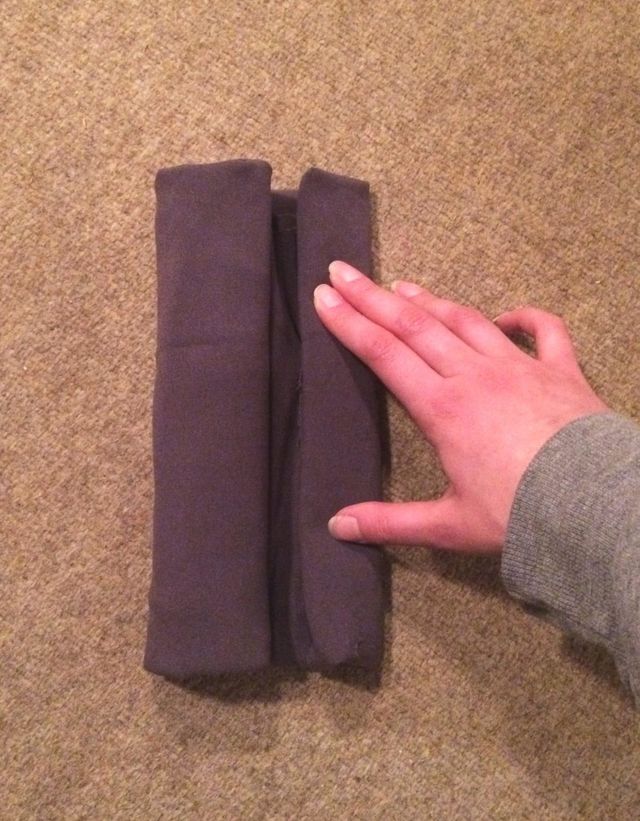
e. Start rolling the fabric from one side.
 Create a tight fabric roll to make the bundle as neat as possible.
f. Once you get close to the opposite side, roll that edge in a couple times.
 Since the opposite side might have some jagged edges, it helps to roll it in a few times to create a polished finish.
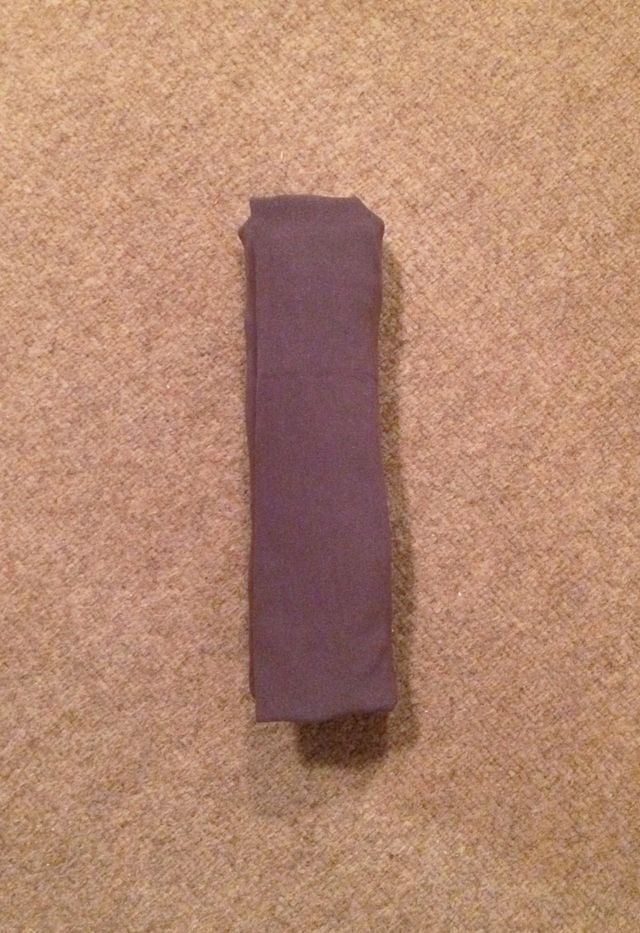
g. Join the two rolls.
 This results in a compact roll of scraps that can be opened or put away easily.
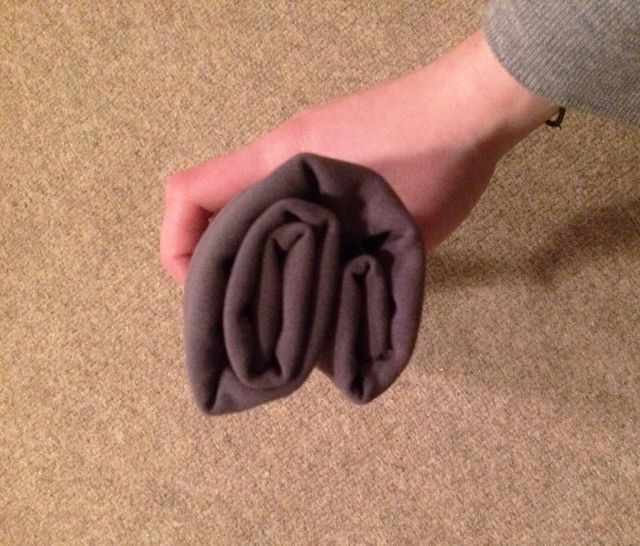
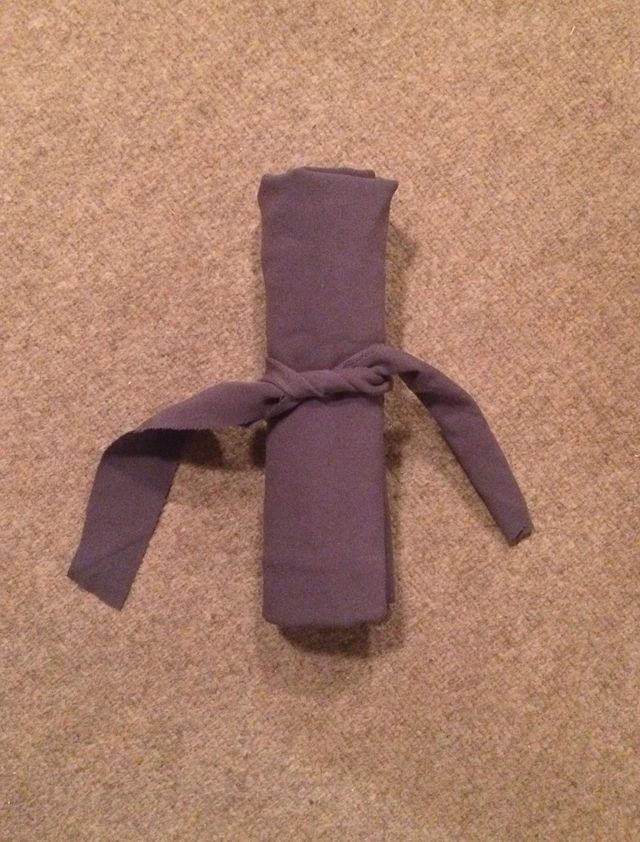
h. Finally, tie the roll together with a fabric strip.

Now the roll won’t come apart unless you need to untie it.
Once you have several rolls, place them in a basket or on a shelf so they are easy to see. You can also choose to section off the basket and group the bundles by fabric type.

Fabric rolls are a great option for managing materials that slip, slide, or have an irregular shape.
What other fabric organization tips do you have? Are there any storage units or containers you would recommend to other sewers? Please share your comments below!


Take the time to MEASURE & LABEL your fabric! This is a game changer. I pin a little paper label to the folded edge noting length+width, so when I'm ready to sew, I just grab a pattern and 'shop' my stash -- never have to pull and measure a piece just to see if I have enough. I also add special reminders like directional print, border print, dry clean only, etc. So much FASTER to get down to sewing something wonderful!
I have WAY too much fabric? I prefer to hang as much of it as possible in order to eliminate the distortion caused by storing folded on shelves or in tubs. I completely unfold it, then fold it again crosswise until it's about 15" wide. I then pin the selvage edge to a wire hanger - large safety pins or long straight pins, depending on weight of fabric. The other selvage edge hangs loose, nothing is pressing folds into the fabric, creasing is minimized, and the center lengthwise crease starts to relax. I pin or staple a note to the selvage with width, yardage, and an "accession" number. I have a binder, arranged by fabric weight and type, with a swatch of the fabric, width, yardage, fabric content, manufacturer, date & source of acquisition, intended use, if any, and any other pertinent info about the fabric plus the accession number and where it's stored. Because I'm really compulsive & have so much fabric, all this info plus a scan of the swatch is in a database, so if I'm looking for something really specific, I can find it by color, source, weight, whatever -- and confirm with a picture. When I use the fabric, I note that in the binder and the database - along with what I used it for and the pattern number if applicable. And, when I want to make something, I can start by going through my binder before wading through the actual cuts of fabric.
I have a couple tips. When I get new fabric, I create an index card with the date purchased, fabric content, washing instructions, yardage and what I think I bought it for, cut a sample with a pinking sheers and attach the sample to the card. I then put it in the appropriate container with like fabrics and note on the card which container it belongs in. I also measure and label large scraps of fabric with a shipping label once I'm done cutting out the project. Once I'm done sewing that project, I usually sell those large scraps at a consignment store. I also keep a clothing construction log so I have a record of the fabric, types of interfacings, pattern information, any fitting changes made during construction that I need to adjust the next time I make it.
I save selvage strips and use those to tie rolls/bundles of fabric. I find lots of uses for them.
GREAT IDEA!!!!!
I hang my fabric and attach a label of how much yardage.
Very interesting ideas. I'm overwhelmed with fabric, but I have a lot of projects that I want to do and I got much of it on the cheap. It is nice to be able to share as well! I just hope when you say that you get rid of fabric that is too small, that as long as pieces are 2.5" x 2.5" and in cotton prints, package them up and donate them to your local thrift store. This is how I have been able to obtian lots of fabric and scrap pieces and some of them have already found their way into my current scrap quilt. Thrift stores will take fabric scraps of all types and I've heard that schools do as well. Just don't let them end up in a landfill! I loving shopping at my thrift stores as it is the only place I can afford to shop and I have gotten some great quilting fabric that I would have never been able to afford otherwise :) Actually I get just about all notions and other goodies for all needlework at the thrift store. It just might take time to 'find' them all.
I also hang my larger pieces of fabric as i often just buy three yards. I like the idea of labeling the amount. For smaller pieces that I roll I used pony tail elastics around the roll---quick and easy.
I bought acid free card stock, 8.5 x 11, used to store comic books. I fold my fabric over it and use a label or pen right on the card stock with the fabric information and amount. When I use it and have any left, I note that amount, what pattern I used, and any other notes.
I've seen so many articles like this which advocate 'visibility' over practicality and protection. Your fabric stash (or thread, yarn, ribbons, etc) is an investment. No matter if folded, hung, or put in bins, please DON'T leave your fabric sitting out where it gets dusty, or worse faded by sunlight. Make sure it is enclosed, either containers with lids, cloth covers, garment bags over hanging fabrics, or shelves or cabinets with doors. If you have a dire need for all of your fabric to be "visible", then at least use clear lids, garment bags with clear sides, or shelving with glass doors.
I have an Excel spreadsheet where I enter every piece of fabric when I purchase it. I have approximately 1800 yards of fabric plus several small 28 qt. tubs of fabric scraps. Since my sewing room is so small -- 8 x 10, it is easy for fabric to get lost. My spreadsheet contains the following information for each piece of fabric -- Fabric No. (numerical order), tub #, description (brief) of each fabric such as "blue and green sailboat print on white", type of fabric (poly cotton), yardage, width, amount of fabric, net amount left, amount used, brief description of project completed (S3936, boys pjs size 14-16), date purchased, where purchased, and columns for additional comments. I also have a three-ring notebook that contains a condensed version of this information. I print out a page on cardstock with lines and columns for each tub number. I include the tub number at the top. My columns are for fabric number, description, fabric content, yards, width, and the last column holds a 1-inch sample of the actual fabric that I either glue or staple to the form.
My fabric is stored in clear 28-qt. tubs because I can't lift anything heavy. They are stacked in a five-foot closet with bifold doors for easy access. As a tub's contents are sewed, I add more fabric and enter it in the spread sheet and notebook. Each piece of fabric is either folded or rolled and has a post-it pinned to it with the tub number, description of fabric, yardage and width. As I use a fabric, I pin the note to my small dressform pincushion until I record what I did with the fabric.
This may seem like overkill, but I had so much fabric that I had trouble picturing each piece (how do you distinguish 10 pieces of navy fabric)and this gives me a visual recall of most fabrics. I can locate most fabrics quickly by looking for the sample and then pulling the tub. I draw a line through each entry as it is used up.
I was coloring in the row when I used up a fabric on my Excel inventory and eliminating all entries of that color at the end of the year but realized that I could use the entries for tax purposes for the many charity projects I sew for so each year's projects get a new color.
To go even further, I have an Excel spreadsheet for each year where I type the month in bold large print and list each project completed by fabric number, yardage used, number of items, brief description of fabric, pattern number, and a few words describing project "FSS shorts outfit or grandson's pjs.
This sounds more complicated than it really is. It only takes a few seconds to record a new piece of fabric or update each entry. One caution -- be sure to have the first column highlighted in the spreadsheet when you make any changes or all your information can shift up or down a row beyond that point. The info will still be there but the tub number will be off a row or two from the rest of the entry. That takes awhile to correct but I can reference the notebook to make corrections.
Thanks a lot for this informative post...
I purchased 4 - Better Home & Gardens 8 cube Storage Organizers & 2 - Better Home & Gardens 4 Cube Storage Organizers. I stacked each of the 4 cube on top of a 8 cube so they would be almost to the ceiling. Then another 8 cube I put on it's side then put another 8 cube upright on top of it. I have filled 11 of the cubes with newly purchased fabric. 6 cubes have second hand items for repurposing. Other cubes hold interfacing, sewing patterns in bins that I bought that fit specifically in the cubes, books. I LOVE these storage organizers!! They make the greatest use of the 10x9 space of our dining room! Plus they were inexpensive! I'm still able to have 3 tables in the room too! The bins keep everything secure too. The individual cubes are very large too for their size. I also keep scrap fabric separate. I fold pieces that are fat quarter size the same way fat quarters are done. Pieces that are smaller I put together & try to make them the same size as a fat quarter that is folded up. I then store all of them in color order in 1 of the bins in 1 cube. I also take a pic of the fabric that I buy & the washing directions. Keep record of how much I bought. I also separate my fabric by type, quilting cottons, then knits, then home decor then utility like clear vinyl.
I agree with packrat1 about protecting fabric from dust and light. My fabric stash is very large with many different types of fabric. I keep my fabric in large plastic bins from Target which are labeled with fabric type on the front. Knits are labeled by what type of knit they are. I have 14 large bins stacked 2 high, tightly covered, and covered with 3 room darkening drapes. Also if fabric is kept in tightly covered plastic bins, the lids should be removed frequently to let the fabric breath and then recovered. I thought that my shelves were safe from light damage as they were covered with a heavy curtain, but not room darkening. I realized that this was not working when I went to cut some bull denim which was kept on the bolt, only to find that there was a fade line all down one side of the bolt and it went through 2 layers of fabric. I had this fabric for several years but it was always kept behind the curtain. Room light can be just as damaging as sunlight, also dust can get in to your fabric as well as your thread, which should be protected as well. Displayed thread can fade and become damaged the same way fabric can. Fabric and thread can be quite an investment and its worth the time and effort to protect them as best as you can.