
A Satin Stitch Adds Elegant Detail to Quilts and Garments

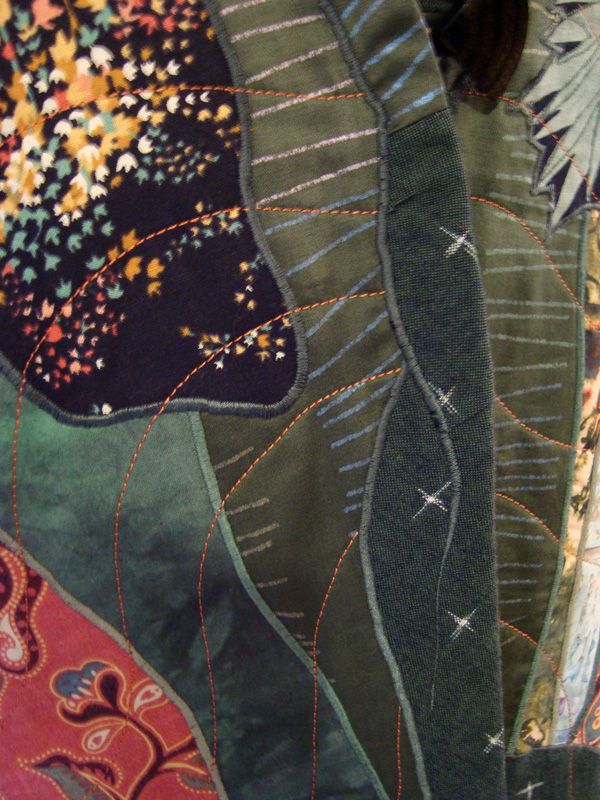
Satin stitching adds texture to patchwork.
Satin stitching has always been my favorite decorative machine stitch. I first used it years ago for machine appliqué, but I’ve found it to be a great way to emphasize seams and add some stitched detail as well. A satin stitch is simply a zigzag stitch that’s sewn with a very short stitch length. The result almost looks like binding – especially when you turn your stitch width dial to the max. And most of today’s fantastic new machines have at least a 5mm-width stitch and some take it all the way up to 9mm.
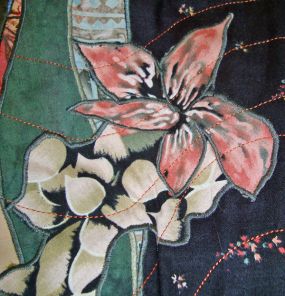
Fabric motifs can be easily appliquéd in place with a satin stitch.
Satin Stitching Tips
Even the most basic techniques require a little know-how, so here are some tips to ensure success and achieve a beautiful satin stitch:
1. Adjust the stitch length so that there’s barely any space between stitches. That will cover the edges of a fabric – if you’re doing appliqué – and give a solid, defined stitch if you’re embellishing the surface of a garment or quilt.
2. Use a presser foot that has a groove on the bottom to accommodate the chunky stitch.
If there’s no room for your nice tight satin stitch to glide under the presser foot, it can bunch up and pretty soon you’ll have a big knot between the foot and the fabric and under the throat plate as well.
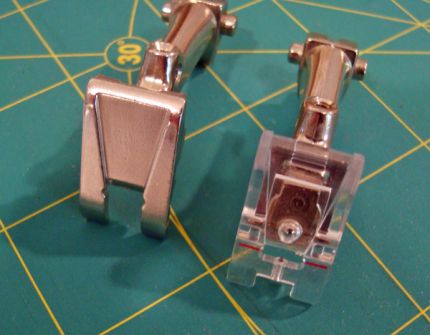
A grooved presser foot glides over the stitching and prevents bunching.
3. Adjust the tension so the top thread pulls slightly under the fabric to give that nice rounded look. This means you’ll need to loosen the top tension or tighten the bobbin tension. How you do this depends on your machine, of course. I sew on a Bernina and the bobbin…
Start your 14-day FREE trial to access this story.
Start your FREE trial today and get instant access to this article plus access to all Threads Insider content.
Start Your Free TrialAlready an Insider? Log in


Thank you for spending time on this topic. Since starting to sew again I have not practiced satin stitching with my new machine. Your beautiful designs have gotten me ready to give it a go.
This was such a helpful article. Up close and personal pictures are so useful for a very visual person like me! Is this pattern on line anywhere. It is quite beautiful for this application. Thank you so much for this sewer who's just gotten back into the swing of sewing.
Poppysquash2
This quilted jacked with satin stitch trim is amazing. A little more info if you please: Did you piece and quilt to create a fabric before cutting pattern pieces? What did you use for filler? You created a quilted fabric that doesn't look as thick as a quilt would be. Beautiful workmanship and even more beautiful finished jacket. Wow!!
thank you for spending the time as the writer above says.
I got so excited when i saw this topic the ideas are endless.
I was thinking of the little peter pan collar on my granddaughter's dress the pockets on my linen dress i haven't made yet for summer in aust.
Also on the end of a crisp linen blouse sleeve cuff.
Will put this in to my sewing file, so i do not have to search in future.
Also thank you for this months magazine, i know some people just like the couture` sewing but the 5 basic things we should know is such a good section to have in the magazine please keep this up as i pass these magazines on to my daughter ( she has to have them back in a week)!!!mm and now she is thinking of getting her own subscription.
We have to give the young one s a reason to keep sewing.
This article couldn't have been more timely. I am appliqueing a blanket for my eldest daughter who just went away to college. I can always count on Threads to give just the right information and inspiration to make my projects spectacular!
I've used satin stitching for years, and I love it, but I really wanted to tell you that I love the jacket! It's gorgeous and inspiring. This is timely since I am revamping my faull wardrobe now ans want to add several artisitc, yet businesslike, jackets. Cheers.
What awesome timing this article is for me! I have been looking to spice up some of the cloting and craft items I am making as Christmas gifts for family. It is a great idea with excellent instructions and suggestions. Thanks!!
This is really beautiful work. The picturea and explanation was good too. Thanks and keep up the great work. I will give this a try now that it looks so easy and flattering.
Another technique for a satin stitch corner is a mitered corner.
When near the corner, stop before you reach the end of the corner. The place where you must stop is the measurement that is the width of the original satin stitch. (That is, measure the width of the satin stich and that becomes the length from the corner where you must stop.)
At that point, slowly begin to narrow the width of the satin stich until you reach the narrowest stitch right at the end of the corner. The end of the stitching tapers to a point.
Turn the item 90 degrees. Start the satin stitch, but this time begin with the narrowest stitch and gradually increase the satin stich width until the empty space starting at the point fills in. You don't want the mitering stitches to exceed the empty space. Try it on some scraps and it becomes quite easy. The mitered corner looks like the frame of a picture on the wall, very nice. Pam
Pam,
Thanks for your tip. Can you post a photo of this? It would be great to see it.
Mary
Awesome jacket. I love jackets and try to make a couple every year. This technique is a touch of class.
Gtlgal