
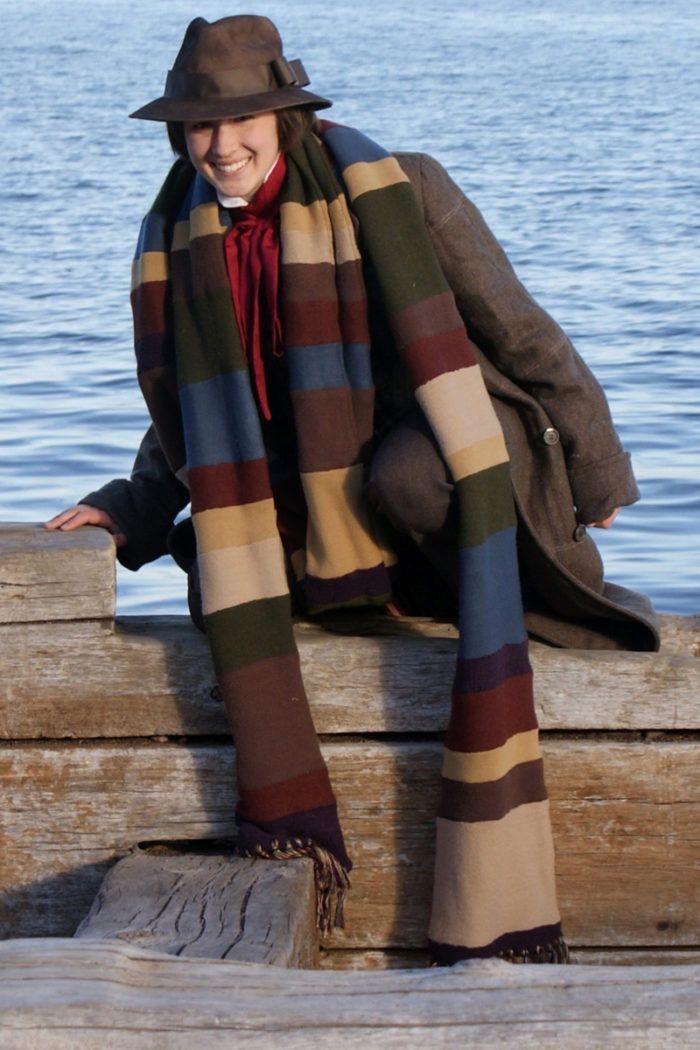
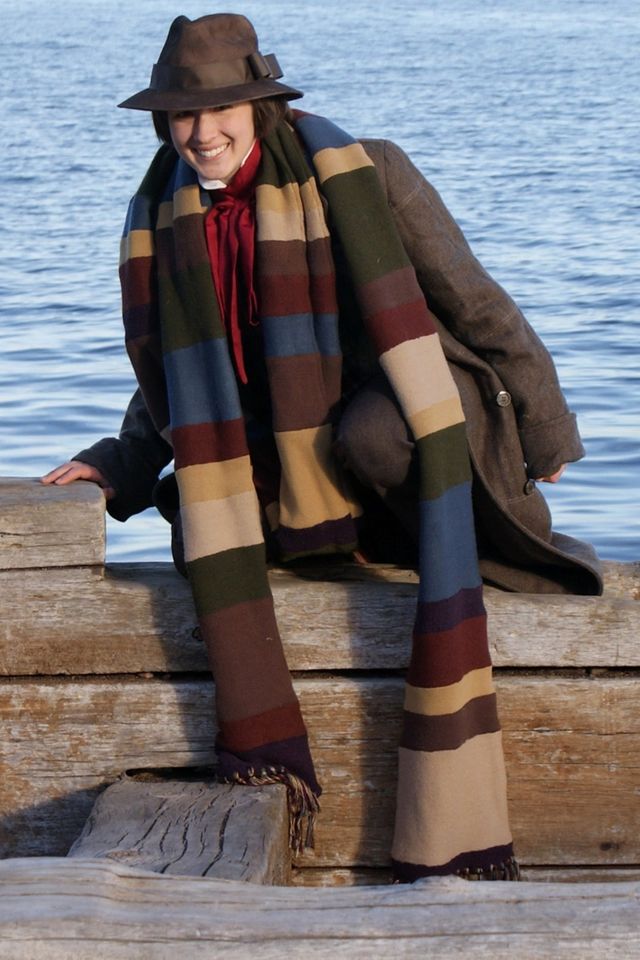
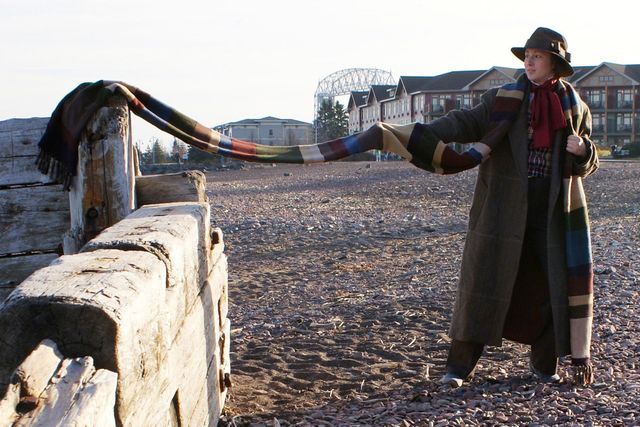
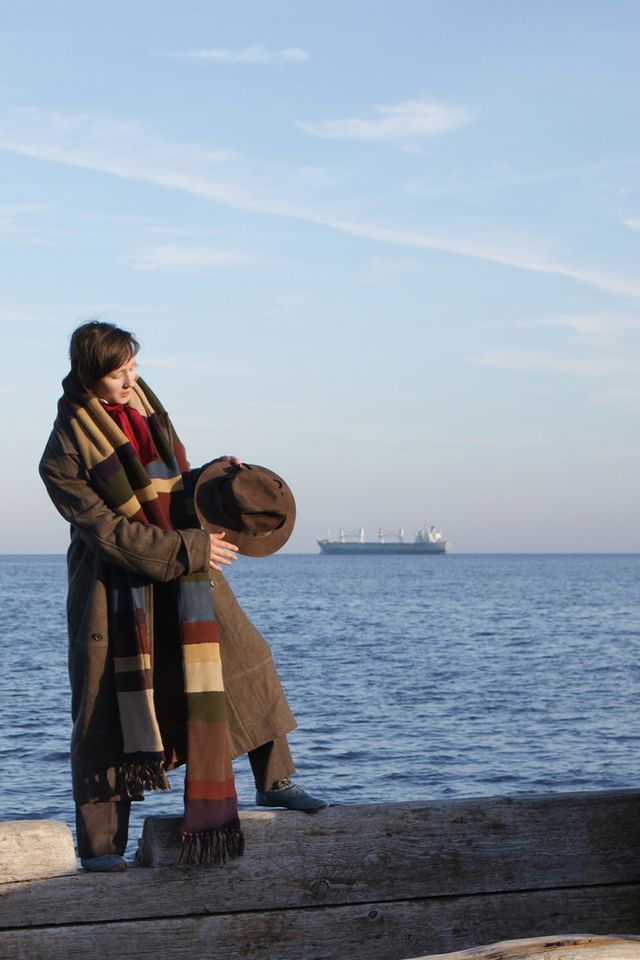
The Fourth Doctor's costume complete with 13-foot-long scarf, necktie, overcoat, and hat!
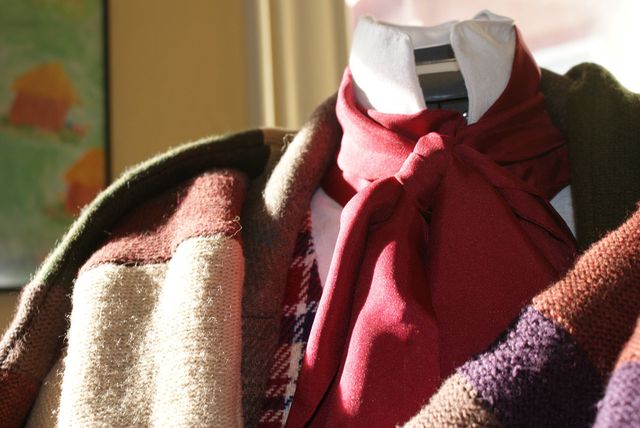
For this costume I made the 13-foot-long scarf out of thrift store sweaters (see detailed instructions below), dyed the hat brown and attached a hat band, made the necktie, and restructured the collar of the button-up shirt.
Doctor Who is a British science fiction series that first began in 1963. The Doctor is a Time Lord who travels through time and space with various companions. So far there have been eleven Doctors (each a regeneration of the previous), and my favorite is the fourth Doctor (Tom Baker). The scarf I made is based off the one worn the fourth Doctor. This oversized, multicolored scarf is definitely the most recognizable piece of his wardrobe.
Materials for the scarf:
-7 sweaters, one for each color
-thread
-sewing machine
-hand sewing needle
-embroidery floss
-iron
-ruler
-chalk
I know nothing about knitting. This is the way most people make their Doctor Who scarves. So, I decided to do some upcycling and make my scarf out of sweaters from a thrift store. I made the original Doctor Who scarf that was worn by the fourth doctor in seasons 12-14.
GETTING STARTED
First came research. (http://www.doctorwhoscarf.com/) This site is a godsend. I downloaded the pattern for the original scarf (seasons 12-14) from this website. I also looked at many pictures of the scarf, both the from the tv show and in real-life, to get an idea of the colours I needed.
CHOOSING SWEATERS
With multiple sheets of color pictures in hand, I hit the thrift stores. I looked for mens’ sweaters since they tend to contain more material. There are seven different colors need for this scarf. The knit pattern I was looking for was one that had small vertical rows on the outside that almost looked braided. I tried to maintain continuity by choosing sweaters with approximately the same size rows or the same knit, otherwise it looked goofy on the side I was using. On the real scarf the rows appear horizontal and the rows on my sweaters were vertical, so I ended up using the reverse side of the sweater as the “right” or outward side of the scarf. I had to search many different thrift stores to find all the colors in the knits I wanted. Chief among these stores were Savers, Goodwill, and Ragstock. I wasn’t particular about the content of the sweaters being all the same; some were cotton, others were synthetic. I was more concerned about color.
MEASUREMENT CONVERSION
Once I printed the pattern off I found that the measurements for each color were all in knitting rows, and not inches. I added up all of the rows in the scarf. I knew that the scarf had to be 13ft long (or 156”), so I divided the total number of rows by 156”, and came out with a conversion of about 8.06 rows/inch.
SEWING KNITS
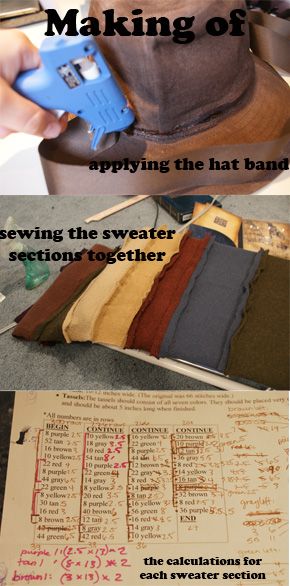
For this scarf I used a 1/2” seam allowance. I used a zig-zag stitch for the entire scarf because the thread is less likely to break as the material stretches. Each section I cut 13 inches wide. The first few seams I sewed turned out squiggly-looking. As anybody who has sewn with knits knows, they can be a pain. The knits stretch as the fabric goes under the presser foot and when the fabric relaxes as it comes out the other end, the squiggly seams appear on the right side of the fabric. After a bit of pondering and experimentation I figured out how to make it less noticeable. As I sewed instead of letting just the presser foot do the work, I sort of forced the fabric through by squishing it together. It doesn’t totally eradicate the problem but it certainly lessens the effect. I further flattened the seams using a technique known as blocking which will be explained later. Having figured that out, I sewed row after row after row after row. FOR-E-VER. The scarf got so long that it became quite a pain to haul back and forth from my pinning table to the sewing machine and back again. I made two lengths of scarf so that I could sew them together and then flip them right-side-out. Everything was done twice. I didn’t really cut out the bands ahead of time but did it as I went along.
BLOCKING
Blocking is a technique that I am new to but it came in handy for this project. Blocking is the process by which you sort of stretch a knit fabric while it’s wet and iron it to make it lay flat. I spritzed each seam with water and sort of stretched it to open the seam. Then I laid a thin piece of cloth over the seam and spritzed that with water as well. Then I ironed down the seams using a medium heat setting (since the content of my sweater pieces was different I didn’t want to melt any synthetic fabrics, even with a layer of cloth in between). I was extremely pleased with the results of this technique—no more squiggles!
PUTTING THE PIECES TOGETHER
After many, many rows of stitching I finally ended up with two identical 13-foot-long pieces of scarf. First I laid the pieces one over the other, right sides together. I must have been looking at a different season’s scarf to begin with because I thought the scarf needed to be 12 inches wide but I guess it was actually 11 inches. I knew that if I just sewed down each side that the scarf wouldn’t turn out to be 11 inches wide just because my measuring is not perfect and the material stretches. So what I did was to make a chalk mark down the very center of the scarf. Then I made parallel lines that were 5.5 inches to each side of the center line, and that became my stitching line. I also used a zig-zag stitch to sew around the perimeter. I tried to pin very carefully along the stitching line so that all the seams lined up properly—and believe me there are a lot of seams, and therefore a lot of chances to screw up on them. If I was way off I just seam-ripped that section and re-stitched it. I left about half of one end open to turn the scarf inside out. But before turning it inside out I again blocked the perimeter seam. After I turned the scarf right side out I sewed the opening shut by hand. Using the cloth again I ironed down the perimeter seam.
TASSELS
The tassels on either end of the scarf consist of all seven colours. Normally these would be made out of whatever yarn you’re using to make the scarf but since I wasn’t using yarn I improvised with embroidery floss. I brought samples of all the sweaters with me to the fabric store and matched them as best I could (kudos for thinking ahead!). I bought two skeins of embroidery floss per color, one for each side. Using my somewhat elementary math skills I calculated that I could cut the floss into 2 x 10-inch pieces for each tassel. I wound the floss around a 10 inch long piece of cardboard and then cut the top and the bottom. I made 15 tassels for each side. The next challenge was how to figure out how to get the tassels through the fabric. All those pieces (14 per tassel) wouldn’t fit through even my biggest needle. Again improvising, I first made a hole where I wanted the tassel with a sewing awl so that I didn’t have to break any of the fibers of the scarf. Then I made a loop out of fishing line and threaded the group of embroidery floss through it, then poked the tail of the loop through the hole I just made in the scarf to pull the floss through. I had to cut the fishing line and slip the ends of the floss through the loop on the other side, if that makes any sense. You can look at the website to figure out the whole looping/tying bit.
THE HAT
This hat was originally a tan color and I needed it a deep shade of chocolate brown. I spray-dyed the hat using Fiebling’s Color Spray in dark brown. I took some brown grograin ribbon and hot-glued it to the base of the brim, and made a bow at the side.
THE NECKTIE
This necktie or cravat I made out of a maroon colored satin sheet. I used the wrong side of the satin and sewed a three inch wide tube of fabric, then turned it inside out and finished off the open end by hand.
CHANGING THE COLLAR ON THE BUTTON-UP
The collar on this costume has to stand up, and when I did that with this shirt the two ends of the collar overlapped and didn’t look at all like a shirt the Doctor would wear. I removed the collar and stitched the ends at a different angle, then re-attached it.
Thanks for checking it out!


Great costume - as a long-time Dr. Who fan, I appreciate your choice of Dr.s! Did you carry a packet of jelly babies in your pocket?
Style points for the subject matter, and nice interpretation!
I can hear the theme music! Brilliant! Best Tom Baker Dr. Who ever!
I am trying desperately to knit one of those scarves... the recycled sweaters are great!!
Nice choice. My choice is like same.