
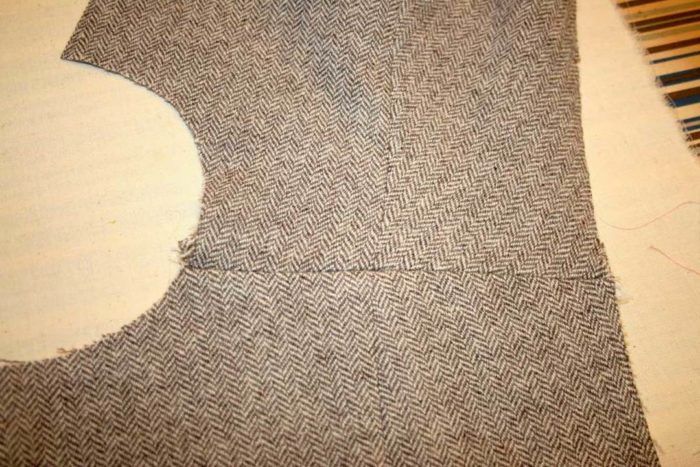
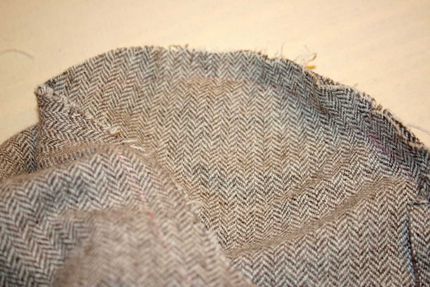
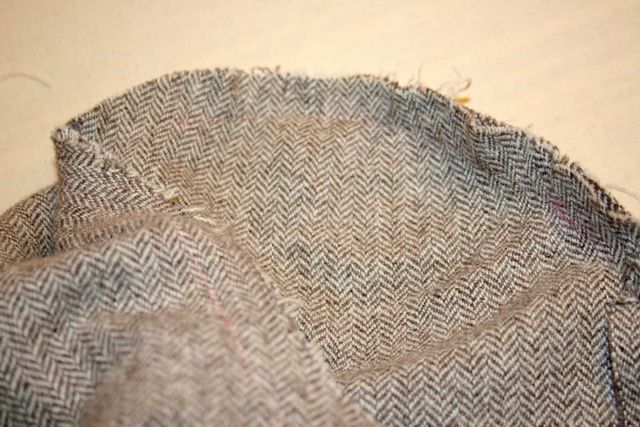
Attach the back and front at the shoulder seam, taking care to align the princess seams.
Now that the lining is assembled and ready to go, it’s time to start on the shell of the jacket. For this project, I used soft herringbone flannel I had in my stash. Wool flannel is a wonderful fabric for seamsters of all skill levels. It has great drape, looks great on, and is very forgiving of mistakes.
Assembling the Shell
I assemble the jacket in much the same manner as I did the lining: I make the back first, and then the front, then I attach them at the shoulder seams. Since this is a shoulder princess-line garment, it’s critical that you line up the shoulder seams as precisely as possible. I like to line up my front and back princess seams starting about two to three inches from the raw shoulder edge. This ensures that they line up at the shoulder seam, as you see here. With a very soft fabric like this, I also reinforce the shoulder seam by sewing a selvage strip of silk organza or chiffon into the seam. This stabilizes the seam without adding any bulk.
Attach the back and front at the shoulder seam, making sure you align the princess seams precisely. 
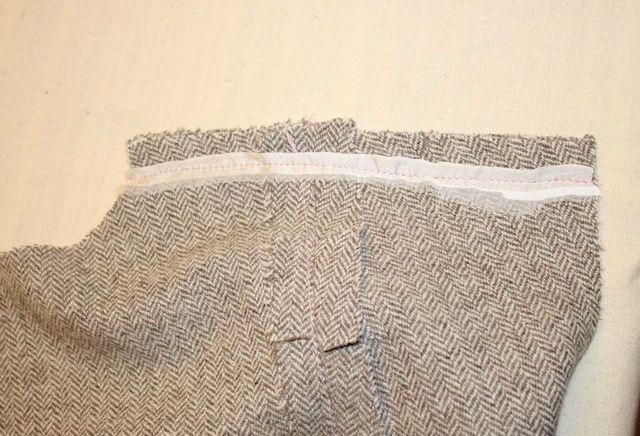
Reinforce the shoulder seam by sewing a selvage strip of silk organza or chiffon into the seam.
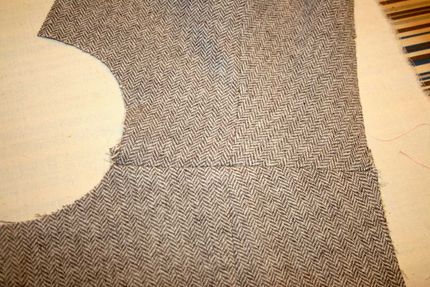
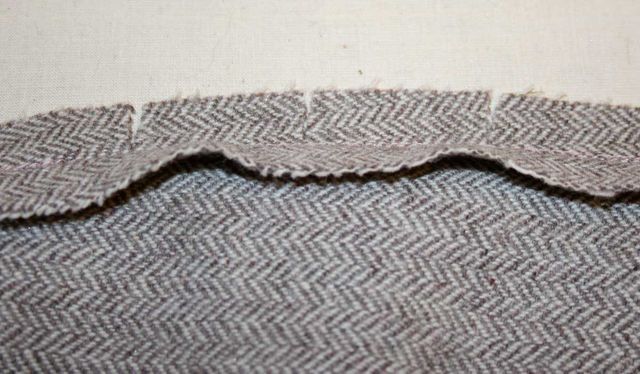
Next I sew the back and front together at the side seams. When you’re sewing curved seams, like a princess seam or a side seam on a fitted jacket, make clips in your seam allowances to the stitching line at intervals. This allows the seam allowance to lie flat and reduces bulk. You can either make V-shaped notches in your seam allowances or, as I do, make a straight clip to, but not through, your stitching. Here you can see the difference between the seam that has been clipped, on the top, and the one that has not, on the bottom. The one on the top lies perfectly flat.

The top seam has been clipped and lies flat while the seam on the bottom, with no clips, ripples.
The Incredible Shrinking Woolen
I pin-ease my sleeve into the armholes of the garment. (For more information on how to do this, check out “Pucker up? Not when it comes to sewing“.) As you can see, there is a lot of ease in the sleeve cap. However, here’s a wonderful characteristic of wool-it shrinks! (If you want proof, just ask my husband, who threw my favorite wool dress into the washer and dryer.) To shrink the sleeve cap so it fits into the armhole, use heat and lots of steam. In this case, I baste the sleeve into the armhole and, holding my iron just over-but not touching-the fabric, I apply lots and lots (and lots) of steam.
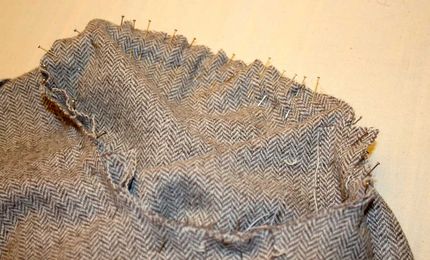
First pin-ease the sleeve into the armholes of the garment. 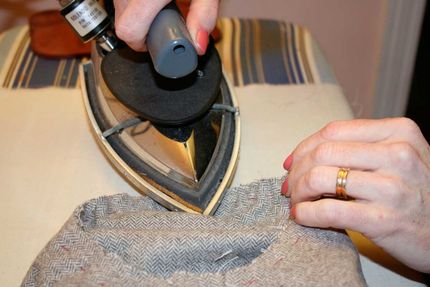
Shrink the sleeve using steam from your iron.
When finished, the sleeve cap fits perfectly in the armhole.
Now your sleeve is ready to fit into the armhole. Notice that the ease puckers have completely disappeared.
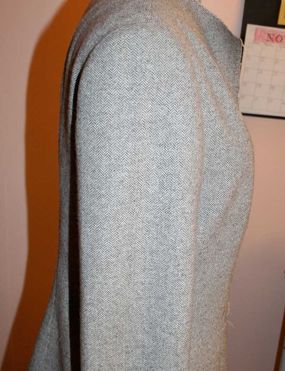
This completed sleeve looks perfect.
Attach the Lining to the Shell
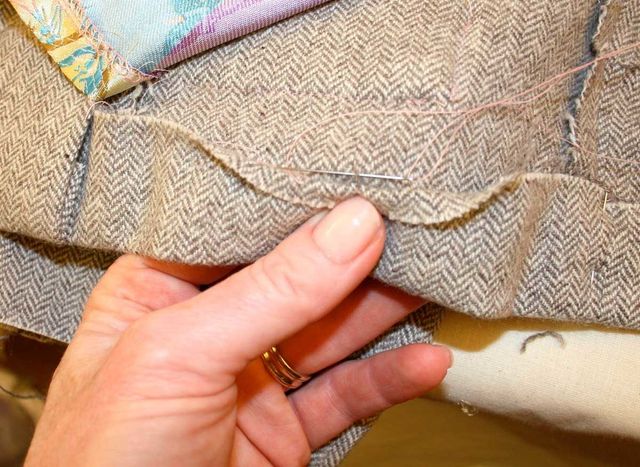
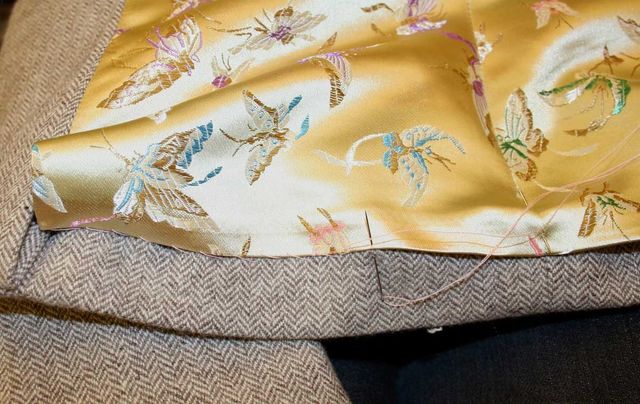
Next, I attach the lining to the shell of the garment according to the pattern instructions. I then hem the garment and the sleeves. My favorite hemming stitch is a catchstitch. I use this to hem my garment shell. Then I attach the lining to the hem of the garment using a whipstitch, as shown below.

After attaching the lining, hem the garment. 
Next, attach the hem of the lining to the garment hem allowance, using a whipstitch.
Almost There
After a final press, the jacket construction is done.
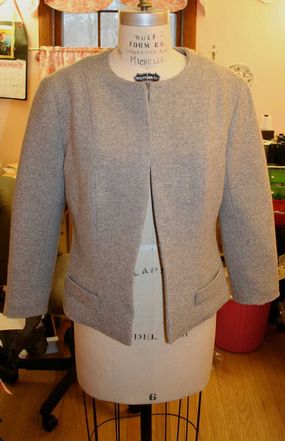
Now your jacket is almost complete–all you need is to select trim.
Now, and only now, do I start thinking about trim. This pattern calls for some sort of trimming. I prefer to purchase trim after the garment is complete. Next week I’ll take you to some of my favorite trimming stores on the quest for the perfect complement to this jacket.


You described step by step thanks
Thanks for sharing it
I've tried it and I finally completed a jacket on my own... Thanks for sharing it