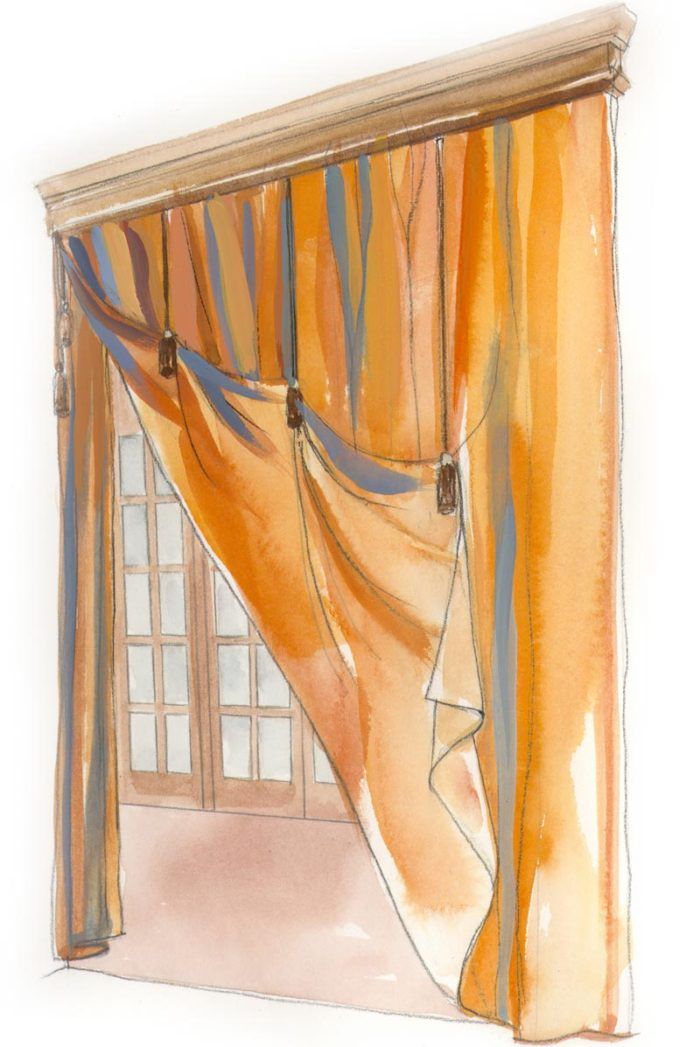
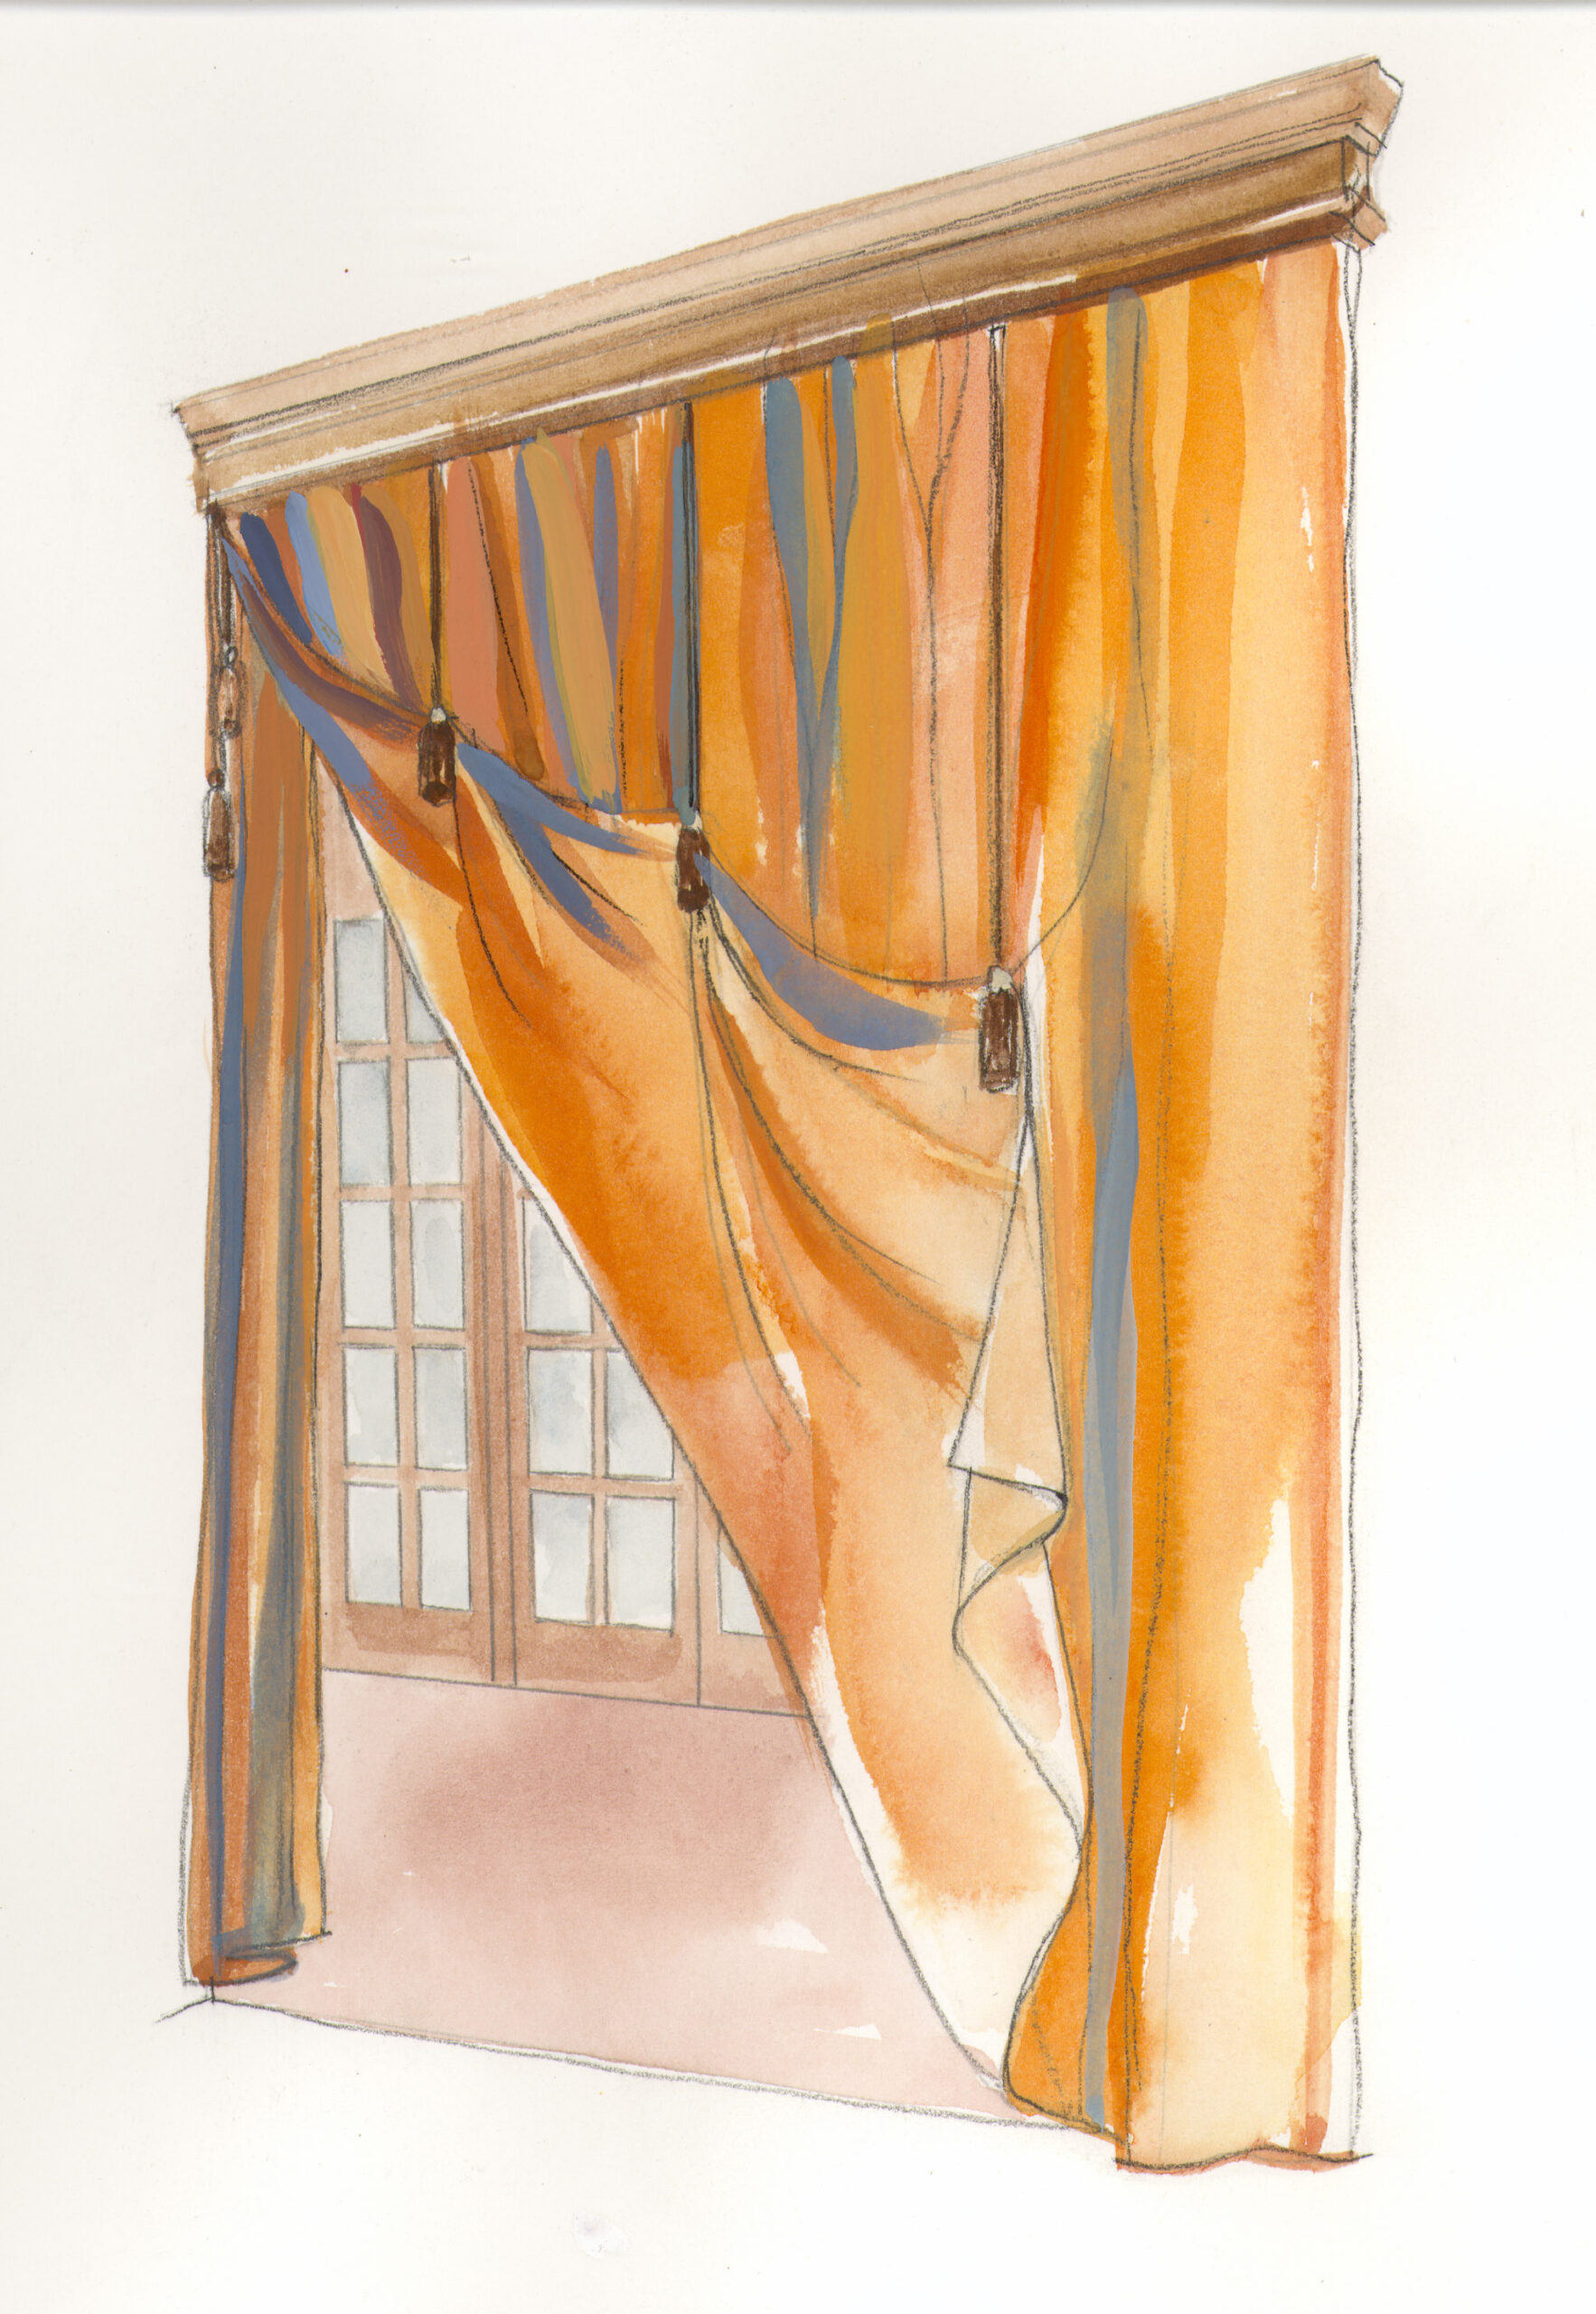
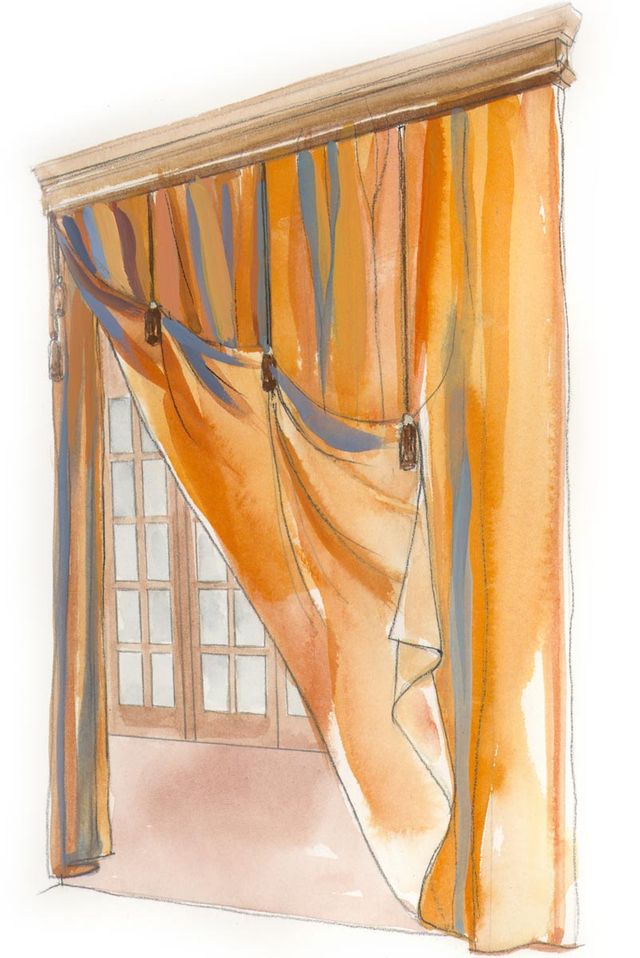
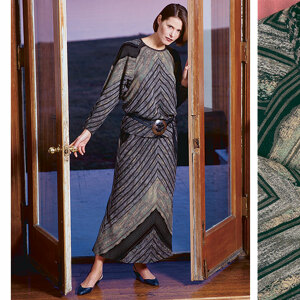
Design elements, such as diagonal lines, attract attention.
Today’s look in window treatments ranges from a simple length of fabric arranged over a rod to elaborate draperies reminiscent of those in historic mansions. Whatever the style, the basic approach to design is the same. And as a professional designer and installer, I’ve learned the tricks for creating treatments that are appropriate, beautiful, well constructed, and suited to my customers’ needs—whether they’re traditional draperies or unique window treatments that incorporate couture dressmaking techniques. These procedures can be helpful to you, too, if you want to make your own window fashions. I’ll elaborate more on the couture techniques in a future article, but for now, let’s take a look at some design fundamentals as well as some tried-and-true workroom techniques to get you started creating effective window treatments for any room.
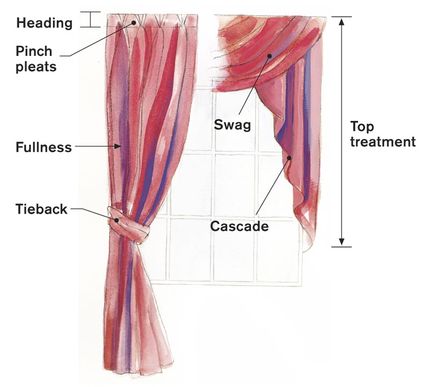
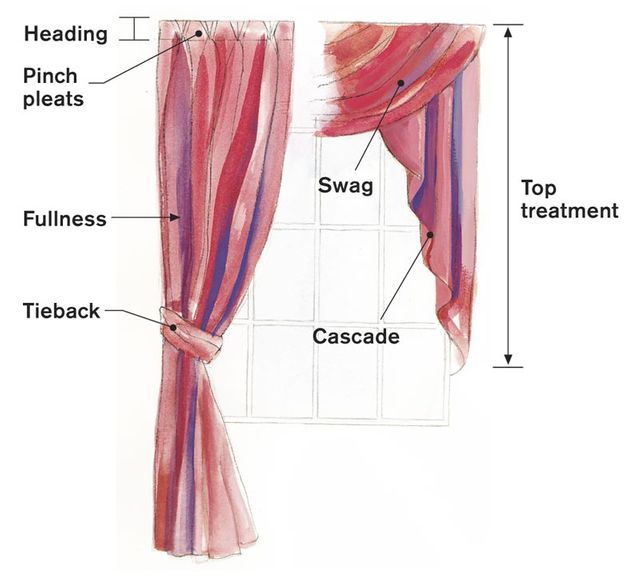
Treatments may vary in style and manner of construction, but the basic components are the same.
Start with the elements of design
Window treatments come under the heading of applied design, which means they must be practical as well as beautiful. For a professional designer, the elements of design—color, line, texture, form, and space—represent tools of the trade in the designing process.
Color: Choosing a color scheme is usually one of the first steps in the design process, because color can be used to create a focal point and set the mood in a room. Colors like coral, red, and peach, for example, create a cozy feeling and are a great way to warm up a north-facing room. Cooler blues and grays might be more welcome in south-facing rooms. Bright colors against a light background can fill up a wall, but those same colors against a dark background will not appear as bright or large. And window treatments placed against a lighter value of the same color blend into the wall. Keep in mind that colors may change from the light of day to evening.
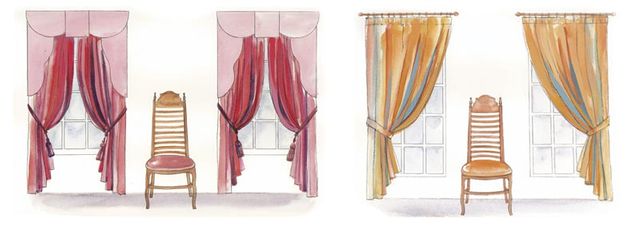
Vertical lines add height and create a feeling of dignity and formality. Horizontal lines are more casual and give a sense of breadth and size. Diagonal lines attract attention and are best used as details or supported with vertical lines. Curved lines soften the mood and keep window treatments from looking too stiff. Bands, borders, and trims are a good way to emphasize line.
Line: The element of line is second only to color in defining mood and feeling. Vertical lines add height and dignity to a room and are considered more formal. A window treatment using strong vertical lines will carry the eye upward and can disguise boxy or odd-shaped windows. Horizontal lines, on the other hand, create a casual, restful feeling or can be used to give a sense of breadth or size and a relief from bold vertical features, like paneling or moldings. Diagonal lines attract attention, causing the eye to follow them in each direction, but they can be distracting if not bordered by vertical lines. I suggest using them as a detail rather than the focal point in a treatment. Curved lines keep window treatments from looking too stiff. Using bands, borders, trims, and contrast fabrics are all ways to emphasize line.
Texture: The surface texture of a fabric can also convey mood. For example, chenille, denim, and linen are more casual, while smooth, shiny silk and moiré are more formal. Nubby, coarse textures absorb more light, creating shadows and making the colors look darker in value, while shiny textures reflect light and tend to look lighter in value. Combining several textures adds variety and interest, but juxtaposing strongly contrasting fabrics, like corduroy and smooth silk, produces incompatible effects.
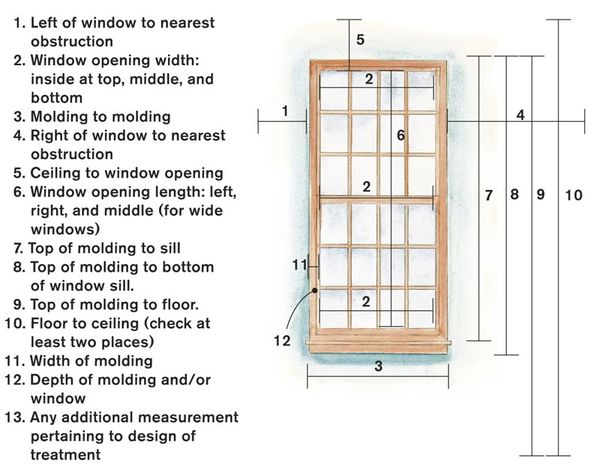
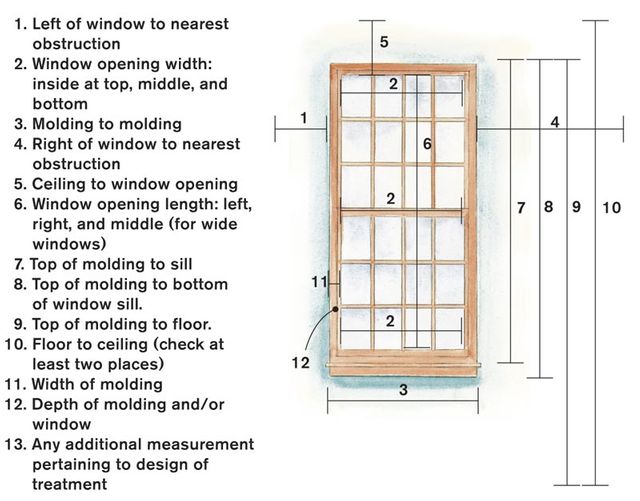
Accurate measurements are invaluable for well-planned window treatments. Rooms and windows vary, but this “designer’s dozen” key points to measure provides a useful guide. Draw a sketch of the window and wall; use a steel tape measure; and work from left to right, measuring first widths, then lengths.
Form: Lines joined together create shapes. In my experience, rectangles are the most preferred shape for window treatments as well as objects in a room, like tables and chairs. You can turn a square-shaped window, like a sliding glass-door unit for example, into a rectangle by extending its drapery onto the wall beyond the edges of the glass. And you can soften the stiff feeling of rectangles with curving drapery lines.
Space: Boundaries create space. For example, walls define the room as well as the window and determine where and how a particular treatment can be installed. Moldings, air ducts, and furniture are also part of the space and must be considered as you design a window treatment. Because space influences the type of design and details you may want to use, precise measurements are a crucial part of planning window treatments. To be sure you measure accurately and include every aspect of the window, refer to the measurement chart at right. When you combine the elements of design with the principles of design–balance, emphasis, rhythm, and proportion or scale — you can alter the look of a window or room to achieve most any effect. Let’s look briefly at those principles.
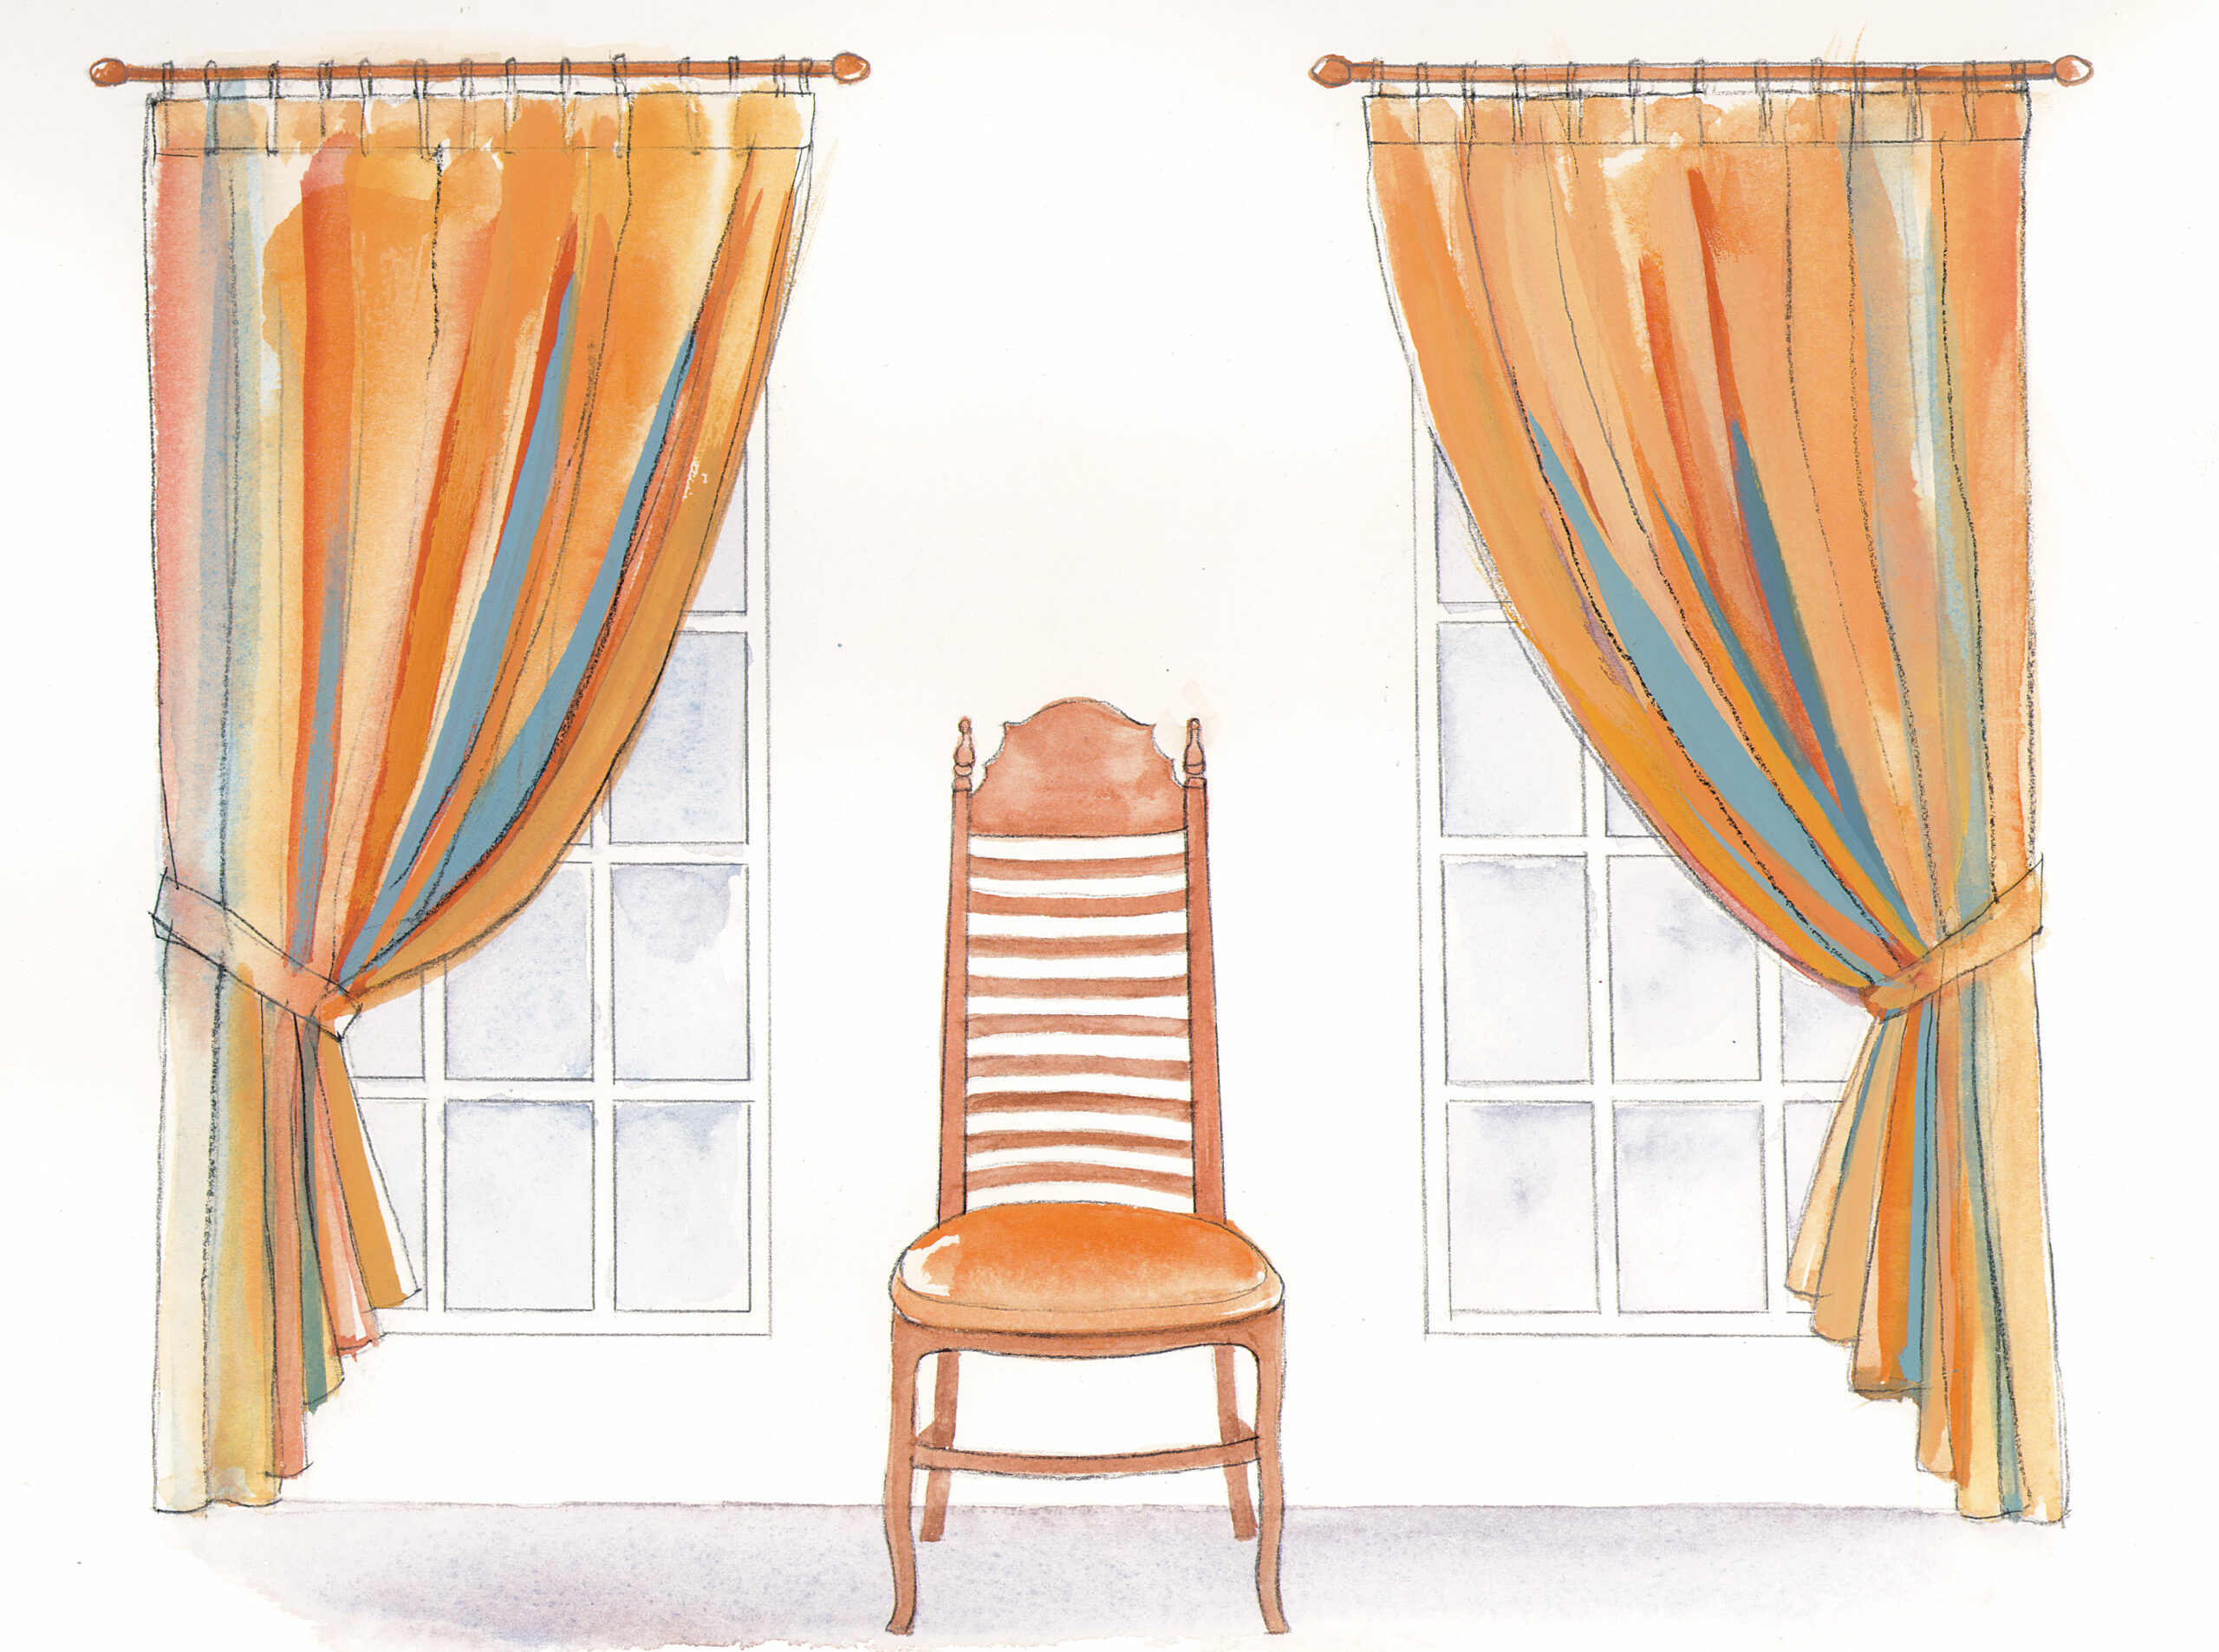
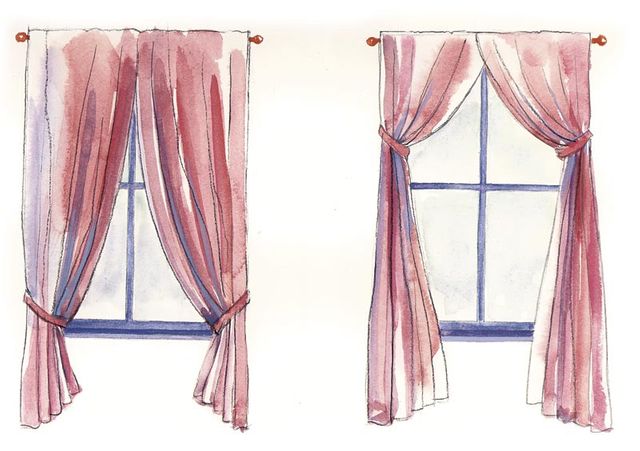
Balance: This principle refers to how and where the elements are used in the window treatment and/or in the room. It considers the visual weight of objects, that is, the amount of space they appear to occupy. Formal balance is symmetrical, projects a sense of dignity, and is usually less interesting than the asymmetry of informal balance, which pairs different objects of the same visual weight, and conveys a more subtle, spontaneous, and casual effect.
 |
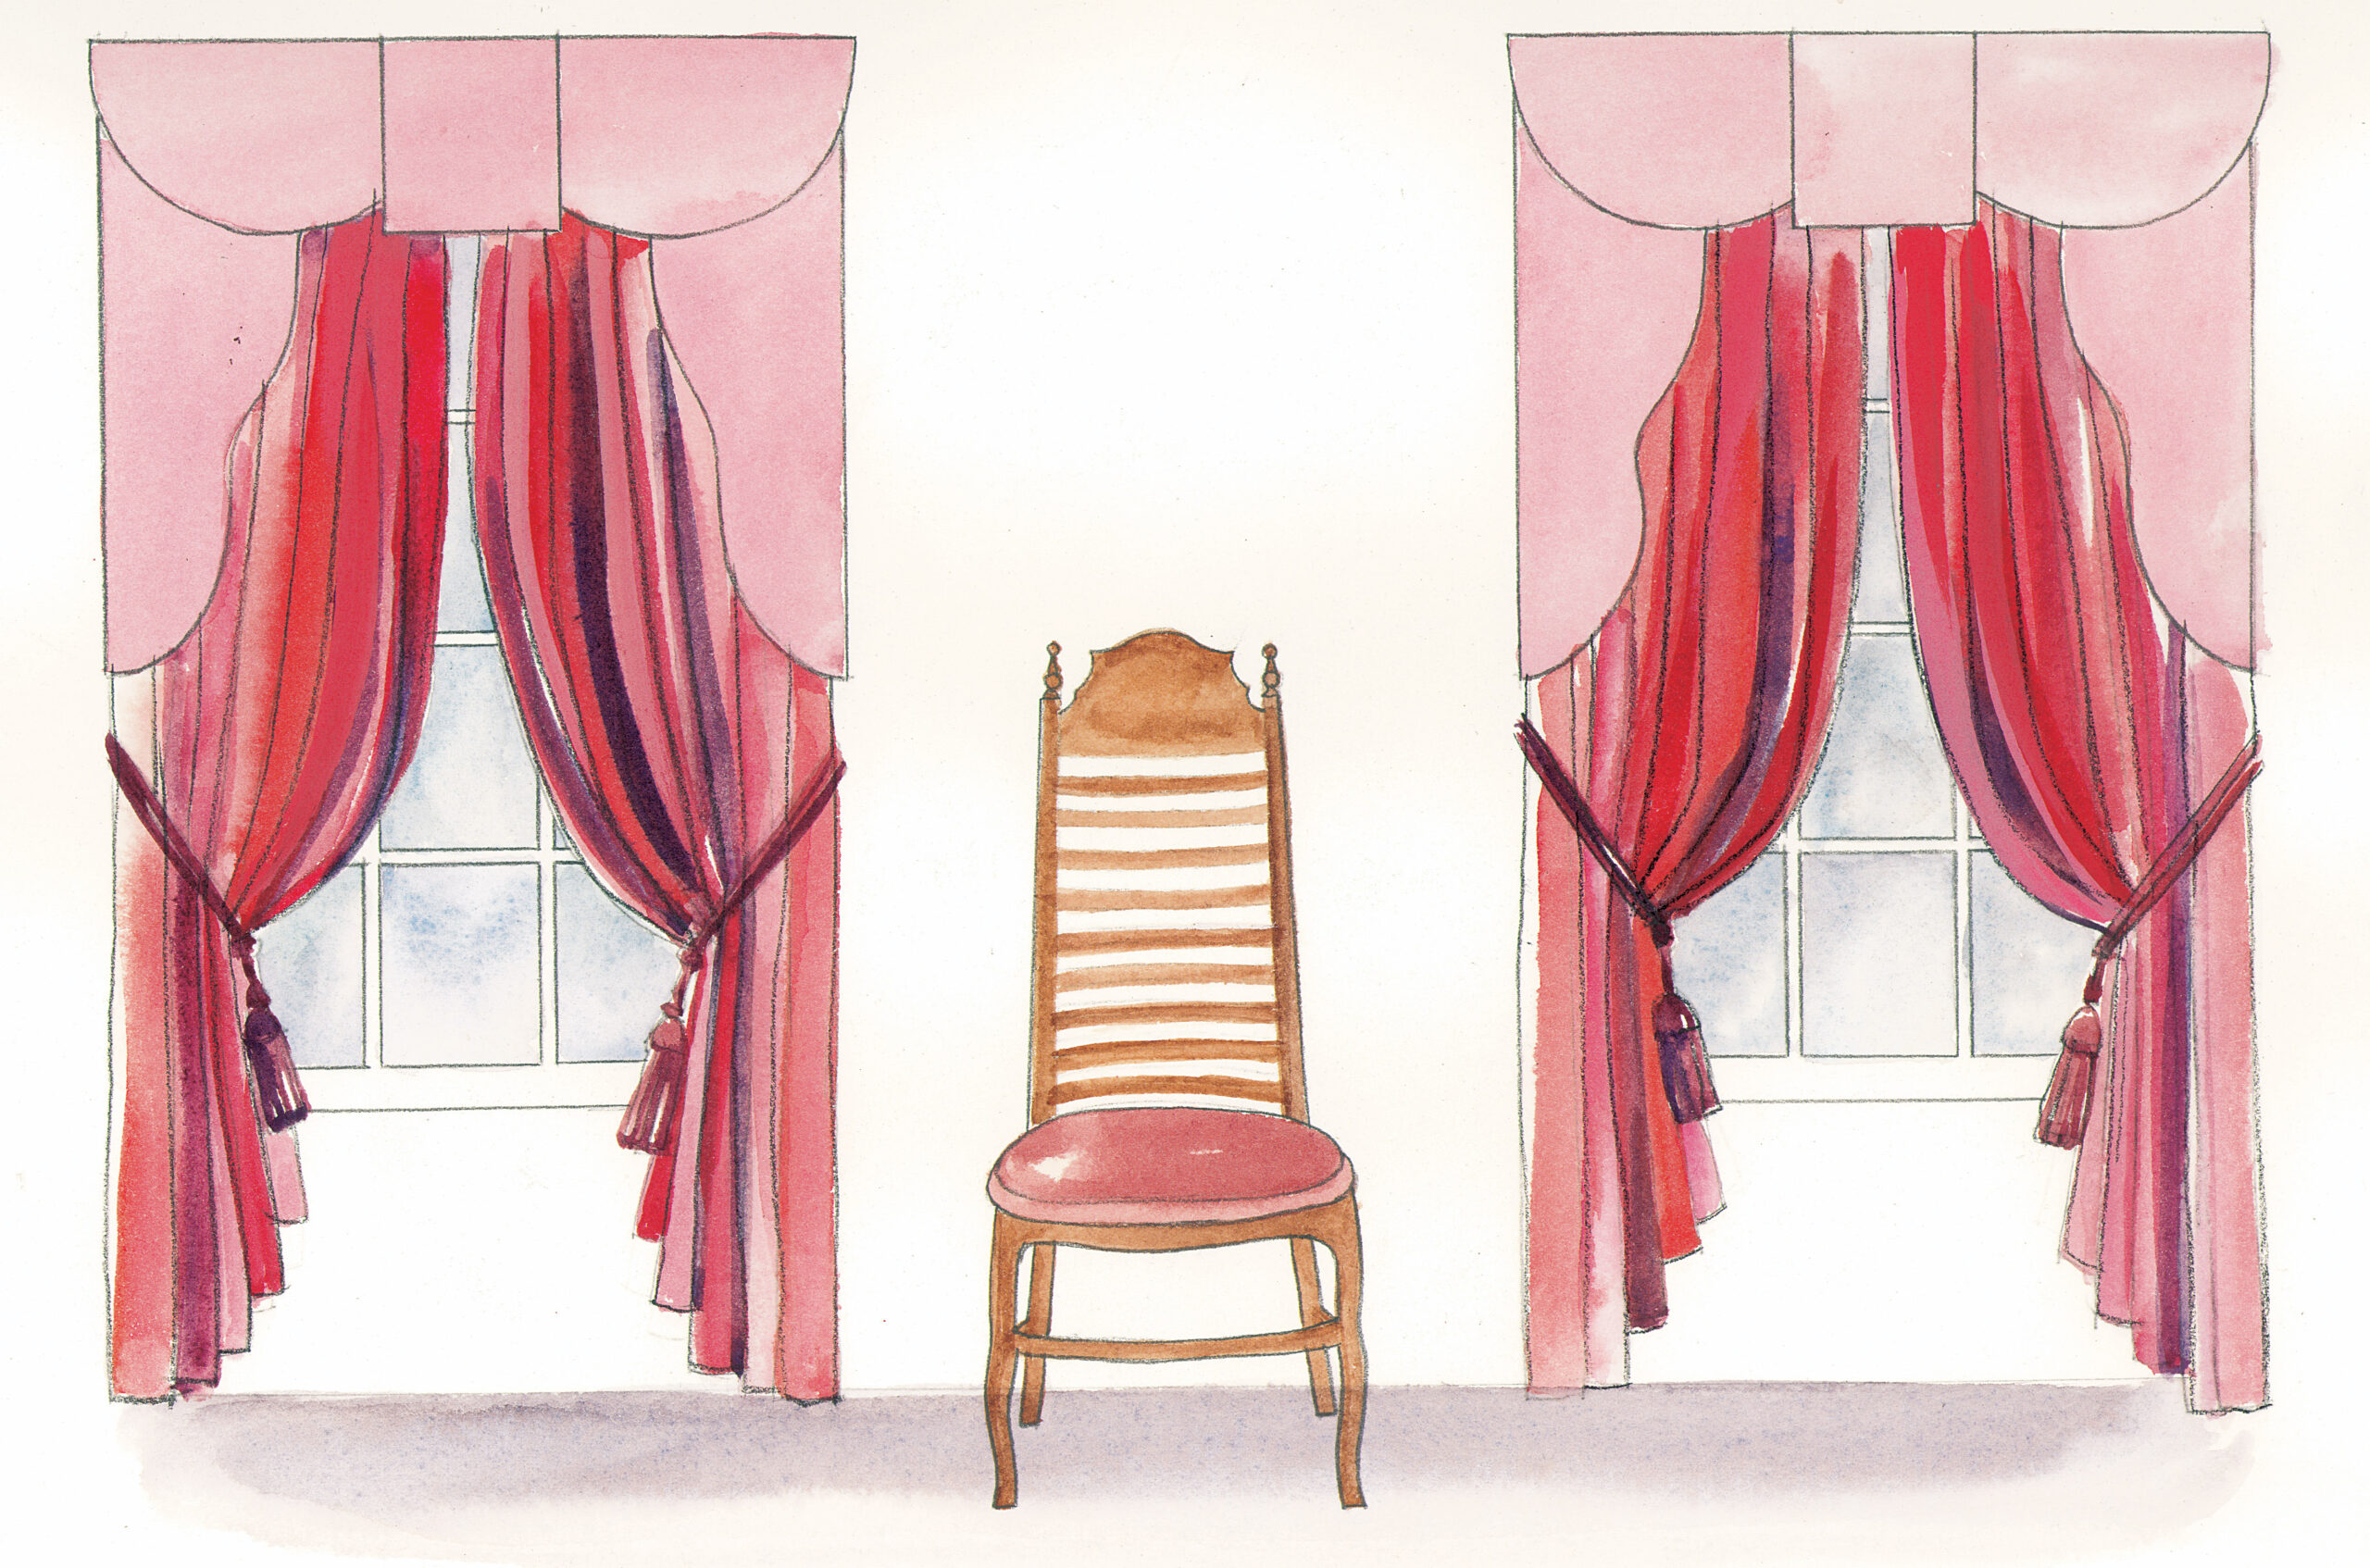 |
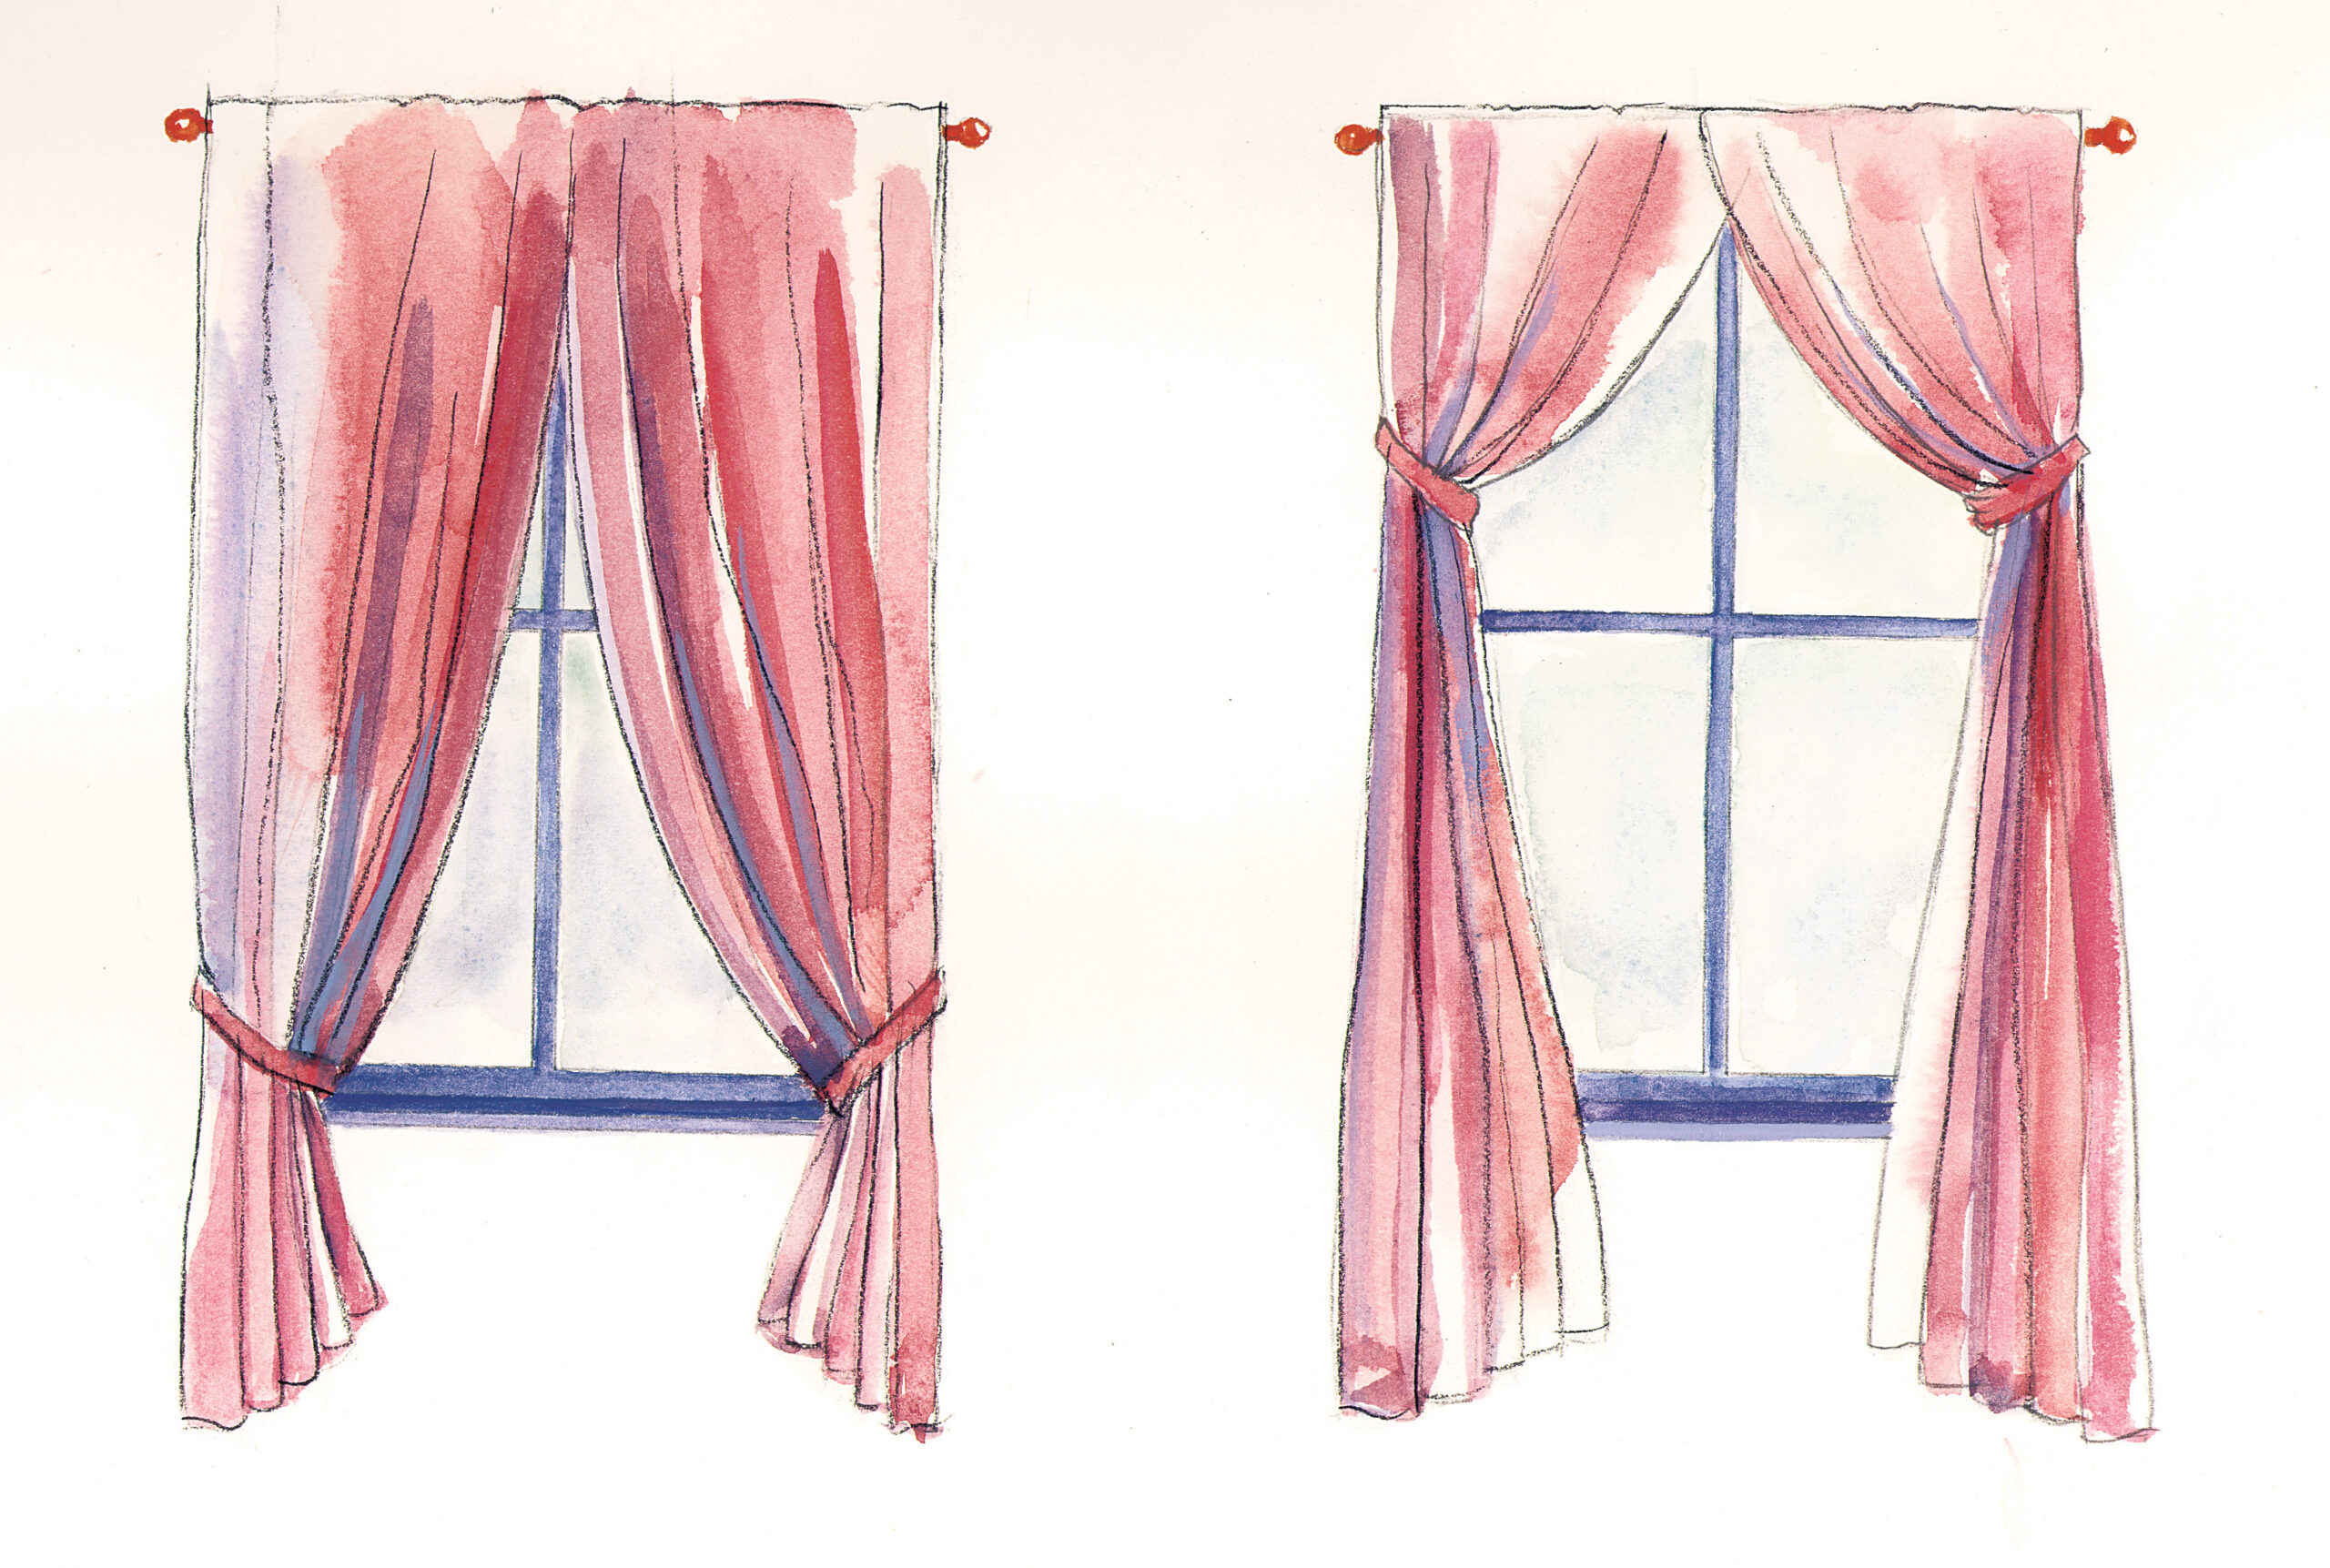
Balance results from how and where you place the elements of your design. Use symmetrical balance for a more formal effect, or asymmetrical placement on the window for a more spontaneous, casual look.
Emphasis: Generally there should be one obvious focal point in a room. Before choosing a window treatment, decide if you want that treatment to be the focal point or a backdrop for emphasis elsewhere.
Rhythm: This principle directs the eye as it moves around the room, through the repetition of line, form, color, or shape and the progression (the gradual increase or decrease in size and direction) of these elements.
Proportion and scale: These principles address relationships of size. Proportion refers to how the elements within the treatment or room relate to one another as a whole. Scale refers to how the size of an object compares with the size of the space it’s in.
It’s essential to maintain good proportion within the window treatment and keep the whole treatment in scale with the room. Designers avoid dividing a window in half and instead use proportion guidelines like the Rule of Fifths or Sixths to create more dramatic effects.
Design considerations
When I design window treatments for clients, I take into account the design fundamentals I’ve just outlined, as well as other considerations, the first of which is style. Be aware of your own preferences in terms of style—that is, formal, classic, contemporary, casual, and so on—but also take into account the latest fashion in interiors. And try to be consistent with the period and architecture of the house as well as the specific room and its special characteristics.
Choose simple treatments for small spaces and more elaborate treatments, like layered draperies over sheers, for oversize spaces. Create treatments that flow visually for multiple windows, and, if there are disparate windows in the room, try to unify them by accentuating their common elements. Consider the shape of the window and hang draperies with a visual reference point, like the window sill, the apron (horizontal trim below the sill), or the floor, following the proportion guidelines I’ll discuss in a moment. And try not to make design decisions that will present maintenance nightmares.
Get out the sketchpad
Working on paper is a way to visualize your design and plot out measurements. Use graph paper and start by drawing the window, then sketch in your treatment, considering all of its components: the drapery length; the heading, or top portion of the drapery, the top treatment, or valance, that runs horizontally across the top of the window (such as a festooned swag made with draped folds of bias-cut fabric and that may include a cascade or sidepiece that’s pleated or gathered and mounted over or under the swag); and tiebacks that hold the drapery lengths off to the side of the window.
Although there can be exceptions, the following proportion guidelines hold true for most situations: Try not to divide the length of the window in half. Instead, use the Rule of Fifths or Sixths. For example, if you want your window treatment to include a swag, divide the total length of the treatment by five or six to give you the swag’s finished length. Here’s a good rule of thumb: For treatments mounted just above the window, divide by six; for ceiling-mounted treatments, divide by five. A cascade should be at least twice the length of the swag drop, and its long point should fall into the bottom third of the window for the best look.
A second rule of thumb—the rule of threes—which I learned many years ago in design school, maintains that objects placed in threes, or multiples of three, are the most pleasing to the eye. If you’re planning stationary drapery panels, use a ratio of two-thirds panels to one-third window. And use that same ratio when using two colors or two fabric prints, for example, and a 60%, 30%, 10% mix when using three. Using three colors or prints allows you to use one color or print as a statement, one as a contrast, and one as complement.
Will it work?
Before your design can become a reality, you need to consider how and where you’ll mount the rods for your treatment. Do you want them on the window frame or on the wall? Placing them on the frame is not as good a choice as on the wall because gaps can occur at the edges of the drapery panels, and the headings may show from the outside. Ideally, consider mounting the rods so the treatments extend at least 4 in. up from the top and to each side of the window. Before I plan to install rods on a wall, however, I examine the wall’s surface to determine whether it’s drywall or plaster, because that might affect installation, especially the choice of mounting screws.
When you’re satisfied with your designs, it’s time to make some patterns. You don’t need actual patterns for long drapery panels — they can be cut directly from the fabric using your measurements–but I recommend making patterns for top treatments with special details. Some designers make their patterns using lining fabric instead of paper, which works especially well for large treatments. It can also be used to model the treatment on the window. Keep in mind as you calculate your dimensions and make your patterns, that you need to make allowances for hems, headers, seams, fullness, and pattern repeats. You can follow standard workroom practice described below, or go a step beyond to create a couture finish.
Workroom standards
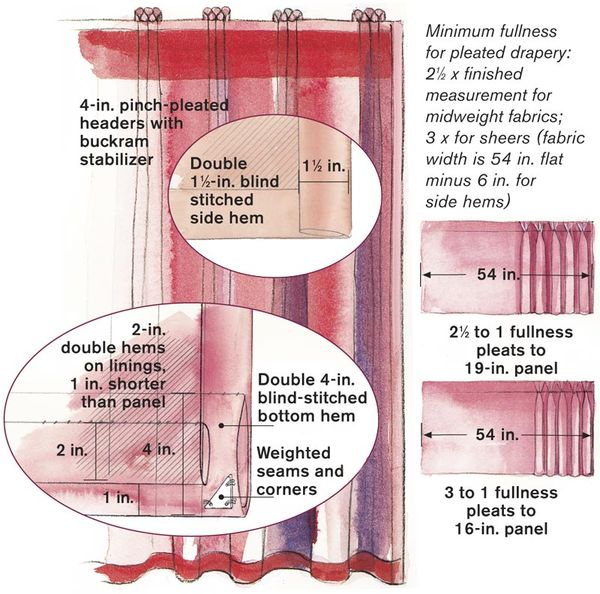
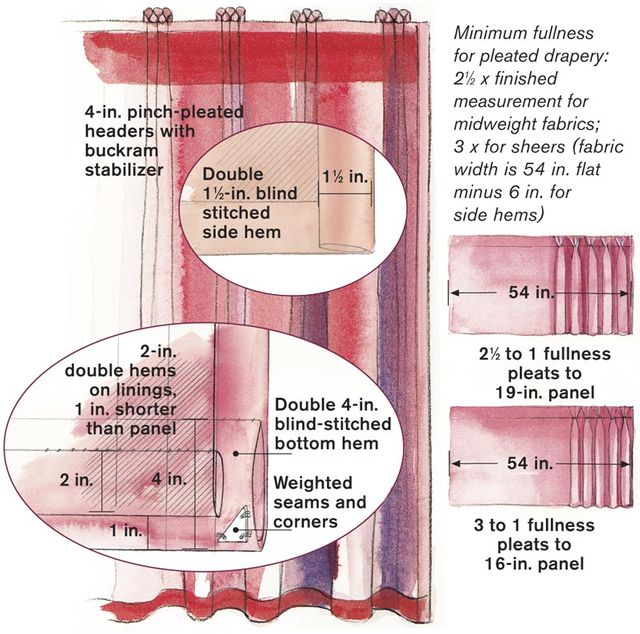
Custom-window workrooms follow basic standards when creating a window treament.
There are no universal criteria, but custom drapery workrooms usually have certain standards for constructing window treatments. Here are the most common practices as shown in the drawings:
• Fabric pattern repeats match.
• Seams are serged. Drapery weights are used on seams and corners.
• Double-side hems are 1-1/2 in. finished (form them by folding the fabric to the wrong side 3 in. from the outer edge, then bringing the edge to the fold and press again). Double bottom hems are 4 in. finished (formed like side hems), and all hems are blind-stitched in place.
• Pinch-pleated headings are usually 4 in. high, have three-finger folds in each pleat, and are stabilized with buckram.
• Lining is used where applicable and is 1 in. shorter than the face fabric of the drapery or valance.
• The minimum-fullness standard is two and a half times the finished-width measurement for midweight fabrics and three times for sheers.
Couture touches
These workroom standards are only guidelines, of course, and you can expand on these to add a couture look to your treatments. For example, in today’s larger homes with bigger windows, 4-in. headings seem too small, so use a 6-in. heading or larger for better proportion. And if you’re pleating the drapery panels, use four to five fingers in the pleats rather than three. Increase the double bottom hems to 5 in.
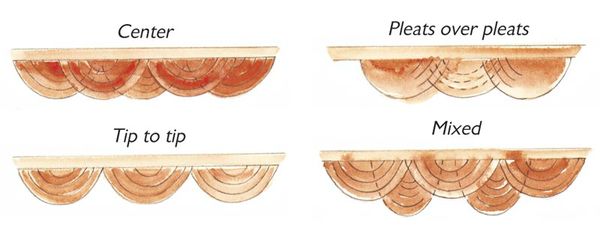
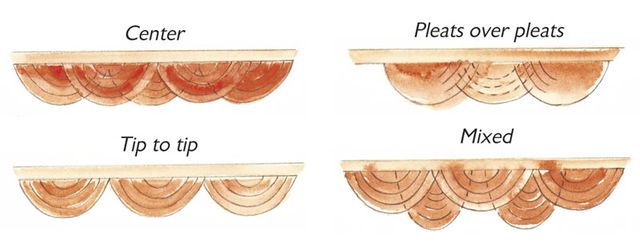
Swags can overlap in any arrangement or abut. Cut swags on the bias for softer folds, and use an odd number of swags for the best look.
Traditionally drapery panels are set 1/2 in. off the floor. But the current look is to stack panels on the floor, that is, add 1-1/2 to 3 in., depending on the length of the panel, so the panel doesn’t puddle on the floor but breaks at the top of the hem, like a man’s pant cuff breaks at the ankle.
Increase the fullness to three times the finished width (three and one-half times for sheers). Line all draperies, except sheers, and for luxurious treatments, interline them with a flannel-like interlining (found in better home-decorating fabric stores). I also set my window treatments apart with hand-sewn trim and dressmaker details — techniques I’ll talk about in a future article.
Whether you follow tradition or expand upon it, I hope these guidelines are helpful. Pair them with basic sewing skills to create fabulous window treatments.
Photos: Sloan Howard; drawings: Dennis Balogh





very educational segment..love it!
I love this article but would like to know how to determine the porportions of a window topper/swag to the window/area.
I was looking for Window Valances and found your site very helpful. Thank you for posting these great tips!
I have a 3-window bay area with a large center window and one of the side windows being a door. I'm trying to figure out the best valance treatment for this area.
Thanks for sharing