
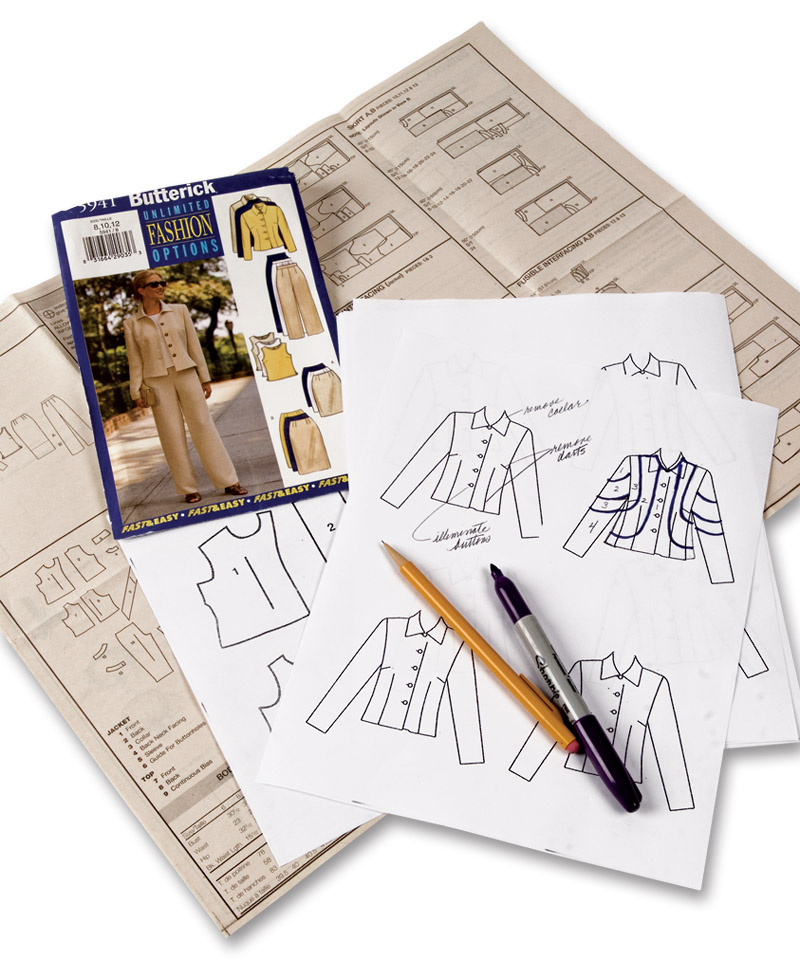
Redesign Favorite Sewing Patterns by Adding Seams
Learn how to get extra style mileage from your favorite patterns by creating new seams.
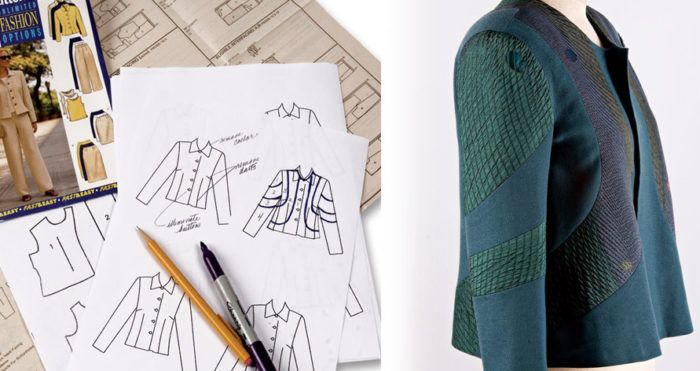
Written by Contributing Editor Mary Ray for Threads #129, pp. 62-67.
When I’ve spent time fitting a pattern and love the results, I’m not going to waste time looking for a new pattern. Instead, I add seams to the original and redesign the way it looks.
Anyone can rework favorite patterns by adding seams. The possibilities are endless, and you don’t need a degree in pattern drafting for success. I’ll show you step-by-step how to do this, but first, take a look at the photos of my wardrobe below, while I explain simple ways to add style lines, develop surface design, and create details on patterns you already know and love.
Adding seams offers a benefit beyond style that I’ll just mention here. Every seam provides an opportunity to fine-tune the fit of a garment. For example, you can add or subtract small increments of fabric in the vertical seams of a jacket or skirt or pants to enlarge or reduce the circumference. You can also make slight changes in the shape of a seam to nip in a waist or expand a bustline, as just two possibilities. Tiny 1/4-inch changes in eight seams around a garment amounts to 2 inches.
When you have problems achieving a good fit, adding seams often provides a viable solution. But for the most fun, change your patterns for style in the ways I show below—it lets you be the designer.
(Most of the jackets started as the same pattern: Butterick 5941, now out of print.)

Insert elements into seams. These sleeves were divided into five sections with a shaped fabric fin inserted in each seam. Divide almost any pattern section into more pieces, then add piping, fringe, or bead trim, for example. Be careful to trim seam allowances to remove bulk. (The author’s design).
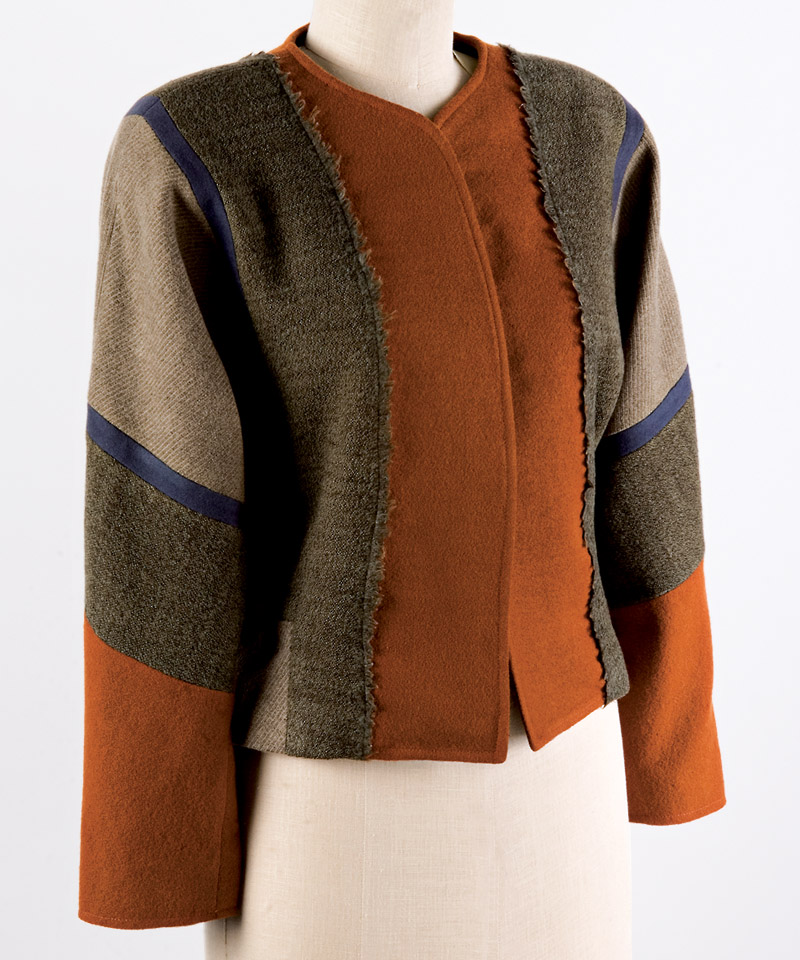
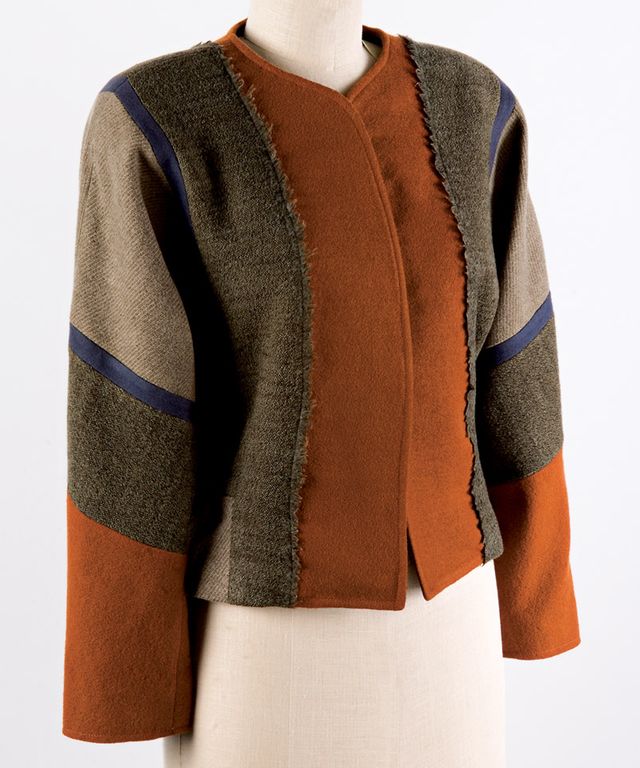
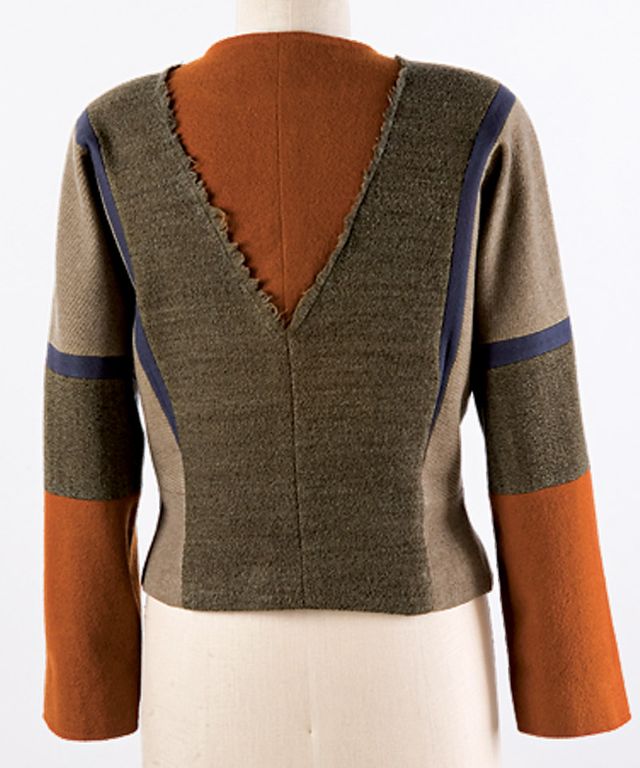
Combine fabrics. Divide a pattern and cut each section from a different fabric. This is an excellent way to use leftover fabrics and coordinate a new garment with others already in your wardrobe.
![]()


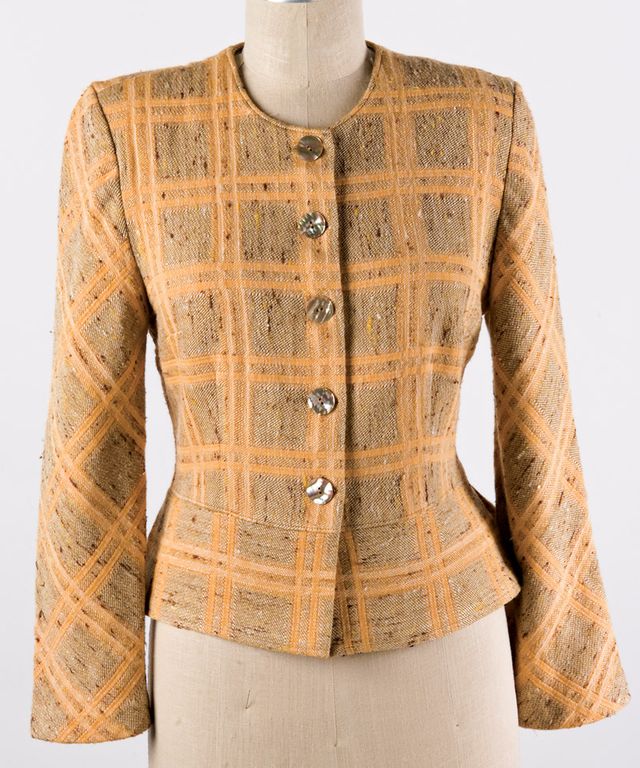
Accent a precious fabric. When I couldn’t follow the fabric’s straight grain on a narrow silk, I cut each pattern piece on the correct grain from a lightweight knit fusible interfacing and fused these to the wrong side of the silk. Curves like this may require using staystitching and clipping to fit the shapes together smoothly. (Butterick 5941)
Add a peplum. Cut off the jacket pattern at the waistline. Cut a strip of the fabric the depth and length of the peplum with pleats added at the side seams and back. Piece if needed. (Butterick 5941)
![]()


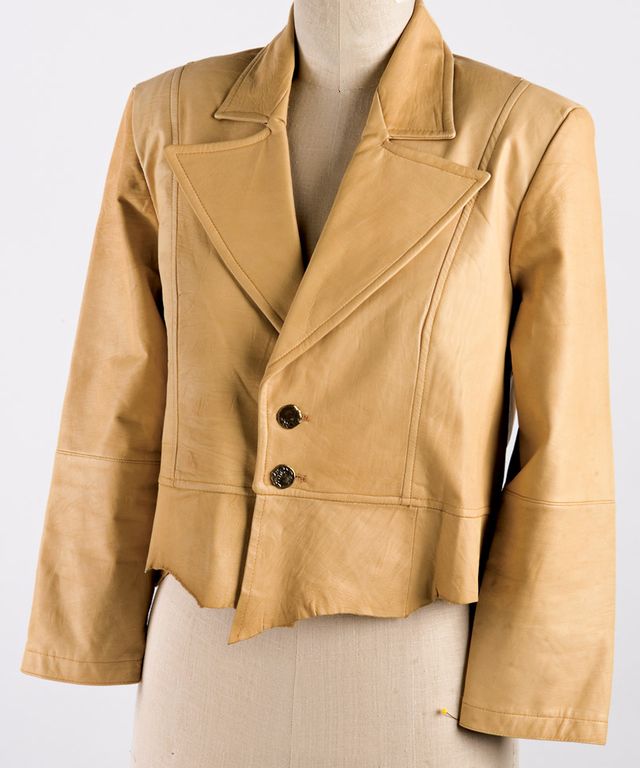
Add seams for economy. Leather jackets have more seam detail because of skin sizes and shapes. Horizontal seams on the sleeves and princess seams help fit the pattern pieces on skins. (Butterick 5941)
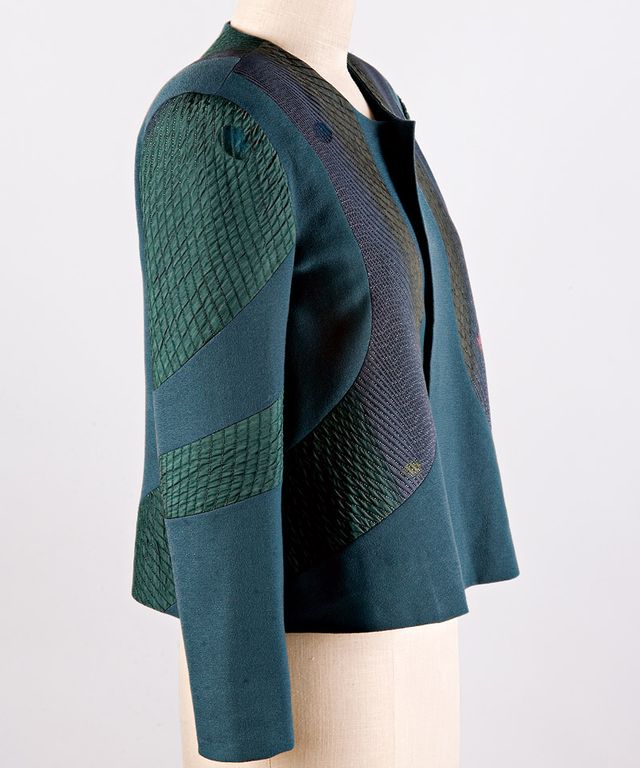
Add enriched inserts. Add seams for a fabric insert. Here, rows of double-needle stitching adorn the inserted panel. A narrower overlaid strip trims the shoulder and sleeves. (Butterick 5941)
![]()

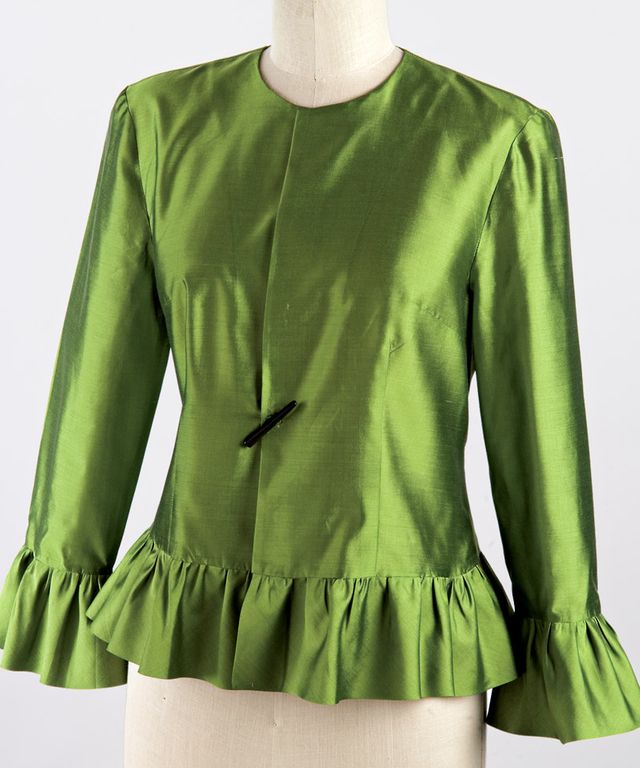
Add a ruffle. Cut the jacket pattern 3 or 4 inches below the waist and the sleeves just below the elbow. Add a doubled bias ruffle for a stylish, soft blouse. (Butterick 5941)
![]()
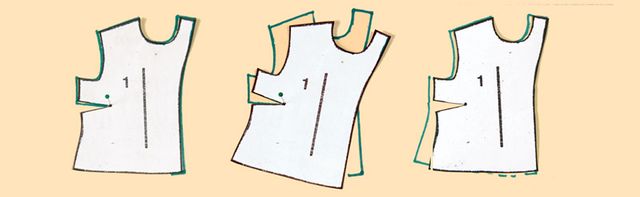
Redesign your pattern
Decide on your garment plan first. Then, trace a copy of your pattern. Finally, cut up the pattern according to your plan, and add seam allowances.
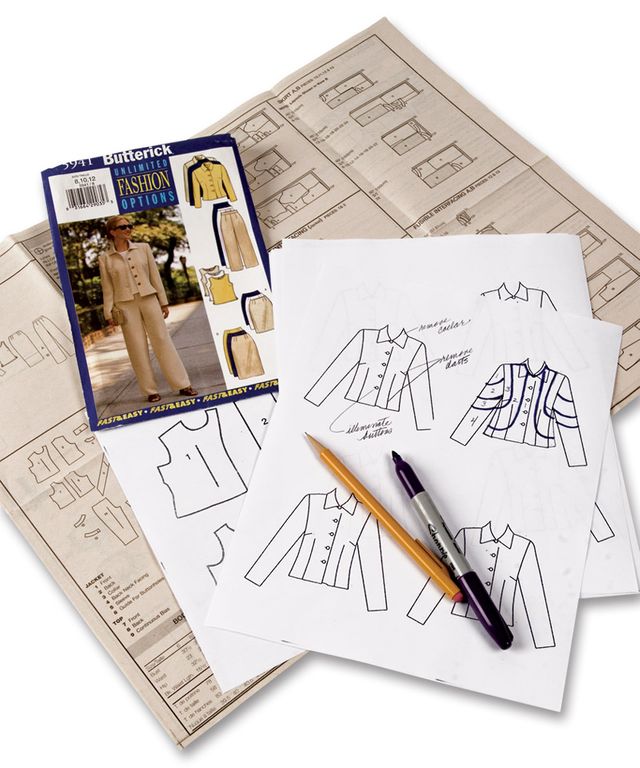
1. Make a plan. Use a photocopy machine to copy and enlarge the schematic drawings from the pattern instruction sheet. The copies are your templates for sketching design possibilities.
![]()


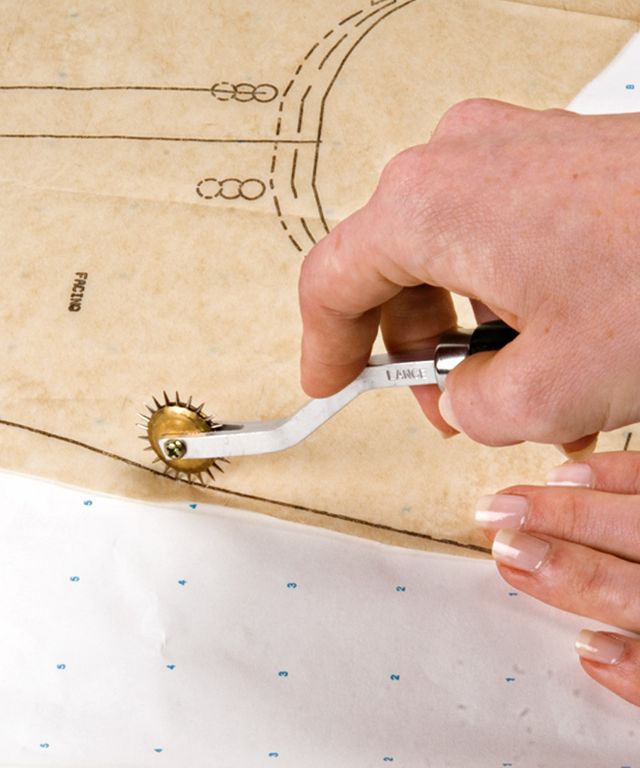
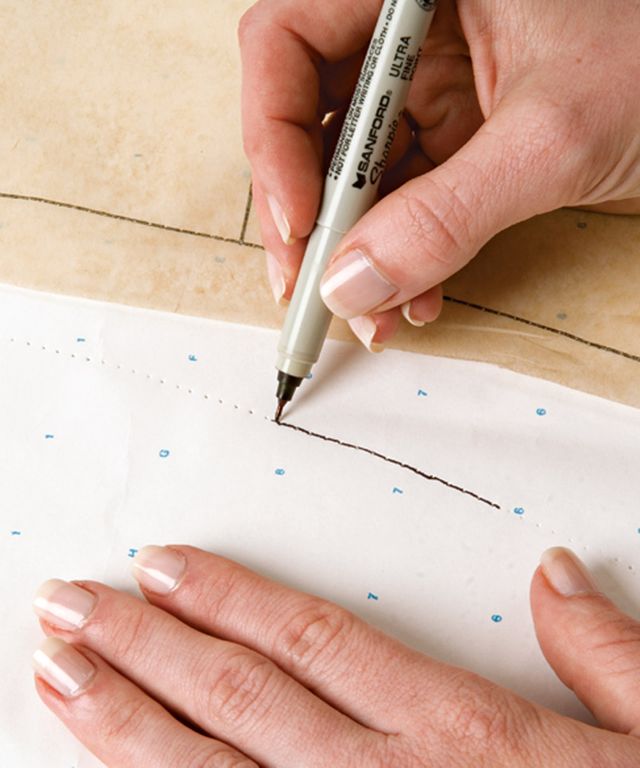
2a. Trace a copy of the original pattern. Position the pattern pieces on pattern paper over a piece of foamcore and trace the seamlines with a needle tracing wheel.
2b. Transfer the existing notches to your traced version by making hash marks across the cutting line. After tracing, remove the tissue pattern and draw over all the pricks with a marker.
![]()
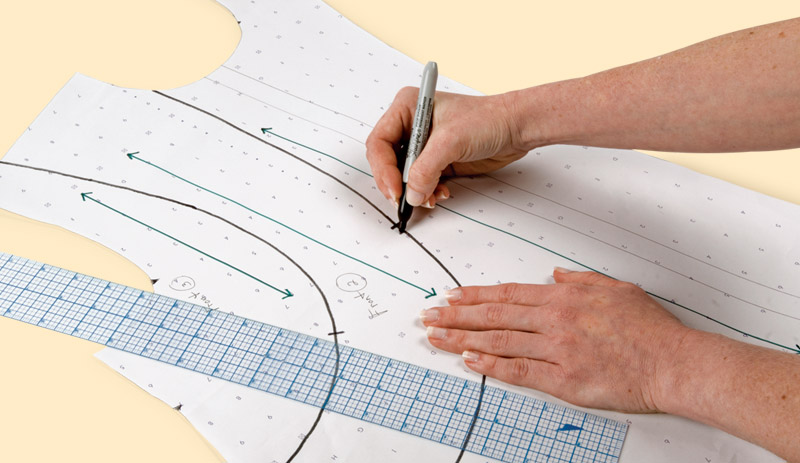
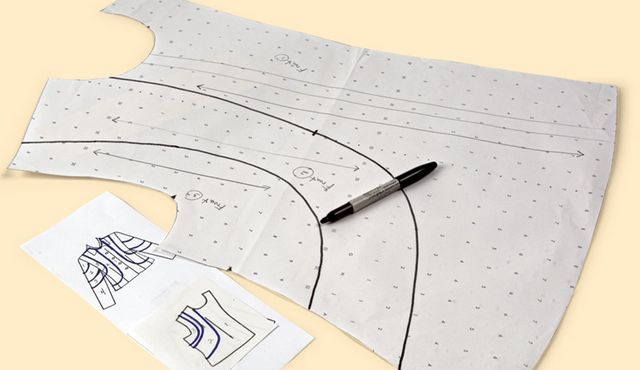
 3a. Make new pattern sections. Follow your planning sketches to draw the new seamlines on the traced pattern pieces.
![]()
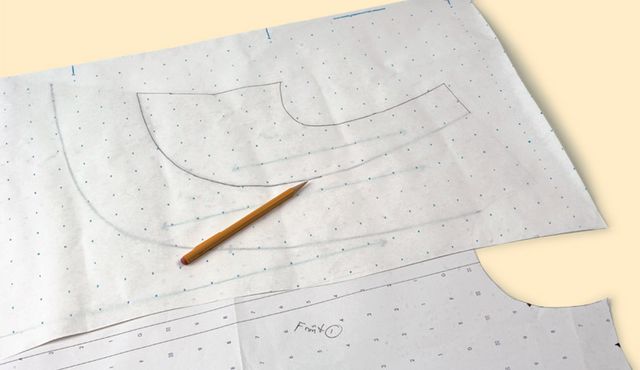
 3b. Place hash marks across the new seamlines to indicate notches. Number the sections on both the intact copy and the individual new pieces. As new patterns, these pieces often don’t make sense when seen separately.
![]()
 3c. Trace each new pattern piece separately.
![]()
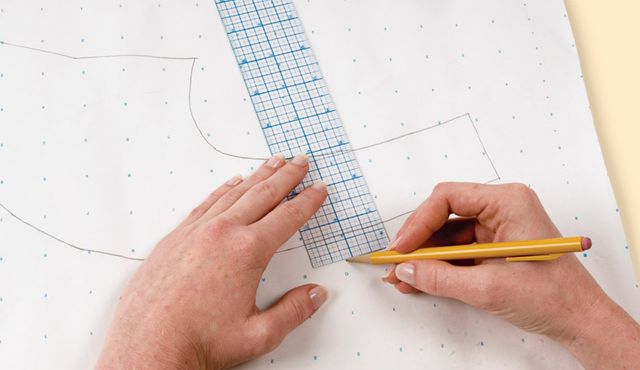
 3d. Use a transparent ruler to add seam allowances before cutting out the pattern pieces.
![]()
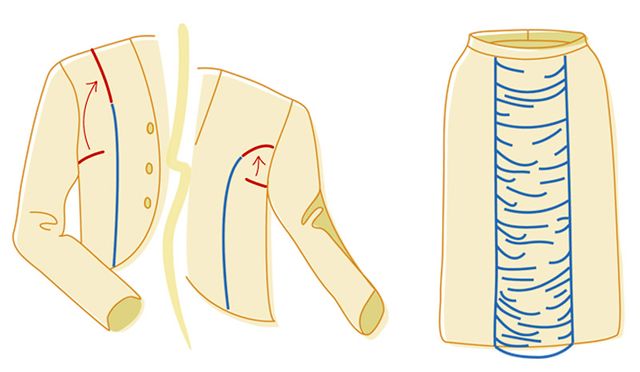
Use new seams to add style lines
Enhance seams for any pattern, including dresses, pants, skirts, blouses, and swimsuits. New seamlines can flatter the figure and always create new fitting opportunities.

![]()
Add a princess seam. With a curved ruler, draw in the princess style lines. This won’t change the fit or shape of the garment, only the lines. Rotate the bust dart (see below) so it disappears into the princess seam.
Create a center panel on a straight, darted skirt. Topstitch the seams for added detail or extend the center panel, then shirr the side edges for a fresh, fashionable look.
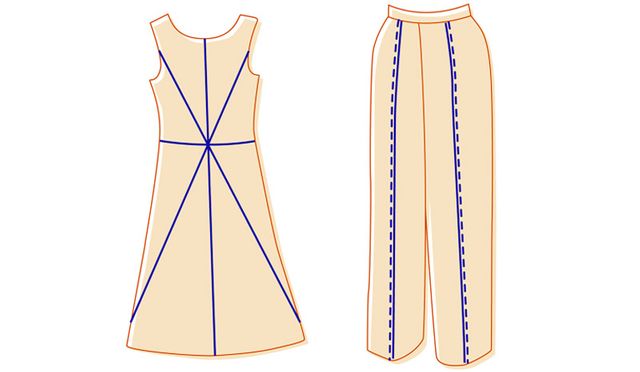
![]()

Divide the back of a garment into sections for a more flattering look.
Create a center seam on front pant legs for a lengthened look. Topstitch the seam for added detail.
![]()
How to rotate a dart

1. Trace around the pattern from the top dart leg to the lower front side seam.
2. Pin the pattern at the bust point; pivot to close the dart. Trace the side seam from the bust dart to the side seam hem. Then, true the hemline .
3. The dart control is now rotated and released at the hem.
Photos: Sloan Howard; illustrations: Lisa Summerell


The pictures don't seem to go with the discriptions. it would be nice to be able to print this and use it, which is not so possible when the pictures don't go along with the text. FWIW, kitty
Hi Kitty, Thanks so much for bringing this to our attention. I fixed the captions to go with the correct images, so you can now print this out for a reference.
nice article, thanks!
Your ideas are getting better and better. This along with new site desing is just perfect for me. Thanks!