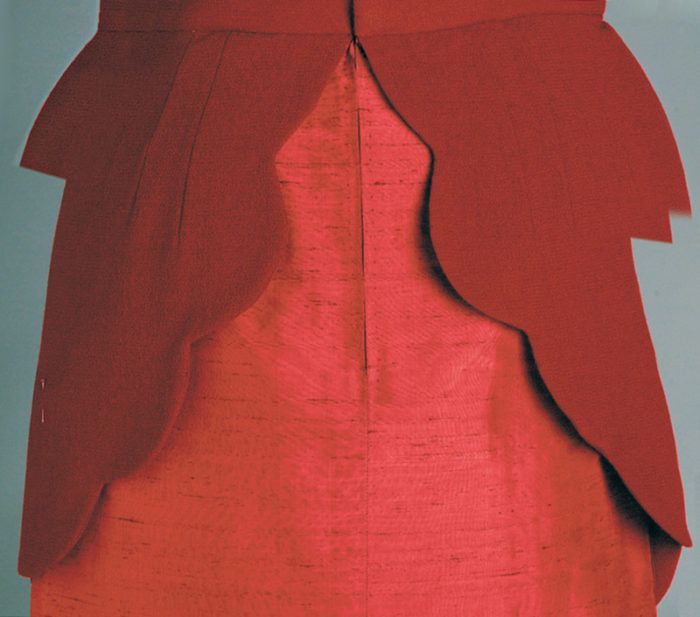
Scallops add an elegant, graphic line to a garment, and they are a fabulous finish not only for hemlines but also for necklines and front edges of a garment.
As a bridal and eveningwear designer, I often use scallops to add a graceful finish to special-occasion garments. I’ve also long seen scallops in couture collections and have recently noticed them in all sorts of ready-to-wear from casual to dressy.
Scallops add an elegant, graphic line to a garment, and they are a fabulous finish not only for hemlines but also for necklines and front edges of a garment.
 More couture techniques from Susan Khalje:
• How to Finish Seams on Chantilly Lace
• How to Support a Dramatic Sleeve Cap
• Combine Topstitching and Binding for an Elegant Seam Finish
• Take a Tour Inside a Chic Couture Skirt
![]()

![]()
I want to explore with you some of the options for successfully adding scallops to a garment and also help you with the logistics of calculating size, marking, facing, and stitching scallops. But first, let’s talk about fabric choices.
Fabric considerations
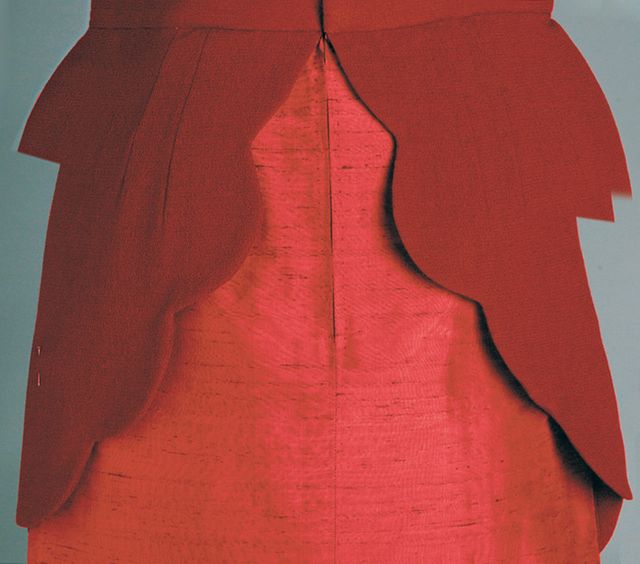
Scallops are most effective worked in fabrics that will curve smoothly along well-defined edges and clearly show the apex of two scallops, or angle where they meet. Firmly woven natural-fiber fabrics like cotton, linen, wool crepe, silk shantung, and silk dupioni are excellent choices. Wool crepe and dupioni were paired for the skirt at left. Loosely woven fabrics and those with loft like thicker satins, moires, jacquards, and piques may produce less effective results. Because scallops require a lot of meticulous clipping, manipulating, and pressing (more about that later), always test your fabric before cutting out to be sure it will cooperate. The results will be better and the sewing much easier.

These sketches offer ideas for using this detail on vertical and horizontal edges.![]()
For scallops that are fun and easy to make, consider fabrics that can be cut without fraying and, therefore, don’t have to be faced or finished. For example, edge a plastic-coated canvas raincoat with small, neat, cleanly cut scallops (see the skethces above). Or create an evening skirt with an ethereal effect using layer upon layer of scalloped tulle. In either case, carefully cut the scallops with your sharpest scissors, and always cut from the curve toward the apex. You’ll need to change direction frequently as you cut, but this is the only way to get a sharp angle. Keep in mind that unfaced scallops shouldn’t be too large because they may have a tendency to droop, unless, of course, they’re at the hemline of a skirt where they have gravity in their favor.
Approximate the size and placement
![]()

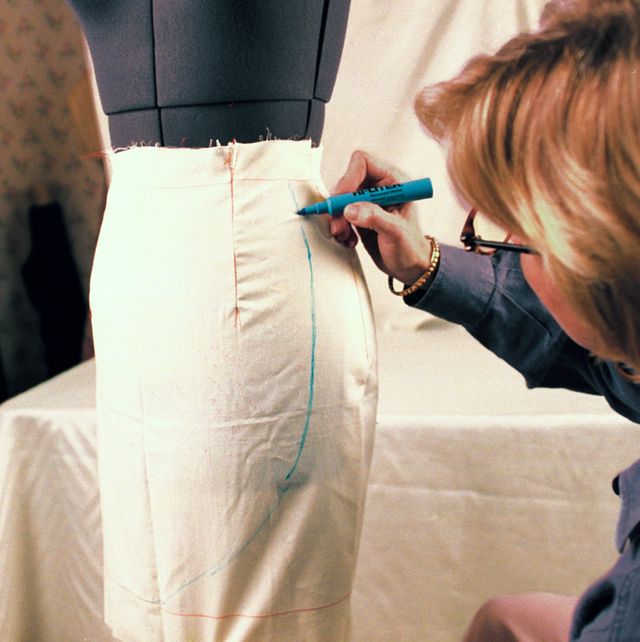
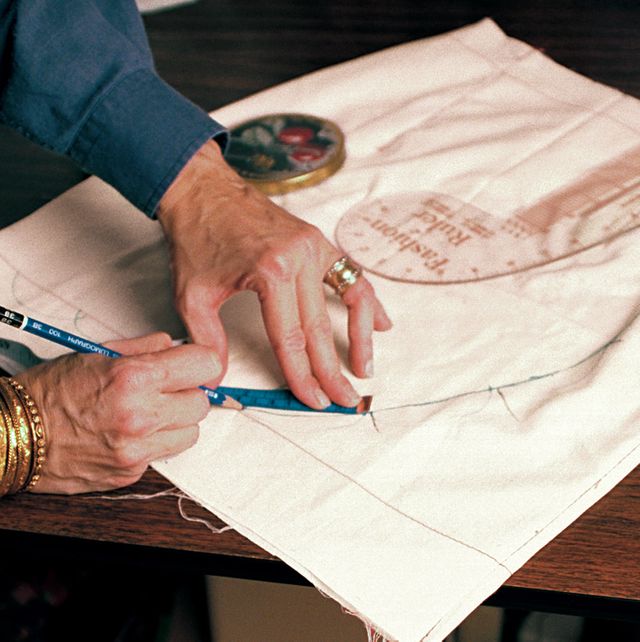
Plan the placement and proportion of a scalloped edge on a muslin of the garment, roughly sketching the scalloped edge in place. ![]()
Begin planning a scalloped edge by making a muslin of the garment and roughly sketching an approximation of the scallops on it (no serious measuring yet). Because there’s a lot of drawing, adjusting, and redrawing the scallops at this stage, a muslin is the perfect laboratory for experimentation. (You can also work with the pattern itself for this step, but copy it onto pattern paper so you have a full front and back to work with.)
As you plan the scallops on the muslin, keep their overall size in proportion to the garment-not too small or too large nor too shallow or too deep. If they’re too shallow, they might look like an uneven edge. If they’re too deep, they might look like flaps. Because each garment is different, this experimentation on the muslin is a trial-and-error process.
In terms of the number of scallops on an edge, I think an odd number-five scallops across the front of a skirt hem, for example-usually produces a more visually pleasing design than an even number. Using an odd number places the deepest part of the scallop’s curve, instead of its apex, at the center of the skirt, which is also more visually pleasing. When scallops are placed along the hemline of a skirt, the bottom of the curve is technically the longest part of the skirt. However, the skirt will often appear shorter because of the areas of the scallops that are cut away. This may not matter in the slightest, but it’s worth noting and considering when designing a scalloped garment.
After I draw on, pin, manipulate, and cut the muslin-doing whatever it takes to plan the scallops-I study it from a distance and look at it in a mirror. Sometimes I even leave it alone for a day or so and check my reaction when I see it again to be sure I’m pleased with the proportions and placement of the scallops. When I’m satisfied, I move on to more precise drawing.
Get out the ruler
Here comes the math part! But don’t run away; calculating scallops is not that complicated if you follow these tips.
![]()

Calculate the final dimensions of the scallops along the baseline on the muslin that parallels the garment’s edge and runs through the apex of each scallop. ![]()

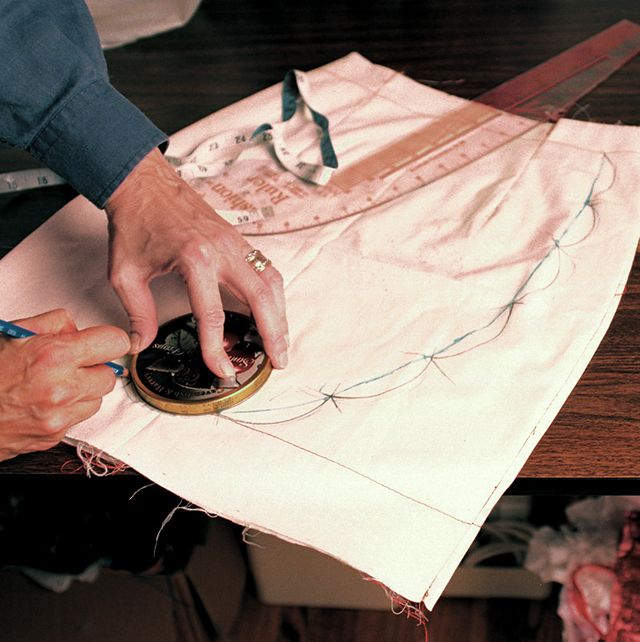
Refine the curves of the scallops using a round object, such as a coffee can lid or a saucer. ![]()
Once the general size and spacing of the scallops is set, you need to accurately calculate the dimensions so the scallops will fit into the allotted space on your pattern. Continuing to work with the muslin, draw a baseline on it from which to calculate the exact spacing and depth of the scallops. This line connects the apexes. If the scallops are along the bottom of a skirt, the baseline parallels the hemline. If the scallops finish a curved edge, the baseline will curve to echo the garment’s edge. Keep in mind that if the baseline falls inside the garment’s original curved edge (for example, along the front edge of a bolero jacket), some of the original jacket will be cut away when the scallops are formed. This may or may not matter, but be aware of it.
Measure the baseline carefully to determine its length. I calculate the spacing in centimeters, using the reverse side of my tape measure, so I don’t have to deal with tiny fractions of inches. For example, dividing 28-3/8 in. into nine scallops is a challenge, but this same distance equals 72cm, which divided by nine is a simple 8cm per scallop. You may need to make minor adjustments to the dimensions of your garment to make your calculations easier. For example, if an edge measures 51 in. and you plan to space 10 scallops along the edge, adjust the original measurement to 50 in. In this case, the calculation and adjustment are so obvious in inches that you don’t need to bother converting to centimeters. When all the calculations are set, refine the curves of the scallops using a compass, saucer, small plate, or even a mug as a guide to redraw them on the muslin.
Make a template for easier marking
![]()

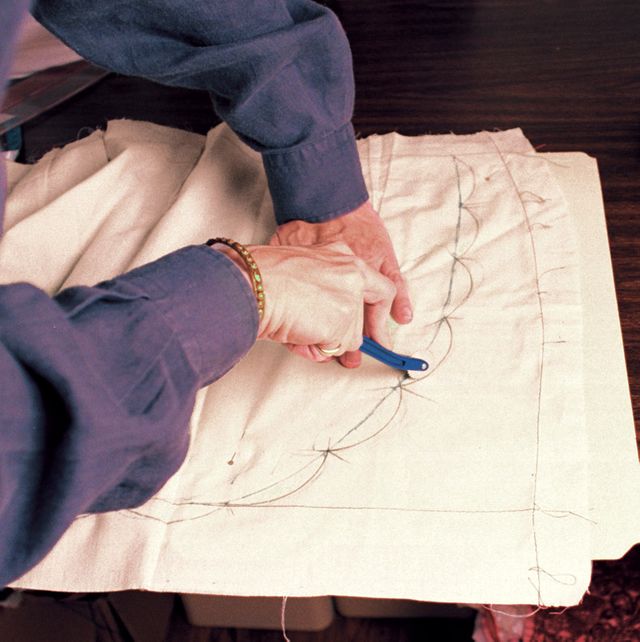
Make a manila-folder template, and transfer the scallop marks to it using a tracing wheel. Use this firm template to transfer the markings to the fashion fabric. ![]()

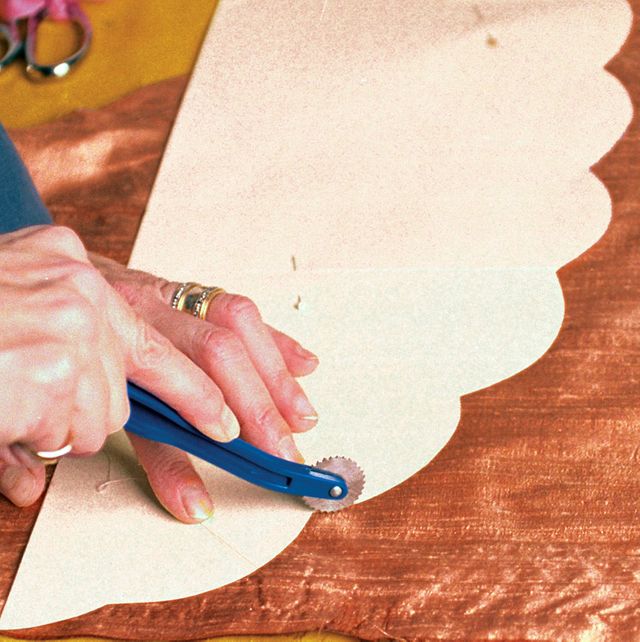
Transfer the scallops to the fabric using tracing paper and a wheel. Trace carefully around the template so the markings don’t show on the right side of the garment. ![]()
A template is the easiest and most accurate way to transfer the scallops to your fabric (I’ll tell you more about marking in a moment). It’s possible to transfer the scallop markings directly from the muslin or tissue-paper pattern, but using a template is so much easier. Old manila folders make great templates because they’re sturdy, easy to cut, and can be pieced together to accommodate any length. Use a tracing wheel to transfer the scallops to the folder. You don’t need tracing paper because the spikes of the wheel will perforate the folder’s heavy paper. Cut out carefully along the perforations. The cut edge is the stitching line, and you don’t need to add a seam allowance on the template.
Freezer paper also works well for making templates. You can iron the freezer paper directly onto the wrong side of your fabric using a cool temperature; then use the cut edge as your stitching guide with no further marking.
What about facings?
Scalloped edges can be bound, but the binding will crease at the apex of the scallop. And narrowly hemming scallops is difficult, to say the least. So the best way to clean-finish a scalloped edge (short of clean-cutting a fabric that doesn’t fray) is to use a facing-either a partial facing or a full facing, which serves the dual purpose of a lining.
For a partial facing, make a pattern using your template as a guide. The depth of the facing should be enough to clear the apex by at least 1 in., but not so wide that it droops. Be sure to mark a grainline on this pattern that corresponds with the grainline on your garment pattern, because if the two are not cut on the same grain, the scalloped edge could pull and be difficult to press.
Cut the facing from your fashion fabric, or use a compatible fabric with the same care requirements. The fabric you choose for the facing can work to enhance the look of the finished garment. For example, if you want a firm finish on your scalloped edge, use silk organza or a crisp cotton; for a softer finish, use China silk. Whichever fabric you choose, be sure to preshrink it. Finish the straight edge of the facing before attaching it to the garment by machine zigzagging, hand-overcasting, or serging, whichever is least visible through the fashion fabric.
Full facings are the best finishing solution in many cases because they eliminate the need for hemming a partial facing and hand-stitching that in place. Lightweight fabrics can be self-faced or a compatible, lightweight facing can be used when the fashion fabric is heavy. Be sure to align all edges perfectly when sewing a full facing to the garment so that the facing/ lining doesn’t bag.
When you’ve determined the type of facing to use, transfer the scalloped stitching-line markings to the wrong side of the facing or to the wrong side of the garment. You don’t need to mark both. I think it’s a little easier to mark the garment, but if you mark the facing, it will lessen the possibility of the marks showing through to the garment’s right side. Use tracing paper and a tracing wheel to mark, carefully guiding the wheel against the edge of the manila template.
Strategies for special scallops
Scallops on knits: Face scalloped edge with a narrow strip of bias-cut tricot, like Seams Great (available from Clotilde; 800-772-2891). Clip sharply into the apex and along the curve. Turn tricot in, and topstitch in place. Make a shallow cut at the apex, as necessary.
Piped scallops: Use short sections of piping that overlap at each apex.
Upward-facing scallops: Be sure that they’re not too deep, or they’ll fall forward . Use a very lightweight interfacing to stabilize them, and favor the facing when pressing.
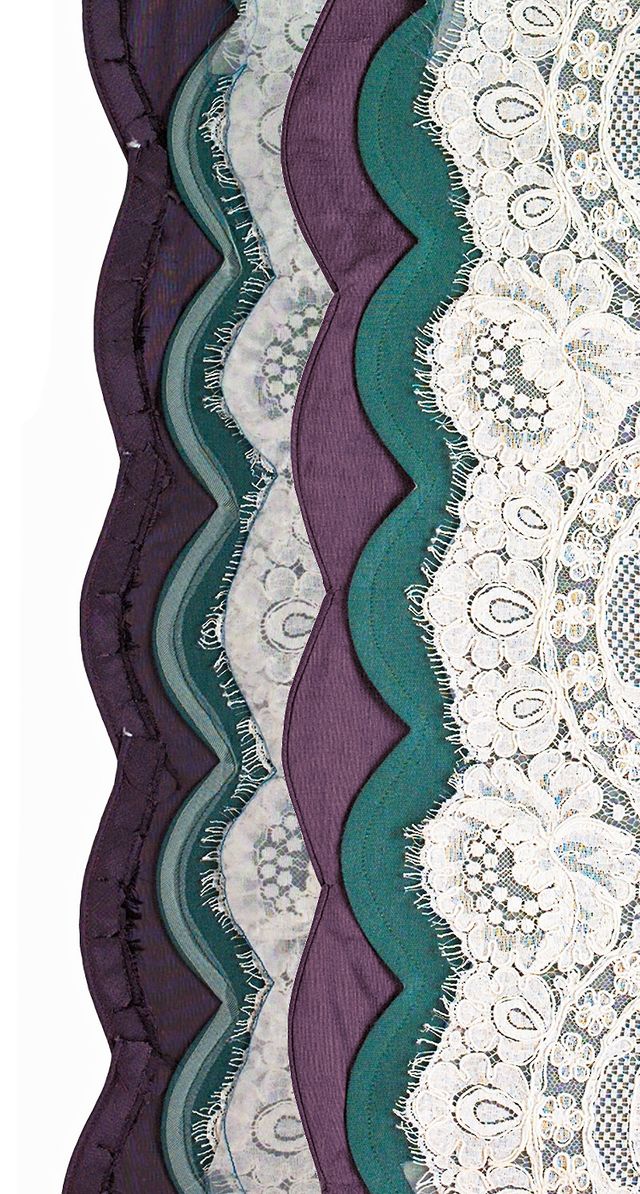
Scallops and lace: Fine laces often have beautifully scalloped edges that are wonderfully regular. You can overhang a scalloped lace border over a straight edge (align the apex of the scallops along the edge), or shape the fabric to form a scalloped underlay.
To join the lace and fashion fabric without an additional facing, staystitch the fabric along the seamline, clip the seam allowance, and turn it toward the right side of the garment. Press well and hand-stitch in place along the staystitched edge. Secure the upper edge of the lace by hand with a fell stitch or a tiny machine zigzag. Press the lace-trimmed border face down on a thick towel.

Special scallops deserve special treatments. From left, scallops on knit fabric, piped scallops on dupioni silk, and scalloped lace at an edge.
Sewing, pressing, and clipping
When the marking is complete, carefully align the garment and facing, right sides together, and sew along the scalloped stitching line. If you’re using a freezer-paper template ironed to the garment’s wrong side, just align the facing and sew along the cut edge of the paper (the paper tears away when you’re done). Use a small stitch length (about 2mm), which is especially important if your fabric is loosely woven. Small stitches are also the key to forming a sharp, well-defined angle at each apex. And they help stabilize the fabric once the scallops are clipped and turned. After stitching, trim away the excess fabric to a 1/4- to 3/8-in. seam allowance.
![]()

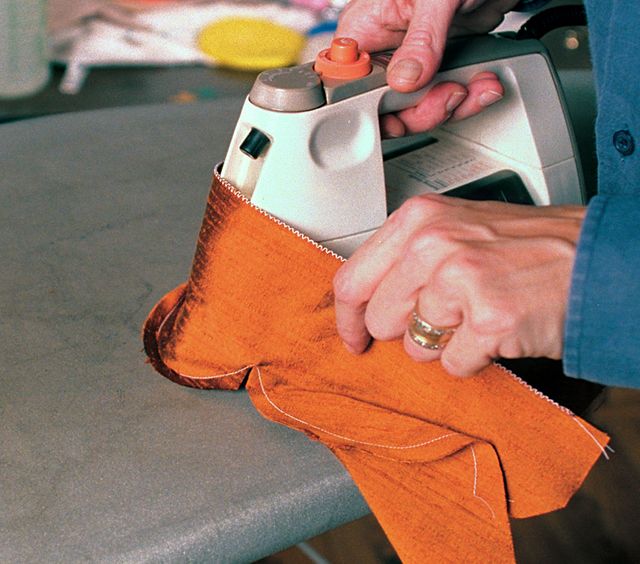
Gently press the scallops, as best you can, from the inside before turning them right side out. Then press seams open. ![]()
Now you’re ready to “sandwich-press” (press as you’ve stitched) the two layers, which firms up the stitching line. Then, before turning the scallops right side out, try to work the point of your iron gently and patiently into the curved seams of the scallops, without distorting the edges. Next press the seam allowances open. I don’t like the little corners that form when a curved seam has been clipped and then pressed. The fabric inevitably weakens where it has been clipped and caves in, spoiling the curve. However, by setting the curve first by pressing before clipping it, you lessen this tendency. You won’t be able to do this on really small scallops, but if the scallops are large enough, and especially if they’re in a prominent place on the garment, it’s well worth the effort.
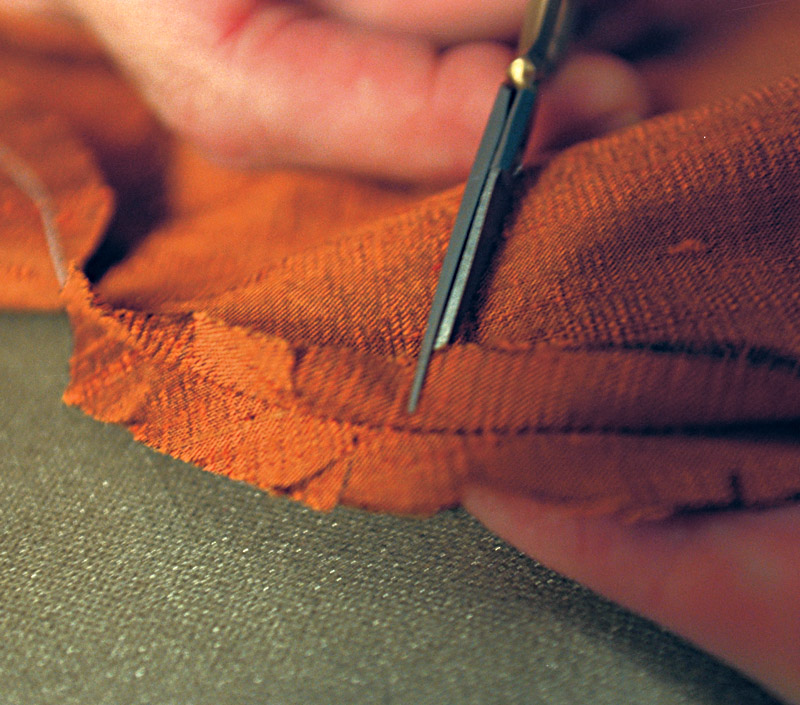

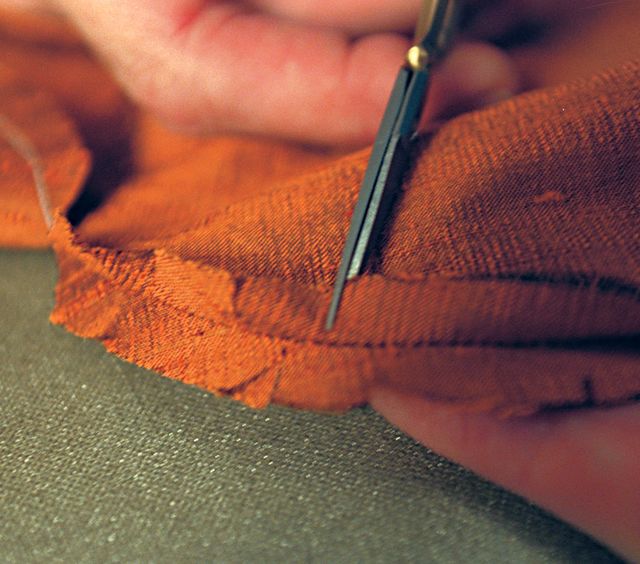
Generous clipping is necessary for flat, smooth scallops. After first pressing the seamlines as stitched, begin by clipping deeply at the apex and then around the curves, staggering the clips on the layers when the scallops are in a prominent area or if the fabric is sheer.
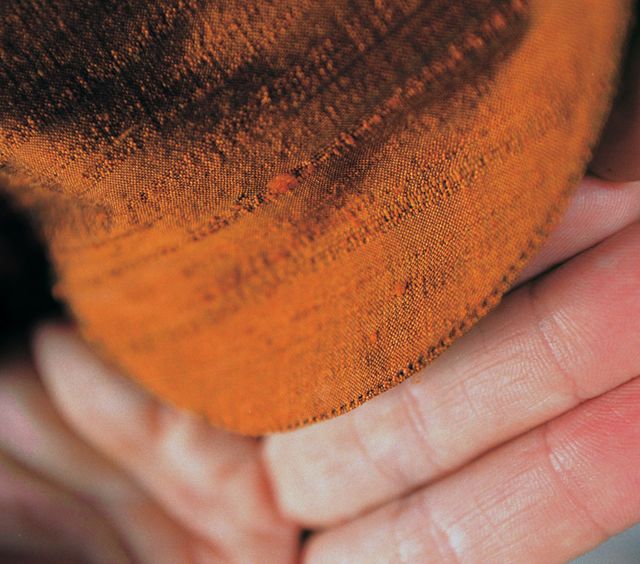
Roll the seamline just to the inside of the garment as you give it a final press. The scallops will curve beautifully along the edge without a visible seamline.
![]()
After pressing, start clipping the seam allowances of a scallop at its apex, cutting carefully and as deeply as possible). If you don’t clip right up to the stitching line, the scallop will never lie flat once turned but will always pucker at the apex. Clip the seam allowances of the curves generously. They’ll be encased and protected from abrasion and strain and are unlikely to weaken. If the scallops are in a particularly prominent place, such as a neckline, you might want to clip each layer of the seam allowance separately, staggering the placement of the clips. Press the scallops again from the right side, favoring the seamline so it rolls just to the inside of the garment.
It’s impossible to understitch the scallops by machine, but understitching by hand can be done carefully using a tiny backstitch to join the seam allowance to the facing. Be careful not to catch the fashion fabric. Topstitching can also be used to help define the edge of the scallops, but carefully hand-baste the layers together first to prevent distortion or shifting as you stitch.
If you need to tack the facing to the garment, stitch as carefully and invisibly as possible using a tiny catchstitch that’s hidden between the facing and fashion fabric so that there’s no visible thread to snag. The catchstitch also evenly distributes the facing’s weight against the garment.


A catchstitch secures the facing to the garment.
A fell stitch holds the lace in place.
![]()
It’s time to put some scallops on your sewing menu. I think you’ll find them fun to sew and just as fun to wear.
Susan Khalje, a custom designer in Glenarm, Maryland, is the author of Linen and Cotton, published by The Taunton Press.
Photos: Mary Ray and Judi Rutz; sketches: Michael Crampton







Log in or create an account to post a comment.
Sign up Log in