
Mastering the Narrow Hemmer, Part One
Learn how to get the most from the narrow hemmer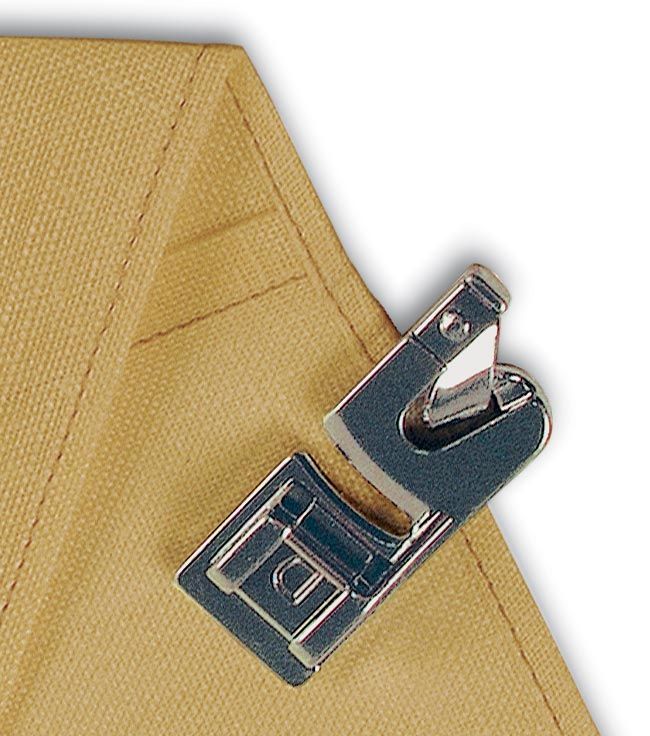
It’s hard to imagine a more basic or useful edge finish than the narrow hem. You see it everywhere: on most blouses and shirts, many linings, sheer or circular skirts, as well as on scarves, ruffles, napkins, tablecloths, and handkerchiefs. But for all its simplicity, this tiny detail can be very challenging to make well. Its very narrowness makes any inconsistency in width or inaccuracy in stitching quite obvious. Pattern instructions for these hems usually read something like: “Turn edge under 1/4 in., press, stitch near fold, trim to 1/8 in., then turn under, press, and stitch again.”
After many unsuccessful attempts to do this without burning my fingertips and producing uneven, amateurish results, I decided to try the professional approach: using one of the narrow-hemming presser feet available for my sewing machine. Like many sewers, I was at first frustrated with the narrow hemmer. But persistence and practice paid off, and it has become clear to me that using a foot is the only way to go. In the photos here and in the related articles, I’ll show you in detail how to choose the appropriate foot, keep your fabric feeding smoothly, deal with crossing seams, corners, and other typical hemming situations, and how to achieve decorative hemming effects. But before we plunge in, let’s clarify some terms, and consider a few basic points about fabric choice and handling.
Anatomy of the narrow hemmer
Start your 14-day FREE trial to access this story.
Start your FREE trial today and get instant access to this article plus access to all Threads Insider content.
Start Your Free TrialAlready an Insider? Log in


Please tell me where I can purchase a Narrow Hemmer foot for my Singer model # 4562 and other acessories for my machine. I enjoy your great articles. They have been a great advantage to my hobby of tailoring. Thank You all at Thteads. DannG
You can go to http://www.kenmore.com/shc/s/s_10154_12604_Kenmore_Sewing+Machines+%26+Accessories_Machine+%26+Embroidery+Accessories?keyword=narrow+hem+foot&sLevel=1|2&sLevel=0&prop17=narrow%20hem%20foot
Your machine needs to be a horizontal or you have to buy and attachment.
Thank you very much for giving us "the" best information.
I think the diagram "Match hem width to groove width" is slightly wrong.
In the grey image on the left showing the underside of the foot, the "width of the groove under foot" is the DARK GREY AREA at the center back that crosses the needle hole, not the finger on the left.
@hrynkiw I believe the width of the long toe on the foot is the same as the groove in the bottom of the foot. This makes it easer to match the hemmer foot to the width of the hem you wish to make.
I am thrilled that this article is so popular & repeated so often!
It went to press without either David Coffiin (editor) or me getting to proof read it. (Very unusual!). As many of you have caught, the arrow on the first illustration
Indicating that the groove on the underside of the foot
Is approximately the hem width that this hemmer makes is pointing to the toe of the foot instead of the groove.
For much more detail on narrow hemming, see Fime Machine Sewing (carolahles.com)
Carol Ahles - author