

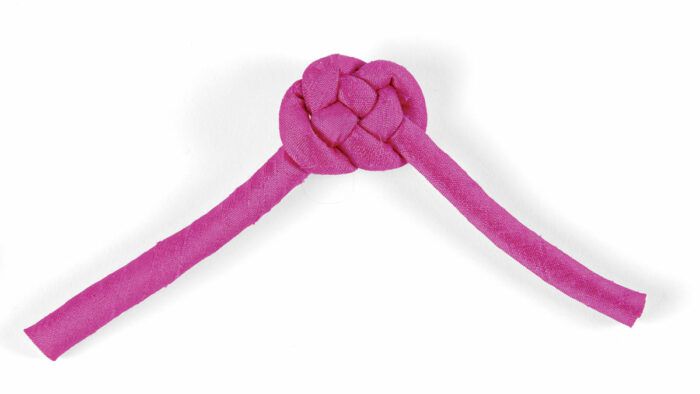
Making cords is easy, but here’s a trick to make them better, softer, and easier to tie into Chinese ball buttons, as shown on dress belt.
Fluff the cord
A cord filler often produces a stiff cord that has too much body for a tie belt. Self-filled cording can also not give you the effect you want. You want a cord filled with something that keeps it soft but also supports it enough to stay round.
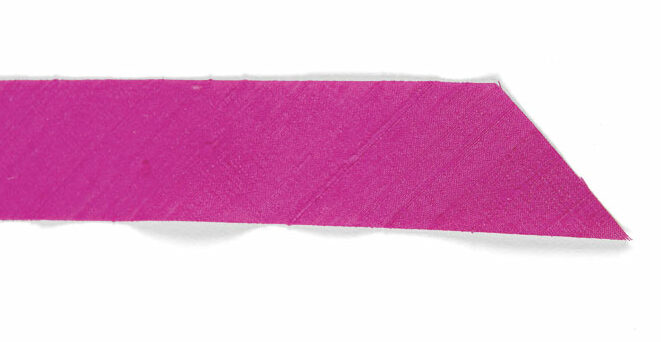
1. For a 1⁄4-inch-diameter cord, cut a 11⁄2-inch-wide bias strip. If needed, piece strips on grain.
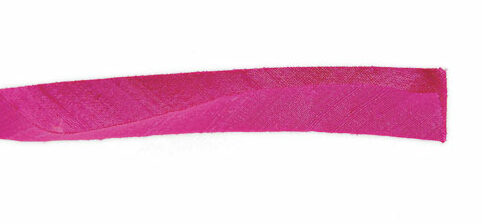 2. With right sides together, lay a 1-inch-wide strip of soft batting (we used Hobbs Heirloom premium wool batting here) under the folded fabric.
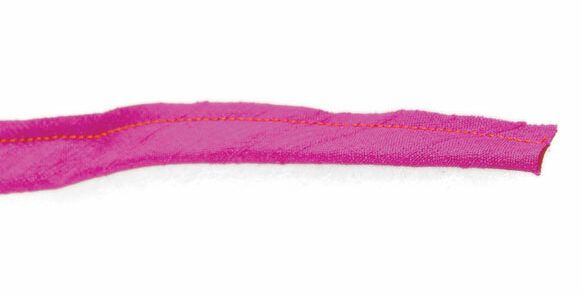
3. Stitch through all three layers 3⁄8 inch from the fold.
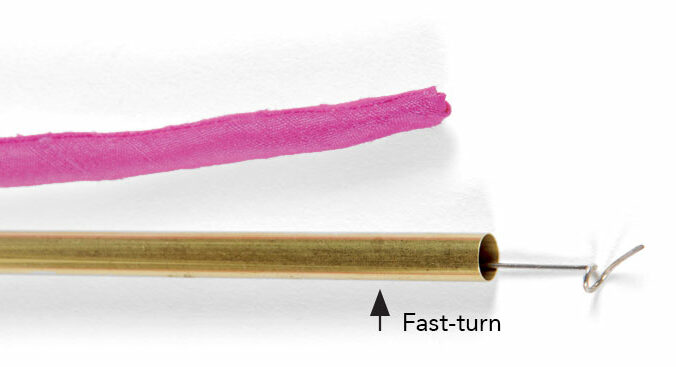
4. Use a Fast-Turn or bodkin to turn the tube right-side out.
Mold the knot
The real success in making a perfect Chinese knot isn’t in how it’s tied but in how it’s shaped.
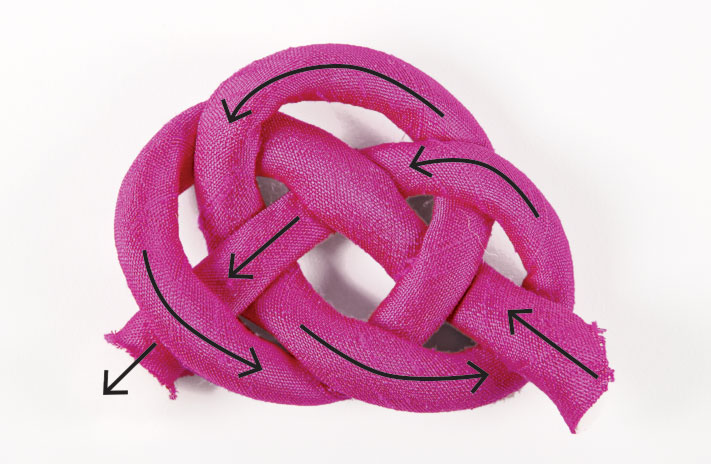
1. Follow the arrows with your batting-filled cord. Keep the seam on the wrong side as much as possible.

2. Mold the knot into shape. Gently coax the cord from the center out to tighten the knot, but keep it flat. Before it’s too snug, start pulling the outer edges tighter until they start curling under to shape the ball.
3. The knot shown is perfectly balanced because it was sewn to the end of the cord and not tied on the end of the cord. To do this, trim the ends of your knot. Then insert one cord end and the ends of your knot into the back of each Chinese knot.
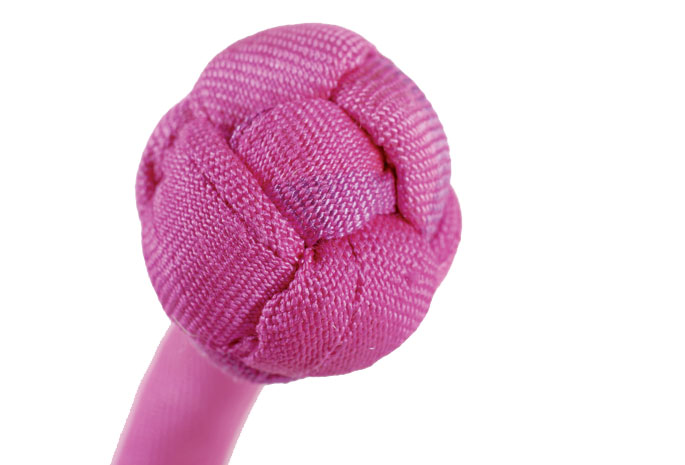
4. Center the cord end, and hand-stitch with invisible stitches to hold everything together. The soft cord flattens when you’re making the knot, which makes it…
Start your 14-day FREE trial to access this story.
Start your FREE trial today and get instant access to this article plus access to all Threads Insider content.
Start Your Free TrialAlready an Insider? Log in


Thank you! This will come in handy for creating the cloth buttons on a medieval mongol caftan I am trying to make. :)
Thank you so much Susan,
I tried making these one time and they just did not turn out nice and neat. Now I will try again using your tips. I am printing out this article to add to my personal notebook. Thanks again, Cindy