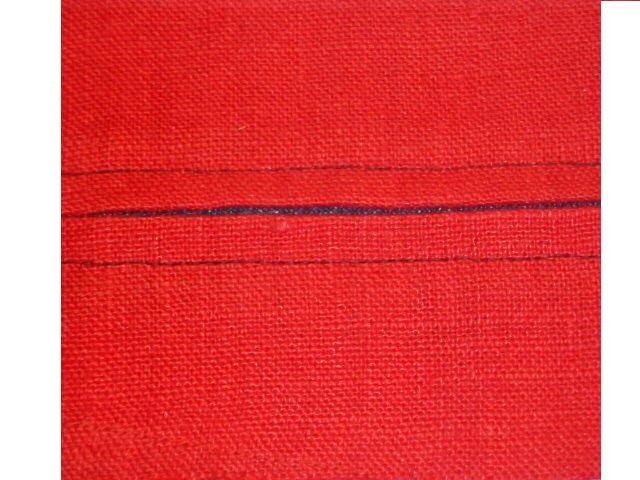
Learn how to create slotted seams.
You can make a slot seam on any seam line straight enough to make a smooth curve without clipping. Use it for a fine tailored seam and a handsome accent.
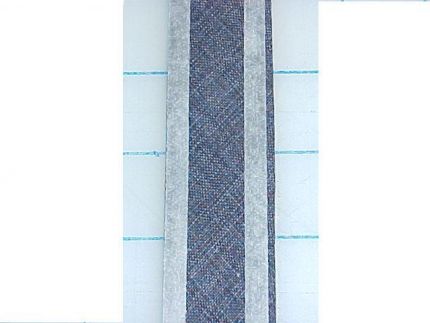
First, cut an underlay strip the length of the seam and the width of the 2 seam allowances. Cut it on either the lengthwise or crosswise grains. But I prefer to cut the underlay strips on the bias for added ease in body movement and because the bias lays flatter under curved and shaped seams.
To sew a simple slotted seam:
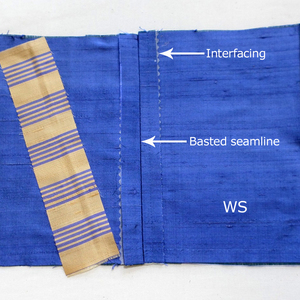
1. With right sides together, baste the two edges along the seamline and press the seam open. You can baste with your sewing machine set at the longest stitch.
2. On the right side of the underlay strip, press a length of 1/4 inch wide Steam-a-Seam fusible tape along both long raw edges.
3. Remove the backing paper and position the strip right side down over the seam allowances so the raw edges of the strip and the raw edges of the seam allowances match. Press into place.
4. Serge along the raw edges. Be sure to move the ‘body’ of the fashion fabric away so it doesn’t get caught.
5. From the right side, top stitch a presser foot distance away from the basted seam. Remove the basting and press.
As the garment moves on the body the contrasting underlay of fabric can peak out for interest.
As an accent, instead of using a straight stitch a presser foot away, try a decorative stitch for interest or pull back the folded edge of the slot about every inch and secure it with a seed bead.
Start your 14-day FREE trial to access this story.
Start your FREE trial today and get instant access to this article plus access to all Threads Insider content.
Start Your Free TrialAlready an Insider? Log in







I love sewing but I hardly have time anymore. If I could I would sew all day. I love creating new thing.
I'd love to see a photo of a garment illustrating this technique.....anyone?
I learn by doing. You'll have to show this technique at our October Retreat. Which pattern would I use this on?
I am a bit confused about Step 5 as the directions say to top stitch away from the basted seam. No problem with that, however, the picture shows that the wrong side seam edges finished with a zig-zag stitch. I assume that the next step (5a perhaps?) would be that after the right top stitching has been sewn and pressed then the seam edges are finished as the picture shows? For sure slotted seams can be incorporated into a lot of tailored it certainly give a very chic look and and perhaps for less formal styles maybe if the backing is a contrasting plain colour or patterned material.
Normandie: The "zig-zag" you see is the serging that you do on the edge of the backing fabric and raw seam allowances of the garment as called for in Step 4.
This technique looks great on a straight/a-line skirt. One pattern I have that uses this is Fashion Sewing Group (Nancy Erickson) skirt.
I too would like to see a finished garmet with this technique used. Of the suggestion of a pattern to use it on.
OK...at first I felt SO stupid, but I read the instructions several times over and now I think I understand it! More pictures would have helped me as I learn by seeing more than reading. I think it's part of the aging process that we don't absorb all we read the first time or two through anymore.
Good instructions and pictures - makes perfect sense to me after glancing over and I will be giving the technique a go soon.
Now ladies - we are supposed to be creative people - why are we asking what pattern to use?? The sky is the limit!! I'm thinking it would look really great on some type of tailored tote or even a decorative pillow, too - just rows of seams for decorative purposes to create eye appeal and texture.
It's always nice to learn different ways to add interest to a garment. It's even nicer when it a familiar method. Adding the underlay strip is done almost exactly the way I learned to add a zipper, how great is that?!
Very neat trick. Might be nice between a yoke and skirt for my toddler with the beads, or maybe buttons, for an accent as she mentioned.
I love decorative techniques. Haute couture uses things like this and we can copy for a fraction of the price!
Thanx for sharing.great technique;)
Thanks for a great tutorial! This sure is a great way to add detail to any garment if you love a simple and stylish look - sort of a bit in the "Less is More" way! :) I can see though how a couple of the steps may be confusing to some, something some others comment on too. In step 4 you're supposed to serge/zig-zag the raw edges, but the picture doesn't show only that, it also shows the topstitching (which you supposedly haven't done yet). The tutorial would be much better if the picture in step 4 was edited (in Photoshop or similar), simply remove the topstitching by cloning the white fabric and by cloning "erasing" the topstitching so that white fabric takes it's place.
Thanks again!
Louise, can I use this technique to add three slotted seams as a design element in the front of a plain shell [like Anything But Ordinary]? I am planning to slice open the blouse front in 3 equidistance places, add the needed seam allowance for each piece. Any problem you can see? I am also considering using the same idea to make some faggoting "seams" using my serger.
About 25 years ago my mother had a coat that I adored. It was a charcoal gray pea coat that had slotted seams with a bright red fabric that flashed with every movement. It was way too small for me or I would have stollen it from her. Just about every year since I've thought about making my own coat with this technique and since I need a new coat I think I may just do it this year if I can find a lovely fabric with a color that speaks to me. I'd really like to sew a couple of shirts with this technique as well. I've never seen another garment that uses it but I think I could get a really striking effect from what is really a very simple and easy way to handle seams. I've always known the basics of how to sew the seams but I really like the idea of using the fusible strips to hold everything together until the top stitching is done. I also love the idea of folding back the seam and tacking it down with a bead to show even more of the contrasting fabric. I wish we had some pictures of some finished garments to inspire us even more though.