Ah, the sweet taste of praise. Maybe that’s the first phase of a sewing addiction—when our friends and peers show admiration for the garments we make. Their support and high regard is intoxicating and keeps us working, learning through the rough spots so we can get to greater and more impressive results. Today an apron…tomorrow a winter coat. Here are a few tips for things you can do to improve the finished results on your next project.
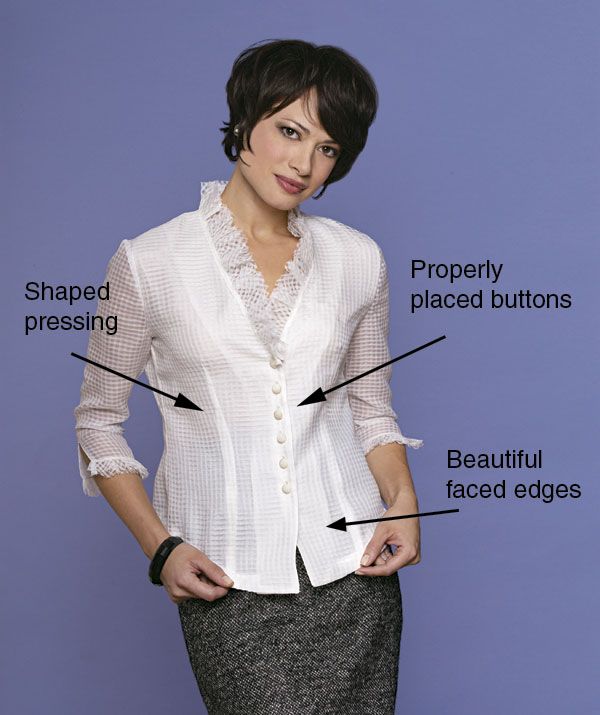
Buttonhole placement—A center front row of buttons can occur on skirts, dresses, jackets, blouses, coats, vest, and more. Even though button placement is shown on the pattern, if you are taller or shorter than the standard used to design the pattern you may need to adjust their position.
1. A single row of buttons (as opposed to double breasted buttons) is usually placed on the center front line. If you follow the recommended button size listed on the pattern, the button edge should then fall half the button diameter from the finished edge. This is a well-balanced horizontal position.
2. To check the vertical button placement, hold the pattern or the garment up to your body and on the center front line place a pin that is perpendicular to the bust point. Place a second pin on the waistline. Divide the space between the two pins into equal distances for button placement. For buttons above and below the two pins continue to repeat the same spacing.
3. Everyone needs to practice making a few buttonholes every time they work on a new garment. Sew your buttonholes while you practice by starting from the bottom buttonhole and working up the garment. That way, by the time you get to the top, where people are most likely to notice the quality of your buttonholes, you will have perfected them. The less than perfect ones are in a position where they won’t be as noticeable.
Pressing facings—This is the biggest tell-tale sign of an inexperienced sewer and the easiest correction to make if you do it during construction and don’t wait until after the garment is completed. When you sew facings to a garment—they can be at the armholes, collar, neckline, center front, lapel, and hemlines—trim the seam allowances and press the seams open. Use a pressing tool such as a ham, sleeve board, or tailor board to hold the curve in the seam as you press. This prevents the seam line from caving in at the edge a forming a small pleat. After pressing the seams open, fold along the seamline and finger press the edge rolling the seamline slightly to the underside of the edge (the hidden edge). Then press the edge with your iron and understitch if desired.
General pressing tip—Pressing is essential throughout your sewing process. Press at every step to prepare for the next step, but don’t over press. Shoulders, princess seams, bust and waist darts are all garment areas that are engineered to form to curves, if you press them flat it ruins the look. These areas need to be pressed on a curved surface such as a ham, steamroll, sleeve board, or tailors’ board to support the shape.
Keep Sewing! And, don’t forget to share your results with us.


Good article. These are definitely the areas that can give a garment that crisp professional look. A little time and care go a long way.
Years ago my mom and I made my bridesmaid dress for a friend's wedding. All the other girls paid to have theirs done by the same seamstress. Shortly before the wedding we delivered my dress- everyone was surprised at the difference in the appearance of my dress-which was pressed as we went-and the other girls dresses. They decided they needed to have the others professionally pressed to look as good as mine did. Pressing as you go does make a huge difference in the finished product.
I agree with the points in the article that result in a well-made garment, but I think you need to include top stitching and gathering/easing. Nothing looks worse than uneven top stitching. And uneven gathering or pinched and stitched (as I call it) easing is a tell tale sign of hurried, carelessly made garment.
Not only do I press as I go along, but I take my garment to my dry cleaners to have a final professional press before I wear it or send it out to a customer because professional pressing equipment gives it that final awesome look.
I totally agree with MerrySunshine! Besides pressing as I sew, I like to give my finished garment to my dry cleaner for a final professional press. It makes a great difference!
I think my biggest rule of making a garment not look home made, is the "well pressed is half sewn" saying. I abide by it, press every seam and press probably mroe than I have to.
Especially making a lot of jeans for myself, the need to press and press is crucial. (http://snuzalsews.blogspot.com/2010/10/34-jeans-talk-about-happy.html latest jeans on my blog. ignore the wee pull at the top of my zip, I get it on RTW jeans too.. to do with button placement I think)
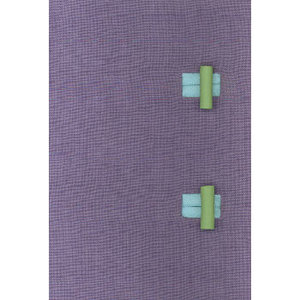
Now I'm off to read how to cover snaps, what a cool idea.
Proper fit is important. If something is gaping or too tight, what's the point?
I once made buttonholes on a machine in a classroom, but never have done it with a home sewing machine. I go to a well-known place in the New York City Garment District. People who do nothing all day but make buttonholes on industrial machines do a much better job. Plus, the price is quite reasonable and the wait short.
We should also use the same techniques when sewing a garment after we have it cleaned and it needs ironing or touch up. After all these years of sewing, I've just begun doing this myself. I still want my garments (crafts, etc.), to look professional.
The best thing about sewing your own garment is the fit. It will fit properly and you will be so comfortable that you will reach for it in the closet happily in the morning.
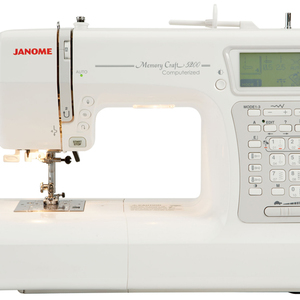
If you find a very reliable place to have buttonholes made, that is fine. However, there can be no errors as the garment is usually completed when you are ready for the buttonholes. All that time, expense of quality fabric, effort, fitting, and then someone may ruin the garment with a sloppy buttonhole. I practice on scraps before I attack the final garment and I make sure I own a quality sewing machine that will stitch the same buttonhole every time (computerized machines are the best). http://www.112sewing.com
all of the comments here are correct especially pressing as you go. i also have made special "hams" for my sewing room for special projects that have made all of the difference. but something that has been over looked here is also pre-treating the fabric before sewing or cutting it out. by this i mean washing and or having the fabric dry-cleaned or steam pressed by the dry-cleaners before construction begins. nothing is worse that having a garment constructed and then sending to the dry-cleaners and haveing it returned shrunken or worse have the "hand" of the material change. also after construction depending on the garment it is sometimes better to use fabric sizing instead of starch when pressing. it is also essential to have a great iron or pressing system. i have a gravity feed iron as well as a steam press similiar to what the dry-cleaners use when pressing pants and other flat pieces. it really makes all of the difference in the world.