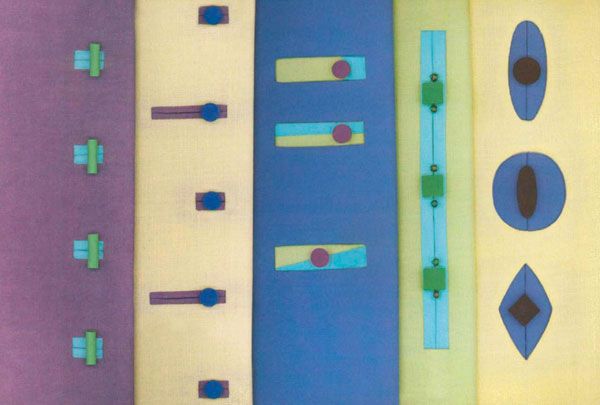
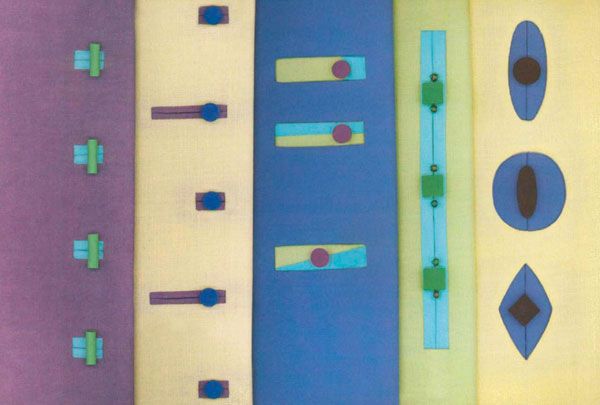
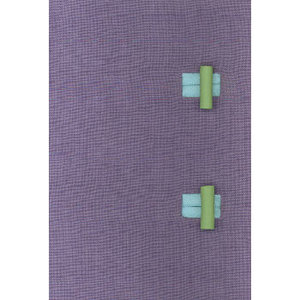
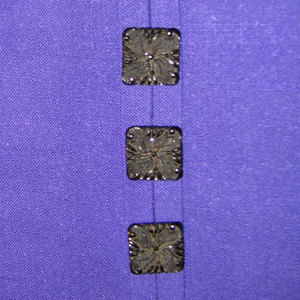
In a past, I showed you how to make Anne Kendall’s classic bound buttonhole. In the photo above there are five bound buttonhole versions that would jazz up any garment. The two on the right were designed by Lois Ericson, who is a beloved teacher and has been inspiring sewers for decades. Review Anne’s methods to get back into bound buttonhole mode and then try Lois’s unconventional versions. You can learn how to make both of her buttonholes right here. In the second from the right she sews one long bound buttonhole and uses it for multiple buttons. On the far right she makes whimsical, faced-shape buttonholes. These are a perfect frame for unusually shaped buttons.
Easy route to multiple buttonholes
This method doesn’t require a basted ladder and makes one long slit buttonhole, whose facing becomes the lips, and which is then divided into multiple buttonholes with bar tacks or another means.
1. Prepare lip fabric: Cut a rectangle of fabric for the button lips that’s the length of the button series plus 2 in., and twice desired width of the window plus 2 in.
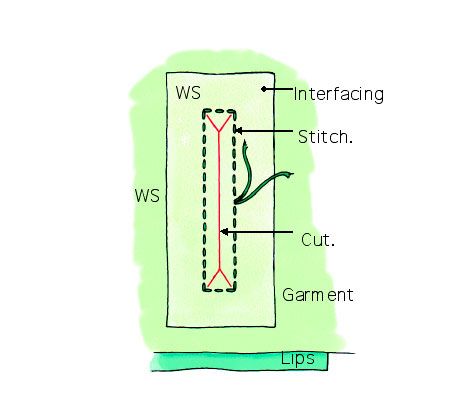
2. Interface WS of garment where the window will be. Mark the window on WS of lip fabric, and position the lip fabric and garment RSs together.
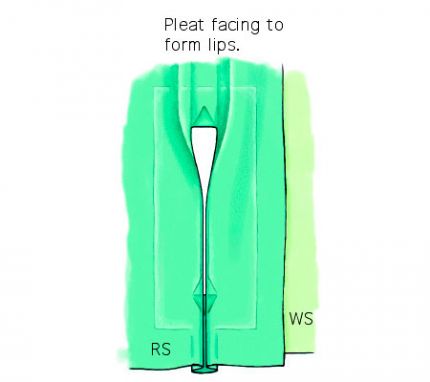
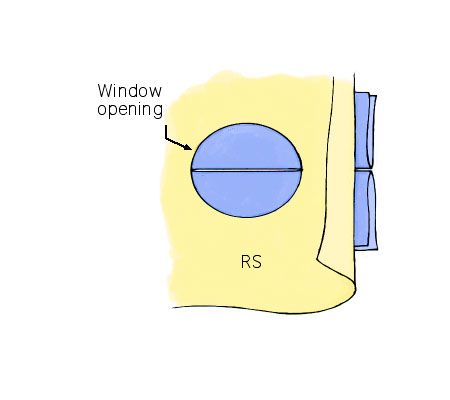
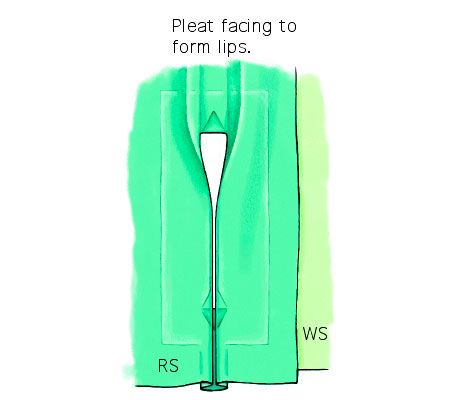
3. Make lips: Stitch window; clip as shown; turn to WS, folding triangles away from the window but leaving the long seam allowances inside the window as filler and guide to form the lips; and press in place.
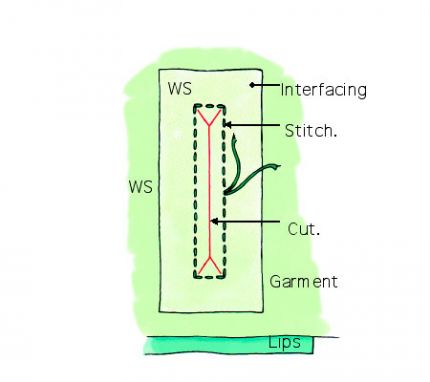
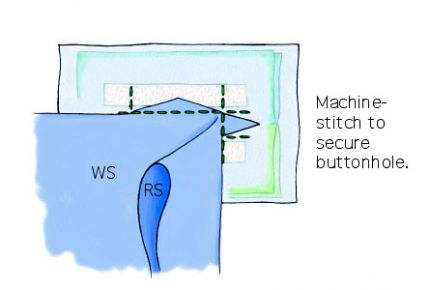
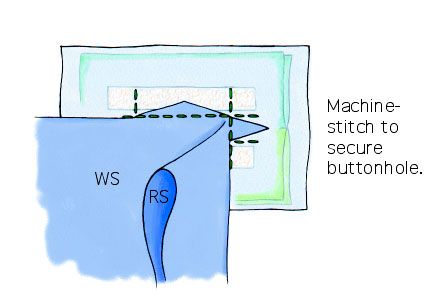
4. Anchor lips: Fold back garment and stitch through interfaced triangles. With garment RS up, fold back to reveal tiny, the triangular seam allowances from making the window. Machine-stitch through the triangles, organza, and lips on all four sides.
5. Establish individual buttonholes: Bar-tack, topstitch, or otherwise divide lips on RS (and surrounding area if desired, as shown in photo of these buttonholes at top of page).
Faced shapes as buttonholes
This method gives new dimension and shape to bound buttonholes.
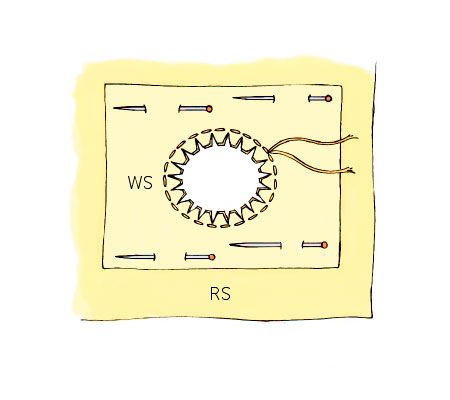
1. Create faced opening: Cut a generous facing piece for each buttonhole. Pin the facing to the garment, RSs together, and stitch the desired window shape (you can use almost any uncomplicated shape). Trim away the shape’s interior, leaving a slight seam allowance. clip any curved edges; turn facing to WS of garment; and press.
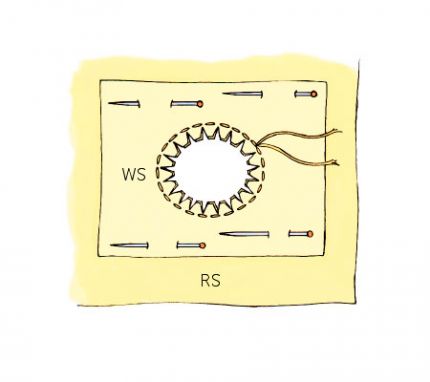
2. Make lips: Cut two rectangles of straight (or bias) fabric for each buttonhole 2 in. wide by the length needed to fill the window size.
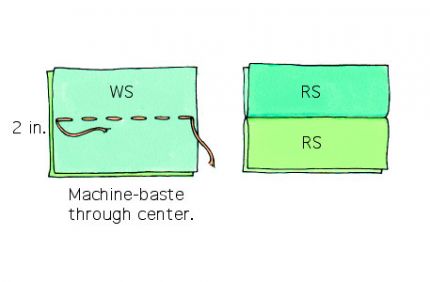
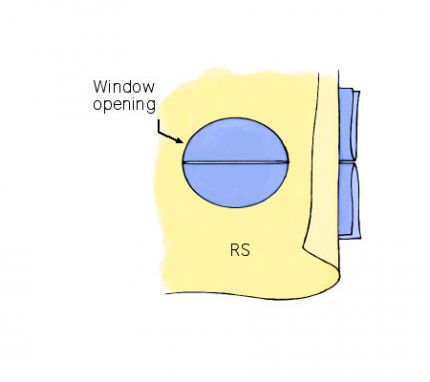
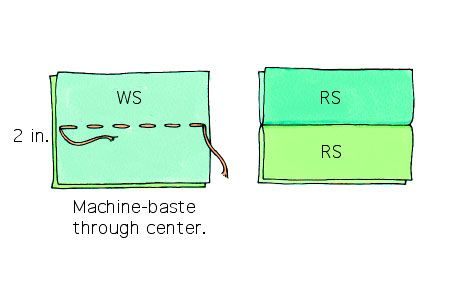
3. Attach the lips: Place the lip fabrics face to face, and machine-baste through the center, then press open on the stitching. Place lips behind the faced window. Topstitch, or lift the garment and stitch the lips to the facing. Remove basting.






Wow Such inspiration for my the garments I make in 2011, Thank you
I love interesting buttonholes...I'll be trying some new shapes!
I've been sewing for more than 50 years. Don't ask why, but buttonholes have always been a major dread. I usually make my own -- usually by hand. I will be trying these. It's something I can do even on my doll clothes.
Thanks!!!
Creative and inspiring for 2011! Thanks for continuing to provide garment making ideas!
WOW!...Thanks for this little tutorial....I think I'd like to incorporate some of these buttonhole ideas on custom handbags that I make.....Don't ya just love to sew!
Thank you!
wooow this is a great idea, really awesome and great tute too.
well done, love it !!! happy new year;-D
and thank you very much for the sharing as well;-D
I too have major anxiety attacks if I need to do button holes. I can do them but....you know....Thanx for another alternative. I just designed a great vest and I wasn't sure how I was going to close it.
NOW I KNOW!!! thank you thank you thank you
Very creative work.. Really good
Thumbs up for the work
Wow, that looks pretty.... I love Lois Ericson designs not least because of the fact he's been around the block for decades but also inspired many as a beloved teacher..
I appreciate your work
Gud job buddy
This is great one!!
I appreciate to work
One of the best
amazing work mate
I really love it