

With support during steaming, a collar achieves a wrinkle-free roll.
by Sarah Veblen
When I sew, I enjoy spending time at the ironing board. It’s here that a garment takes shape, using pressing tools and molding as you press. Strategic pressing and steam application sculpt fabric—creating form in a garment beyond what is intrinsic to the pattern pieces.
Steam relaxes fibers; heat and pressing tools mold them. Some natural-fiber fabrics (linen, cotton, silk, and in particular, wool) have memory: once molded, these textiles stay that way. The result is built-in shaping when the fabric dries.
Prepare before press time
Consider the fabric fiber content, have the garment section constructed, and compile a few tools before molding fabric with your iron. Meld the stitches into the fabric by pressing the seams as they were sewn. If the seam allowances will be pressed open, finger press them first.
Create a shaping tool kit
In addition to an iron, three pressing tools are essential for shaping: a pressing ham, a dry press cloth to protect delicate fabrics, and a clean piece of soft cotton cloth (I use a handkerchief) for forming a flexible roll.
I also use a dress form when I’m shaping collars. The size of the dress form isn’t critical; it’s just to have a “body” to put under the garment. A pillow or a well-padded hanger can also serve this purpose.
Tools (such as a seam roll, wooden clapper, pressing mitt, and point board) are handy for other pressing situations but not vital when building shape into garments. Online sewing notion suppliers, including SewTrue.com and AtlantaThread.com, carry pressing accessories.
Find fabrics that conform
All natural fibers (such as wool, cotton, linen, and silk) can be shaped to some extent with steam. Most wool is extremely malleable and an excellent choice for practicing steam shaping. Cellulosic fibers (such as rayon and lyocell) also can be shaped with steam. Synthetic fibers (such as polyester and nylon) do not respond to steam and, therefore, don’t shape well. These techniques work best with woven fabrics. Most knits do not hold shaping as well as woven fabrics.
Get the steam you need
Most irons have steam capability. You can also produce plenty of steam with a dry iron and a wet press cloth. Place the damp press cloth on top of the fabric just before you’re ready to press. Steam will be produced when the hot iron touches the press cloth and vaporizes the water held within. You can control the amount of steam by managing how wet you make the press cloth.

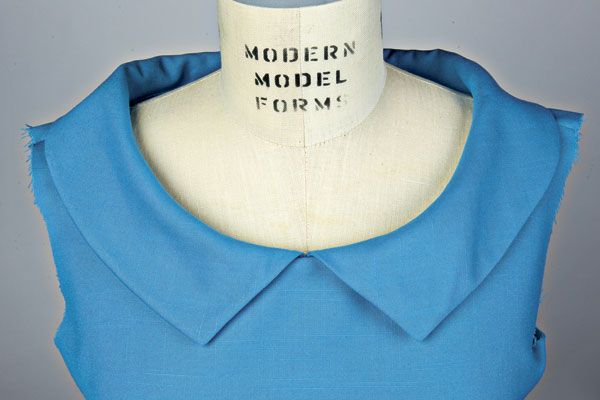
Tip: Calm the waves. A curved collar (like the one below) often looks wavy or dimpled on the roll line at first. Mold the collar over a rolled cotton cloth with your fingers, then steam from above to smooth it. Steam and support help shape a smooth collar on the author’s adaptation of New Look 6619.
Curve a rolled collar
Rolled collars should be gently steamed to build in a graceful curvature. It helps to work on a dress form so the garment and collar rest on a body shape; a clothes hanger does not provide enough three-dimensional form. This technique can also be used for a notched or shawl collar.
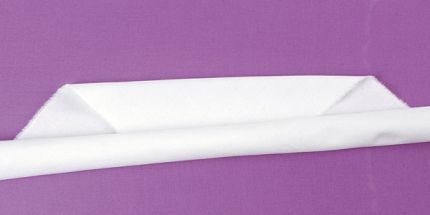
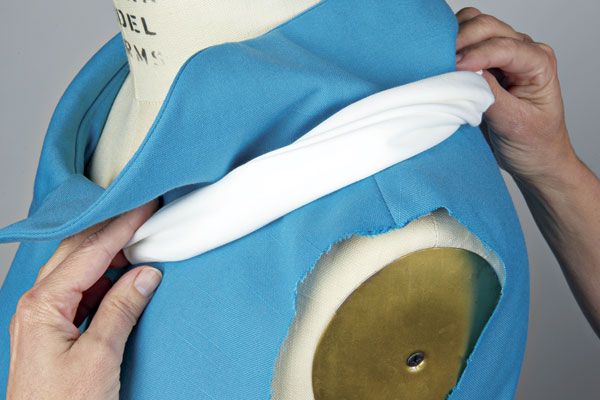
1. Prepare a rolled cloth to support the collar. I use a cotton handkerchief, but any soft and absorbent piece of cloth is fine. Roll the cloth to form a pliable sausage. The cloth should fill the collar’s roll; for a collar with a dramatic roll, a thicker cloth is needed.
2. Tuck the rolled cloth beneath the collar at one front side.

Steam where the rolled cloth supports the curve.
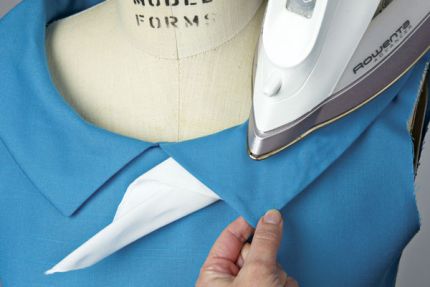
Allow the area to dry for a few minutes. Reposition the cloth beneath the next collar portion and repeat until you’ve gone around the collar.

excerpted from “Pressing for Shape” in Threads #154, p.78


I love the necklines ... what are the pattern numbers? Thank you for sharing the pressing tips!
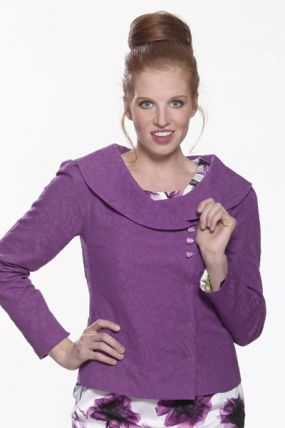
The jacket is the author's adaptation of New Look 6619.
Thanks again for another Pressing article. I find pressing things correctly makes a world of difference, yet, it is so hard to find information. Thanks!
Very Nice!
it's Awesome!
Fantastic!
cool
IMO for this collar to look as if it were made professionally, the under collar should not be the same as the upper collar. The under collar should be cut slightly smaller and on the bias.