
How to Sew Even Bias Fabric Loops
Sewing expert Susan Khalje gives a step-by-step for adding bias fabric loops to a brocade coatdress.
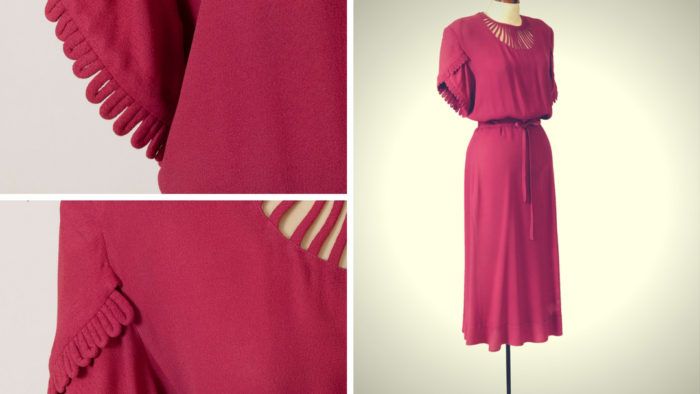
In Threads #194 (Dec. 2017/Jan. 2018), Judith Neukam explores the details of a 1930s dress, which features a scalloped trim made of bias fabric loops.
A student of mine was working on a lovely Marfy pattern the other day. She was making a brocade coatdress, and it opened down the center front. While the pattern illustration showed buttonholes and buttons, we decided that loops and buttons would be a cleaner alternative.
Here are a few samples to show you what we did:
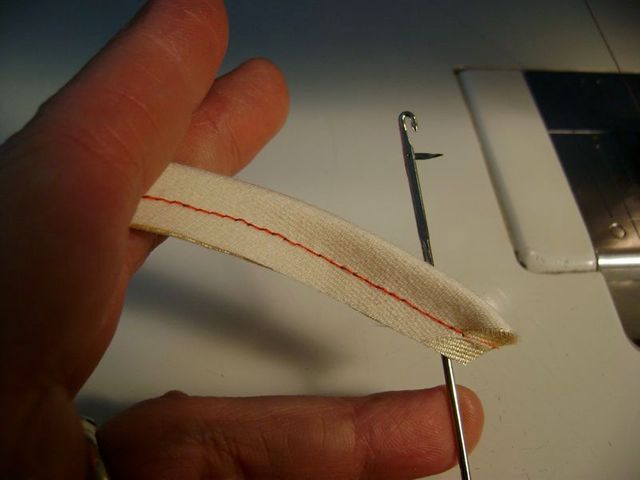
We started with strips of bias-cut fabric, making a sample or two to determine just how narrow we wanted the finished loops to be.
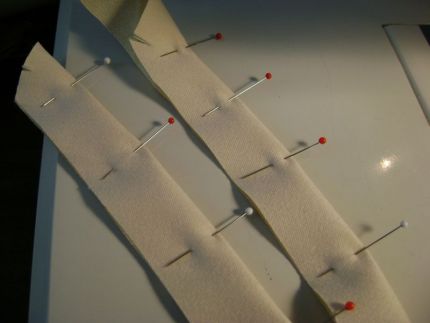
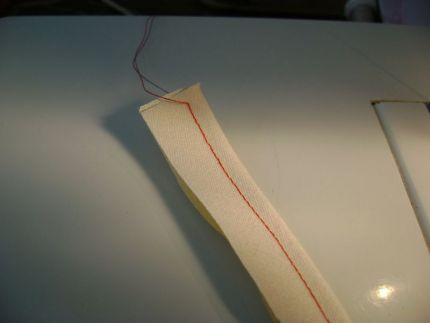
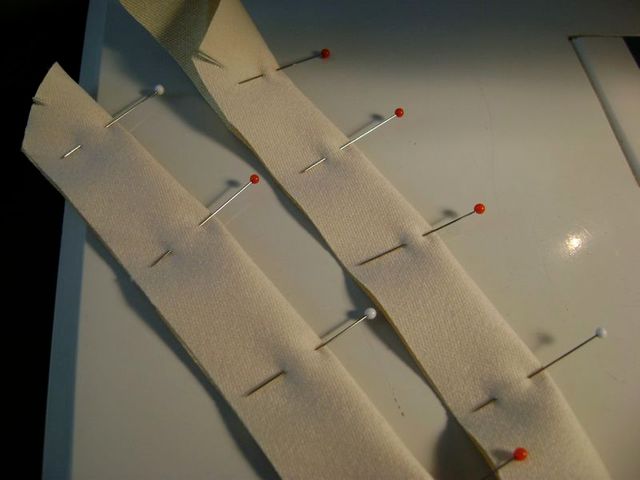
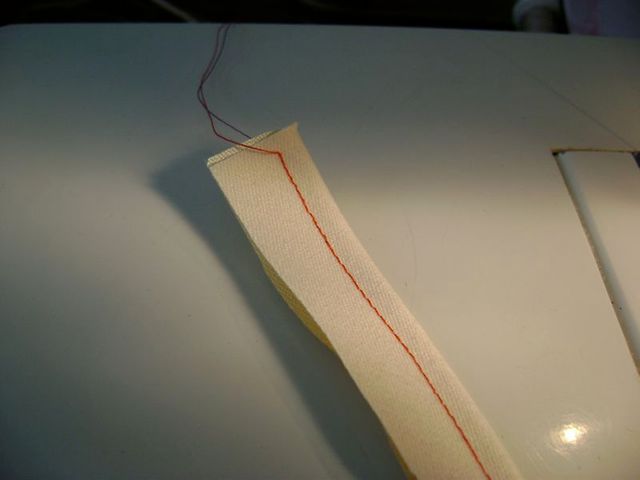
The strips are carefully folded and pinned to maintain their bias, then machine stitched. While much of the seam allowance is cut off, I like to start with reasonably wide strips so that I have more fabric to grip and manipulate as I prepare them.
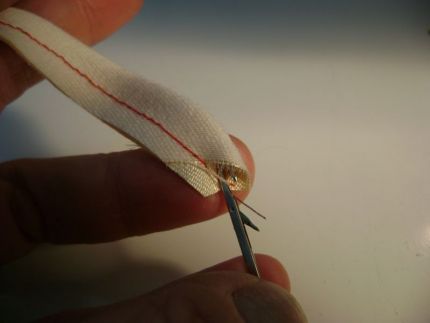
I love to turn loops (and narrow fabric tubes) with a simple loop turner. They do take a little patience to get the hang of, but they allow for a much narrower result than other turning tools.
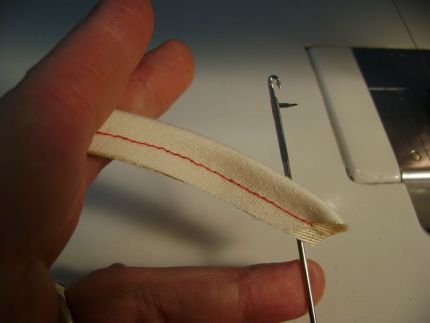
I’ve fed the hooked end of the metal loop turner through the fabric tube, keeping the latch in its open position.
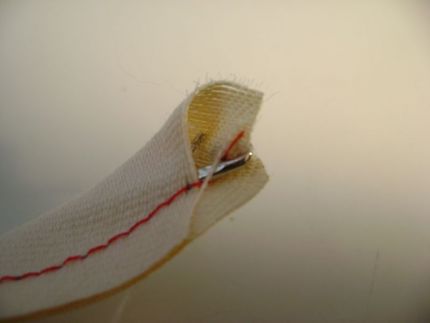
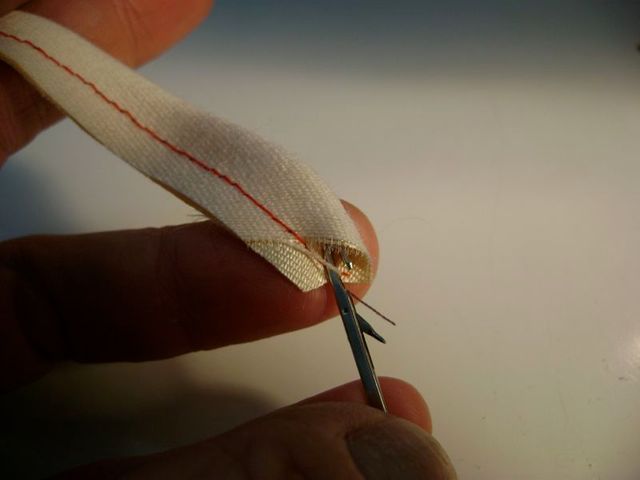
Once it’s through, I’ve secured a small bit of fabric in the hook, then I’ll seal it into place with the latch. Notice in the photo that the tip of the latch is in its upward position. It will hold the fabric in place as I pull.
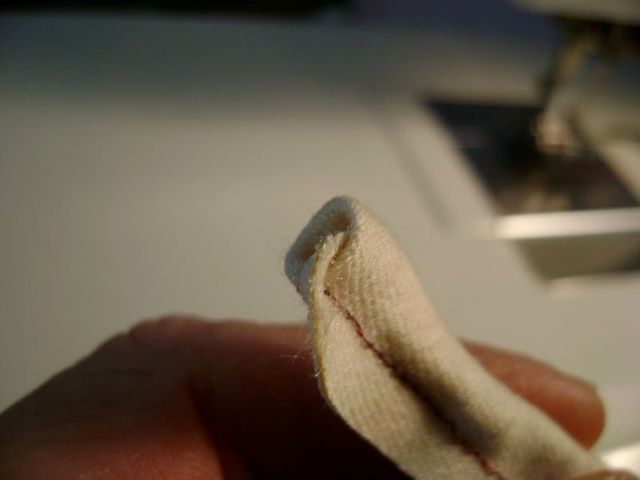
I carefully pull it back through, and here’s where you have to be patient. Getting started is the hardest part: The fabric tends to lump up inside the tube, so you just have to keep at it until you feel the fabric reverse and things start moving along. And if you haven’t gotten a good bite of fabric in the hook, then what you’ve hooked tends to disintegrate. Just be patient and rehook it; sometimes you need to trim the fabric at the top of the tube to give yourself something firmer to attach the hook to. And once you start to pull the hooked fabric through, be sure to maintain your tension. Otherwise, the hook will become disengaged inside the loop and you’ll have to begin the process again.
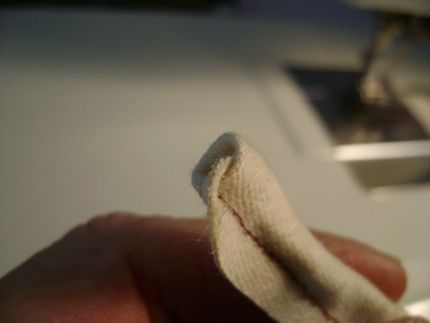

Once the tube is formed (make either one long tube or several shorter ones), I straighten it out and choose tubes of the same thickness.
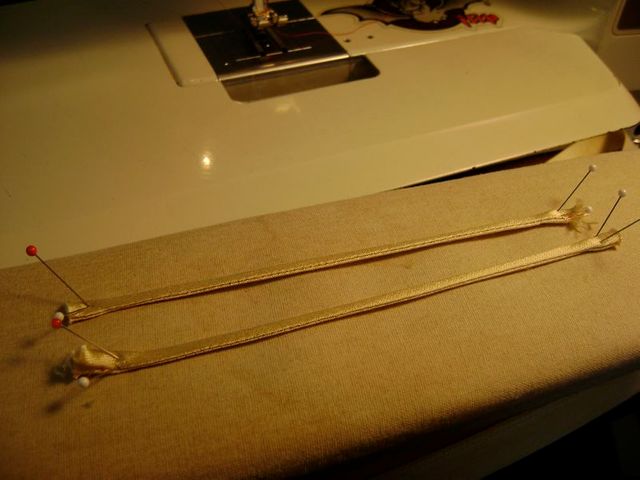
I pin the tubes to my sleeve board, carefully aligning them so that the stitched edge is along one side. I pin them with some tension (I don’t want them to grow once they’re on the garment); steam them (don’t iron them as they’ll get too flat) and leave them to dry.

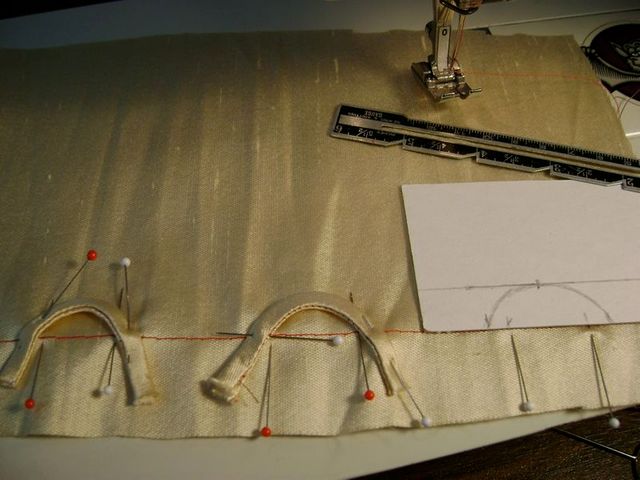
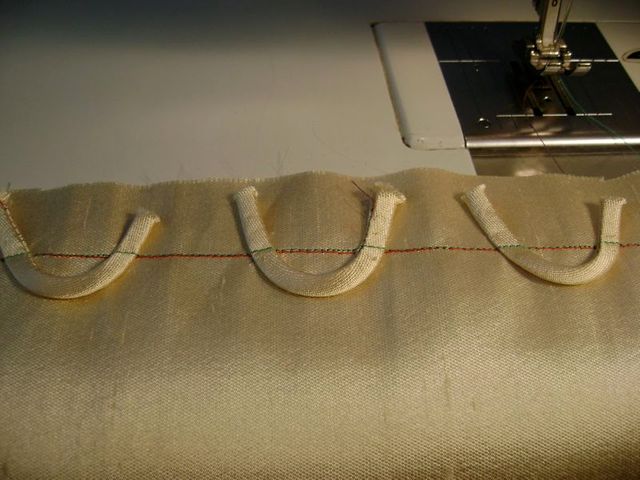
Once they’re dry (it doesn’t take long), it’s time to sew them to the garment. I’ve marked my foldline with a row of machine-basting stitches. They’ll stay there, eventually covered by the garment facing.
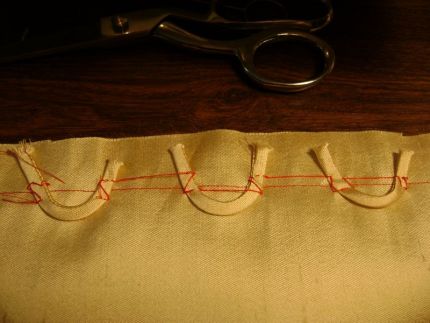
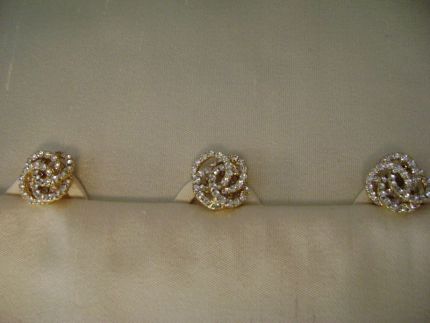
I make a template to guide me, after testing the buttons I’ll be using to make sure they go through the loops easily (but not so easily that they’ll work their way out). I’ve positioned the loops so that their seamline is along the inner edge, and I’ve further oriented them so that the seamline will be invisible once the loops are in their final position on their garment.
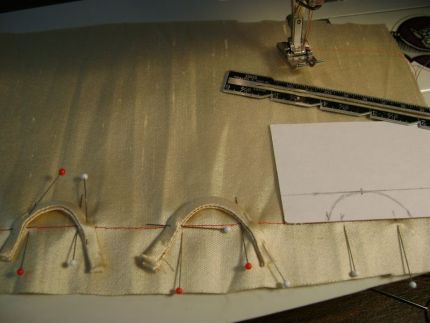
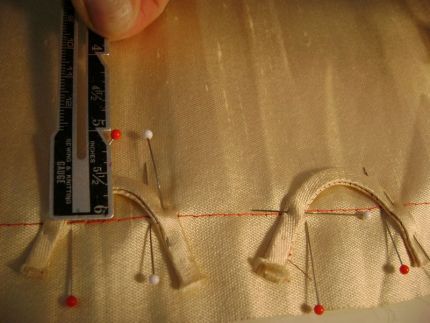
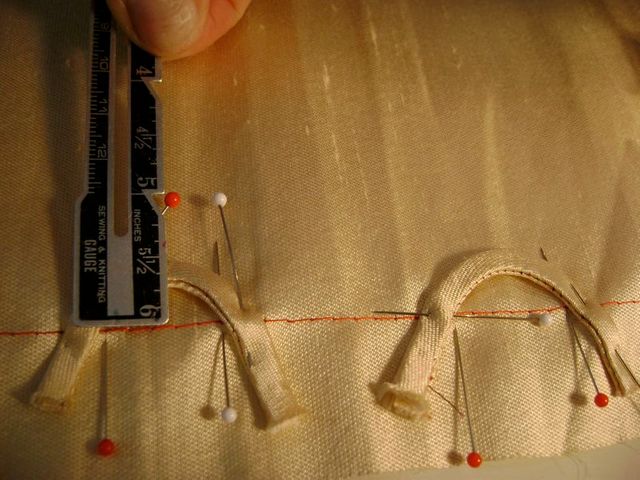
Even with the template, I carefully remeasure to make sure everything is even: that the loops are evenly spaced, each of the same height with the loops angled identically.
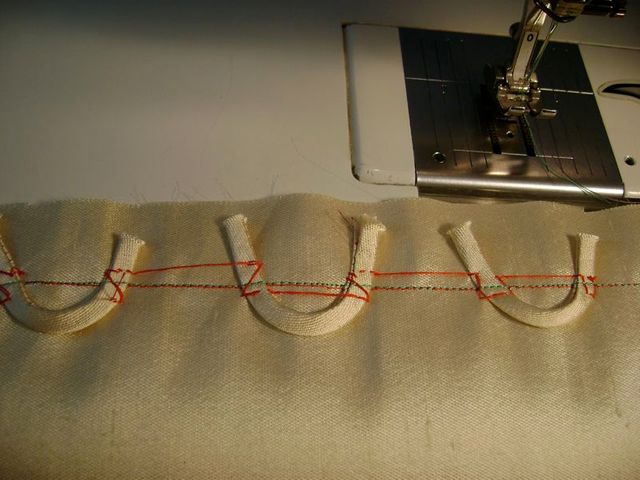
I pin the loops in place and tack them down with a few basting stitches.
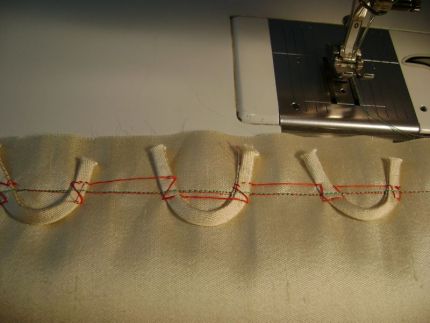
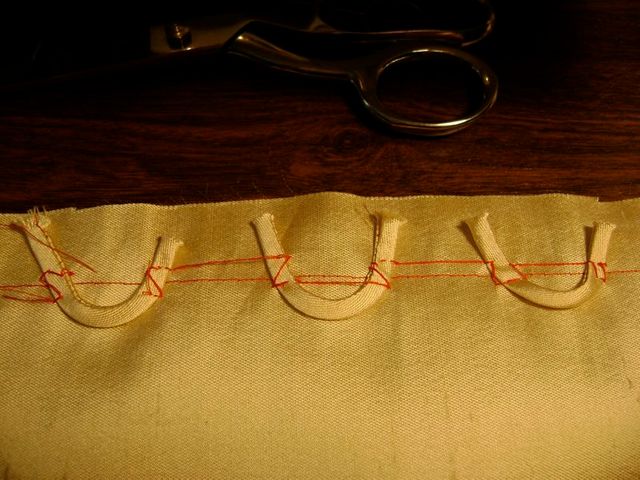
As I stitch along, I lift the presser foot for an instant before I get to each loop, just in case things have shifted.
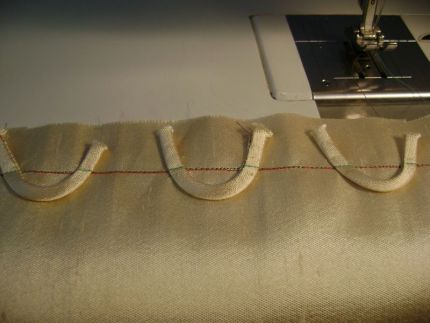
The basting has been removed.
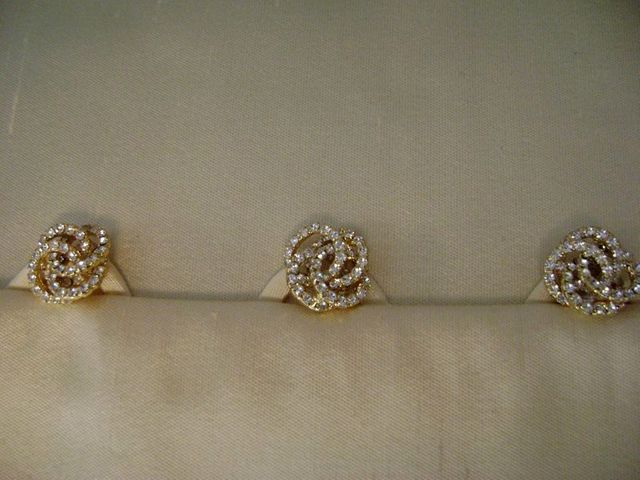
The loops are folded into place and gently pressed.
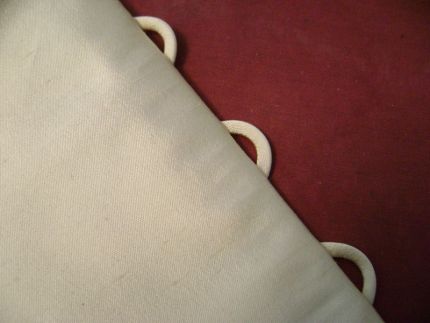
The folded edge with its loops is placed over the underlying fabric and the buttons are sewn into place.


Absolutely wonderful presentation. Thanks so much Susan K. from another Marylander.
Thank you for sharing such detailed instructions with excellent photos, helping to clearly understand. What a beautiful result, too! Thanks again!!!
I have already used a heavy duty needle like a darning needle(but the point is dull and doesn't work on a lot of fabrics) or a carpet needle to turn small tubes. Thread the needle with heavy thread (like crochet cotton0, double the thread, take a stitch in one end of the tube and make a secure knot at the end of the thread. Then put the needle through the tube starting with the eye. Of course, your thread has to be longer than the tube. Now pull the thread through the tube to turn it.
Yummy buttons, that really stand out with loops vs. buttonholes. Did you have to secure the under layer some other way, since it wouldn't be held as securely as with standard buttonholes and buttons?
Thank you for sharing! I have one of those hooks,never new what they were for. That alone made it worth while. thanks again.
I like your loop idea; so much easier than fooling around with buttonholes.
this is GREAT, thanks for sharing...
[please post picture of finished garment too, next time!]
You never cease to impress me with your perfection Susan. I sure miss your TV show!
Thank you sooo much for the bias fold fabric loops directions! I really appreciate it very much. Jackie B
Beautiful, and so clear. I love having this link to share with my beginning and intermediate sewing students. Thanks.
Nice presentation. The same bias tubes can be used as spaghetti straps on a dress, or in many other ways. There is one more important thing to do, especially if intended for use as dress straps, or other places where the strap may be subjected to strain: Be sure to sew the straps in a stretched position - stretched to the max! This way there will be enough thread in the strap if it's so strained as to be stretched to its fullest. In this case, do press them flat, and allow to cool while pinned in a stretched position.
Loops are great for dressing up a project. I have used a double needle, or run the stiching close to the first, then trim the edge of the tube before turning it. That way there is less fabric to pull through. Also, I often have sewn a piece of string inside of the tube, stiching across the end to secure the string. Then use the string to turn the tube inside out. Thank my Mom for that one.
I don't know if I had a ah ha moment or a DUH moment. But cutting the bias larger to work with then cutting down after sewing the seam is so smart. Thanks so much for the instructions. For so long I have been trying to sew these skinny little strips. I love Threads Magazine and Threads site. Thanks for all your help all the time!
Great way of getting tubes for so many projects for summer. (bag straps, summer tops, adding different colors of tubes on a tshirt for collars and cuffs, and etc.) This past year I took a class on making tube bracelet by braiding very small tubes in Irish knots. My grandchildren will love making the tubes and braiding them. Thanks for the quick tip.
Very useful!! First time I found a very clear illustrations and explanations about bias loops. Thank you!
Thank you very much for sharing this well presented tutorial.
I enjoy your articles and appreciate the beautiful workmanship that you are showing us how to achieve in our own sewing.
The end product is very beautiful and the fancy buttons just finish it off nicely.I love the choice of ivory, sheen and sparkly buttons.
lots of work.. but worth it! beautiful result... thanks for the reminder! lovely
Wow, thank you for this very informative presentation! It is a very timely one for me, too as I needed a fresh idea for a project that I am working on.
Lovely!
Patty Branton
Wonderful tutorial! Your expertise is always appreciated as well as inspirational. Thanks!
wonderful instructions, as usual. I assume if you want to make loops on both sides of a closing in order to do lacing, it would be the same...?...right? Or is extra reinforcement needed to account for the tension of the lacings?
for mo12 -
If you're using these sorts of loops for a laced-up back - and you certainly can - you'll want to be sure that the bodice itself is sturdy. There's so much horizontal tension that you may need to counteract it with vertical support, in the form of boning along the looped edges - it's easy enough to hide it in an inside layer. And be sure that your machine stitches really grab the ends of the loops - make your stitches really small.
to Copywriter - yes, you'd most likely have to hold the facing in place some way - so I'd do a couple of things. I'd catch-stitch the raw edge of the facing to the underlining (if the facing went all the way to a princess seam, then I'd catch-stitch it to that), and I'd also do some understitching along the inside edge of the center front folds - again, through to the underlining. That would help hold things in place, and it would also nicely define the front edges.
Great tutorial. I'm looking forward to trying this.
I am beginning to have an ah-ha moment as I notice how carefully and carefully the professionals work. Previously I thought that the experts stiched their "wares" swiftly and deftly. I am now noticing that speed is not their tool, care and method are their secret. I now try to slow myself down, measure carefully, and stitch cautiously. Flash and dazzle does not equal beautifully constructed clothing and sewing projects! I'm 65 and still learning!
This is a fantastic way to make loops that are the same size and look really beautiful. Thanks for this project. Things like this never get old. Thanks again.
Thank you for your fantastic presentation. Could you tell me what kind of corner turner you used? Thank you!
Wonderful presentation - Is there a pattern available for the dress???
Royal touch...wanna wear this designer outfit...
nice!
Wonderful tutorial. Could you talk your student into a photo of the finished dress? The one shot is a cruel teaser. The buttons with that colored silk made me catch my breath.